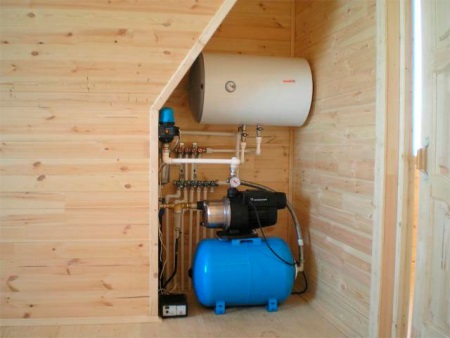
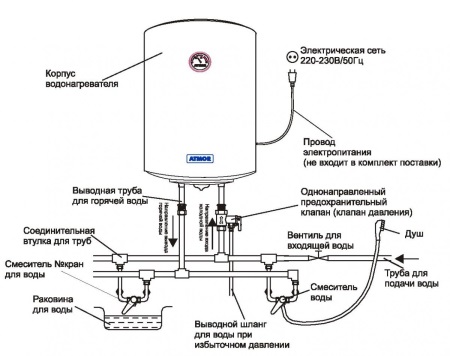
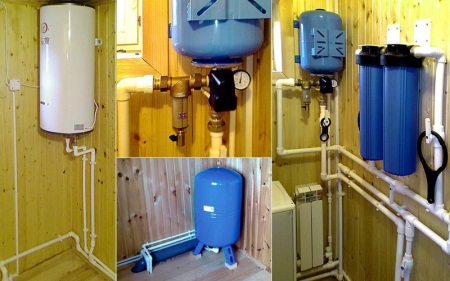
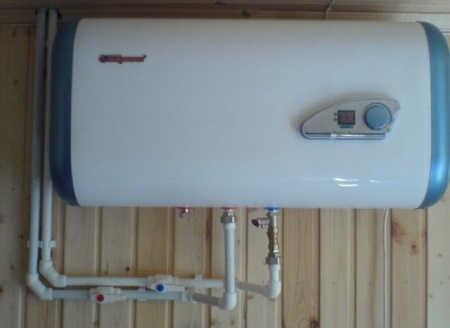
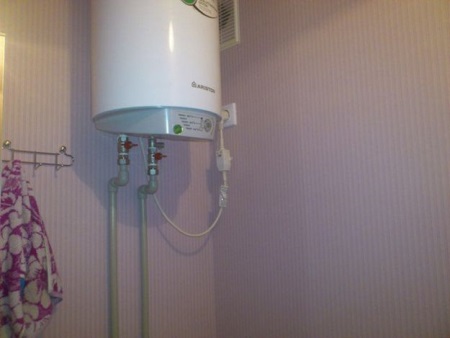
Diagram of connection of the water heater to the water mains in the country
The dacha has long ceased to be a place where people grow vegetables and fruits. More and more people tend to relax in the countryside on their dacha plots.
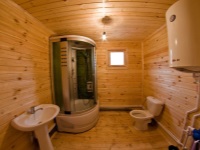
Some move to the dacha for good or for the spring and summer period. And, of course, everyone wants to relax and live in comfort at the cottage, without depriving themselves of the usual conveniences that are in a comfortable apartment. And the lack of hot water can spoil the whole vacation.
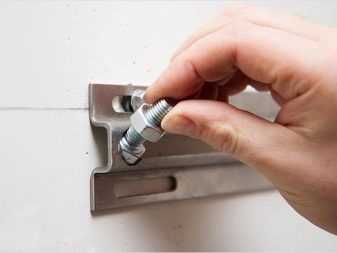
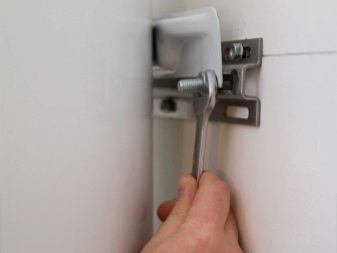
Choosing a place to install the water heater
- The supporting wall must be strong and sturdy. Even if the water heater will be small volume, its weight is quite large. Therefore, care should be taken, if necessary, to strengthen the wall or additional support.
- The dimensions of the water heater. It is necessary to measure in advance the place where you plan to install the water heater, so as not to miscalculate with the dimensions.
- If space allows, you can allocate one room for a boiler room in advance.
- What type of water heater will be installed. Gas water heater requires certain communications. For example, an air duct.
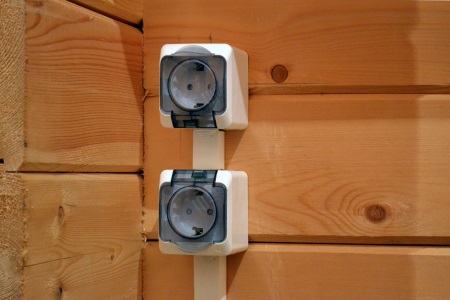
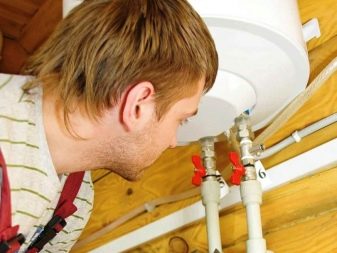
When installing, you should also remember that the outlets into which the heater will be plugged should be insulated from water ingress.
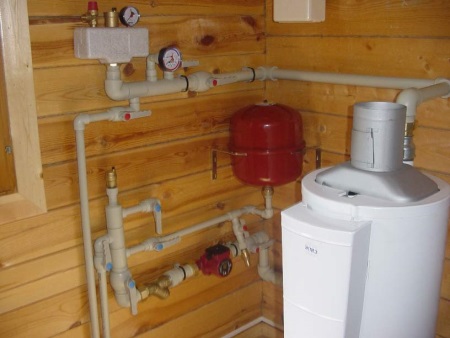
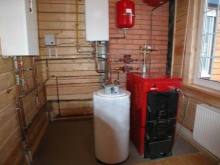
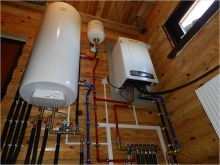
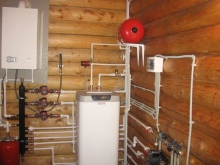
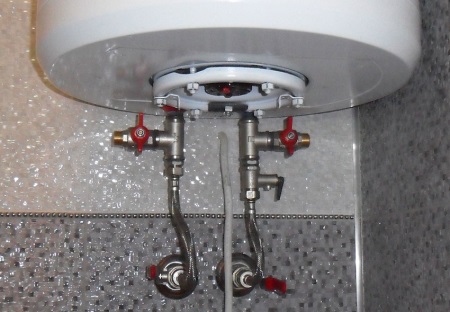
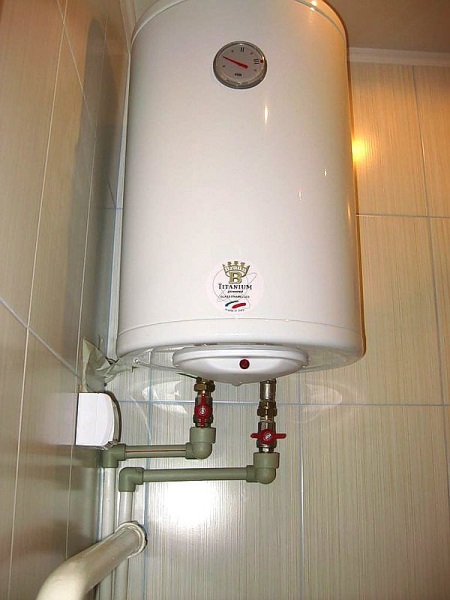
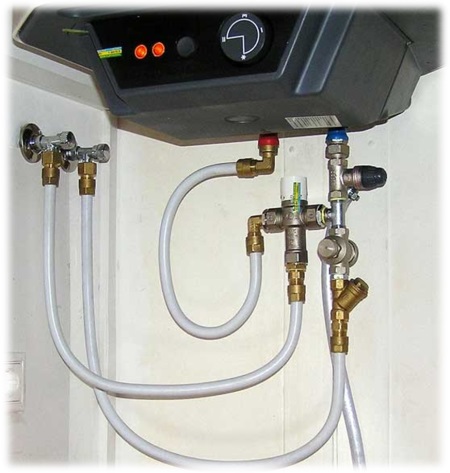
Water heater connection diagrams
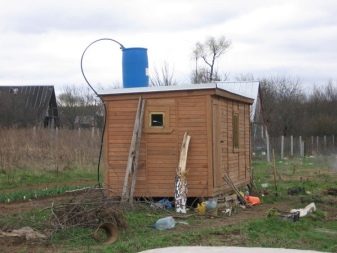
Not all dacha plots have water pipes. Many dacha owners do not have the opportunity to connect a water pipe to their dacha. What should they do in this case?
Thus, depending on the type of water supply, there may be several schemes for connecting a water heater.
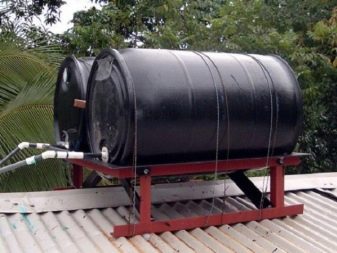
To the water tank
The main rule of connecting the water heater to the water tank - the distance between them should be more than 2 meters.
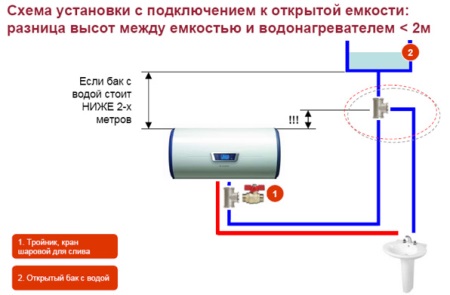
If the distance between the tank and the boiler is less than 2 meters, a slightly different water heater connection scheme will be applied.
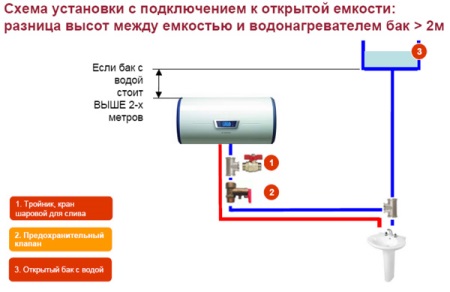
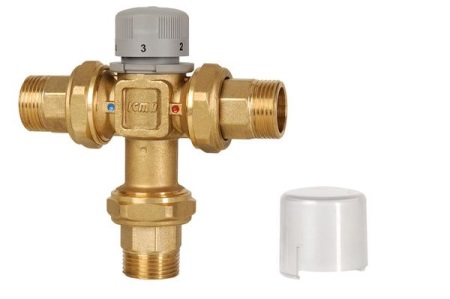
Another nuance to be considered when connecting the boiler is that the pressure must be less than 6 bar. When the pressure is higher it is necessary to install a pressure reducer, which will reduce the pressure. The pressure reducer should be installed in front of the water heater. It is necessary to do this because the reducer will protect the water heater from damage.
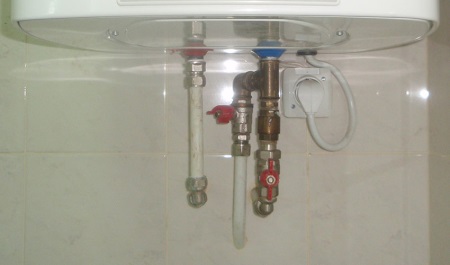
To the water supply
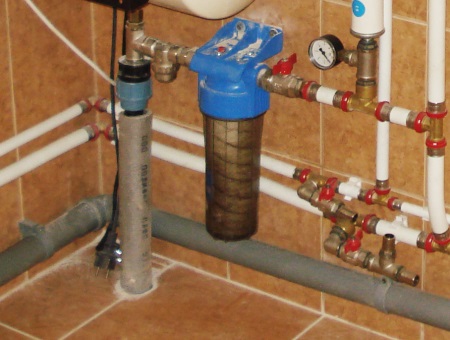
If the water leaves much to be desired, you should install a filter in front of the heater. This will extend the life of the heater.
- if the heater does not yet have water in it and is empty, it must never be connected to the electric mains;
- the water that has passed through the heater must not be used for drinking or cooking;
- when installing the heater, only parts recommended by the manufacturer should be used.
If there is no grounding, the water heater must not be installed.
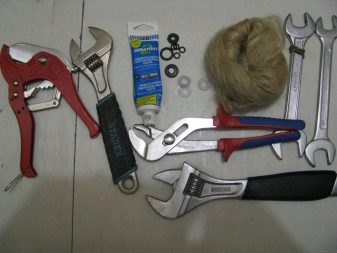
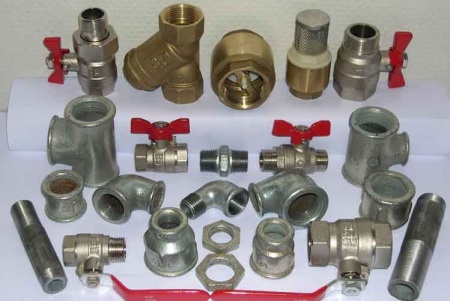
What is required for connection?
In order to connect the water heater to the plumbing system, you will need to stock up on a set of necessary tools and materials. In the process of installation you will need:
- pipes of the required diameter;
- tees for pipes;
- stop valves;
- sealant for plumbing work;
- flexible hoses;
- pipe cutter - manual or electric;
- soldering iron;
- Several wrenches of different sizes.
Taking into account the type of plumbing
The way of connecting the boiler to the water supply depends largely on the type of plumbing. We will consider several installation options - for polypropylene, metal and metal-plastic pipes.
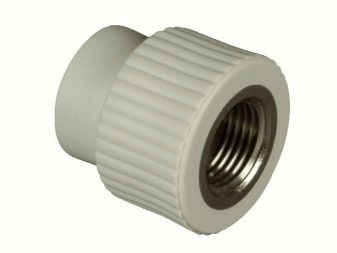
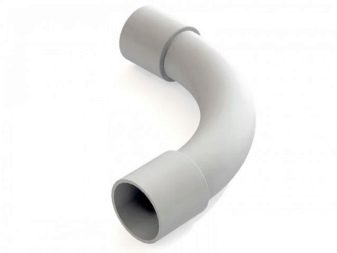
Polypropylene
To ensure a reliable connection of polypropylene pipes, it is necessary to use special end couplings and bends. At the same time, it is better to choose stabilized pipes, that is, additionally reinforced by another layer (most often - aluminum foil).
The biggest difficulties will arise if the plumbing began to operate before installing the boiler. Then part of the pipes will have to be taken out of the wall to make a connection according to all the rules. The work is performed in the following order:
- Cut pipes and connect tees to them with a soldering iron;
- To the tees join more pipes that will be mounted to the appliance;
- connect the pipe to the water heater through the faucet (here we need a terminal socket);
- follow the same steps to connect the hot water pipe to the water heater.
Metal
When it comes to metal plumbing, we usually refer to pipes made of steel. Connecting to such pipes is more difficult to make - this is due, first of all, to the peculiarities of the material. For a more reliable connection, you should use a special clamp that can withstand heavy loads. Clamp should have a so-called "tie-in" (a special spigot).
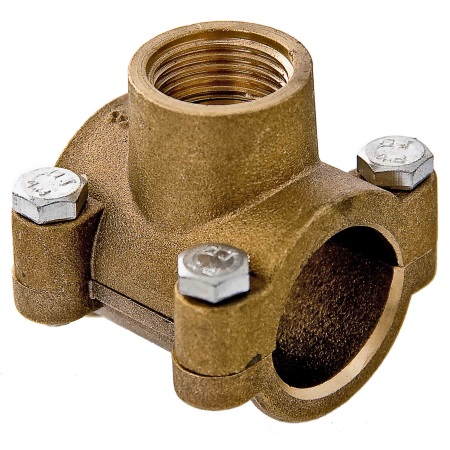
Boiler connection to the metal water supply is performed in this sequence:
- Prepare the place of connection (tie-in): remove dirt and paint residues;
- Install a clamp on the main pipe with a sealing gasket underneath;
- Armed with a drill, drill a hole in the pipe, passing through the branch pipe (in this case, the diameter of the hole to match the diameter of the sleeve);
- we apply the threads and install the connections (threaded fittings);
- We mount the cocks in place;
- Connect the pipes to the cocks, which are then connected to the device.
Metal-plastic
Metal-plastic is the most advanced of all of the above materials. It is lightweight and durable, so it is very convenient to use. Another important advantage of metal-plastic pipes is the convenience of the method of installation: installation is made in the open.
The main stages of connection:
- cut the pipe;
- We establish on it tees;
- Make branches to the water heater;
- Connect the pipes to the device.
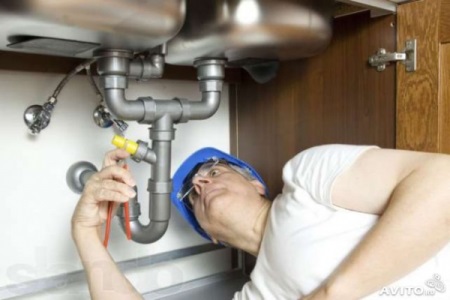
Mounting shutoff valves.
An important stage of connecting a water heater of any type to the water supply is the installation of devices designed to shut off the flow of water. Installation of such fittings for hot and cold water pipes has its own peculiarities.
For cold water supply
- Install the tee on the branch pipe coming out of the tank;
- Connect the drain cock to the side outlet of the tee;
- Install a safety valve or check valve on the tee;
- Behind the valve we put the cut-off valve;
- make installation with cut-in (we mount the assembled elements in the water pipe).
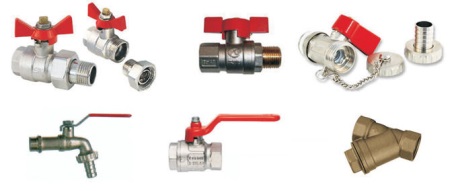
For hot water
- mount the cut-off valve directly on the pipe coming from the tank;
- Connect the tank to the pipe.
Connection to the power grid
To begin with, we want to acquaint you with the basic rules of connecting the water heater to the electrical network. Compliance with these recommendations will allow you to make the installation as safely and efficiently as possible.
- The socket for the boiler must be located in a place that is inaccessible to water splashes. Specialists strongly advise the use of special moisture-proof sockets for this purpose.
- The water heater can be turned on only when grounding is connected to the electrical outlet. This can be done with a three-pole wire (the socket must also be designed for three poles).
Connections of electrical wires must be made outside the room with a high level of humidity. If it is a kitchen rather than a bathroom, this rule can be ignored.
After making sure that all safety rules will be observed, you can proceed directly to the work. The procedure will be as follows:
- Measure the distance between the place where the water heater is installed and the socket;
- Disassemble the plug of the device into elements;
- Remove the insulating material from the cable;
- Grind cores with side cutters;
- armed with a soldering iron, connect the cores to the plug contacts (red - to phase, yellow/green/black - to ground; blue - to zero);
- remove the panel of the water heater and open the contacts;
- Strip the cores at the opposite end of the cable;
- connect them to the appliance contacts and put the panel back in place.
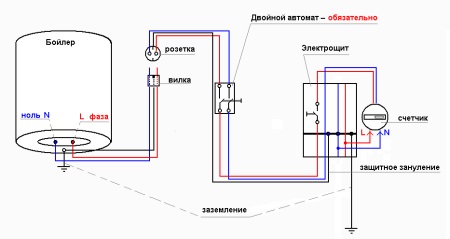
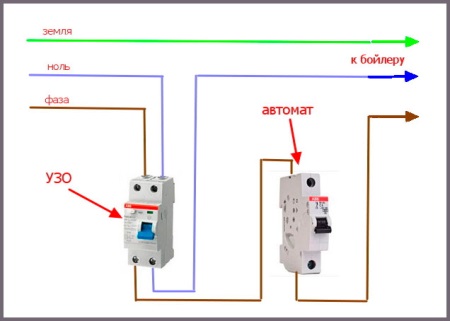
It is possible to make a connection to the power grid differently - to connect the water heater directly to the switchboard. In this case proceed as follows:
- lay a cable from the device to the switchboard;
- Install a circuit breaker near the water heater;
- Run the cable through the circuit breaker;
- Remove about 100 mm of insulating material from the cable;
- expose the phase from the automatic unit;
- Connect the phase from the automatic unit to the upper terminal and the phase from the water heater to the lower terminal;
- Remove the insulating material on both cable ends, loosen the cores;
- remove the lid of the water heater, connect the cores to the terminal of the appliance;
- disconnect the power supply and connect the heater to the electric board.
In the following video clip schemes water heater connection and their descriptions, which will help to understand how to connect the boiler correctly.


