How to make a clothes dryer with their own hands?
Today the choice of location for drying laundry is no longer a big problem. Almost every apartment has spacious loggias, and the height of the walls allows you to place the clothes dryer under the ceiling without taking up valuable space in the house.
There are also a great many devices designed for drying laundry. Stores offer options that can be conveniently used even in the smallest of dwellings. Modern clothes dryers are made of plastic, stainless steel and other moisture-resistant materials. Available ceiling, floor, wall and combined models.
Prices for these products depend on the material, functionality and, of course, the manufacturer of the construction. The highest quality clothes dryers are usually more expensive.
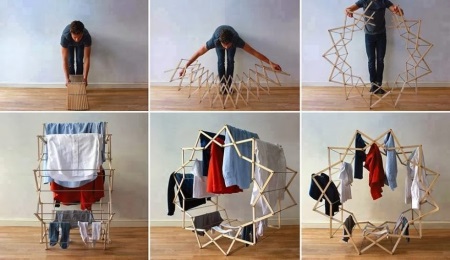
The original clothes dryer can be made with your own hands from improvised materials. Created with your own hands, the device will be no less reliable and convenient than a ready-made purchased dryer.
Types
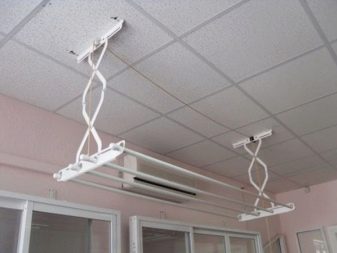
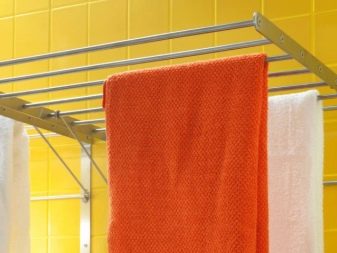
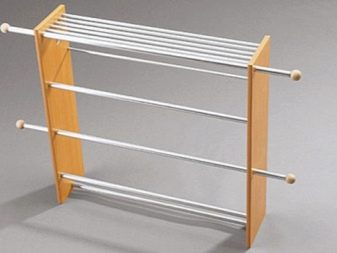
- Ceiling-mounted - traditional clothes dryer in the form of stretched under the ceiling strings or metal tubes, installed on the brackets attached to the ceiling.
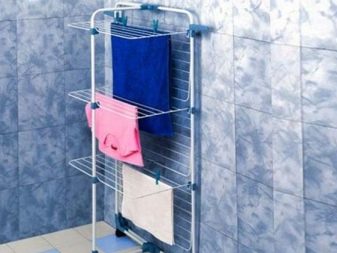
- Floor - folding, mobile design, which can be installed anywhere in the apartment, and after use, folded and put away.
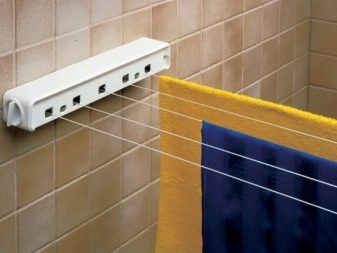
- Wall - a clothes dryer mounted between two opposite walls; can have a folding or sliding mechanism, so the full length and width is unfolded only if necessary.
- Wall-ceiling - a combined model, which is mounted on two ceiling brackets and one fixing the wall bracket; such a design is very functional, because it can be lowered and raised like blinds - so it was more convenient to hang laundry.
Materials
For the production of clothes dryers most often use metal and plastic. Consider the advantages and disadvantages of dryers made of the most popular materials.
Plastic dryers are the most budget-friendly option. They are lightweight, easy to carry and install. The disadvantage of plastic models is that they are not strong enough, and their lifespan is usually very short.
Stainless steel dryers are the most expensive, but also the most reliable option. Stainless steel is a very durable material, so this dryer does not deform under the weight of the laundry. Usually structures made of stainless steel have a chrome coating, so they look just great in the interior of the bathroom.
Aluminum dryers combine the lightness of plastic and the strength of stainless steel, but these models are not without disadvantages. The fact is that aluminum is not the most suitable metal for use in conditions of high humidity. Being in constant contact with wet things, it begins to oxidize, resulting in indelible stains on clothing and linen.
Doing it with your own hands
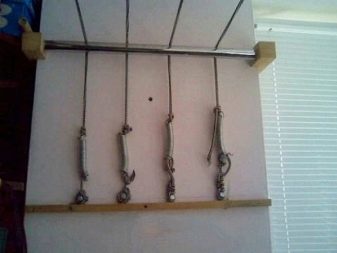
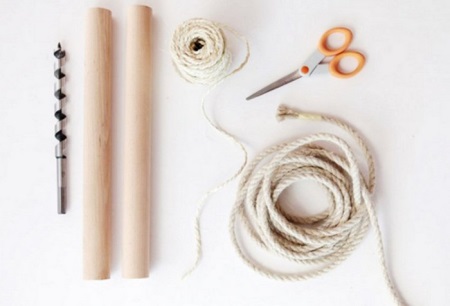
Rope
The disadvantage of traditional rope dryers is that under the weight of the wet laundry, the ropes sag, which looks not very aesthetically pleasing. We suggest you to make a more durable analogue of the rope clothes dryer, able to withstand the heavy weight of the "laundry".
Necessary materials:
- two pieces of stainless steel pipe with a cross-section of 20-30 mm;
- a 60-80 mm thick bar of wood sawn into four equal parts;
- metal springs (4-8 pieces, depending on the width of the future dryer);
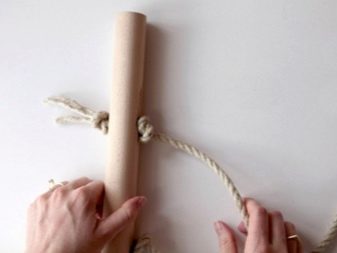
- A roll of strong rope.

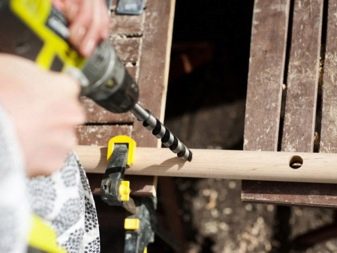
Two pairs of wooden bars will serve as brackets for our construction. To do this, you need to drill holes in the center of the bars, equal in diameter to the metal pipe. Fasten the bars to both ends of the pipes. Along the entire length of the pipes we drill holes through which the clotheslines will pass. The distance between the holes should be 10-15 cm.
Fix the wooden bars together with the pipes on the opposite walls. Under the pipes, at a distance of about half a meter drill holes in the wall, which should be located strictly under the holes in the metal pipes. In the holes insert the self-tapping screws, on which the metal springs are tied with a rope. The other end of the rope is put through the holes in the tube and lead to the opposite side. Pass the rope through another metal tube and tie it to the spring. Repeat this operation for all springs.
The bottom of the structure will look very unsightly, so it is recommended to disguise it with decorative panels.
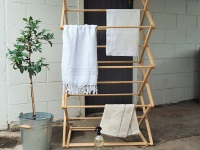
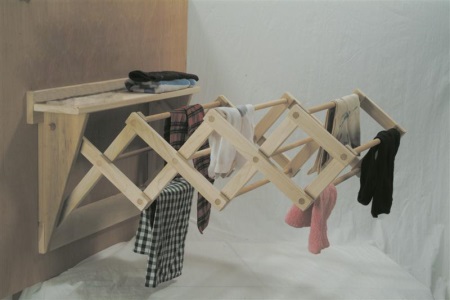
Mobile
Materials:
- A wooden slat or bar to create a frame;
- several wooden bars;
- plywood, plasterboard or wooden board for the base;
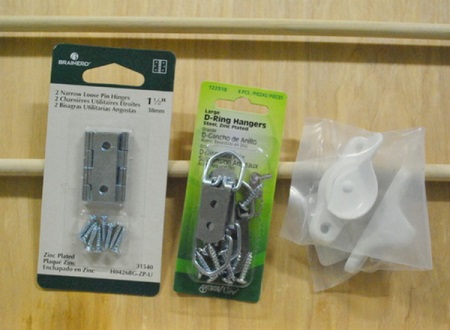
- one or two furniture hinges;
- a simple folding mechanism;
- furniture handles or towel hooks;
- fastener set;
- water-based or acrylic paint.
Workflow:
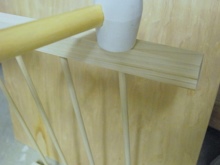
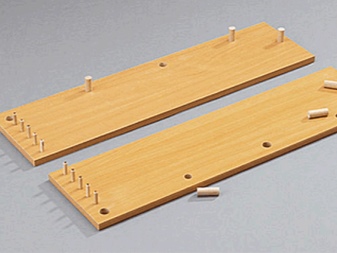
- First, in the two opposite elements of the frame, we drill holes equal in diameter to the wooden bars. Fix the rods inside the frame. It is important that the rods have the same length. To fix them in the holes was more convenient, you can slightly grind the rods at the ends. Then we assemble the frame, nailing the parts to each other.
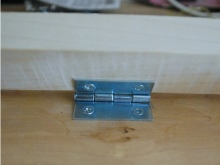
- Now prepare the base. It must be 100-150 mm longer and wider than the frame. Attach the bottom part of the frame to the base on the furniture hinge (if the design is large, we use two hinges).
- Let's proceed to painting. You can paint the whole drier in one color, or you can use different shades of paint for the frame, rods and base. Wait until the paint dries completely.
- On the upper part of the construction we install a fixing lock, and on both sides - a folding mechanism. You need to choose the right angle for the folding mechanism, so that the unfolded dryer would not interfere with moving around the bathroom.
- Screw or glue holders for small items of clothes and underwear (they can be hooks or small furniture handles) to the bottom of our new dryer.
- Drill a hole in the wall and mount the dryer in place.

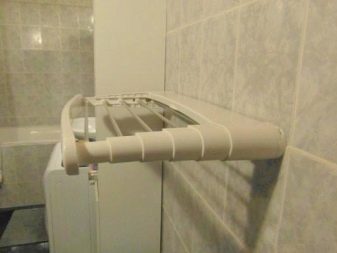
With heating
Materials:
- Two wooden slats (chipboard and MDF will also do);
- 10 metal pipes (half of them must have a larger diameter than the rest);
- 7 pairs of wooden spikes;
- wooden plugs for the pipes;
- instant glue.

Workflow:
- Measure the battery on which the dryer will be installed. The dimensions of the dryer should be slightly larger than the size of the radiator.
- On the upper edge of each of the slats we drill 5 blind holes designed for studs.
- We mark on the front side of the panel for the holes (4 holes should be located at the same distance from each other). Drill the holes, alternating blind and through holes. Repeat these steps for the other panel.
- In the blind holes glue wooden spikes.
- After the glue dries to the spikes, attach those pipes that have a smaller diameter.
- In the remaining holes, insert the pipes of a larger diameter. Some of them must be mounted on spikes and some of them must be free to pass through the through holes.
- If your radiator has a temperature regulator, one of the dryer slats should have a hole for it as well.
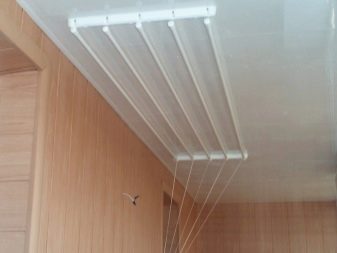
Ceiling
Materials:
- Two wooden slats (approximate dimensions: length 40 cm, width 15 cm, thickness 2 cm);
- 5 pairs of self-tapping screws in the form of rings;
- A roll of clothesline;
- varnish for woodwork.
Workflow:
- First, we drill 5 through holes in the wooden bars at an equal distance from each other.
- We clean the holes from sawdust and insert the self-tapping screws-rings. The self-tapping screws must sit tightly, so if necessary reinforce them with plastic clips.
- Now you need to install the strips on the ceiling. To do this, use a hole punch and dowel nails.
- Coat the strips with varnish and wait the time necessary for the complete drying of the composition.
- Now we cut the clothesline into 5 equal pieces and stretch the pieces of rope between the self-tapping screws.
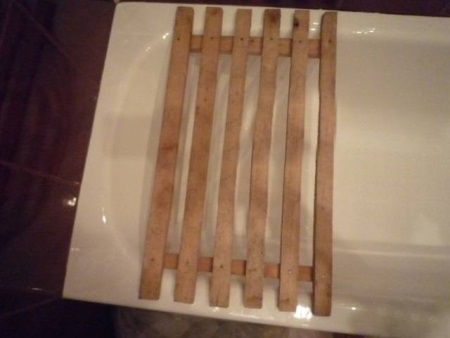
Putting it on the bathtub
For drying small things, such as underwear, socks and pantyhose, you can make a device that, if necessary, can be put on the bathtub and then put away in a secluded place.
Materials:
- Two long wooden bars (slightly longer than the length of the bathtub) and some short ones (the width of the bathtub):
- nails;
- water or acrylic paint.
From wooden bars to make a structure like a ladder. In this case, the short bars should be nailed on top of the long - so the device will be more stable. Finish the dryer with a coat of paint. After the paint dries, the overhead clothes dryer is ready for use.