How to remove the drum of the washing machine?
In the process of using the washing machine, anything can happen to it. If you find any problems in the work of the appliance, you have two ways: seek help from a repairman or try to fix the malfunction yourself. In the first case, you entrust your faithful household helper to a professional, but at the same time lose a few thousand rubles. In the second - you try to solve the problem with minimal losses for the family budget, but risk to damage the complex mechanism by inept actions.
Which way to go, the choice is yours. Those who have decided to cope with their own efforts, our instruction on disassembling the washing machine and removing the drum will help. This information is relevant for household appliances LG, Indesit, Bosch, Ardo, Electrolux, Candy, Zanussi, Whirpool, Hansa and other popular manufacturers.
Necessary tools
Before you get started, make sure you have all the tools and materials you need on hand.
You may need:
- A set of screwdrivers, including a Phillips head screwdriver and a standard slotted screwdriver;
- A set of stars and hexes;
- screwdriver;
- hammer;
- wire cutters and pliers;
- a set of sockets with a ratchet;
- Metal hacksaw.
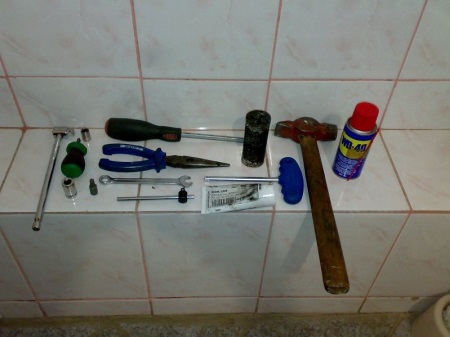
You do not necessarily have to use all of the above equipment - the complexity of the work depends on the model of the washing machine. Some units are very easy to disassemble, but in order to remove the drum from others, you will have to work hard.
For washing machines with different types of loading, the procedure for disassembling the drum can vary significantly. Let's consider the sequence of actions for appliances with front-loading and with vertical loading. Remember that for any model of washing machine, the work of removing the drum must begin with disconnecting the unit from the power supply and disconnecting the water intake and drain hoses.
Front-loading washer
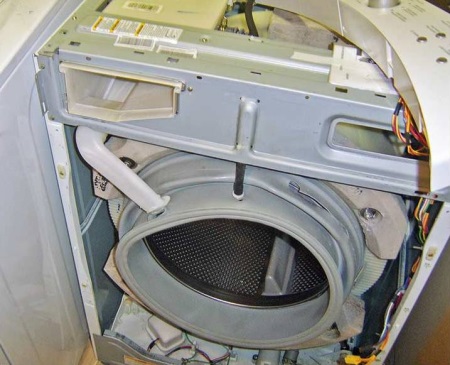
Remove the tank
- Armed with a screwdriver, remove the top and bottom panels of the washing machine.
- Unscrew the fasteners that fix the feeder of washing powder and control unit.
- With care, disconnect these elements.
- Do not forget to take pictures of each step of the work, so that then reassemble everything in reverse order without errors.
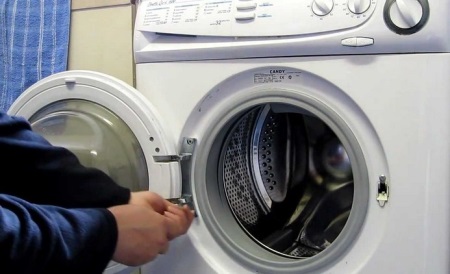
- Now remove from the front panel the rubber collar, which seals the hatch door. To do this, loosen the clamp, which is fixed by a small metal spring or a plastic clamp.
- Freeing the front panel from the seal, remove it. To do this, you need to unscrew the bolts at the top and bottom of the machine.
- Now grab the front panel with both hands and disconnect it by pulling it forward and upward.
- The next step is to free the drum from the wires that connect it to other elements of the washing machine. Disconnect the wires of the heater, pump, valves, as well as various spigots.
- The freed wires take aside and carefully fasten so that they do not get tangled and do not interfere.
- To make it easier to pull out the tank, we remove the counterweights. They are located at the top and bottom of the tank.
- Next comes the turn of the shock absorbers and the springs that hold the tank. We take them off one by one.
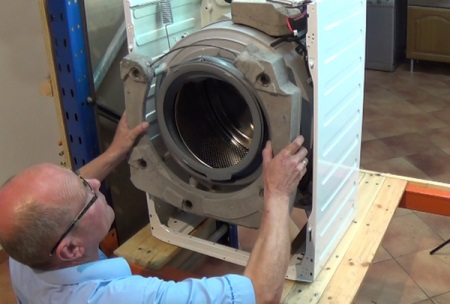
- Finally, we carefully pull out the tank and disconnect the engine from it.
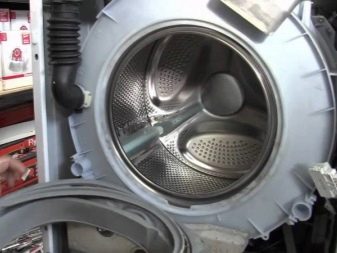
Watch the following video to see how to remove the tank visually.
Removing the drum
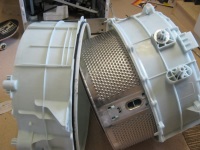
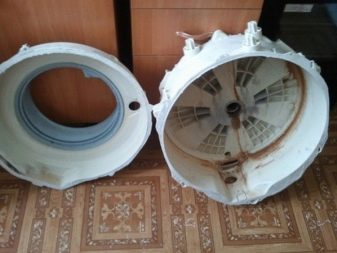
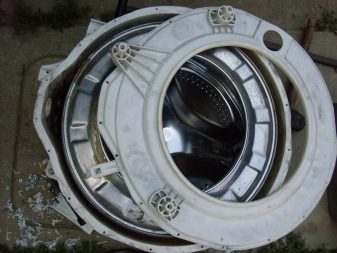
Most of the work is behind us, and all we have to do is remove the drum from the tank. What we do next depends on the type of tank. It can be collapsible or non collapsible.
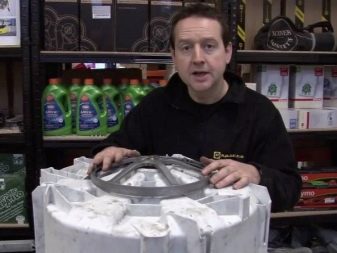
If the tank is collapsible.we simply unfasten the brackets that connect the two halves of the tank.

If the tank is not collapsible.you have to saw it apart. To do this we need a hacksaw, which we had at the beginning of the work. The place of the sawing is easy to determine - you should focus on the weld. Sawed the tank in two parts can be "resuscitated" by joining halves with brackets or bolts (and be sure to treat the joints with sealant).
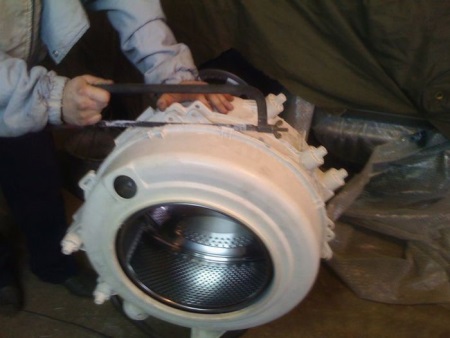
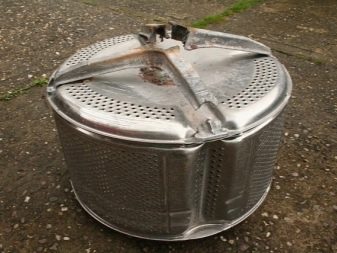
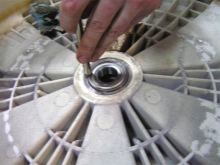
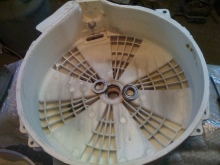
Now it is necessary to pull the drum out of the split tank. First just remove the front of the tank. Then disconnect the pulley. It is mounted on one bolt, which you have to unscrew and then screw back on. After that, take a hammer and carefully hit the shaft with it. After a few blows, the drum can usually be knocked out of the tank.
A machine with vertical loading
- Using a screwdriver, unscrew the fasteners that fix the rear panel of the washing machine, and remove it.
- Slide the side panel to the side, and then remove it.
- Carefully disconnect the wires, having previously photographed the position of each of them.
- Unscrew the screw that holds the shaft. Close the boot door and carefully pull out the tank.
- Then disconnect the two parts of the tank and remove the drum (just like for front-loading models).
In the video below, you can visually see how to remove the drum (using a Whirlpool washing machine as an example).
How do I remove the bearing from the drum?
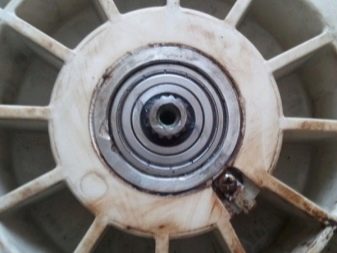
More often than not, we have to remove the drum of a washing machine in order to diagnose and repair any malfunction. One of the most common failures is bearing wear. To replace this part, you will need to disassemble the washing machine and remove the tank.
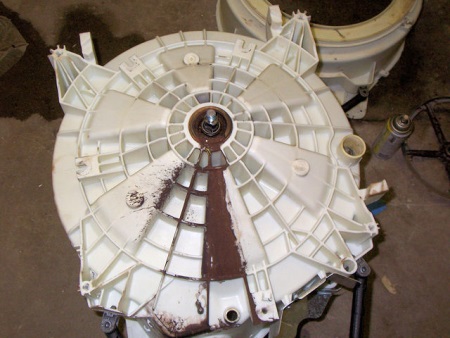
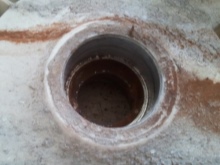
After taking the tank out of the washing machine and disassembling it into two parts, as described in the instructions above, you need to clean the drum. Remove accumulated dirt and foreign objects inside. Then dislodge the bearing with an improvised tool, taking care not to damage the seat. In addition to the bearing, remove the worn oil seals, which we will also replace with new parts. We treat the place where the bearing is mounted with lithol, then put the new seals and bearing. To fix the bearing we need a hammer or a knockout.
Let's remove the rubber band
To remove and replace the rubber sealing collar on the door, you do not need to disassemble the washing machine and pull out the drum.
- First, you need to remove the clamp that fixes the outer part of the cuff. If the clamp is plastic, it is secured with latches, and if metal - with a spring.
- Having removed the first clamp, carefully disconnect the second, inner clamp. Mark the place of its fixation with a marker.
- Pull out the cuff - first remove the upper part and then the lower one.
- Clean the lip of the tank, where the cuff was installed, from dirt and treat it with soapy water.
- Putting a new sleeve on the lip, move in a circle. After that, we put both clamps back in place.


