Plastic panels for the bathroom. Easy and quick repair!
Plastic panels are one of the popular ways to finish walls in the bathroom.
It is a very economical option in terms of repair: the panels are much cheaper than any other finishing materials for the bathroom. Installation will not be a problem, and time costs will be minimal.
Advantages and disadvantages
Plastic panels are made on the basis of solid polyvinyl chloride, in which a softener is added.
Like any material, PVC panels have their advantages and disadvantages.
The pros include:
- Ease and simplicity of installation. Panels are easy to assemble and mount themselves, so you can do without the help of specialists. In order to install a plastic panel, fit absolutely any surface, and does not require any preparation. And after the work there is not much trash left: shavings and trimming of the panels.
- Inexpensive price. If you are planning a budget repair of the room, PVC panels are just right. On average, their cost is 2 times cheaper than the cost of ceramic tiles.
- Practicality and reliability of the material. Plastic panels can be repeatedly assembled and disassembled, which is very convenient for moving. In addition, they do not burn out in the sun and can retain their original appearance for many years.
- Resistance to moisture. PVC panels are not afraid of water, so they are suitable for repairs of bathrooms.
- A large variety of colors and textures.
Today in stores you can see the widest range of plastic panels. The material can imitate the texture of stone, wood or even leather.
However, PVC panels have a number of disadvantages:
- Plastic panels are not environmentally friendly materials, because they are produced with the use of chemicals. If the panel is of low quality, they can also emit a specific smell.
- The release of toxic substances in a fire.
- Panels do not withstand sudden changes in temperature - the material can deteriorate.
- Relatively low strength. Plastic panels are very easily subjected to various damages. But fortunately, the ruined area is easy to replace.

About other options moisture-resistant bathroom paneling read our other article. You'll find many interesting solutions.
Tips for choosing
If you decide to buy plastic panels, focus on their quality, size and design. When choosing wall panels, you should be guided by the size of your bathroom.
Usually with the height is much easier than with the width - PVC panels come in lengths from 2.5 to 3.8 m. And in order to choose the best option relative to the width of the room, you need to divide the width of the bathroom by the width of one panel.
As for quality, it is best to choose panels that have a coating of a special protective film on the front side. With this material, you will avoid a variety of damages that can occur during installation. And after installation is complete, the film is removed.


When choosing the color of the panels, you should be guided, of course, by your own taste. However, in this case, too, there are some nuances that should be taken into account:
- If your bathroom is small, it is better to choose light colors, so that it seemed much more spacious. Visually expand the room also help cool colors - all shades of blue and green.
- If you are going to buy a panel that imitates the surface of a tree, stop also on the light colors - light beech, maple, etc.
Preparing the walls before finishing
The first stage of finishing the bathroom with plastic panels is the preparation of the walls. And there is no way to bypass this process - it guarantees a long service life of PVC panels and their aesthetic appearance.
Preparation of the walls consists of dismantling the old coating, removing mold, rust and mildew stains, as well as treating the surface with antiseptic solutions and water-repellent primer.
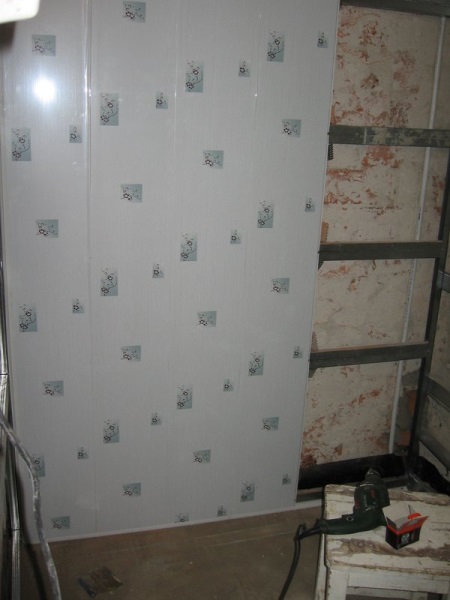
Installation with adhesives
This type of panel mounting can only be done in a bathroom where all the walls are absolutely flat. Mounting PVC panels on the glue is a very simple and fast method of installation, as the panels only need to be glued to the wall with liquid nails.
Features of mounting the panels with glue:
- it is necessary to choose an adhesive that does not contain any organic components;
- Apply the adhesive to the wall only with horizontal lines;
- Glue the panels must have a gap on the floor and ceiling (at the end of the work it must be closed with a skirting board).

The disadvantage of this type of installation is considered difficult to remove the panels (in the case of the next repair).
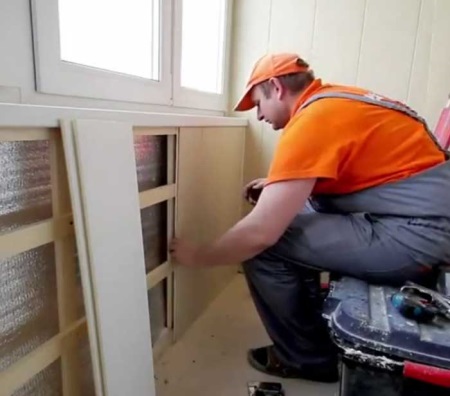
Installation with crates
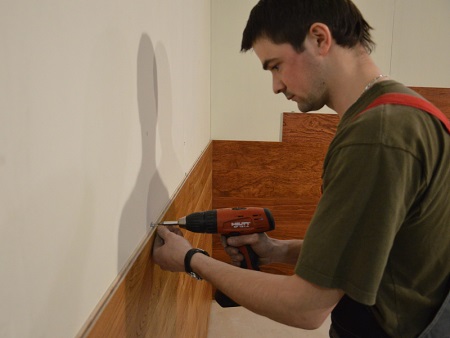
This method consists in the fact that along the length of the wall mounted bars of wood or metal (preferably metal, since the bathroom - a place where humidity is always high), on which then mount the panels themselves. You can use and staples, fasteners, and self-tapping screws that will be screwed into the panels themselves (mounting areas will later be hidden).
Installation process, fastening the panels
For the crate will require laths, cross-section of 20X40 mm. It is fixed at an angle of 90 ° to the PVC-panels with screws. Be sure to check the level, how evenly the laths are set, otherwise the panels may be installed unevenly, resulting in a coating of unevenness. Trims should be spaced at 40-50 cm. Also note that if the walls of the room are uneven, the crate must be leveled, putting it under plywood or timber.
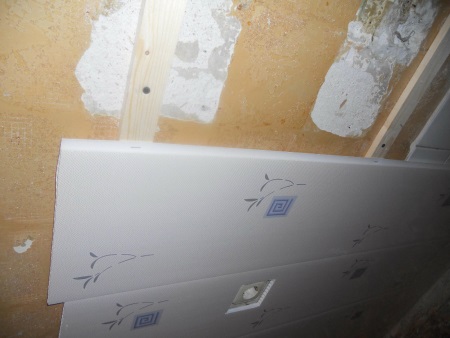
Installation of PVC panels can be started from any corner, but move toward the door or window opening. PVC panel has two fixing shelves: the right side is wide, which is necessary to attach the panel to the frame with staples or screws, the left - the narrow, to insert the previous element in the slot.
First, to the crate with self-tapping screws attached to the starting plastic profile. Then the first panel is inserted into the groove of the corner with a narrow shelf. Then the plastic panel is attached to the crate, which may require a stapler or screws again. The next step is fixing the panel on the wide shelf.
To insert the second panel, you need to snap it into the groove of the first. Fastening to the crate is carried out in the same way as in the case of the first panel. All other panels are installed in the same way.
Sometimes the panel needs to be cut to bypass obstacles (a radiator or towel rail). For this purpose, a grinder, a construction knife or an electric jigsaw will do.
The last panel should be pushed into the finish profile. In addition to snapping it into the previous panel, it must be aligned. In places where PVC panels are connected, you need to put an F-profile.
Mounting tips
Choosing how to mount the panels generally depends on your preferences, but it is worth taking into account some points:
- to install panels on the crate with screws you will have to drill a lot of holes in the wall and in general spend a lot of time and effort on this type of installation; installation of panels with glue - a simpler and faster option, but later you will face problems when dismantling the surface (glued material is difficult to "tear away" from the walls);
- It is easier to fix on the surface of the wall "rails", which can be purchased in construction stores. They are installed horizontally under the ceiling, at the bottom and in the middle of the wall.
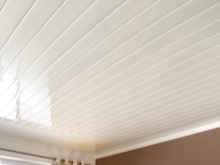
Ceiling
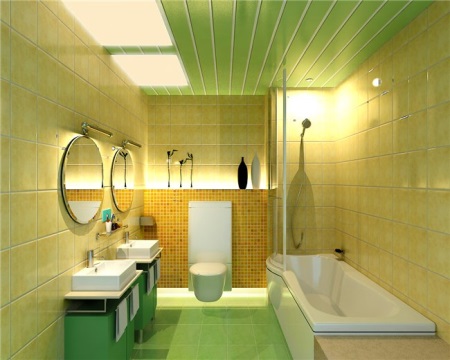
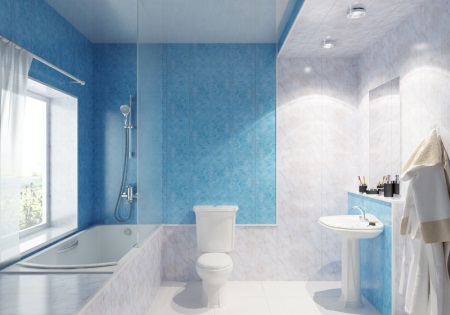
Since the usual whitewashed ceiling has probably already bored many people, the ceiling of plastic panels is a great alternative to it. In addition, by means of plastic panels you can hide any defect in this part of the bathroom.
To install a ceiling made of PVC panels you need to know the area of the floor (it is equal to the area of the ceiling). Knowing this value, a consultant in a construction store will help you calculate the number of panels that will be needed to make repairs.
There are 2 main types of fixing the PVC panels to the ceiling:
- on the glue;
- On a metal frame.
The first method is suitable for those who have a completely flat ceiling. First, it is necessary to attach a long rail on the level and then work from it. Panels are glued on liquid nails.
The 2nd way is considered more reliable and suitable for those who have any defects on the ceiling.
Read more in our article about ceiling panels for the bathroom.
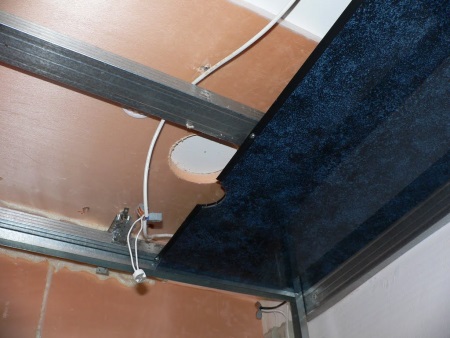
Installation steps on the frame for ceiling finishing
- Make a framework (crate) of slats (slats can be made of plastic or wood), whose thickness should be between 11 to 21 mm, and the distance between them - about 50 cm.
- Select the method of fastening: if the slats are made of plastic, metal clips will do, if made of wood - special staples or nails.
- Attaching the frame to the ceiling with dowels and screws. First attach the vertical laths (step - 50-75 cm), on them are installed 3 horizontal laths.
- Panels are placed on the frame from corner to corner, i.e. a starter or corner profile is attached in the corner of the bathroom, and each subsequent panel is placed in the groove of the preceding one.
- At the end it is necessary to lay a curb or ceiling plinth along the perimeter.
We hope that our article will help you not only to intelligently choose plastic panels for the bathroom, but also to correctly perform the installation.


They are easy to wash, cheap, installed quickly. Therefore, this is my choice. For a small family budget is optimal.