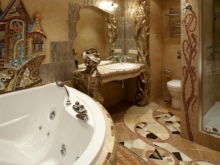
Bathroom tile wall panel
It happens so that the bathroom design was thought out, it would seem, to the smallest detail, but something seems to be missing. There are many ways how to bring the missing highlight into the interior. One of these ways is a panel of tiles for the bathroom. It is enough to free up one of the walls in the bathroom for it and the room is sure to play in a new way.
You can buy a ready-made tile panel, of which there is a great many in stores, or you can try to make it yourself. More about the varieties and features of this element of the decor, we will tell in this article.
Varieties of materials
For the production of the panel is used, mainly the same materials as for finishing walls in the bathroom. Consider the most popular solutions.
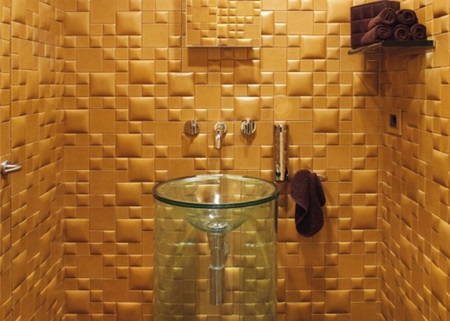
From glazed tiles.
This is probably the most common option. Ceramics has won the love of buyers, thanks to its low cost and a huge variety of colors and textures. In addition, this material is ideal for rooms with a high level of humidity. The disadvantage of tile can be considered its low strength. However, in order to damage a ceramic panel, you will have to make some effort, such as hitting it with a heavy object.
Ceramic tiles
For supporters of the natural style in the interior, a panel made of porcelain stoneware is an excellent choice. Porcelain stoneware tiles are often an imitation of a rock. It is a heavy, durable material that looks really good. The price of such a panel will be somewhat higher than a panel made of tile, but on the other hand it will last you so long that it will probably get boring.
From wall panels.
For those whose tastes are fickle "like the wind in May", this is the most suitable option. These panels can be installed and dismantled very quickly, so you can update the interior as soon as you feel like it. Moreover, they are very inexpensive. Wall panels are made of wooden boards or plastic.
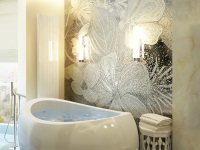
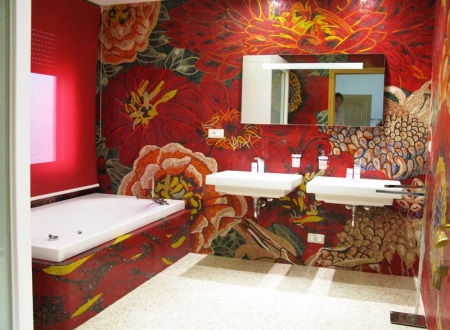
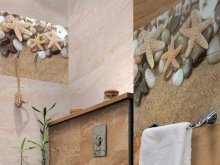
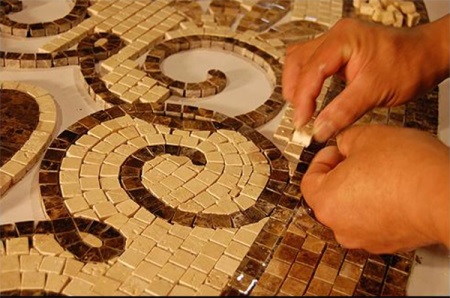
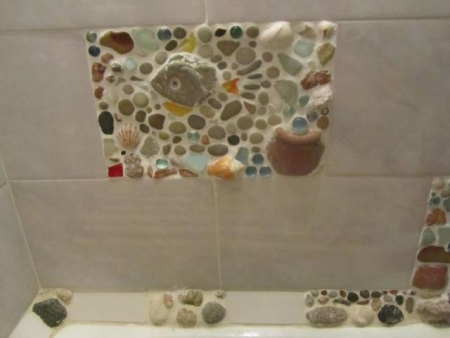
Mosaic
The most creative people will surely appreciate a mosaic wall panel. It represents small tiles of a variety of materials, fixed on a metal grid. Ceramics, natural rocks, artificial stone, glass, plastic, smalt are used for the production of such mosaics. The elements of the mosaic can be arranged in any order, creating your own unique patterns.

Determining size
Determining the size of the panel in the bathroom, it is important to correctly observe the proportions. The key role here is played by the size of the room, it is them that you need to be guided by.

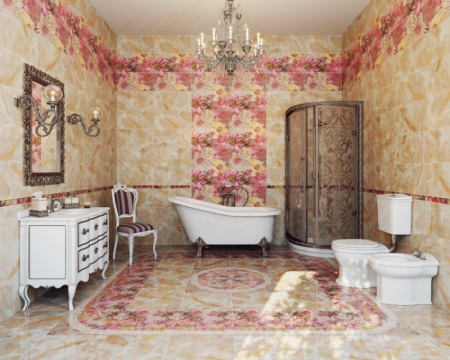
Large bathroom
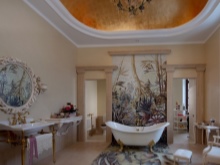
In a large bathroom, a small panel can get lost, and therefore, in this case, it's better to allocate a whole wall under the panel, or even two. In large rooms you are not limited in the choice of pictures. It can be a picture of your favorite artist, an exotic landscape, abstraction or your picture (we'll talk about creating a photo panel below). You can even find panels with three-dimensional protruding parts, reminiscent of ancient bas-reliefs.
Small Bathroom
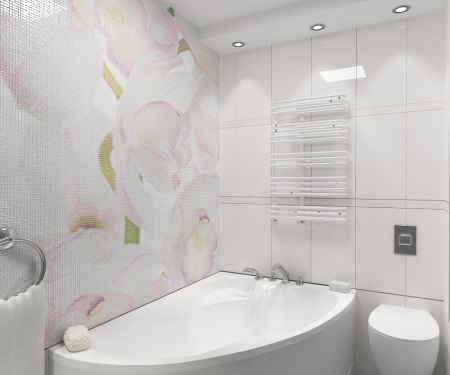
In a small bathroom, the panel can occupy only some part of the wall. If it is too large, then visually the room will seem even smaller, in addition, there will be a "pressing" feeling. Owners of small rooms is better to opt for "storyless" images: abstract fine patterns, landscapes, creating perspective, in general, in these drawings, which will help to visually increase the space.
The size of tiles or ceramic tiles should also be chosen on the basis of the size of the bathroom. The more spacious the room, the larger the tiles should be. The same applies to the pattern: for large bathrooms it is necessary to choose a larger pattern, and vice versa. The exception may be a light figure, which does not create the effect of cluttering.
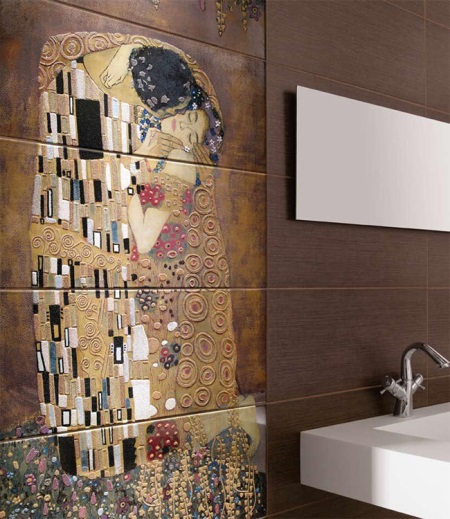
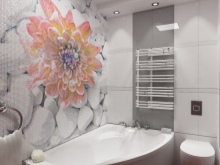
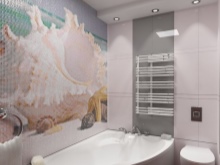
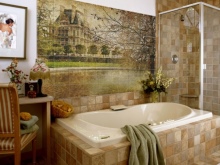
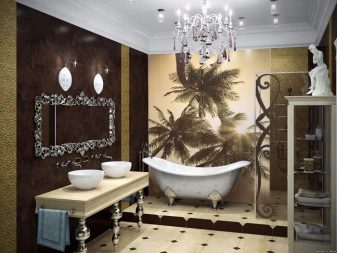
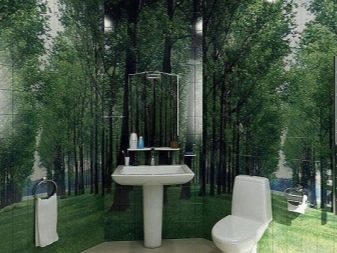
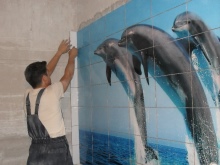
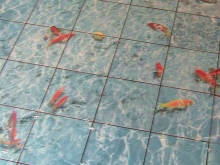
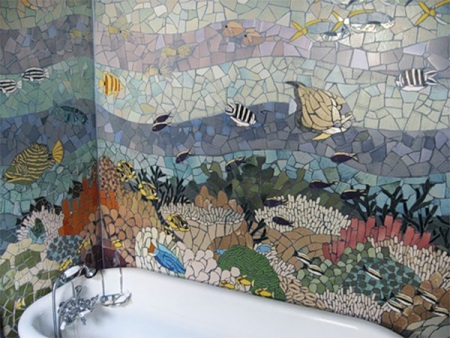
Photopanel
The service of creating photo wall panels out of tiles appeared relatively recently. The special technology of such panels allows us to put images on tiles, which do not lose their appearance, that is, do not fade for 50 years. The picture is impossible to erase or scratch. But the main advantage of this technology is that it allows you to decorate the interior of your bathroom with absolutely any image.
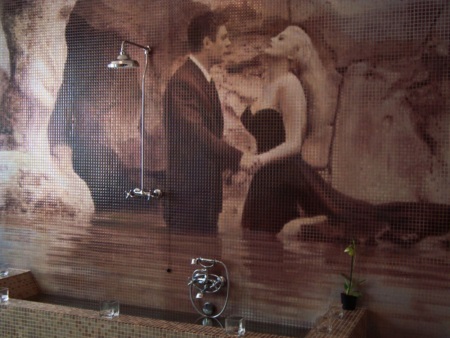
For this purpose you can choose your favorite picture, a child's picture, your own photo - anything you like! Your family pictures that you brought from the summer holidays in the South will look especially good. Also with the help of a photo panel you can create an unusually romantic atmosphere.
Getting a photo panel in your bathroom is quite easy.
- First, choose an image. Consider your decision carefully, because you will be admiring it every day. The resolution of the image should be as high as possible.
- Once you've decided on a picture, you can go shopping for ceramic tiles. Buy with at least a minimum supply!
- Next, find a company that prints images on tiles. There you will help "fit" your picture to the size of the future panel. A few days later pick up the result. The rest will be done for you!
For the most curious readers we will try to briefly describe the technology of the photo panel on the tiles:
- The image is printed on a special paper of the appropriate format;
- The printed image is varnished;
- The paper is moistened and applied to the tile;
- The tiles are burned in a muffle furnace, as a result of which the paper burns out completely and the image remains on the tile.

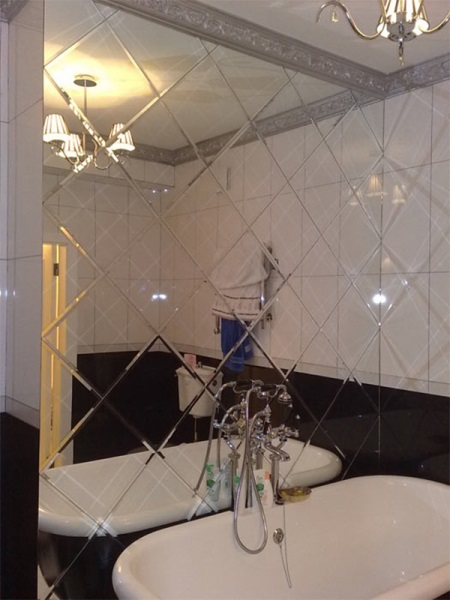
Mirrored
Another no less interesting option for decor - a mirror panel. This is not only beautiful, but also a functional solution. In addition to its main function, the mirror adds light and some "airiness" to the room. A mirrored panel is a wall drawing assembled from differently shaped but specially matched pieces of mirror cloth. You can use elements of mosaic - ceramic, glass, stone and others - as decorations.
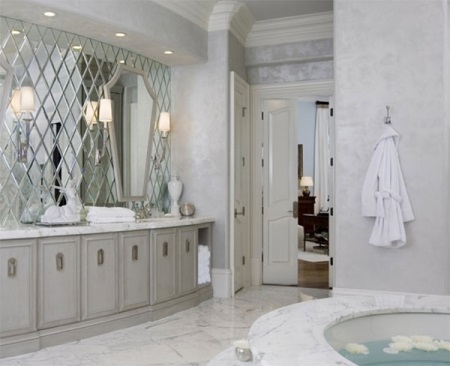
Create such a panel on their own is not easy, because this requires special tools for cutting mirrors, plus an accurate calculation. There are many firms that provide such services. The cost of the work there is quite high, as in the process of production involved several people with different specialties.
- First, together with the designer, you will develop a sketch of the future panel. At this stage you determine its size, shape, pattern, number and color of fragments.
- At the technological stage, the mirror cloth is cut into appropriate fragments, which are then ground and polished.
- Then a facet is made - a decorative cut along the edge of the mirror.
- Then all the elements of the panel are matched and numbered.
- At the final stage, additional decoration of the fragments takes place - patterns, matting, etc. are applied to them.
Mounting on the wall
In order to install the finished panel on the wall, you can turn to professionals, or you can do it yourself. The installation of the panel is not fundamentally different from the laying of ordinary tiles. The only nuance is that all elements of the panel are numbered, and this numbering must be carefully observed.
- First, the walls are prepared: the old coating is removed, the walls are smoothed and primed.
- After the walls have dried, they are applied a marking, which will be laid tiles. We use for this building level and a simple pencil.
- Then you need to dilute the adhesive, designed specifically for tile. All the proportions are specified in the instructions. You can achieve a more homogeneous consistency if you mix the composition with a drill.
- Now you can proceed directly to the laying. Start with the second row from the bottom. Apply spatula glue on the wall and press the tile, do not press too hard, otherwise it will crack. Any excess glue is removed with a piece of soft cloth.
- Adjust the distance between the tiles with special plastic crosses. It should be no more than a few millimeters. During the work, do not forget to check whether the rows are laid evenly.
- When the glue dries, and the tile is securely attached to the wall, you can begin grouting the seams. Choose the color of the composition based on your ideas about style and beauty. Grout can merge with the pattern, and can come through as a bright contrast.
Wallpaper with your own hands from pieces of tile
If you do not welcome ready-made solutions and prefer a creative approach, then try to make a wall panel in the bathroom yourself. The easiest way to make a mosaic panel out of tile pieces. For this you will need shards of tile and ceramic dishes, decorative stones, beads, shells and the like.
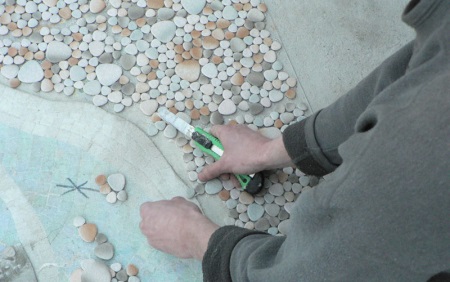
Tile shards can be searched through friends and acquaintances, or you can go to the nearest hardware store. There they sell them at a bargain price, or give them away for free.

Prepare the platform for work. It is better to do it on the floor, laying it with cardboard or old newspapers. Arm yourself with a hammer and break the tiles into smaller pieces. If you already have an idea of what will be depicted on your panel, try to give the pieces the appropriate outline with an emery.
If you are still undecided about the pattern, play with the details, placing them in different order, perhaps you will be able to see in the disparate fragments of the mosaic something unexpected.
When you have finished with the pattern on the floor, you can start transferring it to the wall. This can be done directly, gluing the pieces on the wall one by one, or collect the mosaic on a piece of cardboard, and then fix it on the wall, pre-varnished. For these works, you need to use tile adhesive.


Panels always add a highlight to the interior. I want to make a small one at my place as well, since making a large one does not allow the size of the room.