Bathtub faucet repair: the causes of breakage and repair methods
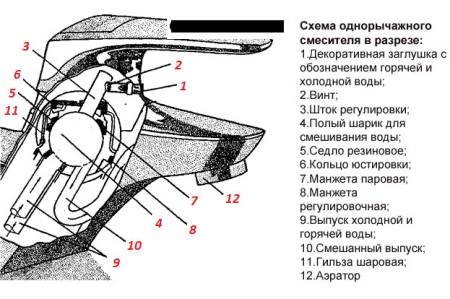
Faucet - is a device for controlling the flow and temperature of the water flowing from the faucet.
The bath faucet also adds the function of switching the water flow from the faucet to the shower. Unfortunately, it is not uncommon for faucet failures to occur. But most often they are easy to fix by your own efforts.
The main causes of malfunctions
Perhaps the most obvious cause of faucet breakage is the poor quality of the product itself. Today's market is replete with low-quality plumbing of Chinese and Turkish origin, the lifetime of which is not long in itself. When choosing a new mixer tap, the desire to save money may play against you. It is better to splurge once, but to buy a quality faucet, which will serve you for many years.
The second reason for frequent failures can be the use of short-lived consumables. For example, using a rubber gasket combined with hard tap water will cause frequent breakdowns. If you use ceramic inserts, the faucet will last much longer.
Incorrect installation also often leads to all sorts of failures and reduces the service life of the product. When installing the faucet, it is very important to take into account its design features.
Faucets come in:
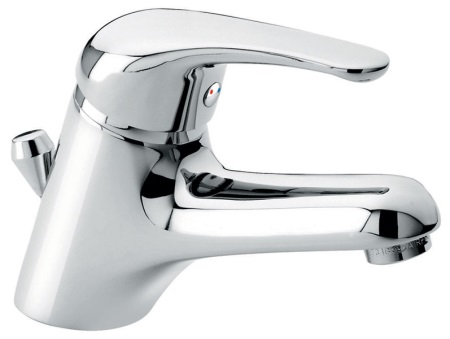
- Single-lever;
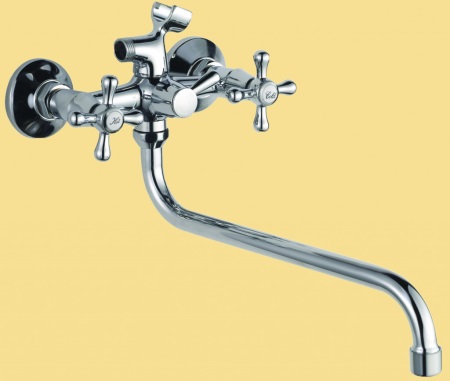
- Two-valve;
- Non-contact.
Read more about the types in our article about faucet selection. You'll also find plenty of helpful tips and advice here.
Each of these types of faucets is installed in a different way and breakdowns in them can also be caused by different causes.
Later in the article, we'll go into more detail on the more specific causes of each type of faucet breakdown and tell you how to deal with them.
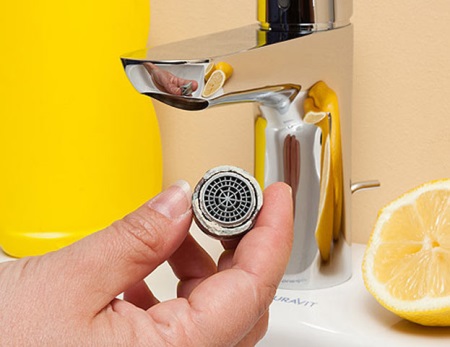
Decreased volume of the jet from the faucet
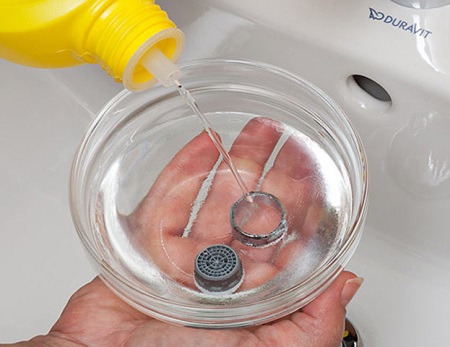
The most common problem associated with the operation of single-lever faucets is a decrease in the volume of the jet. The cause of this malfunction is usually a clogged aerator - a nozzle attached to the end of the nozzle, through which the water pours out of the faucet.
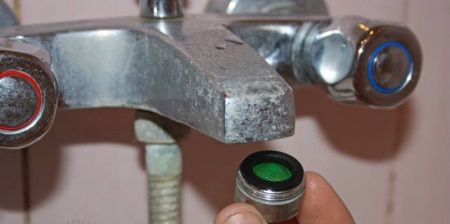
This problem in most cases can be easily solved. You just unscrew the aerator and clean it well or with a strong jet of water, or blow it with a jet of air. After that, all you will need to do - to screw it back into place. This can be done by any housewife.
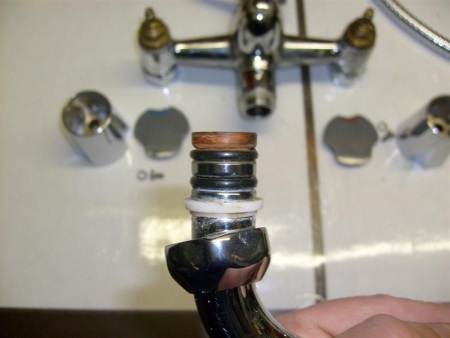
Leaking from under the compression nut of the nozzle
Another common cause of faucet failure is the wear and tear of the gasket. Anyone can probably imagine what it looks like - it's a small circle of gasket material with a hole in the middle. In the old faucets, rubber gaskets were used all over the place. Now it is possible to use more modern and reliable materials, such as paronite.
To fix the leak, we will need a gasket of the appropriate diameter, a wrench and tape of PTFE sealing material or tape with special paste.
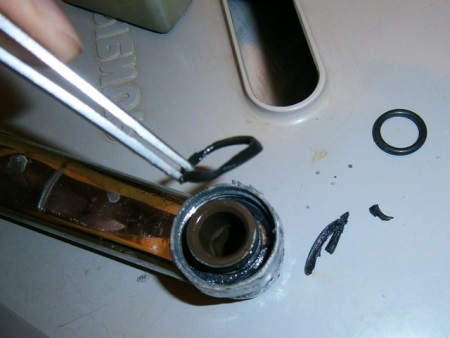
- Remove the metal ring securing the spout pipe to the faucet.
- Remove the spout tube and remove the remains of the worn gasket.
- Install a new gasket.
- Wrap tape or flax and paste around the threads of the spout pipe so that the parts are pressed tightly together when assembling.
- Secure the spout tube with a metal ring.
Repairing a single-lever faucet if it leaks from under the lever
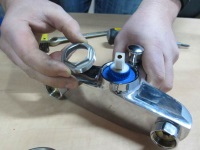
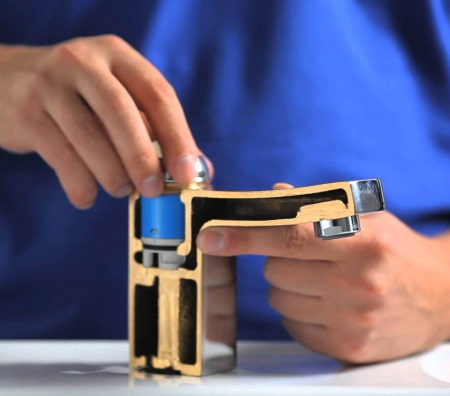
Such a leak is usually caused by a malfunction in the faucet cartridge. First, let's understand what a cartridge is?
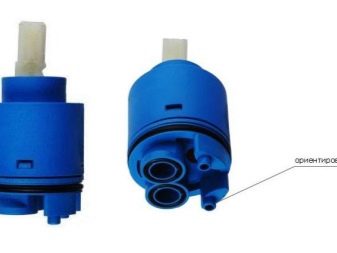
The cartridge - is a prefabricated cylinder with three holes; one hole receives hot water, another receives cold water, and the mixed water pours out of the third.
According to the type of mechanism used to mix hot and cold water, the cartridges are divided into ball and ceramic. In addition, on top of the cartridge is a stem on which the lever of the mixer is attached. This is where the leakage occurs.
When to change the cartridge
The main signs that it's time for you to change the faucet cartridge:
- Either hot or cold water is not coming on;
- The water temperature changes randomly without changing the position of the lever.
- The faucet does not turn fully or does not close completely;
- When you switch the lever, you have to apply additional force;
- And finally, the problem we mentioned above - there is leakage from under the lever.
First of all, we recommend that before you buy a new cartridge, remove the old one and go to the plumbing store with it as a sample.
Choosing a new cartridge
As we mentioned above, it is important to pay attention to the quality of the plumbing fixtures you buy. Give preference to cartridges from proven European companies And try not to fall for the tricks of fraudsters, copying the performance of famous brands.
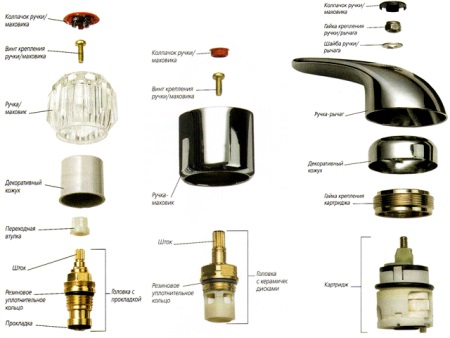
As a rule, if you do not install the entire water supply system in the house or apartment, you have no choice what type of cartridge to choose. The fact is that despite the variety of models, there are only Two main types of cartridges - ball and ceramic.
The advantage of using ball cartridges is the ability to disassemble the cartridge itself and repair it if necessary.
Ceramic cartridge can not be dismantled, it must be replaced as a whole, but the ceramic plates in it are more durable and are not affected by the negative effects of hard water. If the original water faucet was installed with the expectation of using a ballpoint cartridge, you can not put a ceramic one. And vice versa.
But back to the question of repairing a single-lever faucet When a leak is detected from under the lever:
1. Use a screwdriver to remove the plug indicating the direction of cold and hot water.
2. You will find a screw underneath. Carefully unscrew it with an Allen key or a screwdriver of suitable size so as not to damage the threads. If you can't do it carefully, use a drill with a thin bit.
3. Remove the lever from the mixer body by pulling it upward.
4. Remove the decorative element from the faucet with your hands or a pair of pliers.
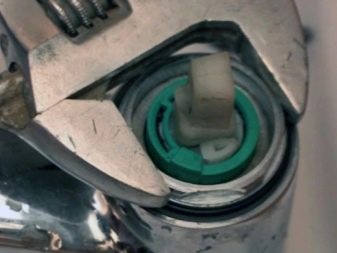
5. Unscrew the nut that directly holds the cartridge to the mixer body. To do this, first use an adjustable wrench, and then gently unscrew it with your hands.
6. That's it. Now you can take out the old cartridge, go to the store and buy a new one.
7. To install the new cartridge, follow all the above steps in reverse order.
Leaking shower faucet
There is another gasket in the faucet, similar to the one between the gooseneck and the faucet body that we wrote about above. This second gasket is installed between the mixer body and the shift lever. It also tends to wear out over time.
Replacing this gasket follows essentially the same pattern as the previous one:
- Unscrew the lever. If you are unable to do this, check to see if there is a mounting screw. If there is one, you will need to unscrew it first, and then remove the lever.
- Remove the remains of the old gasket and put a new one in its place.
- Tape or flax paste around the threads.
- Place the lever in its original position and, if necessary, tighten the mounting screw.

If you want to install a new faucet, we suggest you take a look at our master class on on how to install the faucet..
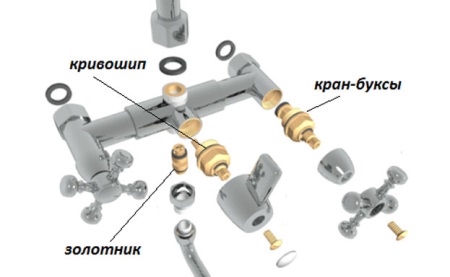
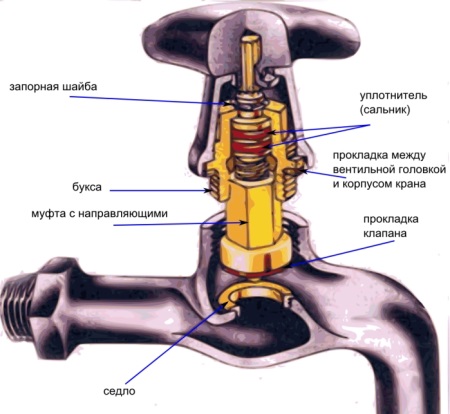
Two-handle faucet (leaking from under the valve)
This type of malfunction occurs as a result of:
- damage to the faucet head - The device inside the faucet that opens and stops the water flow;
- failure of the sealing ring on the faucet head.
Sequence of operations:
- Turn off the cold water tap on the riser pipe.
- Remove the plug from the valve.
- Unscrew the screw with which the valve is screwed. Be careful as the screws in this place are often stuck and it is very easy to damage the threads.
- Use a wrench to unscrew the valve head.
- If necessary, replace the old O-ring.
- If necessary, replace the old faucet head with a new one.
- Reinstall the valve in its original position.
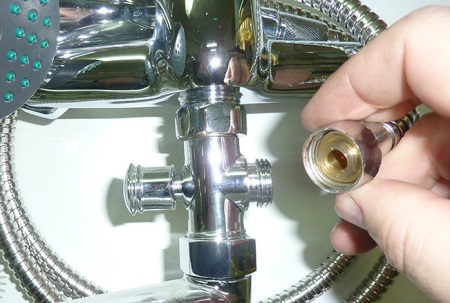
Leaking from under the shower hose nut or from the hose nozzle
The basic principle here is the same as for replacing other gaskets: unscrew the fixing nut of the hose, remove the remains of the old gasket, put a new one in its place, wrap FUM tape on the threads and screw everything back the way it was originally.
Faulty shower faucet switch button
If the water began to leak from both the showerhead and the faucet at the same time, most likely the problem is a failure of the switch button mechanism, namely the gland.
Sequence of steps:
- Unscrew the switch button by hand.
- Using a wrench, unscrew the switch body.
- Carefully pull out the stem and check the condition of the gaskets and replace them if necessary.
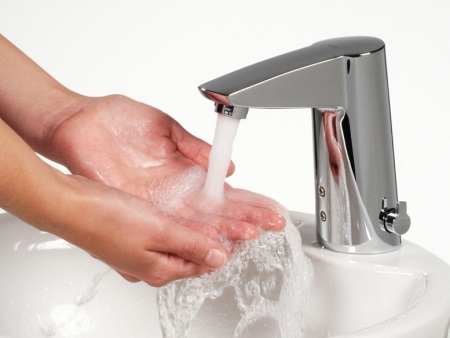
Non-Contact (Touch)
Here we get to the last type of faucet that exists - non-contact, or as they are also called, touch-sensitive faucets.
Their name speaks for itself: they are based on a sensor that detects movement when you bring something to the faucet and automatically turns on the water flow. You don't have to turn anything.
These faucets are considered the most durable and have a lifespan of 5 years or more. In addition, they are really easy to use and help save water consumption.
But their main disadvantage is that they are extremely difficult to repair. We do not recommend doing it yourself. It is better to try to find an experienced specialist who understands this issue. Sensors you are unlikely to be able to repair yourself - most likely you will simply break the mixer permanently.
If we are talking about some minor flaws, such as a clogged aerator, you can cope with such a problem yourself.
A clogged aerator is most often expressed as a decrease in water pressure, resulting in water flowing in a thin stream. To check it, remove the aerator and open the water. If the water pressure becomes standard, if the aerator is rusty, replace it with a new one.
If the aerator is dirty, rinse it under water. In case of heavy contamination, use special products.
If you understand the mechanism of the faucet, it turns out to be not so difficult to repair it. We hope that our article has helped you to solve problems with your faucet and eliminate all malfunctions.
If you haven't found a solution to your faucet breakdown, read our article about faucet repair Bathroom.


My aerator is clogged! Thank you for explaining everything so clearly. Problem solved!