How to Disassemble a Bathroom Faucet: Instructions for Beginners
With all the existing quality and durability guarantees from manufacturers, the lifetime of a faucet sooner or later expires even with the most careful use. If minor repairs or replacement parts do not save in this situation, there is nothing to do - you will have to replace the entire faucet. In the case of a fixable failure for you, we have prepared a series of practical tips on how to disassemble faucet.
Design features of faucets for the bathroom
The most common and familiar to everyone are two-lever and single-lever faucets. Both products have advantages that are characteristic only for them, due to which buyers prefer them specifically. But, at the same time, each type has its own weaknesses. They are the ones that break most often.
You can read more in our article about the existing types of faucets.
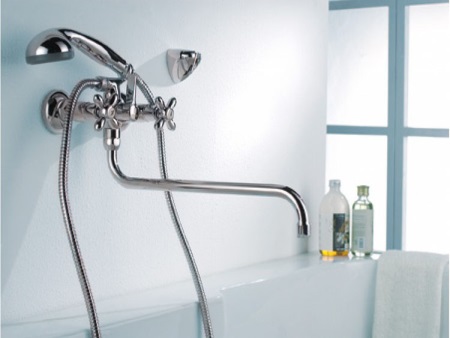
Two-valve
Despite its venerable age, devices of this design are still very much in demand. Mainly because of the smooth control of water flow and temperature, as well as the variety of shapes and designs of valves and body.
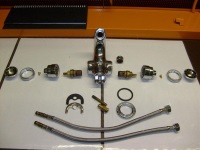
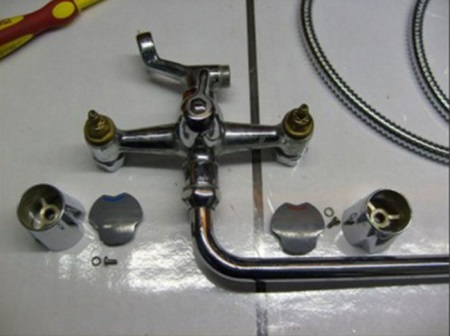
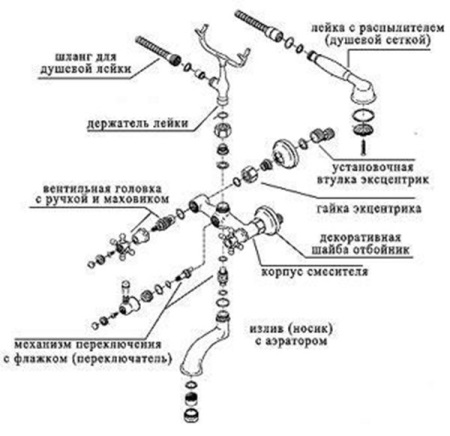
The body of two-handle faucets is cast from brass or stainless steel. Inside the body are drilled channels for hot and cold water. The main operating elements are mounted in the body:
- Bucket faucets .. They are actuated by valves and close the holes in the mixing chamber with rubber gaskets or ceramic discs placed on the ends;
- spool valve to switch the flow from the spout to the shower.
The spout and the shower hose are attached to the respective holes using the union nuts already on the outside. Valves are put on the stem of the shower head and firmly fixed with bolts.
According to the method of connection, there are two types of two-valve faucets:
- Connected through a tee (in the form of "herringbone");
- Those that are connected through branch pipes.
In a mixer of the first type, the tap-beads are pressed to the saddles, closing the holes of 2 parallel channels. These in turn are connected via a T-piece to the water pipes in the bathroom.
The configuration with separate spigots is simpler and allows you to connect to the water supply through hard-wired pipes or with flexible hoses.
The main cause of faults in two-handle faucets is periodic wear and tear of the gaskets and rings, which causes closed valves to leak water, leaks through the cap nuts, etc.
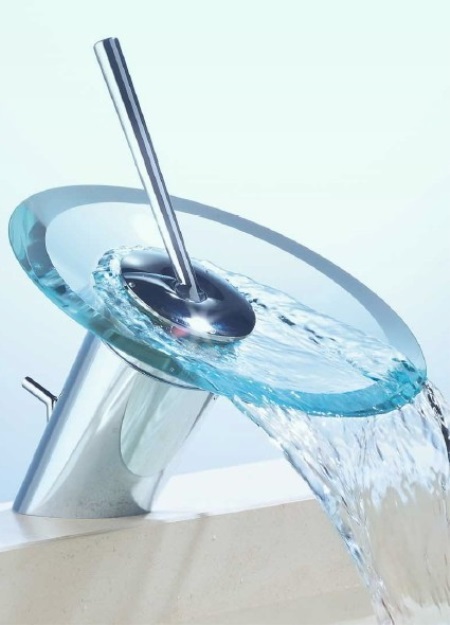
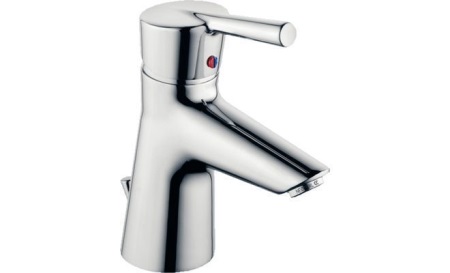
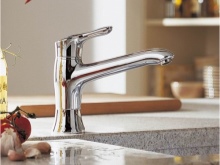
Single Lever
These products have gained wide popularity because of their modern design, compactness and ease of water flow control.
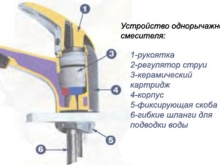
Let's take a closer look at the structure of the single-lever faucet.
It can be distinguished the following components:
- The body of the mixer;
- Control knob;
- The regulating handle; Its safety catch;
- Top lid;
- Clamping nut;
- Replacement cassette (cartridge);
- Seal gasket.
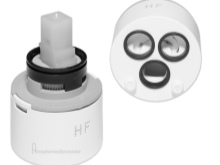
A metal sphere or ceramic plate cartridge can be installed inside this faucet.
In the first case, a hollow ball with holes is installed in the body of the mixer, which is connected to the handle through a rod. The cavity of the ball acts as a mixing chamber: lifting the lever up opens the flow into it, and when you move it sideways, cold or hot water is drawn in. The third hole in the cartridge actually comes out at the spout of the faucet and supplies water to it.
Often there are Teflon seals around the inlets of the faucet.
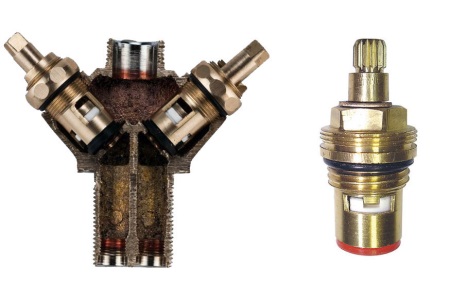
Designs with ceramic cartridges are found with both rotary and fixed spout. In all of them, the control scheme is the same. There are 2 ceramic washers pressed tightly one to the other. Turning the handle of the faucet changes the clearance that forms the holes in the plates and allows you to regulate the flow of cold and hot water. Lifting the handle opens the valve that closes the mixing chamber.
Modern versions of the cartridge have a limiting washer to prevent only hot water from being turned on. Even in the extreme position for the hot water supply to the faucet, there is still some gap for the flow of the cold stream.
The inside of the cartridge hole surface is sealed with silicone or rubber gaskets. At the bottom of the top washer there are small grooves or notches to dampen the sound vibrations and water hammer.
A characteristic breakdown in faucets with a ceramic cartridge is a clog between the ceramic plates, which makes it impossible to completely shut off the water. Due to the fact that the cartridge is indestructible, it will have to be replaced as a whole.
It is strongly recommended to remove the broken cartridge and take it to the store to choose a new one of the same size.
Single-lever faucets with a ball cartridge can be disassembled to clean the surface of the sphere and its seats of clogs.
Required precautions prior to operation
For self-troubleshooting, prepare for the job in sequence:
- Identify the exact location of the leak, jam, or kink on your faucet.
- Consult an experienced person or a plumber for advice.
- Before you begin, shut off the ball valves on the supply pipes and have absorbent sponges and rags ready to clean up any drips.
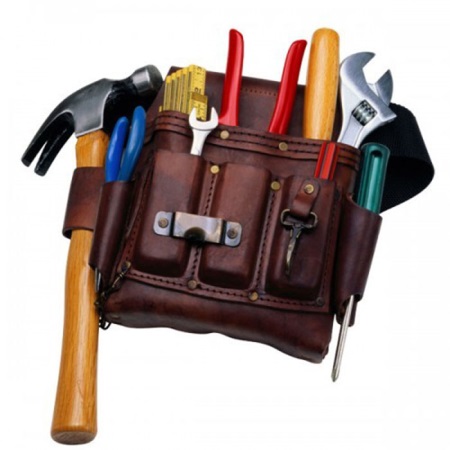
To remove the faulty parts and put new ones in their place, we need the following tools and materials:
- Screwdrivers (flat and Phillips
- Wrenches and adjustable wrenches
- Pliers
- Allen wrench
- Replacement parts
Always on hand when doing plumbing work should be sealing liner (tape, oakum, Fum), spare gaskets of standard sizes and sealing rings. Also for the careful work with wrenches always put a soft cloth so as not to leave scratches on the metal surfaces of the joints.
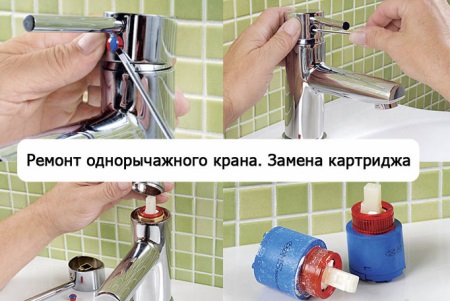
Replacing the cartridge in a lever mixer
First remove the control lever itself. Remove the plastic cover at the base of the lever (on which the directions for hot and cold water are marked in blue and red). To do this, gently pry it off with a flat screwdriver. Then unscrew the screw connecting the lever with the stem and remove the lever.
Under the lever there will be a decorative cap, which hides the nut fixing the cartridge in the body. It is easy to unscrew by hand, but if you have difficulty, use an adjustable wrench. Note that this cap is quite fragile and the effort should be minimal.
After removing the cap, loosen and unscrew the nut. Take out the cartridge and if you have not yet purchased a new one to replace it, take it with you to the market or to the store.
When you already have a new cartridge of the right diameter, you can begin reassembling the faucet.
It is important to clean the seat well before installation, remove lime scale and other dirt.
The reassembly procedure after replacing the cartridge is similar, but in reverse order. After completing the work, open the taps on the tap water supply and make sure the faucet is working properly.
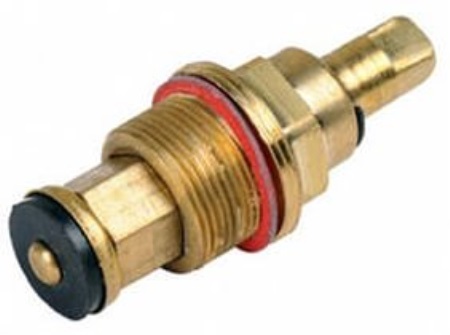
Replacing parts in the valve faucet
If water leaks at the gooseneck even when the valves are closed, it is necessary to remove the faucet-beads and check their condition.
The procedure for removing the faucet bucket is almost identical to the removal of the lever mixer cartridge. First we remove the valve, for which we unscrew the screw that holds it. The screw is also hidden by the decorative cover. After that, remove the cap covering the faucet cup and use a wrench to unscrew the nut fixing it.
After removing the tap-bead, inspect the rubber gaskets at its end. If they are worn out, that's the reason of nonoverlapping water. Replace the worn gasket with a new one, and put all the parts back in their original places.
Please note that it is mandatory to screw in the faucet bucket with the "fully open" position of the stem.
If the faucet closes and opens with half-turn faucet knobs, the problem with water leakage will mean replacing the entire part.
Ceramic or plastic discs for half-turn faucets are not available separately on the market. It remains only to buy a new tap-box to replace the failed one. In order not to miscalculate with the right size, take the old part with you.

How to disassemble the shower faucet
A three-way shower faucet can be installed in the faucet in three ways:
- built into the body using the split-type method;
- permanently installed in the housing;
- mounted between the body and the spout by means of union nuts.
Built-in faucets made by pressing method cannot be removed and replaced. This is the attribute of cheap plumbing and the work of such a faucet is designed for 4-5 years at best.
The more solid products often have collapsible shower faucets, which are easy to replace.
If you take the example of the switch mounted on the moving gooseneck, it can be replaced by disassembling the two captive nuts that secure it at the top and bottom.
There is no point in fixing or replacing the tap head itself. Yes, it will not cost much, but it will be a pain to install.
The body-mounted switch won't be as quick to replace, but it's a familiar process. As with replacing faucets, the first thing to remove is the shift knob, followed by the protective cap. This will give us access to the switch's faucet barrel. Depending on the type of malfunction, you can replace some of the gaskets on it or remove it completely.
Useful Tips
As a word of advice, we are left to give you some more tips:
- It is possible that on older faucets, the locking nuts will not be moved from their place by rust or a long-standing plaque. Don't try to show off your strength - you're more likely to tear the threads or lick the edges of the nut with a wrench. Apply WD-40 rust-removing spray to stubborn joints and the threads can be loosened without any problems.
- Rarely, but it happens that the previous advice does not help. There is one way out - cut the nut with a turbine in half. Then it can be gently removed with an adjustable wrench and a pair of pliers.
- Make sure there is no damage to the cartridge and the normal mobility of its stem, after you disassemble the faucet. The vast majority of leaks are caused by a defective cartridge.
- Take care of the aesthetic appearance of your plumbing fixtures and always place a cloth under the keys when disassembling chrome parts.
- If you own a budget product, be prepared for the fact that the metal in them is fragile and can not withstand heavy loads during disassembly. Proceed with caution!
We suggest reading more of our article on Bathroom Faucet Repair.


I just need to replace the three-way faucet. I'm going to try it out.