Types and installation of towel rails in the bathroom
A towel rail is an indispensable thing in any bathroom, as. helps to eliminate unnecessary dampness, maintain hygiene and, of course, dry personal items and towels.
In the case of replacing old plumbing with new and the need for finishing work in the bathroom, it makes sense to think about replacing the old towel rail with a new more aesthetic one. Current manufacturers offer a wide range of construction and design of these devices. They offer increased durability and reliability combined with a sleek appearance.
Before purchasing a new bathroom coil, pay close attention to the material from which it is made and the features of the design.
Basic types
Depending on the principle of operation, there are the following types of dryers:
- Water-powered. Can be connected to the heating or hot water supply. Beneficial in that they allow you to minimize payment for utilities;
- Working from the electric network. Independent of heating and hot water supply and durable (no corrosion). Easy to install in a convenient location for you, as long as there is a power source nearby.
- Combined. They are a combination of the previous 2 types: during the heating season hot water circulates along the contour, and during periods without heating it is possible to include the THEN for water heating.
According to the type of construction, the devices are divided into:
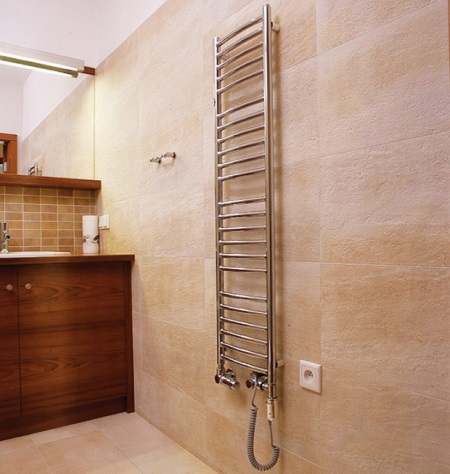
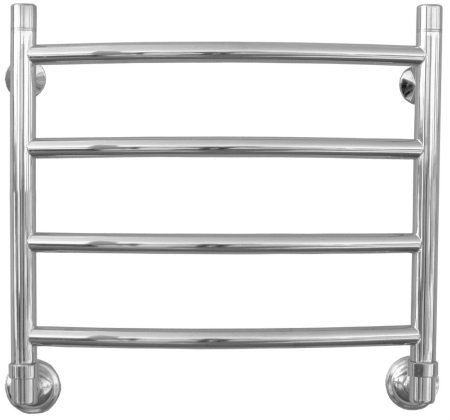
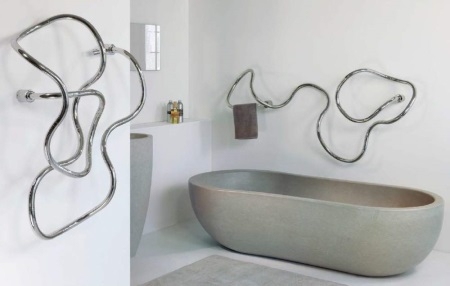
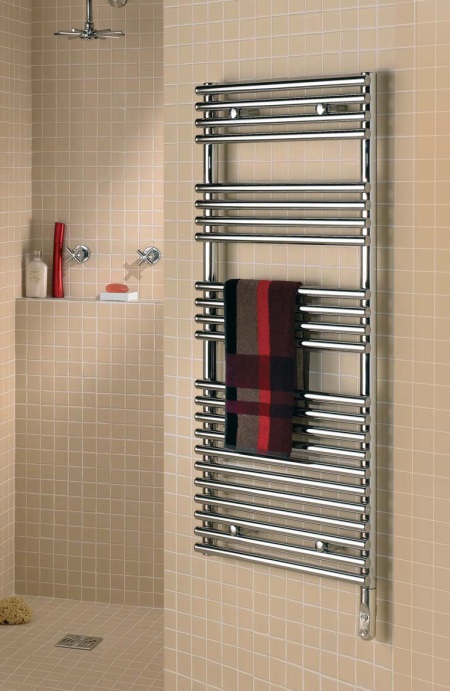
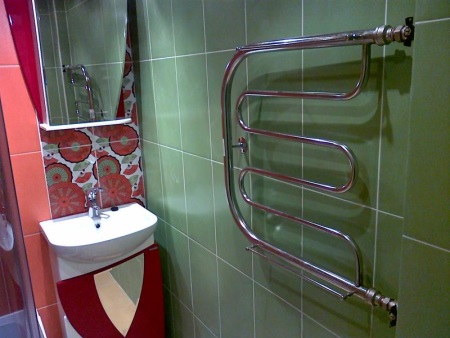
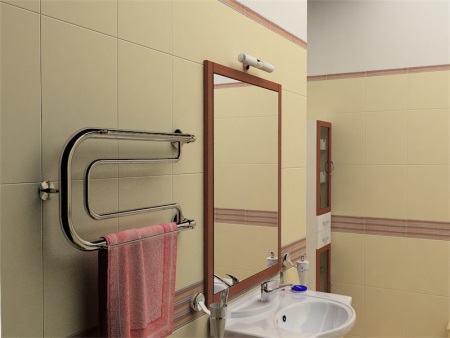
- Horizontal. Have a form of the familiar to us coil;
- Vertical. Executed in the form of a ladder with crosspieces.
Towel heaters are cast from black and stainless steel, as well as brass and copper. The latter, despite the high cost, have the longest service life. The material should be chosen based on the specific situation.
So in the case of connection to the central heating system, towel rails made of seamless steel are more suitable. Their design is designed for pressure up to 8 bar and is not afraid of water hammer. The pressure in the AGV systems does not actually exceed 3 bar, so the best choice will be chrome-plated brass dryers with different variations in shape and design.
It is also worth noting the models with adjustable distance from the surface of the cladding to the dryer during installation. By setting a greater distance, you will ensure good air circulation and faster drying.
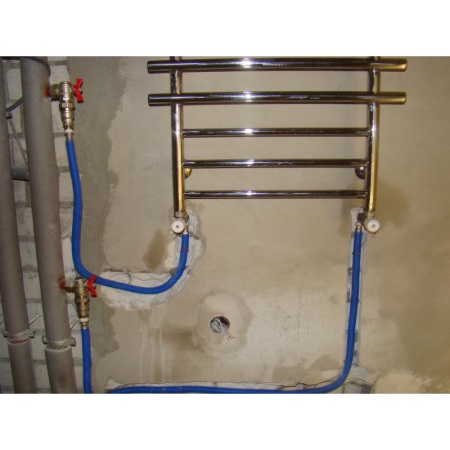
Most modern models are equipped with a Maevsky valve, which allows you to deflate the radiator circuit. Even in new designs there is a bypass jumper to equalize the pressure in the circuit. Having installed an additional ball valve on the jumper, you can adjust the working temperature of the towel dryer. It does not hurt to install faucets on the inlet and outflow coil for quick cutoff from the pipeline in case of dismantling or repair.
Do not forget to pay attention to the installation size between the water inlet and outlet. Especially when you plan to install a new radiator in place of the old one. Depending on the distance between the centers of the pipes there are models with distances of 30, 35, 45, 50, 60, 80 cm.
Installation and connection to the heating or hot water system.
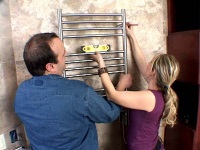
Installation of the towel dryer is not very simple and requires certain knowledge and skills.
Installation rules and regulations
Requirements for connection of a towel dryer to hot water supply systems are stated in SNiP 2-04-01-85.
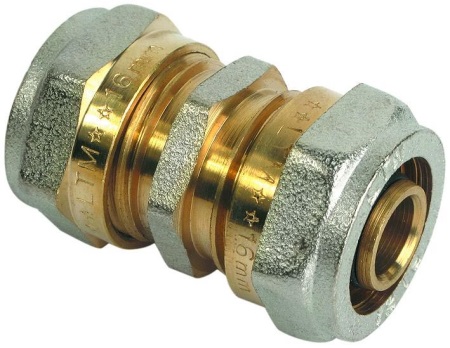
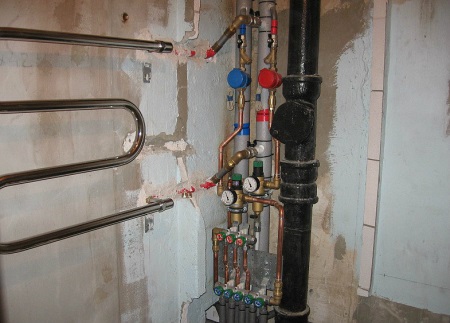
The installation itself consists of connecting the inputs and outputs of the radiator circuit with the corresponding fittings of the heating riser or water main with plastic pipes. Pipes, couplings and outlets are assembled together using a special pin.
To connect the new product, you can also use metal-plastic and copper pipes, but here you should take into account a number of peculiarities. Half-inch metal plastic pipes have a smaller cross-sectional diameter than plastic pipes, and they can't handle pressure fluctuations well. Copper, despite its durability, will cost a substantial sum, and their welding requires special skills and precautions.
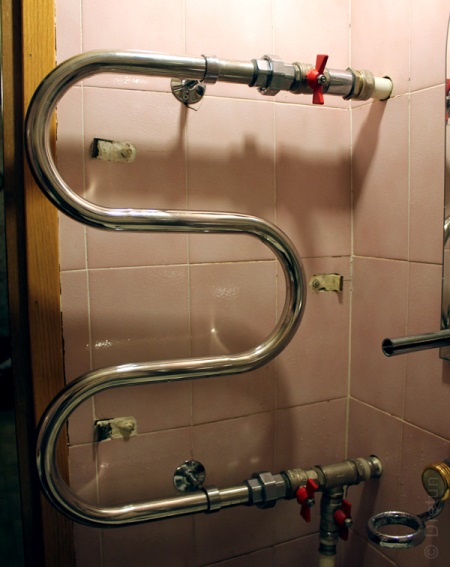
For the correct operation of the towel radiator, you should provide a slight slope of the supply pipe in the direction of the flow of hot water. It makes 5-10 mm along the whole length of the supply pipe. The flow of water should go from the upper point of the contour of the device to the bottom. For this purpose, the upper flange of the radiator is connected to the hot water riser pipe.
The clearance between the pipes of the circuit and the wall surface must be maintained. It is at least 35 mm for pipes up to 23 mm and 50 mm for pipes over 23 mm. These distances are adjusted by a stud screwed into the bracket, but there are also fixed mountings in which this distance cannot be changed. Supporting piping structure should not be fixed rigidly to compensate for thermal expansion of pipes and not load their load-bearing parts of the wall.
Required Materials
Before installation, check the completeness of your purchase, carefully familiarize yourself with the design and connection diagram of the new device, study the instructions attached to it. Prepare in advance all the tools and materials necessary for the work, these are:
- directly the towel radiator;
- brackets;
- PVC pipes of the necessary diameter (26, 32 mm);
- a knife for cutting PVC pipes;
- screwdriver;
- screwdriver;
- fasteners;
- hammer, spirit level;
- 2 adjustable wrenches;
- gasket or other sealant;
- 2 caulk nuts;
- soldering iron for PVC pipes;
- 2 or 3 ball valves,
- PVC elbows,
- 1 PVC elbow with internal thread,
- 2 tees (if installing a jumper),
- 1 socket with internal thread.
When the tiling work in the bathroom is not completed, you can connect to the AHW with two water outlets. American-style sockets for connecting the radiator inlets and outlets can be purely metal, if metal fittings with threads have already been removed from the mains.
Dismantling the old coil
Contact the company that serves your heating system and water supply in advance with a request to cut off the water supply for the time of dismantling works. And only then proceed to the very process of removing the old coil.
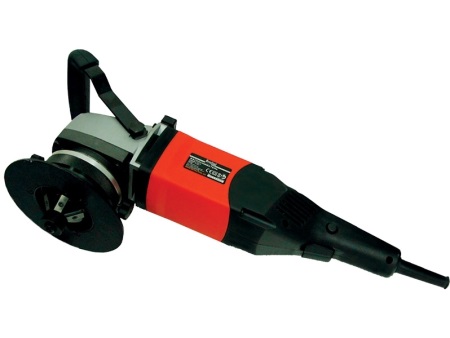
Even with the removal of the old radiator is worth paying attention to the wear and tear of the riser to which it was connected. If its condition leaves much to be desired, it makes sense to replace it partially or completely. It is not unreasonable to ask the opinion of the neighbors from below and above, if they support the idea of changing the riser completely. In any case, even if you only do the replacement, you need to do it with the expectation that the old pipes are not left overlapping and the places of connections to the new sections were visible and accessible. After marking the places of cuts, cut off a part of the riser with a bolt cutter along with the coil.
You will need to cut the threads on the cut ends of the pipes and a threading machine will come in handy for this. At construction markets and stores everywhere sell or rent this tool. Chamfer the cut pipe ends with the turbine, insert the pipe cutter of the proper caliber into the seat of the tool and, after attaching it to the end of the pipe, gradually cut the threads.
Welding Pipes
Among the pipes for connecting the plumbing most commonly used steel, copper and polypropylene. The latter benefit from the ease of installation, immunity to corrosion and a favorable price.
Plus, the process of welding propylene pipes together is very simple and easy to master. You will need the following tools for your own work:
- A soldering iron for welding pipes
- A set of nozzles of desired caliber
- Pipe cutter or wire cutters
- Chamfering tool
- A pipe shaver (to remove the aluminum layer from the pipe)
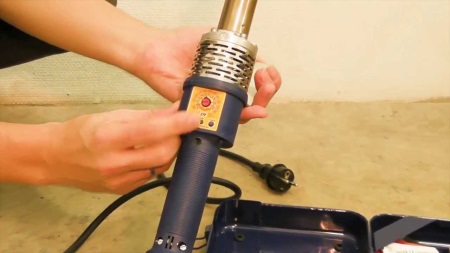
We recommend that you buy the soldering iron at a specialized store to be assured of quality. Included with the soldering iron itself are always nozzles of different sizes and the original stand on which it can be fixed. Only a quality soldering iron can make a reliable weld, so it is not advisable to save money on it.
At the beginning of the work make a scheme for yourself, taking into account the size of sections, the location of tees, taps and elbows. Guided by it will be convenient for accurate assembly and saving materials. Also, the scheme will minimize the number of joints on the weight.
Cut with wire cutters or pipe cutters required length and chamfer the ends. The standard bevel is 15 degrees and 2-3 mm in length. Remember to deburr and deburr the cut pipe edges for a more secure weld.
To join the end of the pipes to the sleeves, heat the pins to 260 degrees and place the elements in the sockets of the appropriate sleeves. The socket is put on the pin on one side and the pipe is inserted into the socket on the other side. The heating time will be determined by the diameter of the element and its wall thickness. It is normalized by international standards and can be found in the relevant tables. Independently determine the readiness for soldering by scrolling the element on the heating surface: at sufficient heating the pipe or socket will rotate smoothly and effortlessly remove from the nozzle.
The heated coupling and pipe should be connected immediately after removal from the soldering iron. At the same time try to align them with each other and press them to the stop, but it is not necessary to press by force. It will literally be possible to change the position of the joined parts within 3 to 5 seconds after joining them before they finally set.
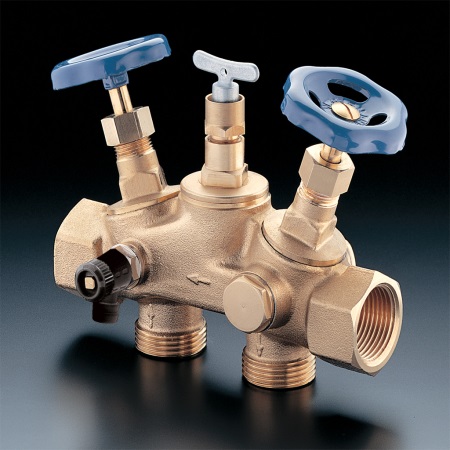
Installing Bypass and Taps
The bypass jumper, although not a necessary element, can be very helpful in case repairs are needed on the installed towel radiator. Elementary replacement of seals at the points of connection of the coil to the riser will require the blocking of water in it. And this means filing a complaint to the housing and utilities and additional costs. By prudently including in the scheme of connections jumper and shut off the valve can be without the hassle of cutting off the circuit dryer from the main line in case of repair or in order to save money.
Both steel and copper or polypropylene pipes can be used for installation of the jumper. Since working with metal involves a complicated welding procedure, it would be more rational to assemble a bypass of plastic pipes. To cut off and regulate the flow in the desired areas, we need 3 ball valves. Installing one on the jumper itself, and two on the supply and return fittings, we can shut off the water supply to the radiator, cut it off from the riser. By adjusting the position of the tap on the jumper, you can reduce or increase the flow of water in the circuit, and thereby adjust the temperature of heating.
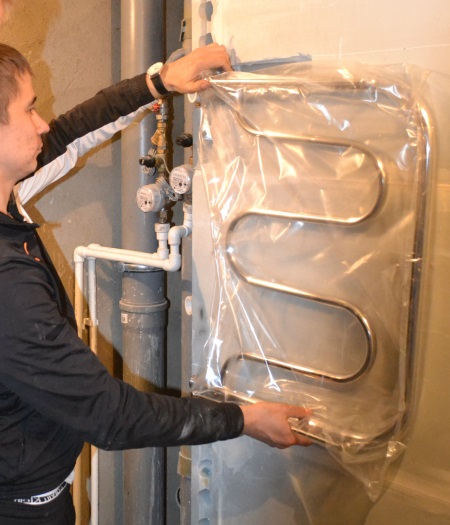
Installing the new towel radiator
Installation and connection work is carried out in several stages:
- Cut off the water supply.
- We remove the old coil. If it is connected to the riser thread - unscrew it with adjustable wrenches. If the coil is welded to riser - cut it off together with the pipe using a turbine.
- Install ball valves and jumper.
- Screw the faucet Maevsky in the bypass for ease of deflating the system.
- The places for the future mountings are marked on the wall with a pencil. We set the marks horizontally, using a pointer level.
- Drill the holes according to the marks and hammer dowels into them.
- Having aligned the towel radiator so that the holes coincide, screw it with a screwdriver. Do not forget to maintain the required distance from the wall to the pipes and adjust it, if there is a bracket with a stud.
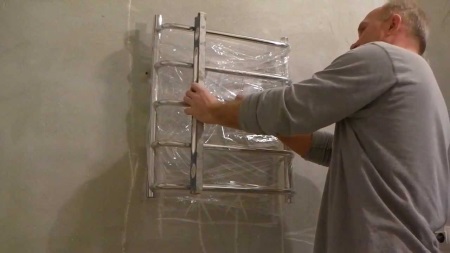
- To connect to the water supply and return fittings, use the fittings from the kit. They can be straight or angular. Do not forget to seal the threads with oakum or other wrap. You can use wax to seal the tapered threads. When installing the device, be sure to set a minimum slope of the supply (5-10 mm). Tighten the union nuts with a soft cloth under the wrench to prevent scratches. Place gaskets at the end of the nut. Tighten smoothly and without unnecessary force, if you have difficulty in turning the wrench, unscrew the connection and align the connecting elements. After tightening the nut to the end, slightly crimp, but do not overdo it, so as not to break the threads.
- When you have finished assembling it, you can start pumping water into the radiator. Open the water supply smoothly to avoid water hammer. Slightly open the valve on the jumper to release air from the pipes. When it starts to leak water, you can close it. Carefully inspect and hand iron all welds and threaded joints for leaks.
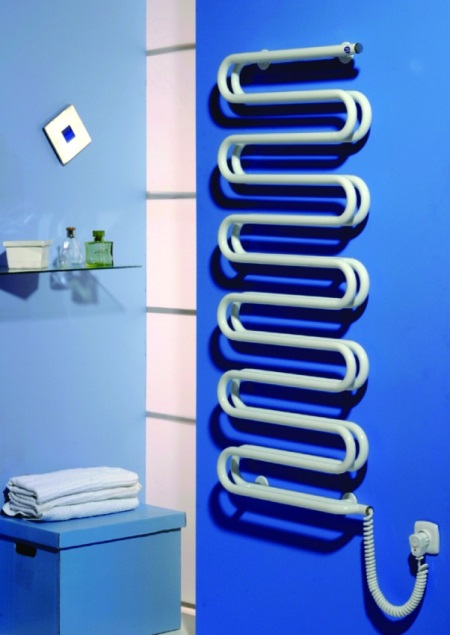
Installing an electric or combination towel radiator
As with the water dryer option discussed above, the installation of electric and combination models begins after removing the old device. Connecting the electric towel dryer will have to be carried out after removing the old device.
It is noteworthy that With a competent approach, it is possible to initially work from the central heating to equip the device with a heating cable. In this case, the cable with the thermostat will be led inside the pipe through the lower connection of the towel dryer.
For the correct and safe operation of the electric dryer you must follow a few requirements. Power consumption of the electric heater will be at least 1 kW and for its connection it is necessary to bring out a separate socket. A wire with a cross section of not less than 2.5 square meters should be drawn from it to the electric room. The line for the power supply of the heating element must be equipped with an automatic fuse.

Making a choice in favor of a device with an electric heater, you can not depend on the time of year and the heating season. Use this device can be quite economical, including it only when really needed.
Grounding
The key point is to ground the towel radiator. The place for the attachment of the grounding wire is usually already provided by the manufacturer. It remains only to put a protective socket and run a three-wire wire from it to the panelboard. If grounding through the panelboard for some reason is not provided, you can carry out "grounding" - to make a jumper between the zero and the ground. Such grounding is performed at a minimum distance from the panelboard.
As you can see, installation and connection of electric and combined dryers will require certain skills and knowledge of working with wiring. Carry out such a thing yourself or trust the experience of professionals - you decide. Soberly assess your strength and do not take risks if you are not sure of the quality result.


There are towel rails as design art! I'll be looking for one just like it. I want something out of the box.