What to seal the joint between the bathroom and the tile
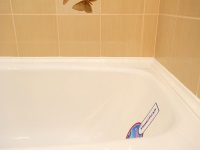
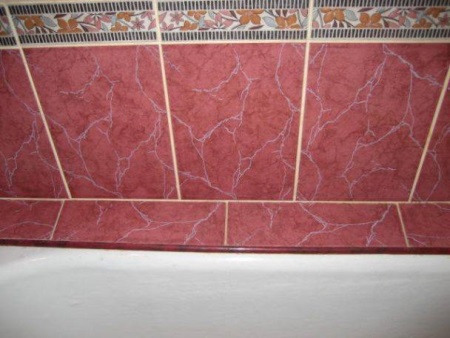
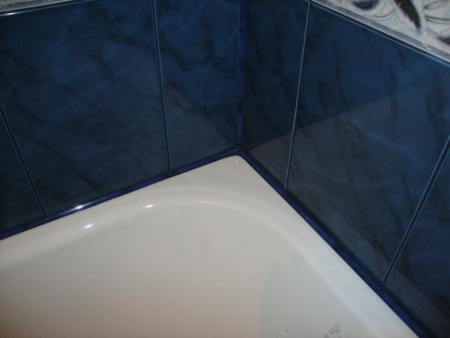
Repair in the bathroom is sometimes fraught with unpleasant consequences. For example, the emergence of gaps between the joint between the bath and tile.
Such a problem can occur for one of the following reasons:
- The dimensions of the bathtub do not exactly match the size of the room;
- The corners of the bathtub are not straight and in relation to the walls are not at an angle of 90 degrees;
- the bathtub was installed after tiling the walls;
- Bath installation was not successful; mistakes were made.
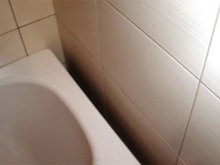
Such unpleasant joints bathtub and tile is not just "cutting the eye. Bathroom - a room with constant humidity fluctuations and with a high concentration of water. Even in a narrow gap can get water, and then the floor will be constantly puddles. That is why the joint needs high sealing, because because of the large accumulation of moisture on the tiles can cause fungus.
Some of the worst cases are corrosion of the metal of the bath or flooding the neighbors, if suddenly a large amount of water got into the gap.
What to seal the joint with?
Previously, the problem of joints between the bathroom and the tiles was solved simply: the gap was sealed with cement mortar, and then it was covered with paint in the color of the tiles.
Now there are much more effective and neater ways. Let's look at the most popular ones.
With cement mortar
As mentioned above, cement mortar is quite good for caulking the gaps between the bathroom and the tiles:
- Before applying, you need to give the surface a good scrubbing and degreasing.
- For the mortar to lay better, the edge of the bathtub and the wall tile in the places of formation of the joint is moistened with water.
- If the gap is large enough, before applying the mortar, it is necessary to fill it, otherwise the entire composition will be on the floor. For laying, even a thick rope of synthetic is quite suitable.

The disadvantage of this method is not very noble in appearance. Then you will have to think how to fix the picture and make the joint more aesthetic. In such a situation, you can use paint or lay a tiled border along the bathtub.
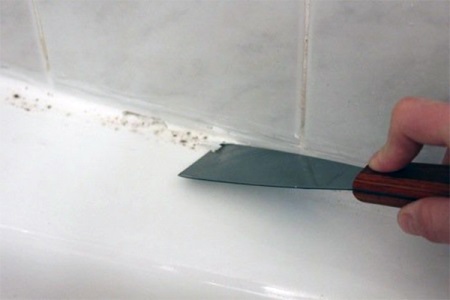
Trowel
Pretty good method suitable for caulking narrow gaps. White grout is best for this purpose. If you have in the bathroom intertile joints of another color, then pick up the grout to match them or at least the general color scheme of the interior of the room.
The advantage of using grout is that the resulting joint will be resistant to moisture and retain its color.
To get the resulting joint is not covered with rust or dirt, it can be treated with Fuga-gloss.
Assembly foam
If the joints between the tiles and the bathroom are small in width (within 1-3 cm), a good way out of the situation is the assembly foam. Since the bathroom is a zone of high humidity, you need to choose a foam that contains water-resistant components.
The big disadvantage of this method is that extreme accuracy is required. Not allowed to hit the foam mounting in any other areas except the gap, otherwise you just do not wash it off later. It is common to put painter's tape along the gap and cover the bathroom floor with newspaper.
You must wear special clothes or clothes that you will not feel sorry for, as well as gloves and a mask.


Preliminarily all surfaces must be cleaned. After that, you can apply the foam.
Excessive zeal here is not to hand, as the foam tends to increase in volume.
When it dries completely in one or two days, its excess should be carefully cut off, and the seam to close any decorative elements. Usually use a plastic corner.
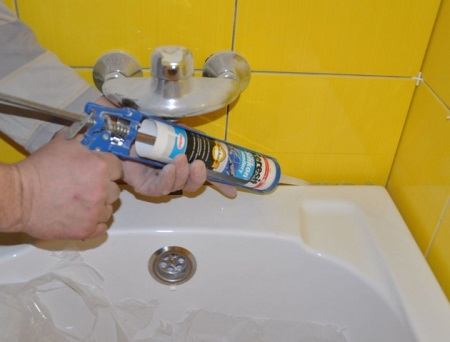
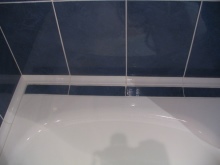
Silicone sealant
The method is convenient to use for narrow gaps between the bathroom and the tile. The sealant is sold in special tubes, and is applied to the surface with a mounting gun. In this situation, it fills the space of the joint between the tub and the tile.
Depending on the composition of the product, it hardens either under the action of moisture or under the action of air. Due to its high adhesion, the sealant fixes reliably even on glossy tiles. It is non-toxic and fairly easy to use.
After it is applied, you will need to smooth out the layer, for example, with a spatula. To surfaces are not left on the silicone surplus, use masking tape. Sealant can dry in different ways, so it is better to wait a day before using the bath for its intended purpose.
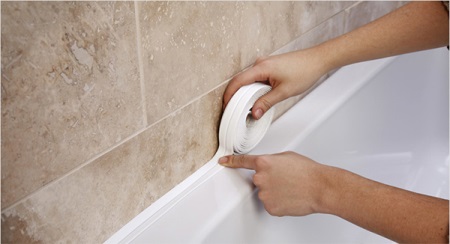
Flexible self-adhesive edging
Self-adhesive edging is purchased in rolls, and the package very often includes a trowel of plastic.
The tape already contains sealant, so this edging has a high moisture resistance, but it also looks very aesthetically pleasing. Before you glue the curb, the surfaces are thoroughly cleaned and dried.
The protective film is removed from the tape, and then the edge piece is pressed to the joint with the adhesive side.
To form a corner, use a plastic spatula.
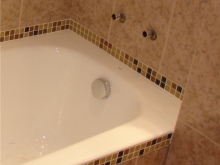
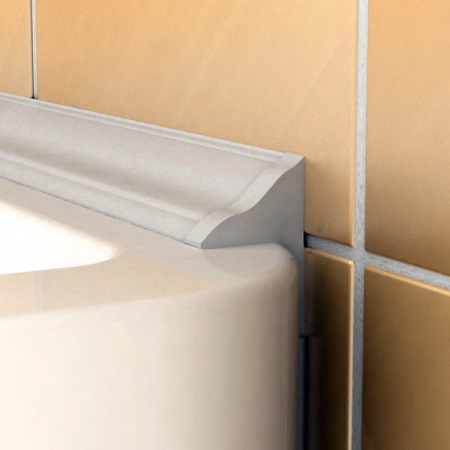
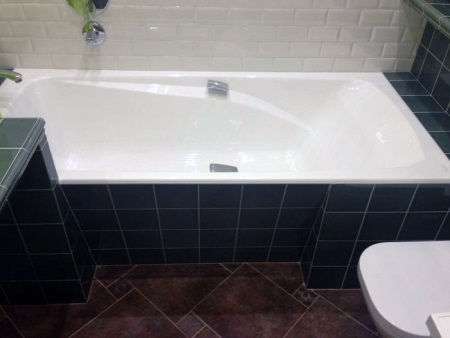
With ceramic tiles or ceramic borders
With this method, the joint between the bathtub and tile can be sealed with the tiles themselves, including the curb. As a result, you will get a monolithic joint, which is unlikely to please you much if you plan to change the bath in the near future.
Ceramic skirting usually fits quite well in the bathroom, complementing its interior. Modern manufacturers allow you to pick it in the tone of the tile or bath. Glue the curb on the same principle as the plastic, but here we will have to cut it with a grinder.
When the work is finished, it is recommended to grout the adjoining places.

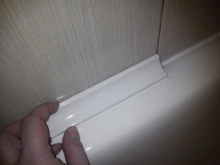
With a plastic curb
Plastic edging is convenient because it has a relatively low price, but it provides an aesthetic appearance. It is attached to the glue, and at the final stage the corners are installed. The complexity of the process is only in the measurements. To avoid staining the bathtub and tile surfaces with the adhesive, apply a protective adhesive tape.
Combination method
Basically, life uses a combination of the individual methods listed above. If the gap between the tiles and the bathtub is quite wide, then it can be caulked with foam, then cover with sealant, and then glue the curb. If the gap is narrow, then treatment with silicone and gluing the curb is enough. The skillfully chosen combination of methods allows you to hermetically treat the joint between the tile and the bath and at the same time aesthetically beat it.
How to choose the right method?
When choosing a method of sealing the joint or a combination of them, you should take into account some nuances:
- when using cement mortar or assembly foam, some problems are possible, because the metal bathtub, for example, made of steel at different temperatures changes slightly in size. Due to this new gaps will be formed. But for acrylic and cast iron bathtubs, such methods are quite suitable;
- Self-adhesive curb, with all its good characteristics and low cost, does not have a very long service life. On average, you will have to replace it in a year;
- silicone sealant is the most reliable;
- the choice of method depends on the width of the gap.

Technology and sequence of work
Consider the most reliable way of sealing the joint - treatment with silicone sealant. Recall that it is suitable for not wide gaps.
- First, the place adjacency of the bathtub to the tile is wiped with a solvent to degrease the surface.
- A small hole is made in the tube with sealant. A tip is put on top of the tube.
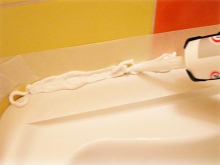
- Sealant is placed in the assembly gun and begin to gradually squeeze it out of the tube into the joint between the tub and tile. Silicone can easily fill the space. The gap is caulked in one layer, as the silicone quickly begins to harden. It becomes impossible to apply a second coat.
- Prepare a soapy solution, in which then dip a brush (you can take any).
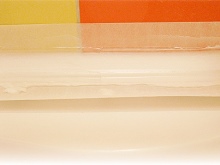
- With a brush soaked in the solution, smooth the surface of the silicone.
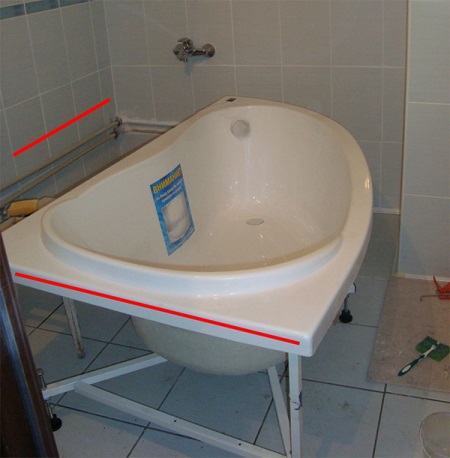
A shelf instead of a curb
It is possible to find a compromise between aesthetics and functionality. Let's say you have a large gap between the bathroom and the wall. Caulking it up is a lot of work and money. And then you still have to think about what decorative elements to close it with.
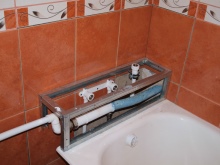
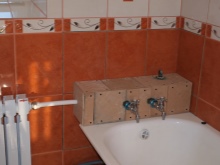
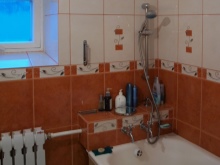
You can get out of this situation with the help of a shelf. It is more functional, and for aesthetic reasons can even surpass the curb design. On one side it will rest on the bathtub rim, and on the other - on the profile frame.
But it is still necessary not to forget the following details in the arrangement of the shelf:
- Metal will not be the best choice for the material of the shelf, as it is prone to rust and corrosion, despite the careful treatment of surfaces. It is better to choose materials that will have high rigidity and moisture resistance.
- The shelf will still need to be tiled at least for waterproofing purposes. This will prevent moisture from getting into the cracks between the shelf and the bath or wall. For tiling, tiles that can withstand the effects of water are ideal.


Sealant turns yellow over time. I regret that we closed the joint with it.