Outlets in the bathroom - rules of choice, installation and assembly
Not long ago, just a few decades ago, electrical equipment in bathrooms was very sparse. More often than not, it was limited to a single incandescent light bulb under the ceiling. A little later came the first washing machines, which were most often plugged into outlets located outside the bathroom. In the 21st century, our bathrooms began to fill en masse with electrical appliances that needed power sources located directly in the bathroom. The advent of whirlpool tubs, showers, boilers and other such equipment led to the need for outlets in the bathroom.
Wiring
Previously, it was believed that the socket, located near the water sources, will certainly lead to a short circuit, so electric appliances in the bathroom were tried not to use. Now it has become inevitable, and we can hardly imagine a bathroom without a hair dryer, a fan, an electric razor and other useful appliances.
Of course, the wiring in the bathroom should be different from the wiring in other rooms. The sockets must have the appropriate protection class against moisture and it is recommended that they be installed in a concealed manner and without the use of metal sleeves.
Installation and mounting rules
There are several regulatory documents in which you can find requirements concerning the arrangement of electrical wiring in different types of premises. The most authoritative sources are the "Rules for Electrical Installations" (abbreviated PUE) and GOST R-50571.11.
The most important recommendations to follow are as follows:
- If you live in an old house that doesn't have a grounding for outlets, you should take care of it yourself. Low-wattage devices can be powered by safety transformers.
- Since the bathroom is always high humidity, the electrical wiring should be made hidden. However, this statement is only a recommendation. The main thing is to ensure good insulation.
- To install outlets, you must carefully choose the place: do not do it on walls prone to condensation and at a distance closer than 0.6 meters from the bathtub.
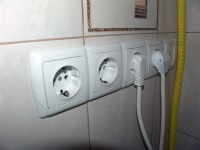
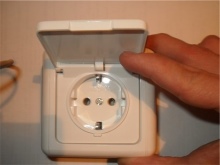
- In the bathroom, you must choose electrical outlets that have a certain class of protection against moisture and dust. It is denoted by the abbreviation IP and two numbers. These sockets are equipped with covers and rubberized elements. The minimum allowable degree of protection in the bathroom is IP 44.
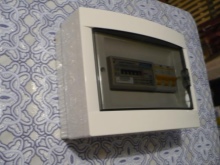
- If you plan to plug in a lot of powerful appliances, be sure to install a safety disconnect device on the wiring that can protect your family members and appliances from the effects of electrical current.
- Installation requirements for high-powered appliances are usually spelled out in the instruction manual. Be sure to follow them! Use three-pin outlets with three-core cables and a circuit breaker.
- If you do not have sufficient electrical knowledge, have all wiring work done by a professional electrician.


Safety Basics
The close contact of electricity with water can not be a priori safe, so the rules do not recommend installing outlets in the bathroom area of less than eight square meters. However, in our apartments, where even the kitchens often barely reach six "squares", it is almost impossible to meet this requirement.
The safety of electrical outlets in bathrooms directly depends on the equipment used. Let's talk about it in more detail:
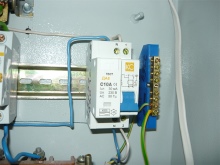
- Grounding. If you live in a new building, it is likely that the builders have taken care of it for you. The owners of "Khrushchev" and "Stalinok" less fortunate. But do not get upset: grounding wiring in the bathroom is quite possible yourself. The grounding circuit is usually located in the switchboard, next to the meter. It is necessary to connect a single-core cable and lead to the individual switchboard, which is located in the apartment, or to a junction box with wires in the bathroom.
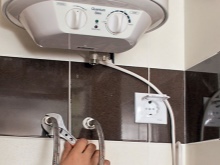
- The circuit breaker, or as it is called popularly - "automatic device", is necessary only if there will be a washing machine or a boiler in the bathroom. For these purposes, a circuit breaker with a capacity of 16 amps will do. If there are no powerful household appliances in the bathroom, you can do without it.
- Circuit breaker It is also recommended to install it only on a heavily loaded electrical wiring. However, you can also install it just to feel completely safe. If water enters the socket, or an object that can cause a voltage drop, it will shut off the power supply and no one or anything will be damaged.
- Do not connect wires in the bathroom with twists, terminal strips or similar products. All connections and wiring should be made outside the bathroom, even if you are installing concealed wiring.
Installation locations
As a rule, there is not much space in the bathroom to install an electrical outlet. Difficulties are also caused by the fact that not every free piece of space is suitable for this. If you visually divide the room into zones, you can determine which place is most suitable for the installation of the outlet.
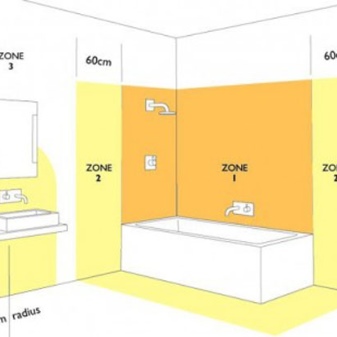
There will be a total of four such zones:
- Zone 0 - Is plumbing equipment: bathtub, sink, toilet, bidet, shower stall. In other words, all that is associated with water. In this zone, the installation of outlets and other equipment with a voltage greater than 12 V, with the exception of those necessary for the operation of sanitary devices, is prohibited.
- Zone 1 - These are the areas located above and below zone 0. Socket outlets cannot be installed here, but water heating equipment with an earthed housing and IP N5 protection class can be installed.
- Zone 2 - is the same 0.6 m that should separate water sources from electrical equipment connections. Sockets with IP N4 or higher can be installed in this area.
- Zone 3 - is an area which begins where the previous zone ends. The width of this zone is 2.4 m. Here it is already possible to install electrical sockets of protection class IP N1.
Selection
After deciding on the place where the socket will be installed, you can go shopping. Choosing an electrical socket for the bathroom is not so difficult, because of all the variety presented in stores, only a few fit us.
In this article we have repeatedly mentioned that the socket, installed in a room with high humidity, must be protected against drops of water.
The IP NN marking will help you determine the degree of protection, where the first number shows the protection class against dust and the second - against moisture.
The sockets of IP N0 have no protection in principle, while those of IP N8 can resist long-term immersion under water more than 1 meter deep.
We need a happy medium - IP N4 or IP N5.
Weatherproof sockets must be equipped with a cover and rubber waterproofing. Grounding, i.e. a third contact, is also a must.
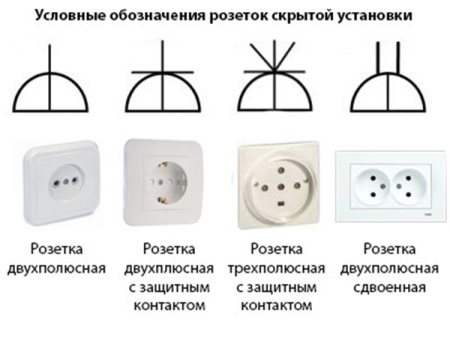
Among other things, sockets differ in the number of electrical appliances to be connected. The most popular variants are single or double sockets. We recommend to buy double sockets, as they help to save space and simultaneously use two appliances.
In addition, pay attention to the power rating of the electrical outlet. To connect, for example, a washing machine, you need a power of at least 16 amps, and for smaller household appliances will be enough 8 amps.
Installation process
First, let's consider the variant when the outlets are installed in the bathroom at the first stage of repair, respectively, all finishing materials are dismantled and we are dealing with the rough surface of the walls.
Order of work:
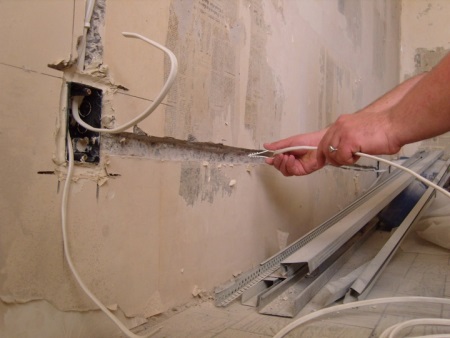
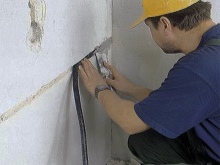
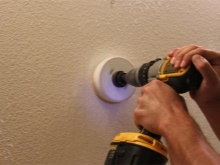
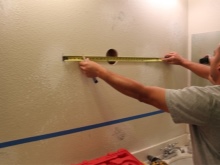
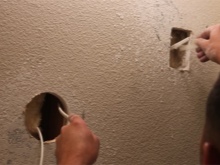
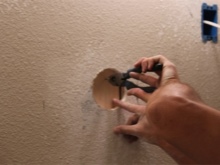
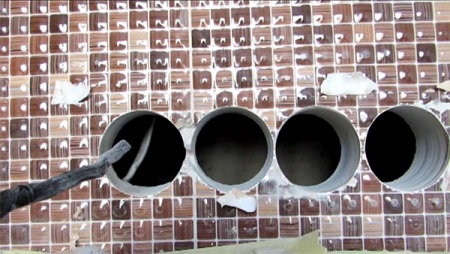
- Installing the socket begins with the dirty work. First, we mark on the wall the place where the socket will be mounted. Then, with the help of a hammer with a special nozzle for working on concrete, we punch a hole in this place for the socket. Next, we drill through the wall from the hole to the ceiling. Under the ceiling, we punch a through hole in the wall, through which we will then pull the wires.
- A simpler option is to cut right through the wall, in the place where the socket will be located. But in this case, the installation work will have to be carefully disguised.
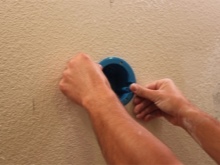
- We put the socket in place and fix it with a solution of alabaster. Hook it to a three-core cable and on the hole lead it outside the bathroom, securing it with alabaster.
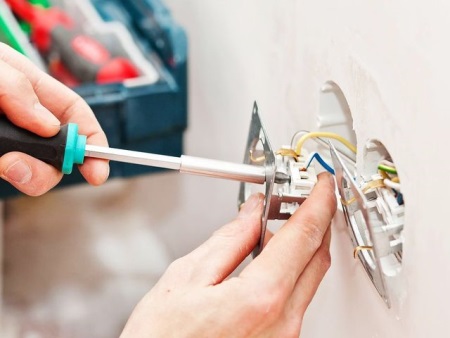
- Install the socket on the socket and connect the cable to the main electrical wiring - panelboard or junction box, depending on the capacity of the equipment used.
Installing an additional socket
It also happens that the repair in the bathroom is long finished: the electricity is installed, the outlets are installed, but you suddenly need to connect another device, which requires a separate socket. What to do, because the use of extension cords and adapters in the bathroom is categorically not recommended? In this case, you can install an additional socket without completely knocking the finishing off the walls. However, the socket will be very low, almost at floor level.
To do this, it is necessary:
- de-energize the switchboard;
- From the switchboard to energize the new wire and pull it under the baseboard;
- Remove the finishing from the place where you will install the socket and to the floor;
- In the removed wall covering (for example, in a tile) we drill a hole for a sub-socket;
- install the socket;
- Drill a channel in the wall to the floor and make a hole under the baseboard;
- pull the cable through it up to the electrical outlet;
- Put the finishing back in place and assemble the socket.


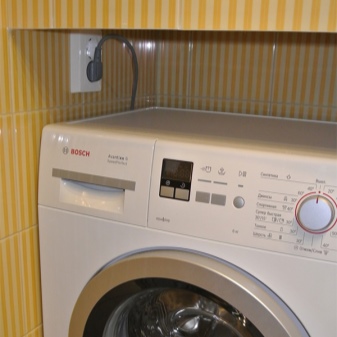
In the bathroom, you need to provide a lot of outlets: for the washing machine, for the wife's hair dryer, for other little things. And I have only one. As a temporary solution bought an adapter.