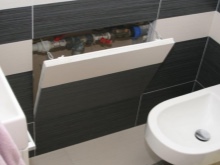
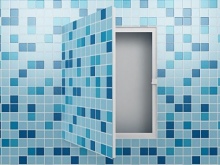
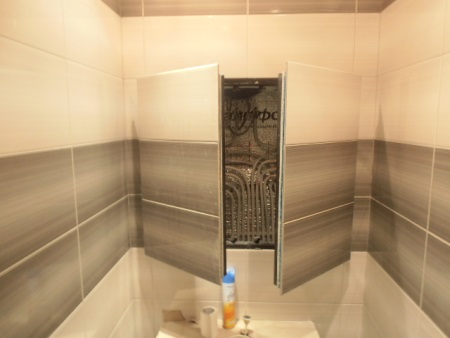
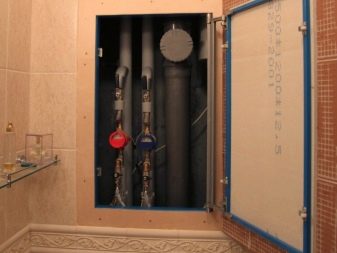
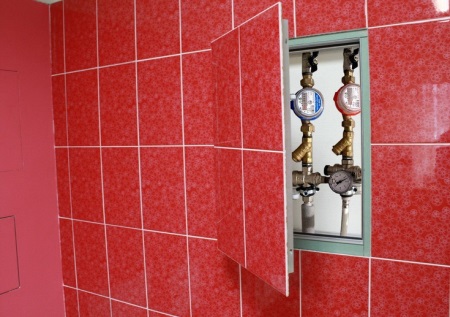
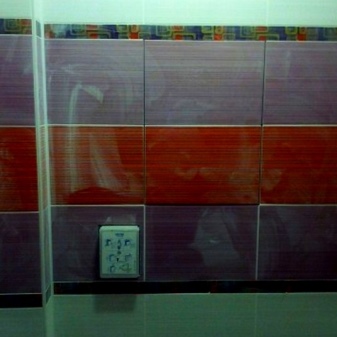
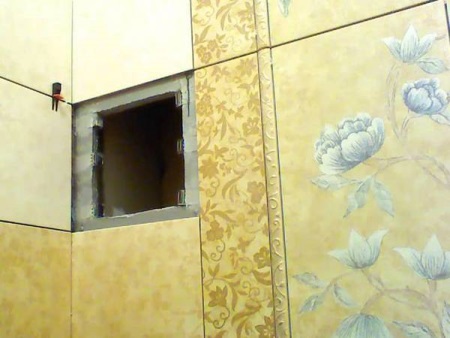
A revision hatch under the tiles - hidden access to the communications
Not so long ago, in the bathrooms all communications were in plain sight, and it was considered completely normal. But time is of the essence, now they are hidden behind hypocardboard structures, turning restrooms into stylish rooms with a minimum of clutter. To save access to meters and taps and not to spoil the beauty help revision plumbing hatches. You can buy them or make them yourself.
Types
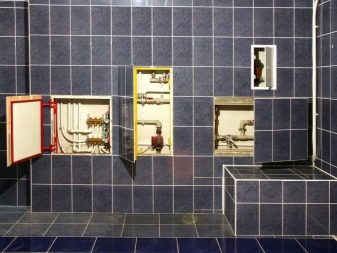
Depending on the object, hidden behind the hatch, there are the following hatches:
- electrical;
- plumbing;
- ventilation.
According to location:
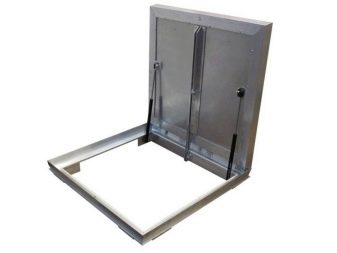
- floor;
- wall-mounted;
- ceiling.

Particular requirements for strength have floor and ceiling hatches. Floor models must be resistant to external physical effects, have a reliable design, frame, with additional equipment, moisture protection and sound insulation. Ceiling doors must have a light weight, thought-out option of closing, so that the doors do not accidentally swung open. Such windows are used in commercial premises, public places, garages.
In homes and apartments, wall hatches are more readily used for a number of reasons (space saving, wider choice of models, simplicity and ease of installation).
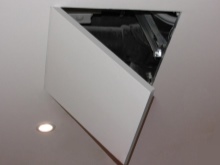
Traditional shapes for plumbing hatches are square and rectangular. If necessary, you can make or order non-standard doors, but their installation and use will be slightly different.
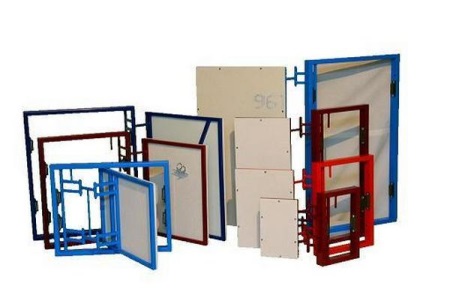
According to the material of manufacture are distinguished:
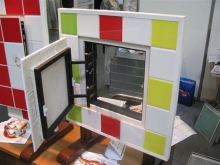
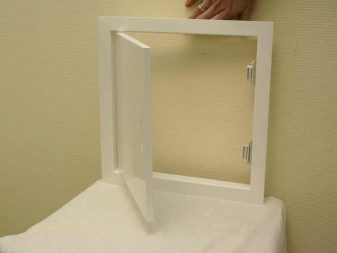
- Affordable plastic models. Usually with a handle or push-button. Often white is used, but you can also find other popular colors on sale. A wide variety of sizes.
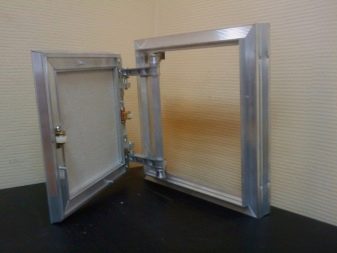
- Metal doors are color-coated (powder paint), they are loved for their durability and stability.
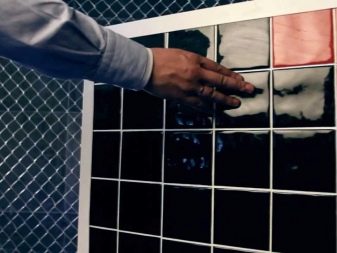
- Other materials. Make a sanitary hatch under the tiles can be made from improvised materials (plasterboard, chipboard), which allows you to apply a masking coating on top. The frame for such a door is usually made of aluminum or metal, to ensure durability. They can be played around and hidden in a traditional design. This is an elegant solution, which is becoming popular not only among designers, it is also to the liking of ordinary people. Especially this option is good when it comes to non-standard shapes and sizes.
The more inconspicuous the inspection hatch in the interior, the better. Therefore, more and more interest is aroused by such models as magnetic, hidden, and push-button.
Push-button designs.
They are made on push systems, on roller mechanisms. Often combined with invisible mechanisms, with spatial hinges, twin, which save space and do not use handles. The doors can be sliding, hinged, swinging in one or both directions. Mechanisms are better to choose from proven manufacturers.
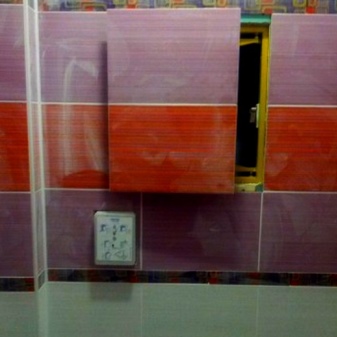
A feature of some pressure systems is that they open in two steps: after a strong pushing the door is slightly shifted to the side, after which it becomes visible. In this condition, the cover can be easily pulled aside. In practice, this is the design of the sanitary hatches of small and medium-sized.
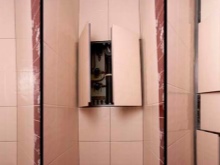
Concealed, invisible
Popular invisible systems combine the nuances of the other options and allow you to make large doors invisible.
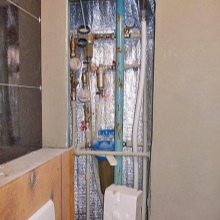
They are usually used in residential homes in bathrooms to visually increase space, as well as to decorate communications in niches, providing an approach. The use of special hinges and plasterboard on the cover helps "adapt" revision hatch under the wall. At the same time, the installation of such a window must be taken into account in advance in the design of the niche. For the completed repair, the redesign under the "invisible" can be inconvenient and, on the contrary, will spoil the whole view.

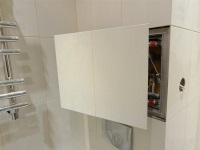
On magnets
Neodymium magnet designs are used in floor and wall view windows. The magnets are very strong and can carry a lot of weight. Making such a cover invisible helps a clever approach: the slot for the hatch is made a little smaller, so that the door itself is under the flooring (tiles, a piece of laminate), masking it. In larger versions, or with heavy materials, the lid is equipped with a handle for convenience. Lightweight and small hatches can be removable and without handles, large often make hinged. The magnet helps the cover to hold, in some versions, they just move it to the side to relieve the pull, in the floor they supplement the force of its own gravity cover.
Dimensions
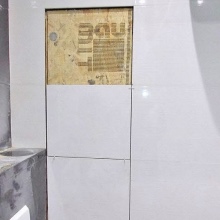
The standards of revision hatches assume a minimum size as a square 10 cm * 10 cm among the finished products are used hatches on the size of the usual tiles 20 * 30.
Working with any parameters, masters tend to bring them closer to such a variant, so that the hatch could fully accommodate ceramic products. This approach will allow you to "hide" the hatch. Specific dimensions depend on the purpose of the door and the position of pipes, cables.
The largest of the ready-made options are considered doors 120 cm. Self-made doors, different from the usual parameters, it is worth approximating to such: not less than 5 - 50 mm of tile reserve on the fixation with the wall, not more than ½ of their own parameters of the tile on the free side.
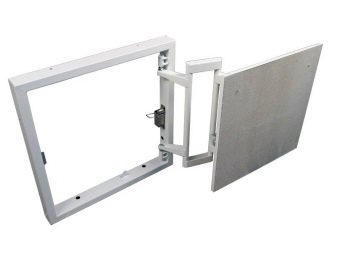
Components
The structure of a particular hatch depends on its type. The standard wall version includes an aluminum frame, a lock, a hinge structure and a door.
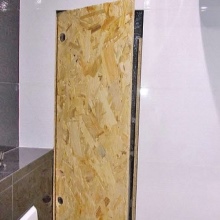
Hidden plumbing door material is usually made waterproof (eg, treated plasterboard, particle board, OSB). The frame is mounted in a niche or wall. The lock "reacts" to external influences by holding the door in the recess groove.
Hinge mechanism and adjustment - an important part, which depends on how exactly the hatch opens, in which direction. In simple versions, it can be hinged or furniture hinges. In the tricky - twin with additional adjustment units.
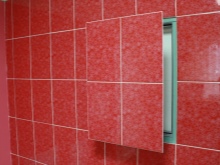
The position of the hatch and the side of opening
Usually try to determine the location of the revision hatch in such a way as to open it did not hurt other objects in the room, as well as give the necessary overview. Convenient is the opening of the door to the left and right, with few exceptions. Vertical opening is accompanied by a more responsible preparation of the place.
Unreasonable is the angular position of the viewing window: the corners of the door will interfere, the design will be weaker. It is better not to make the doors against the floor: the lower edge can scratch the floor and leave marks. The rule of whole tiles also applies to this point of installation.
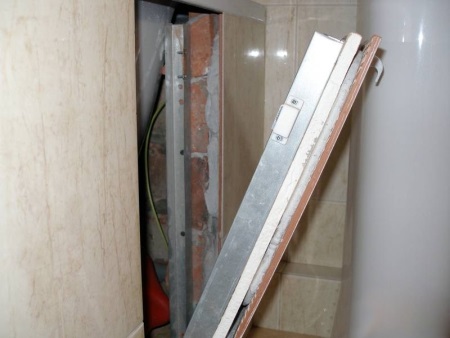
Installing the hidden hatch
Installation of the hidden hatch begins with the attachment of the frame. In plasterboard construction, profiles are prepared in advance to connect the hatch frame to the frame with metal self-tapping screws. Slots for them are drilled in advance. If the installation is carried out in an opening in a brick or block wall, then use dowel nails, and the gaps between the frame and the wall of the foam. In this case, the door is removed from the frame and installed when the sealant is ready (about a day to cure removing the excess on the contour).
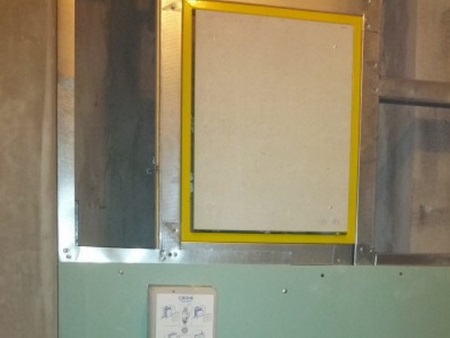
After mounting the frame is made lining the niche with the material overlapping the frame. The surface of the frame must be even. After installation, check the operation of the hinge mechanism, it can be debugged with a hexagon wrench.
Trim
Finishing the hatch and the walls are done simultaneously. To glue the tiles to the invisible door, you need to prime the work surface. Pressing mechanisms are fixed with special fasteners, the doors are weighed down by weight or use a loading bolt. On drywall tiles are glued to liquid nails or use special cement mixes. Reinforcing mesh is pre-installed on wood boards. When applying adhesive to ceramics, consider future gaps. For quality fixation of the tiles, the adhesive must hold at least ½ of its surface.
The mixture should not flow and clog the space between the hatch and its frame. Eliminate the excess should be faster. The mixture will harden in a day, then you can remove the excess from the tile.
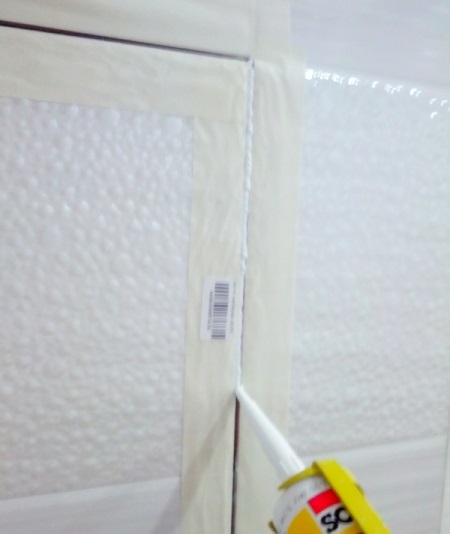
Grouting, sealing.
Treatment of invisible hatches has its own characteristics: they are not grouted at the edges. The rest of the hatch is covered with the composition, as well as the entire wall. To accurately determine this place, the edge is processed with construction tape, releasing a small gap. Silicone sealant is put into it, smoothing the layer with your fingers. For the mass to behave obediently hands need to be moistened in a soapy solution. After that, the tape is gently removed. It takes 2 days for the silicone to dry. The final touch: cuts around the perimeter of the hatch. Make them at an angle of 45 °, trying to reach the base with a construction knife, using 1 movement on each side. This helps to avoid "fringe" at the edges.
Remove excess sealant from the open hatch.
How to make your own hands?
Not always ready-made revision hatches meet the needs. In this case, you can spend a little time and effort and make the necessary detail yourself.
If you need a small window, then magnetic options will work well. To do this, install magnets on the corners of the door, and on the edges of the frame - magnet doublers (it will take a total of 8 magnets). It is better to equip the lid with a neat handle, it will be more practical. As a handle, use regular furniture fittings.
When making large doors, furniture parts will also be useful: it is convenient to mount ready-made push-pull systems and conventional hinges.
- Take measurements, mark the future place and check it with a level to avoid warping.
- Prepare the base and frame. You can use a normal aluminum profile under the frame, the frame to make from slats or from the same profile. Install the frame.
- Making the cover: the base must be tight, use wood boards. Covering depends on the thickness of the layer and the planned work. It is better to use gypsum board: finishing work on it goes more successfully than on the prepared wood. Carefully connect the parts of the cover with self-tapping screws.
- Prepare the grooves for the hinge mechanism: on both sides indent 10 mm and drill. Having connected the hinges with the cover, attach it to the frame, make markings for the holes for the mechanism.
- Install the hinges in the frame. Now you can hang the hatch in place. The cover must go flush with the raw wall and not rise above it. The hatch should have a gap so that it can be easily opened by pressing (consider the future cladding).
- Secure the door with special bolts, use a weight. Clean the hatch of dust, primer and proceed to tiling.
- After the tile adhesive has dried, check the door mechanism. Adjust if necessary.
- At the very end, mount the pressure mechanism.
Tips
Redecorating plumbing doors is not an easy task. An uncomplicated interior element requires careful attention. Many people only after purchasing and installing it understand how it would be better to carry out this procedure. It is useful to ask your upstairs or downstairs neighbors how they solved this issue and whether they were satisfied.
Pay attention to these points as well:
- When buying a prefabricated plumbing hatch, check whether the orientation is the same as desired (vertical or horizontal). Often the size 20*30 leads to confusion and sellers and buyers.
- When installing use a level.
- Small windows are installed immediately with a cover, and large disassemble into parts.
- Facing the walls is better to do immediately under the door invisible system, leaving the bottom row above the floor last. This adjusts the size of the tiles and avoids accidental misalignment.
- Unsuccessful operations with cutting sealant can be corrected: apply silicone to the edge and close the hatch. Remove the mass that has come out and leave it to dry again.
- If the wall is prepared for painting, the joint should be cut after puttying, before the mixture dries.
With a little experience, you can quite quickly install ready-made revision hatches, and if you want - create it with your own hands. The work of a master fears!