Repair of the bathroom in "Khrushchevka"
It is no secret that a large percentage of the population of our country continues to live in Khrushchev-era houses. For many Soviet families Khrushchevka was the first and long-awaited own dwelling. As a rule, apartments in Khrushchev houses were distributed from organizations, on a first-come, first-served basis. A lot has changed since then. Such apartments are usually inherited from our grandparents or purchased with a mortgage as the most affordable housing. How to competently make repairs to the bathroom in a khrushchevka?
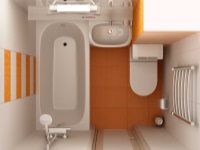
The layout of a standard apartment in a khrushchevka is probably known to everyone. As a rule, it is one or two rooms (usually adjoining), six-meter kitchen and a three-meter combined bathroom.
New owners often get an apartment in a very poor condition. But if you spend a certain amount of time, money and effort, you can turn an ordinary Khrushchev apartment into a very presentable house.
If you responsibly approach the task at hand, then your new, stylish and comfortable interior will be the envy of even the owners of apartments in new buildings.
We propose to start the renovation of your Khrushchevka apartment with a bathroom. About Design in a khrushchevka bathroom We spoke in another article.
The main problems
Khrushchevkas were originally positioned as a budget housing option, so they are completely free of any excesses - both aesthetically and practically.
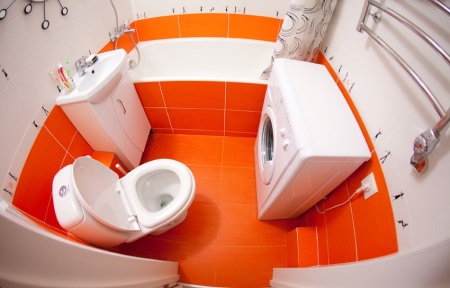
The layout provides a minimum of usable space - just as much as necessary to meet the basic needs. The bathroom is no exception. In a standard en suite bathroom there is barely room for the basic sanitary equipment - bath, sink and toilet. And yet we still need to put there a washing machine, a shelf, a mirror, towels, cosmetics and household chemicals. That's why questions of beauty and convenience often take second place, giving way to questions of space saving.

So, the first problem of bathroom renovation in Khrushchevka is a very small area.
The second problem is related to the fact that Khrushchev houses are if not dilapidated, then very old. The very first khrushchevkas were built in 1959, and the last ones in 1985. That is, as of today, the "youngest" Khrushchev houses are about 30 years old. Many houses have not undergone major repairs for decades, so the state of all engineering systems - sewage, plumbing, ventilation leaves much to be desired. Since modern plumbing fixtures often require connection to new, reliable water and sewer pipes, if possible, it is better to replace the entire distribution system. What cannot be replaced should be overhauled.
In addition, the poor state of communications, the impossibility of replacing or transferring them limits the freedom to redesign the bathroom in khrushchevka.
The third problem applies not only to Khrushchev houses, but to any built "hastily" housing. These are. Uneven walls, which require additional work in order to be able to finish them with tiles.
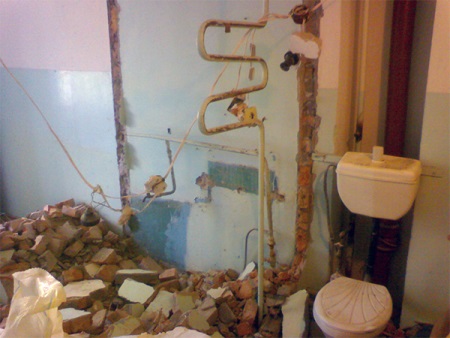
Dismantling work
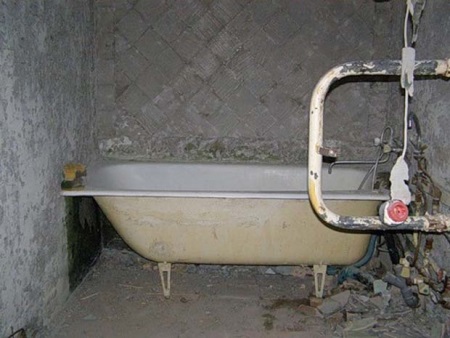
It is best to plan the location of plumbing and furniture in the bathroom after you have removed all the old equipment and finishes. With a "clean slate" in front of you, it will be easier to fantasize. The preparatory work should begin with the dismantling of plumbing equipment. Before this, do not forget to turn off the hot and cold water supply.
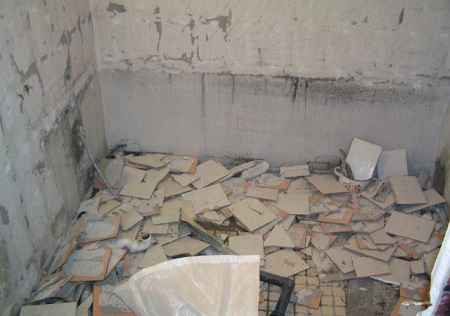
After the old plumbing is removed, proceed to the dismantling of the distribution of water pipes, if necessary. Next, you must get rid of the old finishing coatings. Paint from the walls and floor is removed with a stiff metal brush, and the tiles are knocked down with a punch or hammer and chisel. If the floors need to be leveled, the screed is crushed to concrete with a hole punch. The remaining debris and dust must be thoroughly cleaned up.
Replacing Pipes
Start replacing water and sewer pipes should be done before the floor and walls are leveled. To begin with, you need to have an accurate plan of arrangement of plumbing equipment, according to which will be carried out Piping in the bathroom.
If possible, replace the old cast iron pipes with plastic. They are no less reliable than cast iron, but weigh much less, so the installation can be done alone. In addition, plastic pipes and tees help to free up a few centimeters of usable space.
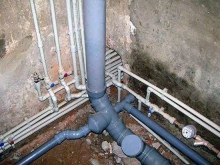
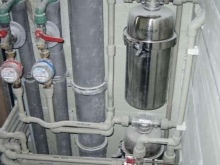
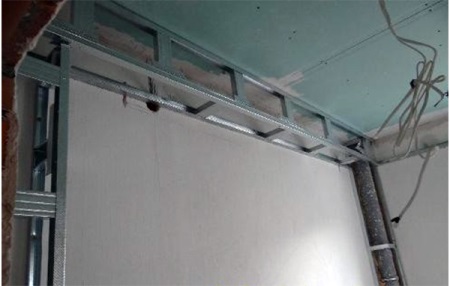
Pipes are laid in the grooves in the wall or attached to it with metal clamps. If desired, you can hide them in a niche of plasterboard, but it "eats up" a lot of space. Since in khrushchevka free space is worth its weight in gold, it is better to spend time on shrovelling and plastering the walls.
When distributing sewer pipes do not forget about the slope. It should be 10-20 mm per linear meter. If necessary, increase the thickness of the concrete screed on the floor, but be sure to respect the height of the slope of the sewer pipes. Where the distribution of pipes connects to the riser, provide the possibility of installing a pass-through valve, so that you can independently shut off the supply of hot and cold water.
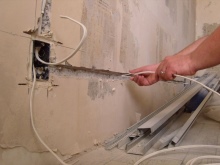
Divorce electricity is done before finishing work, as for laying wires will also need to drill through the walls.
Provide in the bathroom the required number of outlets, preferably double. with the appropriate degree of protection. The switch should be located outside the bathroom.
If there will be a lot of electrical appliances in the bathroom, install a circuit breaker on the wiring.
Choice of materials
If our task is to spend as little money as possible on the repair of the bathroom, the best option is to paint the walls with water-resistant paint.
In addition to cheapness, this option has another advantage: buying white paint and tinting you can achieve exactly the color you need, while other options do not always provide such an opportunity.
But there is one essential nuance: in order for the painted walls looked really beautiful, you need to have perfectly smooth walls, and to achieve such walls in Khrushchevka is very difficult.
About bathroom wall decoration We wrote in another article.
Another budget solution is to finish the walls with plastic panels. They have a large variety of colors and factor, are easy to install and just as easy to remove, do not require perfectly smooth walls and they are easy to look after. Read even more ideas in the article about budget bathroom renovation.
Their only drawback - this finish is not "for the ages", sooner or later it will have to be replaced by a more durable material.
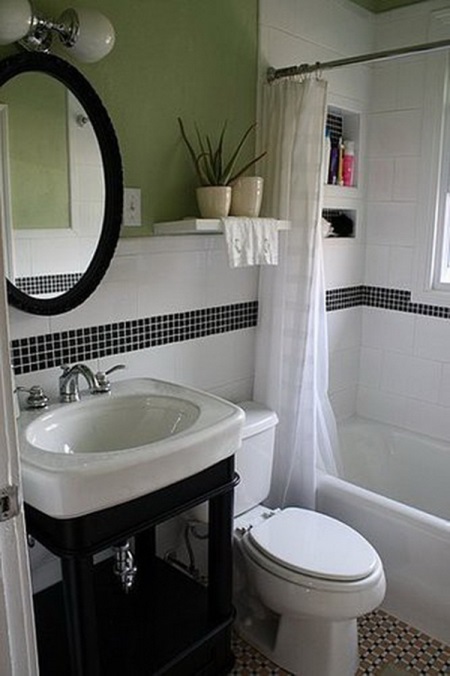
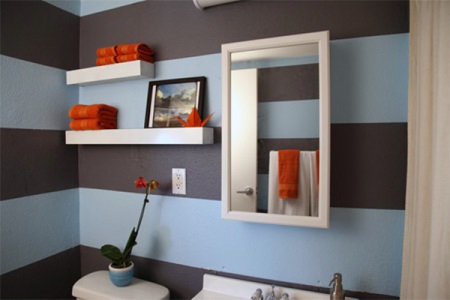
The most common wall decoration is tile and porcelain tile. These materials have earned their popularity due to their long service life, resistance to temperature fluctuations and waterproofing properties. Today in the store you can find a variety of forms of tiles - square, rectangular, hexagonal. About the variety of colors and patterns, there is no point in telling for a long time - there are a huge number of variations. If you're not satisfied with ready-made solutions, you can create your own patterns by combining tiles of different colors and textures.
Think in advance about the color solution of the bathroom, the perception of the room as a whole depends on it directly. Peculiarities of Choosing and bathroom wall finishing are discussed in detail in another article.
Tiles are the best coating not only for the walls, but also for the floor in the bathroom, as only it is able to provide the proper level of waterproofing. There are other options for flooring in the bathroom. The cheapest is linoleum, the most expensive is water-resistant laminate.. But in terms of their characteristics, both options lose to the tile floor.
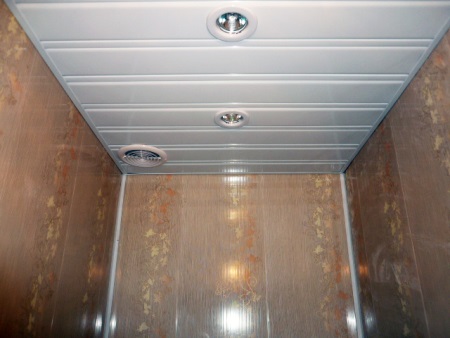
The ceiling can simply be painted with white paint or covered with plastic panels.
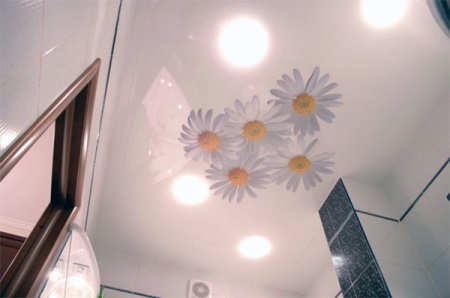
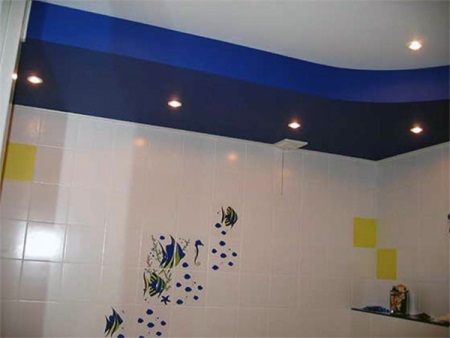
However, we advise you to spend a little money and install a suspended ceiling.
First, it looks great, and second, it will protect you from leaks from above. And if you opt for a glossy material, then visually the ceiling will seem even higher than it really is.
The design of the ceiling should blend in with the overall design of the bathroom. Ceiling in the bathroom can be very different, read our review and make your design dreams come true.
It is important to remember that you can start finishing the ceilings only when the walls are finished.
Preparing surfaces for finishing
Preparing the floor and walls for the installation of finishing materials begins with the removal of the old coatings, which we have already talked about above. After the old coating is removed from the walls, if necessary, they need to be leveled. Use a special cement-based plaster for this purpose. When the plaster dries, treat the walls with putty. You can also level the walls with sheets of plasterboard, but this method will significantly reduce the already small area of the bathroom.
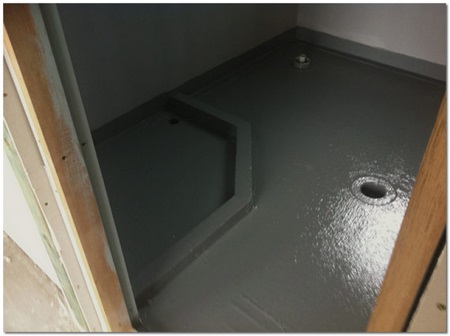
The floor is prepared as follows: After dismantling the old concrete screed, remove the remains of debris and dust, lay waterproofing, do not forget about the 15-cm overlap on the walls, and pour a new screed.
Facing the walls with tiles
Procedure:
- With a plumb line and a construction level, mark the horizontal and vertical lines on the wall.
- Prepare the tile adhesive and apply it with a trowel to the area of the wall where the work will be done.
- Then use a special trowel with teeth to go over the treated area of the wall. Grooves will form on the adhesive.
- Place the tile on the wall and gently press it down. Adjust the distance between the tiles with plastic spacers.
- When the work is finished and the tile adhesive has dried, finish the seams with a tile grout.
Choosing Your Sanitary Fixtures
Owners of apartments in Khrushchevka have to be very thoughtful about the choice of plumbing fixtures for the bathroom.
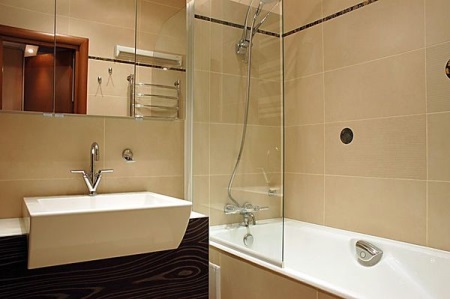
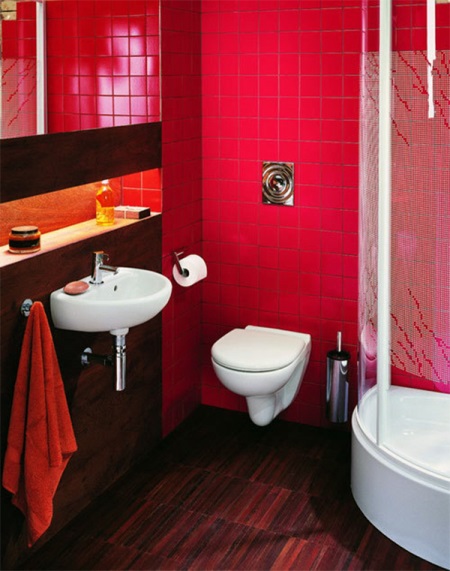
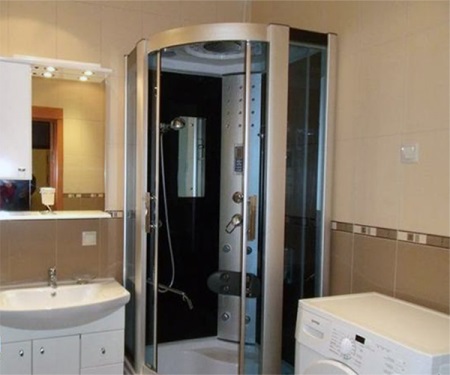
First of all, you need to make a choice between a bathtub and a shower cabin, Because in a small room there is room for only one of these devices. Shower cubicle allows you to save space that will be useful for installing, for example, a washing machine. In addition, the elderly and people with disabilities without assistance is much easier to use the shower than the bathtub.
Meanwhile, in the bathtub is convenient to bathe small children or wash large things that require delicate hand washing. In addition, many people like at least sometimes to bask in warm water and fragrant foam.
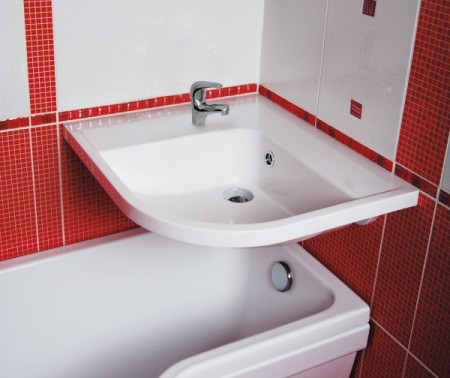
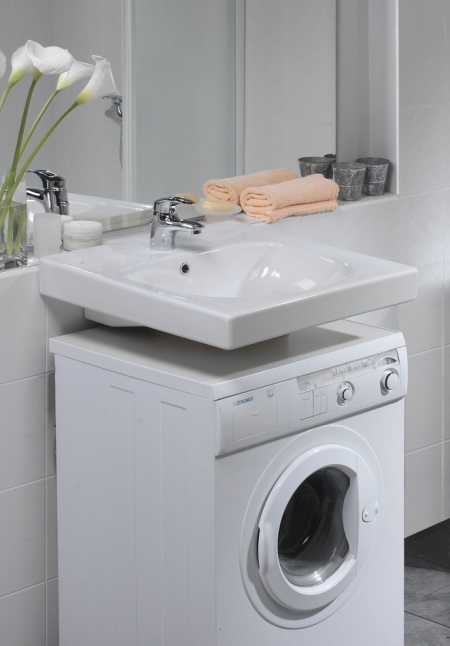
For a bathroom in a hruschevka suit corner models of bath, sink and toilet. The sink can also be installed above the washing machine, for this you will need to buy a special model of sink-pot, or install it into the countertop of the cabinet. There are also sinks that can be hung directly above the bathtub, but this design is not very convenient.
Read more in our article about Sink above the washing machine..
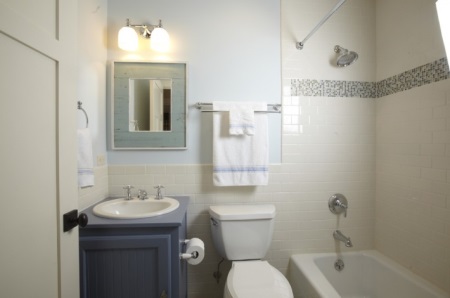
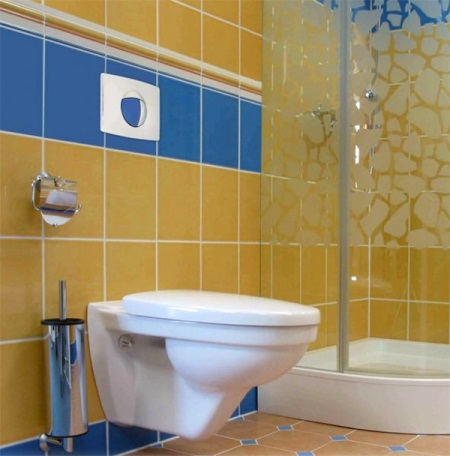
When choosing a toilet bowl, you need to pay attention to the drainage system. It can be horizontal, vertical or oblique. The vertical system allows you to put the toilet bowl close to the wall, so you're better to opt for it.
The choice of doors
When choosing a door to the bathroom, the following important points must be taken into account:
- The door must be resistant to temperature changes and moisture, not deform over time.
- It should have heat-insulating and noise-insulating properties.
- On the door should be installed quality handles and locks, as in the bathroom they wear out the fastest.
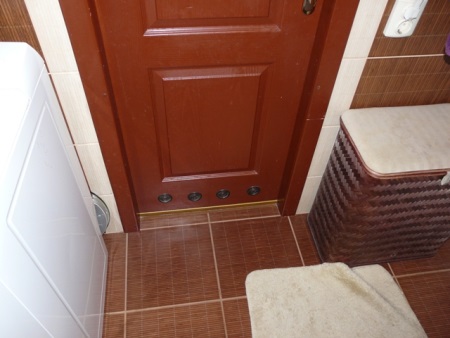
- The door should have a ventilation hole. If it does not exist, during installation, provide a gap between the door and the floor.
Also read our article, which provides an in-depth look at choosing doors for the bathroom. So you can not get lost in the huge choice and choose a quality door.
Bathroom doors are usually made of tempered glass, plastic, wood or chipboard. If you choose the products of reliable and well-proven manufacturers, no matter what material the door is made of, it is sure to serve you for a long time.
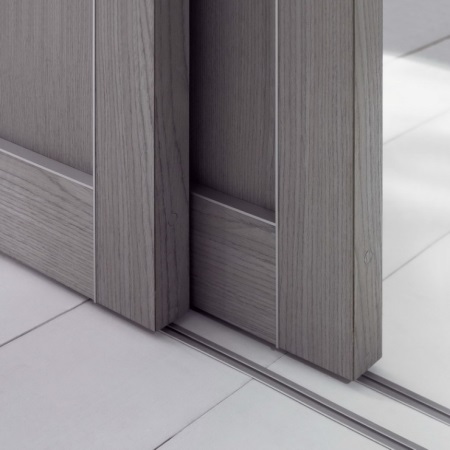
To save space, consider sliding doors or swinging swing doors that open both ways. You can also opt for folding doors, which are made on the principle of "accordion".
Bathroom door can be installed only after all the finishing work. If you still purchased a regular hinged door, then during installation, make sure that it opens outward, not inside the bathroom.


Love the idea of the corner sink over the tub - saves a lot of space!