Installing pipes in the bathroom - tips masters
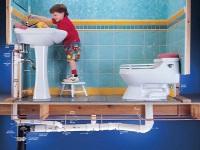
In the issue of home repairs can not ignore the installation of pipes in the bathroom and toilet. The wiring scheme should simultaneously provide a convenient location of plumbing fixtures, access to key nodes for repairs and fit well into the current or future interior.
It is not uncommon for renovations in older rooms to require the replacement of worn out water risers and supply pipes. In this case, you may encounter certain difficulties due to the fact that not all obsolete and faulty elements can be replaced with modern ones. Very often the new plumbing differs in installation dimensions, connection thread diameters and method of attachment. It is in such cases, it is necessary to provide a new scheme of supply and connection of sanitary appliances.
Work on the distribution of pipes is mandatory, if the bathroom is equipped from scratch.
Let's consider in detail the ways and rules of distribution of plumbing.
Development of a scheme of the location of objects and piping
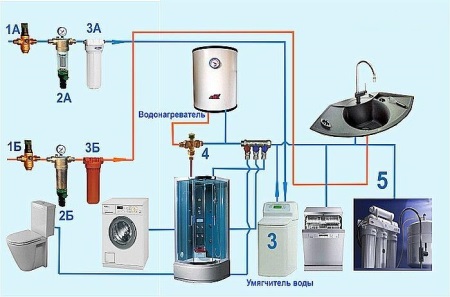
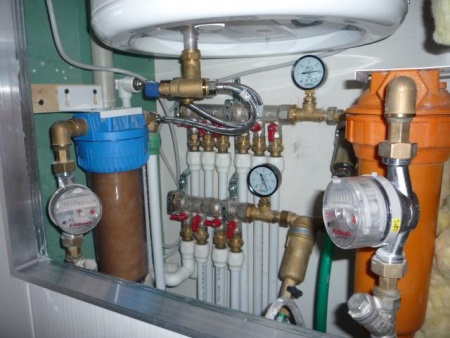
A diagram of the location of the connection elements, taps, water meters and pipe elements will be absolutely necessary for quality results. It will help calculate the number of connections and outlets, determine the locations of plumbing fixtures and help save time and materials.
Standard in the wiring diagram include the following mandatory elements:
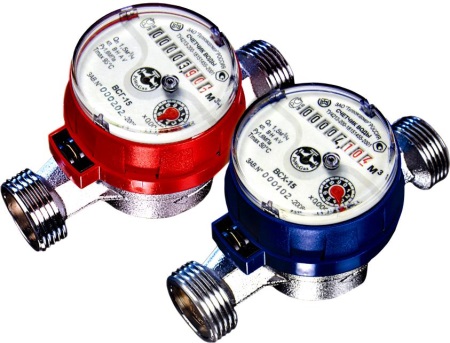
- Water meters;
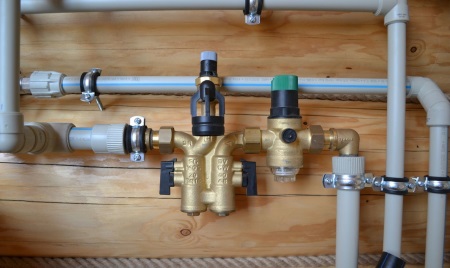
- Stop and regulating fittings;
- Filtering elements;
- Fittings (couplings, angles, water outlets, adapters);
- Reducing valves;
- Check valves;
- The approach from the riser to the towel rail;
- Sewer manifold.
Deciding for yourself where the plumbing fixtures will be located, you, on the basis of their size, calculate the length and diameter of the supply areas. After calculating the length of sections and the number of additional parts, it remains to choose the appropriate type of distribution.
Types of distribution pipes
At the moment, the following 3 types are recommended for plumbing work:
- Collector (with parallel connection of each object to the main pipes);
- Sequential (connection of each object to the main pipe through a separate tee);
- With through outlets (similar to the serial, but instead of tees set sockets).
The last scheme of laying is used only in private homes. It will require the installation of an additional pump for water boosting and laying of pipes of considerable length.
In the apartments also use the first two circuits, about them tell more.
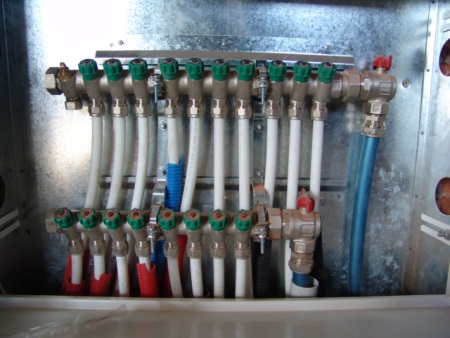
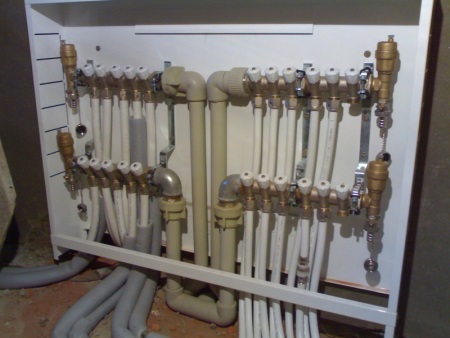
Manifolding
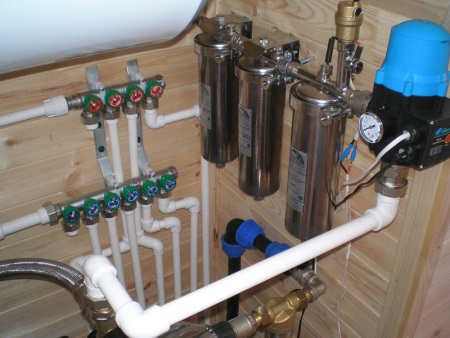
Among the existing proposals for the organization of the water supply - this is the most reliable and practical. Each consumer is connected through its supply pair, with the tap water to it can be at any time to adjust or cut off completely. The taps are located on a small collector, which is hidden in a special cabinet. The supply pipes have a minimum of connections and can be laid concealed.
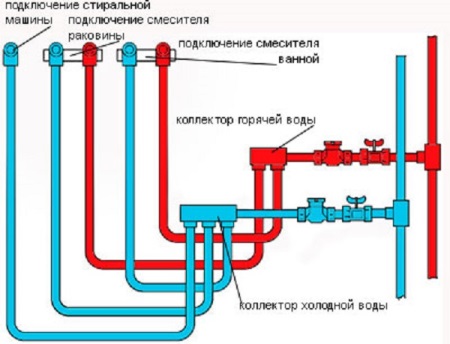
Of course, this option is quite costly, because you will need shut-off valves for each connection to the manifold. The work itself is painstaking and will require precise calculation and execution, so it is wise to entrust it to an experienced craftsman. But the advantages are obvious: for service and repair of washing machines, faucets and other devices you won't have to disconnect the entire bathroom from the water supply at once.
Consecutive wiring
This type of pipe laying is suitable for rooms with a small number of consumers (a common faucet for the washbasin and bathtub and supply to the washing machine). The sequential scheme is convenient to implement if the bathroom is already finished decorating. Pipe laying when using this scheme is usually open. In the tee scheme, the pipes have a small number of connections and are arranged compactly. The assembly process itself is uncomplicated - you just lay the line from one consumer to another by taking the supply pipes out of the tees. Such a procedure does not require a lot of materials and additional costs.
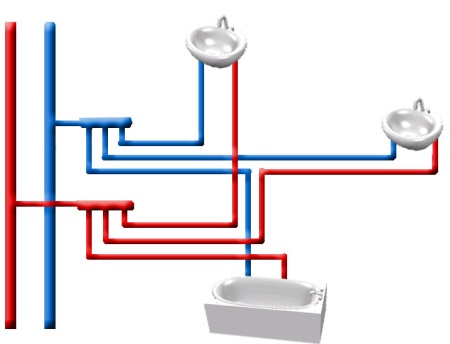
But when your bathroom has multiple water intake points (separate faucets at the sink and bath, boiler, washing machine, toilet, dishwasher) work this scheme becomes unsatisfactory. There may be a lack of water pressure to operate all consumers simultaneously.
In both cases considered there are a number of nuances that are always taken into account when assembling the plumbing scheme:
- The number of connections should be minimal;
- The pipe and couplings should be of homogeneous materials;
- Pipes should preferably be insulated to prevent condensation;
- Free access to detachable joints, filters and metering devices is necessary.
The right choice of pipes and their varieties
When considering pipes for laying utilities, keep in mind that different materials are adapted to certain operating conditions and vary greatly in price.
For example, metal pipes are made of galvanized steel or copper. The first are characterized by good heat dissipation and strength. The latter are more durable and easy to take a given form, but at the same time are the most expensive.
A cheaper alternative to steel and copper are plastic products. Plastic and metal-plastic pipes have almost completely replaced stainless steel pipes in the plumbing industry. Easy to handle and durable, they have made advances in quality and speed of installation.
Some of their advantages include:
- pipes are easy to connect by soldering, the joints themselves are resistant to pressure differences;
- plastic is not subject to corrosion, the inner surface does not silt up and does not grow lime scale;
- polypropylene products are cheaper than metal ones.
It is worth noting that metal plastic pipes are less plastic, brittle and do not tolerate water hammer. Metal-plastic products are usually used in the assembly of sewage drains.
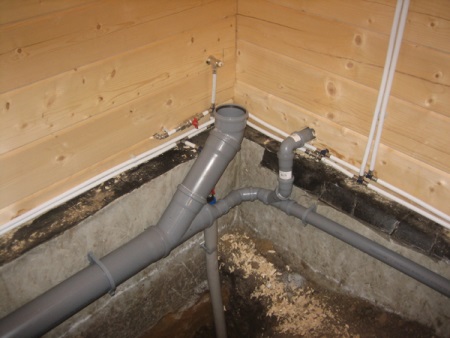
Concealed, open and combined method of laying pipes
The wiring of communications in the bathroom can be organized in 3 ways.
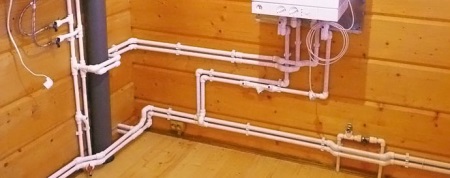
External distribution. It takes place when it is impossible to hide pipes in the walls. This type of wiring allows you to constantly monitor the appearance of connections and can easily dismantle them in case of clogging or replacement parts. It is also cheaper when involving installers for routing - from 7000 rubles, including materials.
Concealed dissemination. Due to the fact that all the connections and parts are hidden under the lining, and there are only fittings for connections, this type of piping does not disturb the interior design. The pipes are securely hidden in the walls can not be damaged by carelessness. But the process of laying takes more time and labor. Before laying, the walls are drilled - cut channels for the placement of pipes. After laying, the walls are sealed, while maintaining the plane. Pipeline prior to installation must be clad in a casing pipe in accordance with building regulations.
As a result, the hidden way of laying is noticeably more expensive than laying pipes outside (from 12000 rubles). Well, if we are talking about the load-bearing walls, then on them drilled in principle forbidden.
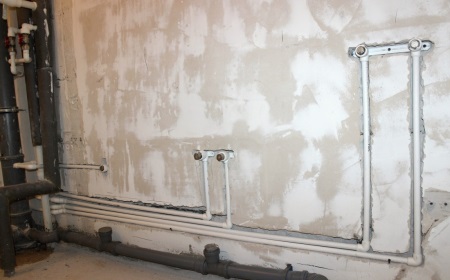
Concealed laying is possible only with incomplete finishing work. When finished lining is only possible option of open and combined assembly of pipes.
Combined laying is the laying of pipes on the surface of unfinished walls, followed by the installation of decorative trim panels or ducts that conceal the pipes. This is quite a complicated method, because it is necessary to harmoniously fit the protruding parts of the box into the interior and maintain a cozy atmosphere in the room. Here comes the help of profiling the shape of the box by means of plasterboard and external finishing with tiles and decorative elements.
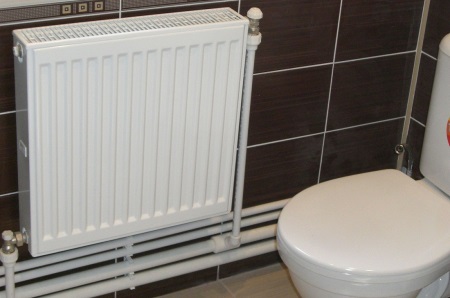
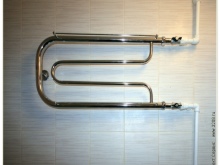
Pipe connections to the towel radiator
The connection pipes can be run to the towel dryer from the heating standpipe or from the hot water mains. You should consider that when working from the central heating system the radiator will only work in the heating season. Also It is also necessary to cut off the supply on the riser pipe for some time, Which representatives of housing and communal services do for a fee. In the winter time such work is not carried out at all because of the risk of freezing the pipe.
Therefore, it will be more rational to connect from the hot pipeline. In this case For convenience and hot water saving between the main line and the towel radiator we recommend to install a bypass jumper. It connects the direct and return pipes, and ball valves in front of the coil and after it will allow you to cut off the towel radiator in case it is replaced or to save heat.
When laying the supply pipes you need to accurately maintain two dimensions: the axial distance of pipes to connect the radiator and the minimum indentation from the wall of the bathroom. At radiators with a pipe diameter to 23 mm it is equal to 35 mm, at pipes with a diameter over 25 mm - 50 mm. In general, to connect the towel radiator you will need 2-3 taps on the bypass jumper, 2 T-branches on the main pipe and outputs from it, 2 T-branches on the bypass and 2 adapter sleeves to connect the coil.

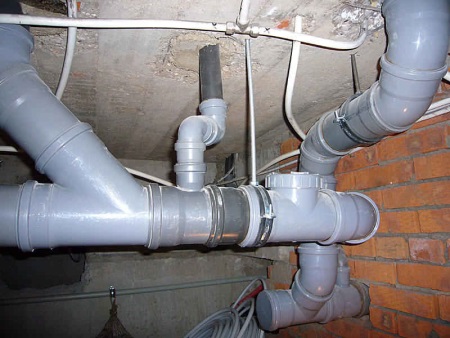
Divorce pipes sewer
Creating a distribution of sewer pipes is carried out taking into account a number of requirements for normal drainage and prevent stagnant water. These requirements are as follows:
- The slope in the direction of the drainage collector is maintained. Its value is from 0,02 to 0,03 of the total length of laying.
- When assembling it is not allowed to put outlets at right angles.
- In areas before bends, where there may be clogs should be put revisions - tees with a removable cover. With concealed laying in front of the revision should leave a viewing window.
- The diameter of the pipes should provide good permeability for the effluent. Toilets are connected to the manifold pipes with a minimum diameter of 100 mm, and sinks and bathtubs - pipes with dimensions of 50-75 mm;
- When assembling to leave a reserve for thermal expansion: the end of the pipe should not rest against the connection and not reach the bottom of 10 mm.
To obtain the required value of the slope, use a construction level when marking the clamps
Pipe laying and installation with your own hands
With a ready-made scheme of laying pipes and the selected way of laying, you can proceed to the assembly of the system. Note that you can not perform the assembly of steel and copper pipes by yourself. Working with them requires skill with a welding machine and precision machining. This can only be done by an experienced professional. Therefore, in this section we will describe the technique of installation of polypropylene pipes. It is easy to master and will require only the clear adherence to instructions.
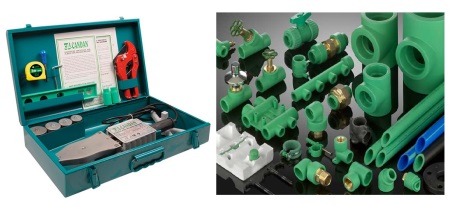
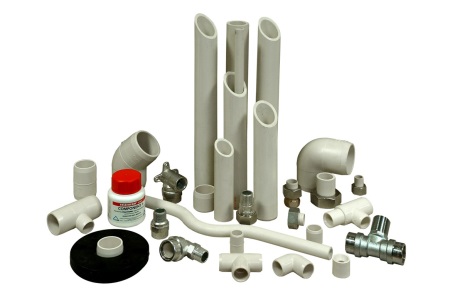
Prepare for work all the necessary materials and tools:
- Soldering iron for plastic pipes with nozzles of the required diameter;
- Turbine (grinder);
- Pipe cutter or hacksaw for metal;
- A hole punch;
- Sealing lining of linen or hemp;
- Dowels with self-tapping screws;
- Polypropylene pipe;
- Wrenches;
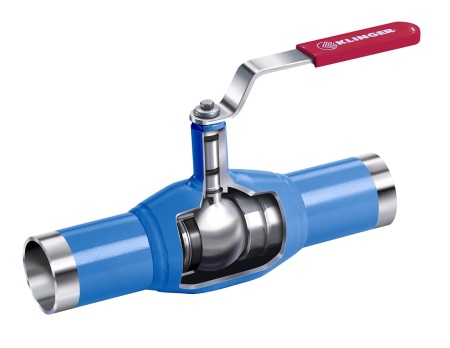
- Ball valves;
- Couplings, elbows, tees.
- Filters of mechanical purification;
- Pressure reducer.
Dismantling of old pipes
We should start with the dismantling of previously installed communications. To do this, we shut off the water supply and disconnect connections to drain the water. We unscrew all the threaded connections and remove the old taps, couplings and tees. Elements that are still in good condition and have no dirt inside will do well as spare parts. Cut the welded joints with a grinder. To get to the areas hidden in the walls, use a hole punch with a chisel.
If the nipple on the riser has a thread, it is mounted a new control valve, followed by a filter and a water meter. If the old tube was mounted on a weld, then indent from the seam of 10-15 inches, cut off the pipe and cut the thread with a dolly.

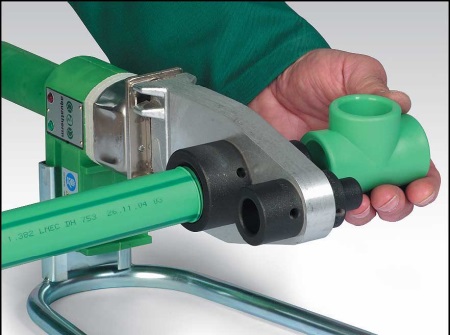
Pipes will be attached to the fittings by soldering. For soldering, pre-install the sleeves and barrels of the right size and turn on the pellet. The optimum temperature for soldering is 260 degrees, the corresponding mark is on the toggle switch of the device.
We advise you not to cut all sections of the pipes beforehand. It is more correct to connect them one by one, so as not to miscalculate with the size. Pieces of pipes are cut with a pipe cutter or a hacksaw. The cut is cleaned of chips and burrs with a stationery knife.

The heat-up time of the parts depends on the diameter and wall thickness of the pipes. You can find tables where it is normalized. In the norm, 5-7 seconds is quite enough. The melted pipe or coupling can be effortlessly twisted on a sleeve or pin and easily removed. Once removed from the soldering iron, the two parts should be connected instantly. It should be pressed all the way in, but without a lot of pressure. Within 3-5 seconds, you can turn the parts if you suddenly aligned them crookedly. After that, the joined parts will finally stick and they will not come apart. For practice, it won't hurt to practice on unnecessary scraps.
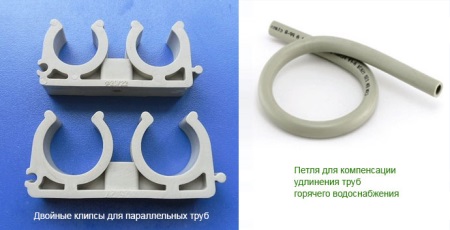
Pipes will be attached along the walls by plastic clamps. Those in turn pressed to the walls with screws. Their design will make it easy to fix the pipe by snapping the lock and just as easy to release.
After completing the installation, check the quality of the assembly. Open the cold water supply for a quarter of an hour. Then run hot water through it for the same amount of time. Carefully check the condition of the threaded and soldered joints. In case of leaks, immediately replace the unreliable connection. In such a case will not be superfluous to stock up on a couple more fittings.
Some tricks to make the job easier:
- Mark and drill holes in advance for dowels and fasten the clamps. There is no need to press the clamps firmly in place until you try the pipe on them.
- To align the tees and corners, try them on the pipe before soldering and mark them with a marker.
- Pipes can be soldered on the weight and already assembled strapping fastened to the clamps. The previous tip will help you assemble it accurately.
Safety precautions for laying pipes
In order to protect yourself when working, prepare your workplace - remove everything that prevents you from approaching the places where pipes are installed. Before working in the bathroom, make sure there are no open electrical outlets or bare wires nearby. After shutting off the water in the riser pipe, open the flow to all faucets to make sure there are no leaks through the shutoff valve.
Working with a soldering iron will require care to avoid burns and fire. Do not leave the soldering iron unattended and always place it on its dedicated stand when not in use. Place it on a nonflammable surface away from flammable materials and liquids.

Take care of your own health and safety. Wear overalls made of thick jeans with long sleeves and trousers. Wear good working shoes on your feet. Cover your hands with gloves made of durable cloth. Wear safety glasses or a mask to protect your eyes before operating the hammer.


Difficult topic, well helped me to understand the wiring of the bathroom. Thanks