Calculation of the number of tiles for bathroom repair
In a situation where you will be installing tiles yourself, it is difficult to foresee all the pitfalls. Very often you have to deal with shortages of materials. The reason for this is the breakage of tiles in sloppy work, the need to cut it to the right size and bypass the protruding areas of the bathroom and toilet. And this is not to mention the fact that tiling often must be performed in compliance with the location of the pattern.
But do not despair, because there are key steps in the preparatory work. They will save you both material costs and time.
The first thing to do is to calculate the number of fragments for tiling. After receiving the scheme of laying, taking into account the actual size, you will determine the exact area for tiling. When purchasing take the number of tiles with a reserve of 10% of the calculated area. Such a volume of spare material is not unnecessary and can be useful in the future if you need to replace the installed fragment or will need a visual sample for the selection of bathroom accessories in the tone of the walls.
Measuring the area of the room
Our volume calculations begin with measuring the bathroom. We take a tape measure and measure the height of the walls and the size of the floor. The bathroom is rarely square when viewed from above, more often rectangular. In the first case, it will be enough to measure the length under one wall, and in the second, under two walls. Having calculated the size of the perimeter of the room we will multiply it by the height of the walls to get the total area.
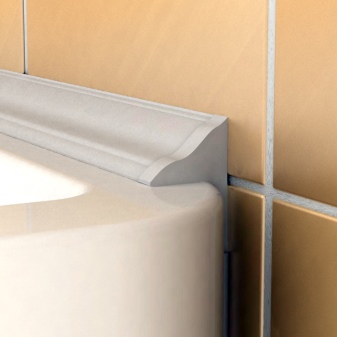
From the area of the entire room will be subtracted the size of the doorway, windows, exhaust and the area of the wall, which will close itself a bathtub. She, by the way, is worth putting in the last place, but for now you can screw on the wall mounting profiles at the level of its upper edge.

If the room has a non-standard shape and it has niches, vaulted walls and columns, all elements must be measured separately. We do not need to get the exact values of their area, to determine the consumption of cladding material is quite enough rough estimates. Total to the area of solid rectangular sections of the walls add the size of the elements of complex shape. The result we need to round up.
Based on the results of measurements, we make a schematic plan of the bathroom. Or taking them into account, we can ask designers to simulate a project that shows the finished view of the room after tiling. If you want, you can display the location of plumbing, furniture and other interior items on it.
Choosing the method of laying tiles
Depending on the method of laying ceramic tiles can change the material consumption and speed of work. Choose a method suitable for you can from the proposed options:
- Standard;
- Diagonally;
- With an offset;
- Parquet laying
- Modular laying
Choose the tiling method you need carefully. Not every one of them will work for tiles with a certain pattern direction. Now let's take a closer look at the advantages and disadvantages of each.
Standard
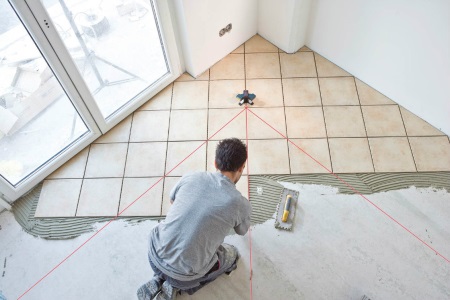
Widely used method of tiling both floors and walls. Assumes the laying of fragments in even horizontal and vertical rows butt to butt. The important condition for a neat laying - is the observance of the level of horizontal and vertical. To do this, check the right angles with a triangle, and deviations from the vertical and horizontal building level.
The standard method glue rectangular and square tiles, it is also convenient when installing tiles of large dimensions. For a richer design, you can put together a concentric pattern of fragments or alternate rows of different colors. The method itself is easy to master and saves a decent amount of time. But, at the same time, it has its disadvantages:
- The method is suitable only for tiles without seams and correct shape;
- Requires the absence of defects in the toning and thickness of the plates;
- The pattern of the cladding will be somewhat monotonous.
You will have no difficulty in achieving a quality result with standard laying if you keep an even joint between rows and adjust the tops of the corners of adjacent pieces.
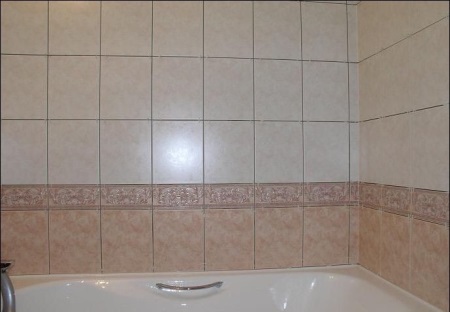
We recommend that you line up the tiles on the wall from the second row horizontally, focusing on the anchored on the level of the beacon. Then all subsequent rows will be laid evenly, and the fragments at the junction with the floor and ceiling in case of unevenness can be trimmed.

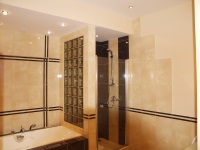
Diagonal
As the name implies, the rows of tiles will line up diagonally with a slope to the surfaces at 45 degrees. Due to this cladding visually stretches the distance between the corners of the plane. In the diagonal direction of the rows visually aligned non-perpendicular to each other walls and floors.
The method is not as simple as the previous one, it implies accurate planting with the observance of the angle of inclination and trimming a large amount of material on the wall areas. Laying diagonally takes longer than other methods.
This type of masonry will require a precise layout, taking into account the actual size of the tiles and walls. All tiles must be the same size, with no protrusions or chips on the edges. It is more rational to opt for a square tile in this method of laying.
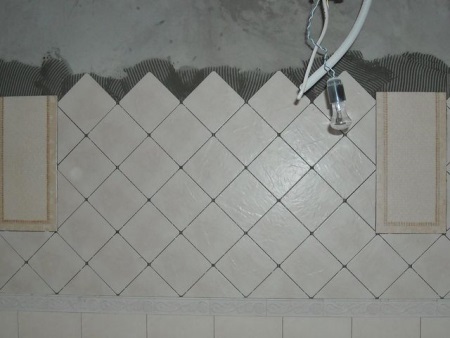
For convenience, the first row of tiles is placed in a standard way. It puts the tiles of rectangular shape with a length equal to the diagonal of the square pieces of the main masonry. On a number of rectangular pieces of hypotenuse down put triangular halves of square tiles. From them will line up rows of solid squares, one after another. It is important to align the edges of adjacent pieces so that their tops are on a straight line. Check the horizontality and verticality of the rows with a level, and correct the glued tiles if necessary.
Laying methods for rows
There are two ways of laying rows:
- Sloped. In this case, it is easy to go sideways and deviate from the angle of 45 degrees. Do not put the tiles yourself in this way if you are not an experienced tiler.
- Horizontally. This method is easier and you will have no difficulty in placing the pieces of tiling correctly. Just align the horizontal and vertical corners of each in a straight line.
Laying with an offset
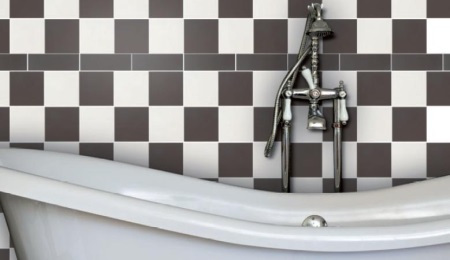
The finished surface pattern after such cladding resembles brickwork. It will be very appropriate if you have chosen a material with a volumetric surface, stylized as natural stone or wood. This method is applicable mainly to rectangular tiles, but in the case of square fragments will also look organic.
Placing tiles on the principle of brickwork will look equally good on the walls and on the floor. It is desirable to choose for it a material of a single color.

As with the traditional method, the laying is done horizontally, starting from the second bottom row. The main feature in the process of laying will be to adhere to a given width of the joint between the tiles, so as not to leave too wide a gap at the walls.
Place the next row over the previous one with the condition that the seam of the lower joined pieces was in the middle of the solid rectangles of the upper row. It is best to start laying from the middle, to align the bottom seam in the center of the tiles.
Parquet
Since the cladding laid in this way strongly resembles the pattern of a parquet board, it is more likely to be suitable for the floor.
On vertical planes to repeat this will be problematic, and the side walls will visually bend in this figure.
The characteristic pattern is laid using only rectangular tiles. The effect of it will be more vivid if the ornament will be interspersed with two kinds of plates of different colors.
Parquet masonry is found in two types:
- Regular herringbone, where the rows are in a zigzag pattern;
- Pinned herringbone, where the main tiles are laid around a smaller square.
A specific parquet masonry pattern is great for rooms where the walls are not joined at right angles or have a complex shape. The most suitable for such a pattern of tiles with the texture of natural wood, warm colors or a contrasting combination of black and white plates. In the scheme of tiling "herringbone with a huddle" will look good more saturated and dark colors.
The process of parquet laying is somewhat similar to the laying of a diagonal. You will need to cut a solid piece along a line drawn from the corner to the middle of the opposing larger side of the rectangle. Of the resulting pieces formed an equilateral triangle. Having obtained the desired number of such triangles, attach them to the wall. So we get the first row, on top of which we will lay out the subsequent zigzag.
The convenience of this layout is the small amount of waste. Cutting will generally need to be resorted to much less often than in other cases.
Modular method
Modular laying due to the large number of components makes the interior of a small bath more detailed and rich. The drawings of the modules can be stacked in complex geometric shapes, colorful mosaics or even whole paintings. To effectively use the free space of the room and bring them a creative element, we advise you to enlist the help of bathroom designers. They will design a custom design for you.
At the same time, you can do the modular laying work yourself, guided by ready-made maps. They are included in the module kits and are sold in specialized ceramic tile stores.
In the process of assembling a module of component parts, you must be guided by a precise scheme. The dimensions of the tiles with different patterns and colors should be shown as accurately as possible in your plan. When assembling, you definitely need to align the corners to the triangle and clearly adhere to the width of all joints.
Simulated modular assemblies offer you to get rid of the need to calculate everything yourself. Their front side already contains a modular grid of decorative elements. There is a large variety of pattern layouts and design style, so you will not be limited in your choice.
Procedure for calculating the number of tiles
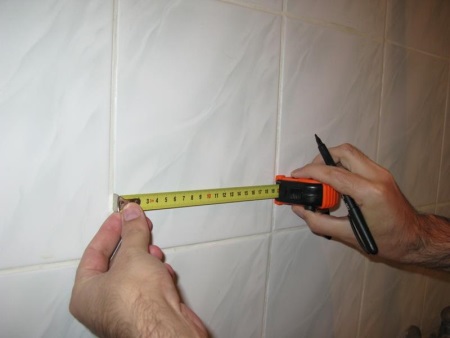
In calculating the amount of material consumed, it is important to accurately determine the area that will be covered with tiles. To do this, calculate the area of the floor and walls and subtract from them all areas where tiling is not laid: the wall areas behind the bathroom and shower stall, door and window openings, vents.
When calculating the floor and walls of irregular shapes, conditionally divide them into a combination of areas in the form of simple geometric shapes: triangles, rectangles, trapezoids. After calculating the areas separately, sum them up and round up.
For clarity and better understanding of the location of fragments in the future laying scheme, do it with the observance of the scale. Draw out the pattern grid to see how many one-piece pieces will be laid on the wall and where they will need to be trimmed.

Floor
In advance, we calculate the area of the floor, it is better to round the received figure to the whole in square meters.
For example, according to the results of measurements, we calculated that the floor occupies 8 m2. Choosing a tile, you settled on a tile with a square shape with dimensions of 35x35 cm. The area of one such fragment will be 0.123 m2. We calculate the number of pieces of tile, for which we divide the total area by 0.123. The total obtained 65 pieces.

Knowing that an integer number of pieces along the length will not fit and trimming is inevitable, we add a reserve of 8-10 percent to the amount received to have a reserve. Taking into account the amount of material we calculated, we end up with 71.5. Round the number of tiles to a whole number, and as we see, we will need 72 tiles to cover the floor.
It is important to remember that tiles in this format are packaged in a pack of 10. If there is no possibility to buy individual pieces by the piece, it is better to buy the right number of packs with more material than the estimated number. The standard number of plates in one pack is 5, 7, 8, 10 and 12.
Wall
The order of calculations for finishing walls is almost no different from the calculations for the floor. Knowing the height and perimeter of the bathroom, calculate the total area. From it, subtract the dimensions of the areas hidden behind the bathtub and the dimensions of the door frame with window frames.
Some difficulties arise if the laying pattern involves alternating rows of tiles of different colors, inlays of decorative plates and trim pencil or border. Here and we can use a clear scheme.
On paper or in a graphic editor, depict one column of tile masonry. On it, mark with different colors or numbers plates with different patterns and colors, borders, decor. Divide the perimeter of the room by the width of one plate to get the number of tiles to lay in a continuous row. Where rows are interrupted by openings or overhangs, subtract and add their length to the perimeter accordingly.
The calculated number of tiles for each individual tile rounded to a whole and increase by 5% to have a reserve. Repeat all of the above to calculate the costs for each row, if several rows of identical tiles will be laid, then sum them among themselves.
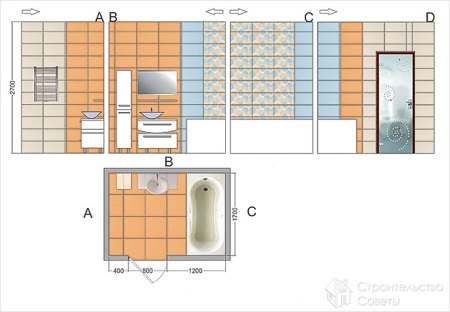
So for a room measuring 4x2 m the perimeter is 12 m. Subtract the width of the door 60 cm, we have 11.4 m. We divide this value by the width of the rectangular tiles - 35 cm. Rounding up the number to a whole, we get 33 plates, and taking into account the reserve of 37 pieces.
Diagonal
The ways of calculating the consumption of tiles described so far are applicable if you adhere to a standard laying or a scheme with an offset of rows. Similarly, determining the number of tiles for the diagonal method of laying will be incorrect.
Diagonal laying is known in the professional tiler community as one of the most costly in terms of material. Whole plates will be very often and in large quantities are trimmed as the rows are laid, because the size of the trimmed parts will need to be adjusted from time to time, and where it will be rejected if there is a large dispersion.

Tiles are easy enough to calculate if you make a drawing with a marking of its laying on millimeter paper. Whole pieces can be counted in order, and with those that are trimmed to the shape of a triangle, everything is quite simple.
If rectangular-shaped tiles are used for the work, the triangle for trimming will be a quarter of the sheet. When the pattern is laid out of square sheets, when trimming them in half. From here, it's easy to calculate how many whole tiles it will take you to trim.
Nevertheless, a reserve for trimming is a must. In the case of a diagonal scheme, it will be at least 15% of the area of the prepared surface.
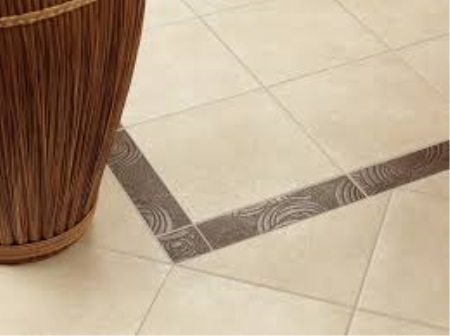
Additional elements
Let's deal with the number of borders and pencils for the planned facing. The perimeter along which the paving is carried out, let's divide by the width of the element. That is, in our case 11.4 divided by 0.25. As a result, we got the nearest whole number of 46. This figure will correspond to the exact number of curbs.
Since the pencil will be installed at the top and bottom of the curb strip, you will need twice as many - 92 pieces.
Surface Character and Quality
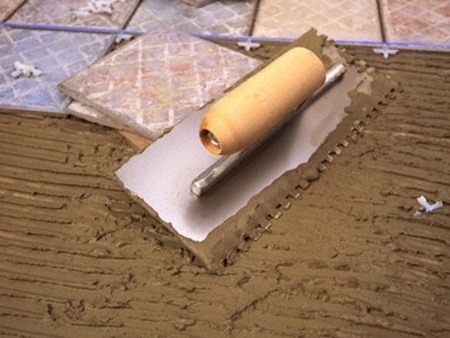
For the best quality result, the prepared walls and floor are aligned in a plane with differences of no more than 3 mm. Then the tiles are placed on a minimum layer of glue, which only attaches it to the base. The required thickness of the layer in this case is 5 mm.
Less desirable to apply the mixture and lay tiles on surfaces where the differences reach 30 mm. Glue in such a situation does not just fix the tile to the walls, but also fills the voids and aligns the working plane as a whole. Laying is carried out with the application of a thick layer and entails additional consumption of the mixture.
Minimizing adhesive consumption will, in particular, help to lay on a smooth surface with few pores and roughness. Due to their porous structure, untreated cement walls absorb more liquid mix than smooth concrete and gypsum board. Not to mention the fact that the latter is good for leveling imperfect walls.

Remember, vertical tile installation will be more reliable if the adhesive is applied both to the wall itself and to the back of the plates.
Tile size
The thickness of the applied layer is directly proportional to the size of the ceramic tiles. The proportion is approximately as follows, if the installation takes place on glue with a cement base:
- For tiles square 10x10 - up to 2 mm of adhesive mixture;
- For squares with sides from 20 to 30 cm - 2-3.5 mm of adhesive;
- Slabs 30x30 to 50x50 cm - 3.5 to 4.5 mm of adhesive;
- Plates larger than 50x50 cm - a layer of about 4-5 mm of adhesive;
- For boards with sides over 60 cm additional layer of glue is applied to the back surface.
Set the desired height of the layer of adhesive helps different sizes of trowel teeth. The standard height of these tines is 6, 8, 10 and 12 mm.
Since it is impossible to apply a layer evenly with an ordinary flat trowel, the adhesive is smoothed with a toothed trowel to get a layer of equal height and remove excess mortar.
Given that the trowel will be convenient to lead at an angle of 45 degrees, you will automatically derive grooves of adhesive of the correct height. A layer with a height equal to half the height of the teeth will be obtained.
So to work with tiles 30X30 you will need a trowel with teeth not less than 8mm, for tiles 50x50 - with teeth 10-12mm etc.
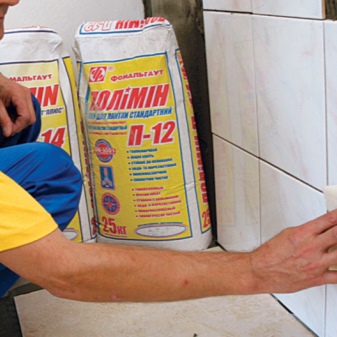
Types of glue
Modern adhesive mixes are divided into 3 types:
- With a cement base;
- Dispersion glue;
- Epoxy glue.
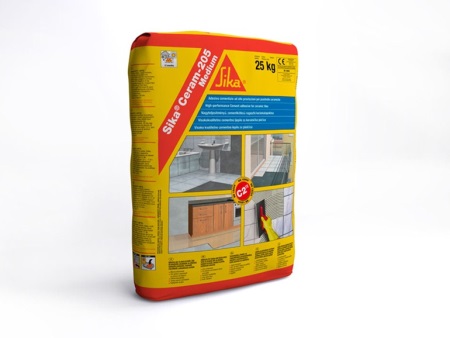
Mixtures with a cement base, in addition to the cement itself, contain binder additives. Clean water with the addition of latex primers are used for preparation. Cement-based mixtures are used everywhere because of their low cost and ease of work. An area of 1 m2 can be evenly covered with a 1 mm thick layer at a consumption of 1-1.9 kg of dry cement mixture.
The dispersion adhesive is sold in the form of a ready-to-use resin-based mortar. You do not need to additionally dilute the purchased composition. This type is convenient because there is no need to maintain the proportion and mix in several steps. Higher cost compared to cement glue is compensated by half the consumption of dispersion mortar.
Epoxy glue is a set of synthetic resin and a catalyst. The two substances are mixed in a given proportion and form a ready-to-use adhesive mixture. This type of mixtures adheres very firmly to any surface, is adapted to high mechanical loads and exposure to aggressive environments. Shrinkage of epoxy adhesive is practically eliminated. Consumption of this material is high (1.5 to 3.5 kg per m2), but the quality of the connection surfaces and operating conditions are not comparable with other types of mixtures.
Calculation Example
So, for our example, let's try to determine the consumption of dry cement adhesive for finishing the walls and floor. The size of our tiles for the walls is 25x35 cm, so the optimal mortar layer will be 3-3.5 mm. This thickness requires a minimum consumption of 3.5 kg/m2.
With a perimeter of 12m and a ceiling height of 2.5m, the wall area is 30m2. Minus a 2.06x0.6m doorway, the surface area for laying the tiles is 29m2. Multiplying the adhesive consumption given to us by the area of finishing, we get 101.5 kg.
It is easy to calculate the consumption for laying the floor tiles. For 35x35 cm large pieces, the adhesive consumption per square meter is almost the same as for the walls - 3.5 kg. The total amount of dry mix for floor tiling area of 8 m2 - 28 kg.
In total, you will need at least 130 kg of dry mix to complete the work in the bathroom, which is equivalent to 6 bags, if you take with the reserve.
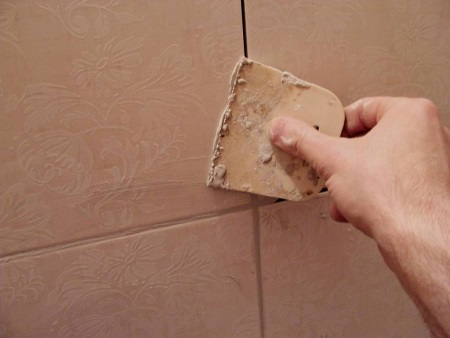
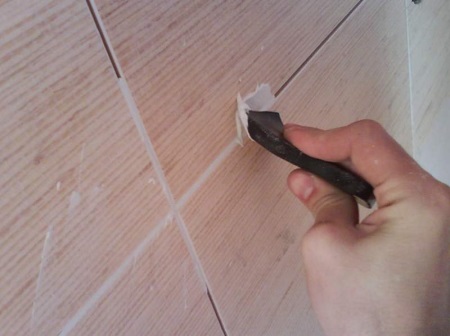
Calculating the amount of grout for joints
It is worth detailing and on determining the mass of grout for joints. The amount of the mixture is determined by the size of the joints themselves (width and depth), the quality of brushing them from glue residue, the evenness of the laying.
In addition to the size of the joints, the consumption of grout mixture directly depends on the size of the tile fragments. The average consumption value can be derived from the formula:
(A+B)/(AxB) x C x D x 1.6 [kg/m2], where
- A - length of the tile, mm;
- B - width of a tile, mm;
- C - thickness of a tile, mm;
- D - width of joint, mm.
Then it remains only to multiply the obtained number by the total size of the surface.
In our example, for a wall area of 29 m2, covered with tiles of 25x35 cm with a joint width of 2 mm will require grout:
(350+250)/(350x250) x 7 x 2 x 1.6= 0.154 kg/m2
Hence the volume of dry grout for caulking the entire surface is 0.154*29 = 4.466 kg.


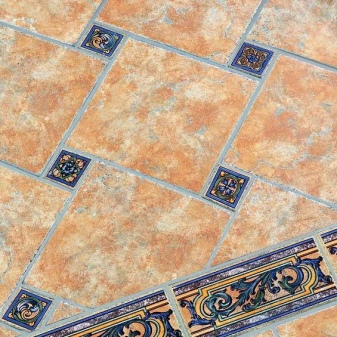
The tiles laid diagonally look interesting. I'll have to show my husband, though he probably won't want to mess with that complexity.