How to update the tiles in the bathroom without a major investment
Bathroom tile is one of the best materials, which not only has a pleasant appearance, high durability, but also a long life. It withstands temperature changes and is loyal to water. But even tiles can run out of life.
Over time, the tile will become duller. It can become cracked or chipped. One way to solve this problem is to replace the tiles. But doing a complete repair in the bathroom is an unnecessary expense and time. There are other ways to update the tiled surface, which will be discussed below.
Replacing cracked tiles
For many people are familiar with the situation when, from excessive mechanical impact, the tile broke or it went cracking. For the sake of one or more damaged tiles do not necessarily get into repairs, in fact, just replace the damaged tiles.
You should start with the selection of tiles that are suitable in color and style. If you have leftover materials after the repair, that's great. Then you can simply replace the damaged element with a whole. But what to do if the exact same tiles are not left?
Procedure:
- If the damaged element is located in a place to which hardly anyone will look, then you can find a tile that is more or less suitable in color and exactly the same size as the defective.
- If the tile is cracked in the open space, and to find the same one does not work, then you can cheat a little. Instead of a damaged part, you can use some decorative element of the same size. If it looks strange in a single piece, then replace several whole tiles with the same decorative parts. Yes, it's a little more costly and troublesome, but what can you do?
- Finally, you can replace the cracked tile with the same size tile, but cover it with a vinyl sticker.
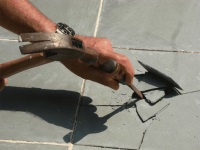
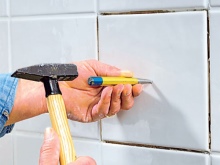
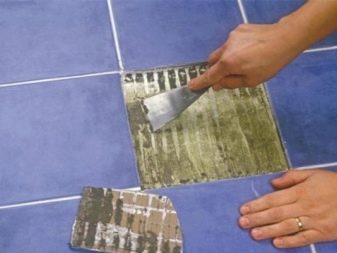
The next important question is how to remove the damaged tile and not ruin the rest?
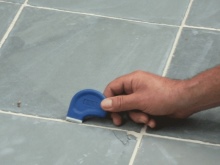
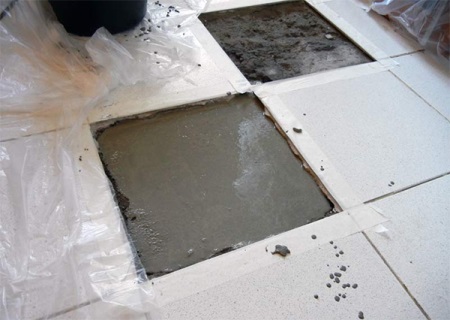
- Around the damaged part completely with a scraper it is necessary to remove the grout.
- Several holes are drilled in the center of the damaged piece.
- Next to the holes, set the chisel and with strong, but careful strokes split the tile.
- The splinters are also removed with a chisel, moving from the central part to the edges.
- The compound, on which the tiles were glued, is carefully removed from the wall.

Actually, that's all, you can install a new tile. There is a risk that the new piece will catch the eye.
To prevent this from happening, follow these steps:
- Apply adhesive to the surface of the wall and align it with a trowel over the entire area;
- Install a new tile in the vacant space, and at the joints leave mounting fasteners (then the joints will be of equal thickness);
- If the tile protrudes slightly forward, then tap it lightly to make it fall into place;
- When the glue has hardened, remove the mounting fasteners and fill the joints with grout.

Updating tile joints
Sometimes the type of tile joints determines the overall picture as well. For example, the tiles look great, but the joints are darkened or yellowed, they appeared chips, and because of this the bathroom gets untidy look.
To ensure that the inter-tile joints always look like new, they need to ensure proper care: use special products. You also need good ventilation - this will help prevent mold from withering.
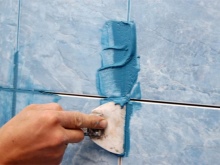
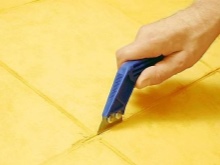
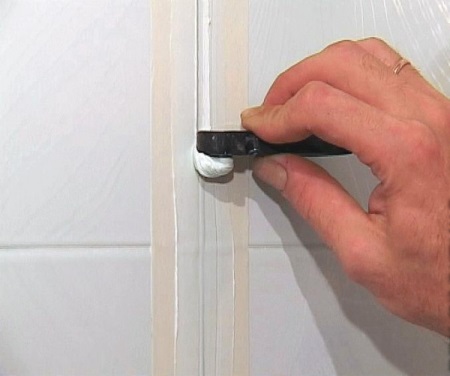
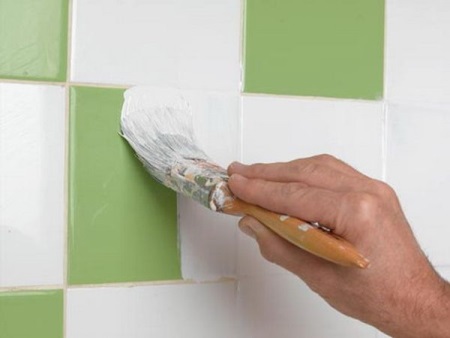
To return the joints to their former well-groomed appearance will help to renew the grout. To do this:
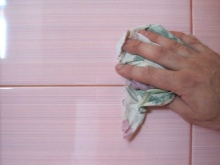
- Remove the previous grout with a spatula. Work with great care, as you risk damaging the tile. You can use store remedies to remove grout. After applying a special liquid, the composition softens, and it becomes very easy to clean the joints from the old grout;
- Prepare a new grout composition. It is recommended to pick up his color under the tone of the tiles. But you can also try to play up the contrast;
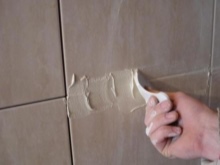
- Apply a new compound with a rubber spatula;
- When the grout dries, use a damp cloth or sponge to remove excess grout. The tile should be well polished.
If the bathroom tiles are in good condition, renewing the grout will give a great result, as if you have just had a renovation.
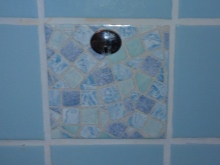
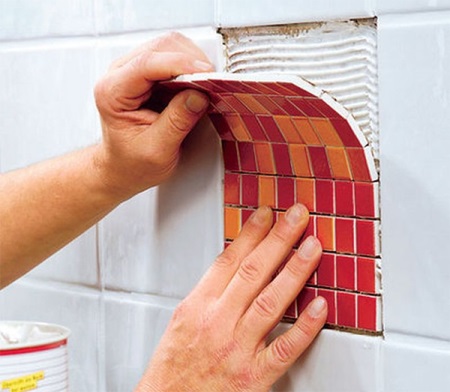
Replacing multiple tiles
The work algorithm when replacing multiple tiles that for some reason are damaged is the same as when replacing a single tile. The only difference is that you have to remove several tiles at once. It is easier if they are next to each other, but if they are in a different order, you need to remove them very carefully, so as not to damage the neighboring elements.
To ensure that the tiles are on the same level as the others, use mounting crosses. They guarantee the same width of joints and allow you to install the new tile evenly.
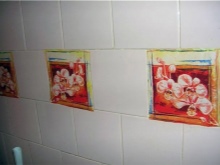
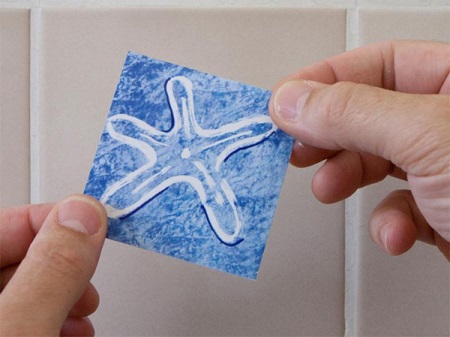
Vinyl stickers
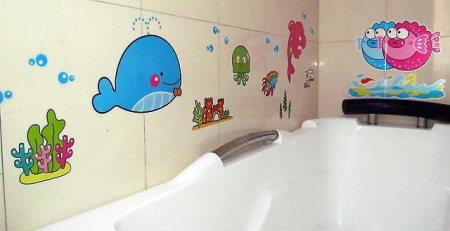
Vinyl stickers are an easy, quick and cheap way to make a cosmetic tile upgrade. Now manufacturers provide a huge selection of stickers in a variety of colors and patterns, so you can easily pick something to match the tone of the tiles.
Keep in mind that vinyl stickers will not last long. Over time, they will peel off and need to be replaced. But at the same time, this is not only a disadvantage, but also an advantage, because you will be able to periodically change the design of the bathroom.
Vinyl stickers are glued elementary. On the back side you need to remove the protective layer of paper and attach the sticker to the desired surface, and then carefully smooth out. The main prerequisite is the cleanliness of the tiles. Before you glue something, the surface must be degreased, otherwise the sticker after some time will begin to bubble, and you will have to change it quite quickly.
Painting
We've talked about the fact that you can use vinyl stickers. But when you paint the tiles, the result will be more durable. You can get a little creative with this. You can just completely repaint the tiles, or you can paint on them. Consider both methods.
If the tile has aged and lost its presentable appearance, it is easier to repaint it completely. For an effective result, a thorough preparation of the surface is required, as well as a competent choice of paint.
With this solution, the stages of work will take place in the following sequence:
- first, the tile is cleaned with detergents, and then thoroughly rinsed with running water;
- It is necessary to degrease the tile surface. Acetone or alcohol will help here. Simply wipe the tile well with any of these substances;
- It is necessary to remove the glossy layer, so the tile is polished with fine sandpaper;
- A layer of epoxy primer is applied to the surface, which dries in a day;
- The tile is sanded again;
- After the preparation, you can apply epoxy paint or special tile stains;
- The first layer must dry for at least 12 hours. After that, the second layer is applied. If you are using light-colored paint, you must wait until the second coat dries and then apply a third coat.
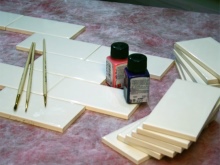
If you want to apply a pattern with the paint, it is not necessary even to have artistic ability, because if you have a stencil you can depict on the tiles almost any pattern.
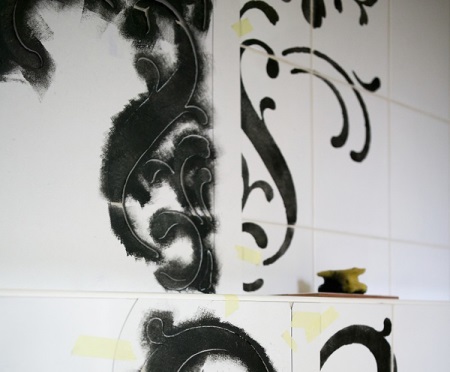
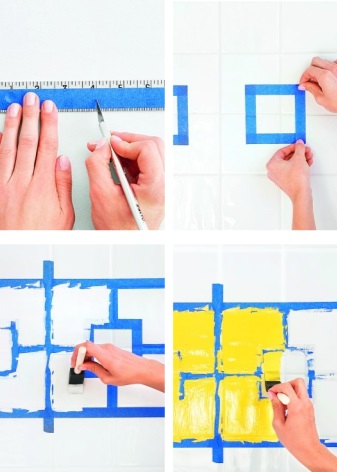
If you do not have a stencil, try to create geometric designs. They are the easiest to perform and always relevant. Instead of a stencil, you can use masking tape. Work steps are as follows:
- Mark on the tiles the drawing by hand or with a pencil, a ruler and a triangle (for example, if the pattern is geometric);
- Along all the contours glue a regular painter's tape. Here it is important to be careful that the tape went exactly along the lines. If it didn't stick right away, that's okay, you can always try again;
- Use a brush and sponge to apply a primer over the patterned surface;
- After at least a few hours, you can apply a coat of paint. Allow the primer to dry naturally. By using a hair dryer, you run the risk of introducing dust to the surface;
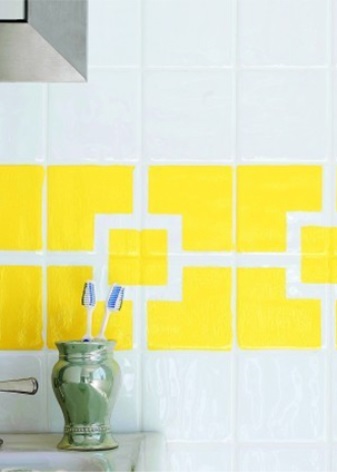
- Once the paint is completely dry, apply a second coat. If the paint is lighter than the tiles, another coat may be necessary;
- After at least one day (once the paint has dried completely), the tape can be removed.
It is advisable to use a paint that is water-resistant. Ideally, the use of epoxy paint, then the tiles will not be afraid of even detergents without abrasives.


We're going to be stenciling tiles this weekend as a family!