Glue and liquid nails for bathroom tile
15-20 years ago, the choice of means for bonding tiles was poor and was limited to cement mortar, which sometimes had added adhesives: casein or PVA. Often the tiles were even laid on oil-based thick paint.
Nowadays, the achievements of the chemical industry have increased the list of such products so much that the choice has become a difficult matter, and the number of manufacturing companies, exceeding a hundred, has finally confused the issue. Especially for the beginner, who decided not to surrender "at the mercy" of the sales consultant, but to understand everything himself.
Types and purpose
In the beginning it is necessary to understand whether you are meticulous and patient enough, accustomed to following the rules, instructions and recommendations, or are willing to overpay a little, but save time and effort.
Glue is divided into three types according to its degree of readiness:
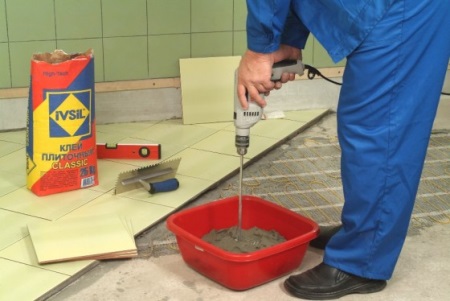
- dry mixture of cement and sand, which is diluted with water to make it ready;
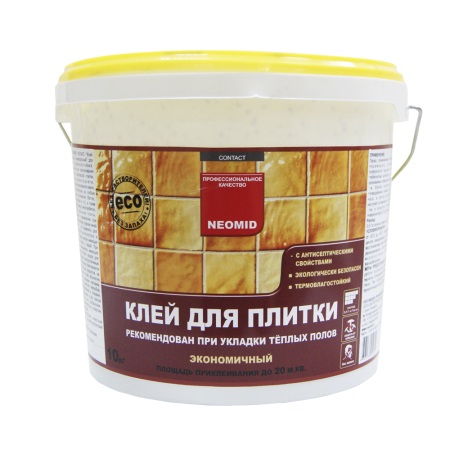
- Ready glue (one-component);
- Two-component glue, including polyurethane and epoxy resins.
The first option is convenient because water will be added at home and will not weigh down the purchased and delivered products.
The disadvantage is the extra time you have to spend on the preparation of the glue. Plus, it is necessary to read the instructions for the preparation. It is better to carefully observe the proportions and sequence, than to get a non-working solution through your own fault.
The second option is attractive because it is ready to work completely, which leads to some savings in materials, and the consistency of the glue is optimal for installation work. Also a positive point is the possibility to work with less dust and dirt.
The disadvantage is the increased weight of such mixtures. Especially since almost always in a hermetically sealed container sold not simple, cement-forming, but complex dispersion mixtures, which are more expensive and are required in special cases.
The most complex and "contrived"The third option is a two-component adhesive used in certain cases, which consists of two separate substances that are mixed together to produce certain chemical reactions that give the adhesive its exclusive properties. When choosing this type of adhesive, it is required to carefully observe the quantitative proportions of the substances mixed and adhere to a certain temperature regime for the duration of the work. An unfavorable factor is the high price.
How to choose
It is not bad at this stage to clearly define the "What? Where? When?" formula, since the choice of adhesive is strongly influenced by both the tile material and its size (What?), the quality and composition of the base on which the tiles will be laid (Where?), in what conditions they will be used (When?) .
If you look carefully at any package with adhesive, you can read all the required information about its characteristics and properties. For example, the largest letters will necessarily indicate its purpose.
Types according to purpose
Types of adhesives by purpose are:
- Basic (or standard)
- Reinforced
- Universal (for both exterior and interior work)
- Waterproof
- White glue for transparent and translucent mosaic
- Other specialties
Others include frost-resistant, special adhesives for high temperatures, aggressive environments, etc.
Reasonable for Repair in the bathroom to take exactly water-resistant adhesive or at least read the inscription about the increased moisture resistance in the table of its characteristics.

Factors influencing the choice
When buying glue, it is necessary to know in advance the size of the future tiles and its composition.
If the tile is a ceramic tile, small in size, the number that indicates the adhesion of the adhesive, in the accompanying instructions to the adhesive may be limited to 0, 3 - 0, 5 MPa. For volumetric tiles and glue would be logical to choose a reinforced adhesive with enhanced adhesive properties (strong bonding). By the way, and the consumption of glue itself will be more, because to avoid the fall off the tiles will need a thicker layer of it.
The composition of the tile also affects the weight, porosity, moisture absorption of the material, respectively determining the type and amount of necessary adhesive. So for porcelain tiles must have a number of adhesion of at least 0, 7 MPa, that is, the ability to adhere, to bond to the surface must have the ability to withstand 7kg per square centimeter.
When choosing to finish the mosaic tile options must be a special white glue, which, incidentally, then you can use instead of grout.
Grounds for finishing can be of two types: simple and complex surfaces.
- Simple bases - a fairly solid, even and solid, not amenable to deformation surfaces. (bricks, sand-cement screeds, concrete). For these, you can take a basic adhesive or universal adhesive.
- Difficult substrates include surfaces such as glass, wood, metal, plasterboard, plastic, and wall surfaces in new buildings.As in a year to 2 years in such buildings are likely to move, displacement, shrinkage and other deformations, which will require a special adhesive.
There is a difference in laying tiles on the bathroom floor and on the walls. Gluing tiles to the wall is called tiling, and laying them on the floor is called laying.
The numbers and signs in the characteristics of adhesives, except for adhesion, are more important for professionals than for amateurs.
Thus, the correction time (the time when you can move the glued tiles and correct the detected irregularities) is usually from 20 minutes to 3 hours. This is usually quite enough.
Of course, if you like to do everything thoroughly and quick performance is not your strong suit, it is better to pay attention to such an indicator as the open time. Although it is unlikely that 3-4 hours after diluting the glue will seem insufficient.
Consumption of glue
Information about the consumption of glue can be obtained from the same instructions for use on the package.
But such a preliminary calculation will need to be adjusted depending on a number of factors, such as:
- the evenness of the walls and floor
- the frequency of the trowel teeth you will use
- the specifics of your bonding material (if any)
- the experience and skill of the installer.
It is understandable that the consumption of adhesive will be somewhat higher than indicated on the label, if the surfaces to be repaired are far from ideal. And the more you need to level them, the more glue you will need.
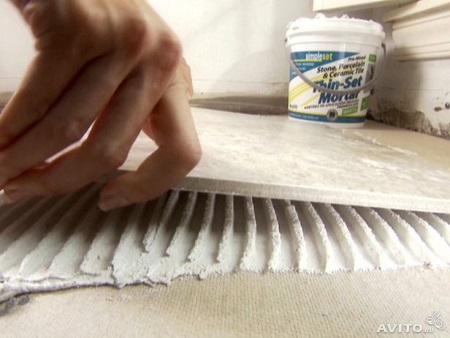
If the tile is small and its surface is smooth on the glued side, a trowel with 0.3 cm teeth is sufficient, but if the tile is larger, then the tool for applying the adhesive is taken with a larger size of teeth, which means that the adhesive will be used more.
The angle of the trowel when applying adhesive is also important, since reducing the angle from 90 to 60 or 45 degrees gives a significant reduction in material consumption.
A 25-kilogram bag is usually enough for 4-6 square meters.
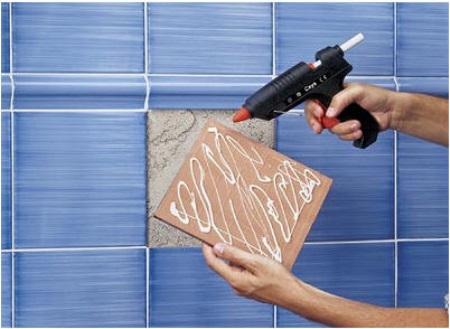
Liquid Nails.
An impermeable, high-quality construction adhesive, based on synthetic rubber with the presence of polymers, called "liquid nails", has proven to be a particularly durable and easy to use bonding material.
In addition to its undeniable advantages, it is generally recognized to have two disadvantages:
- A very small correction time. About 10 minutes. Later you will not be able to correct the position of the glued, which is not very convenient if you lack experience.
- The significantly higher price compared to other adhesive mixes makes it pointless to use "Liquid Nails" for mass treatment of surfaces. But it is very possible to carry out restoration repairs by gluing small parts with it.

Brands and prices
Each brand of tile adhesive has about a dozen varieties, due to the features mentioned above.
Yes, and prices in different retail outlets can vary significantly.
The most popular brands are:
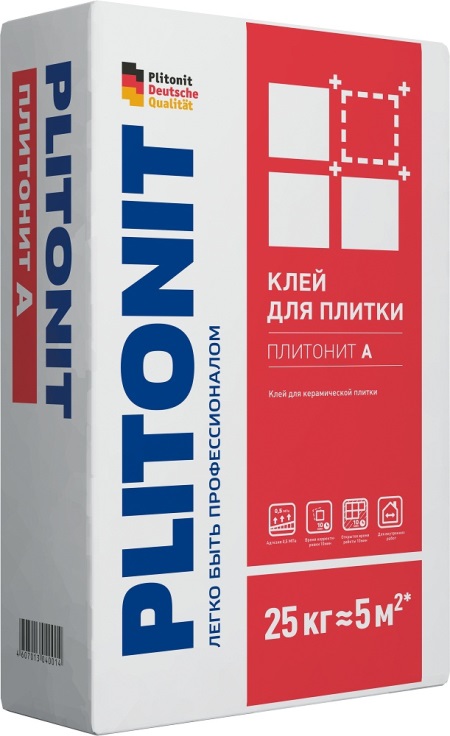
- Plitonit,
- Knauf,
- Cerezit,
- Pobedit,
- Osnovit,
- Unis,
- Fungenf,
- Ivesil,
- Starateli,
- Kiilto.
Each of these well-known and repeatedly tested brands has its pluses and positive qualities, all of them will be a good help in your work, especially if you choose the water-resistant version of any of them.
You can chase the profit and buy less "promoted" and therefore cheaper brands of glue.
Most likely the difference in quality will not be strongly felt, but what is worth checking for sure is the shelf life of the material and, if possible, make sure it is stored properly.
On average, the price of glue will be around 300 rubles per 25 kg.
How to install tiles with their own hands
On how to glue ceiling tiles, see the following video.
So, you have the right amount of tiles pleasing to the eye, suitable glue and grout of a beautiful color. Took out the toolbox, borrowed from a friend or just bought a trowel with teeth of the required size. Do not forget the primer for safety.
There are a lot of secrets and nuances of independent bathroom renovation, but let's imagine that everything is perfect: the surface is flat, straight, there is no plumbing and nothing prevents the laying of tiles.
It is recommended to begin with the walls.
Be sure to primer the surface. You can do it twice.
Then, having made a calculation on paper or simply mechanically applying a number of tiles to the wall (while not forgetting the necessary gaps of a few millimeters), you need to imagine the picture of laying. If the tiles are the same, you can start.Otherwise, it is recommended to spread somewhere in a free section of the floor pattern, so as not to mix up the planned pattern and then take a tile from there.
If the wall will contain not a whole number of tiles from ceiling to floor, that is, it will be necessary to use cut tiles, then the rules leave room at the floor for such an incomplete layer, nailing a support bar for the second (non-cut) row, and then go from bottom to top.
If you don't want to mess with dividing the tiles, you can pick up a border tile in the thickness of the desired layer and it will be easier and faster to put the pattern.
For more confidence, draw vertical lines on the wall to check the evenness of the tiles.
There are three ways to apply glue when tiling:
- Smearing the wall (small areas one at a time).
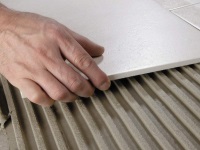
- Applying glue to the tile itself.
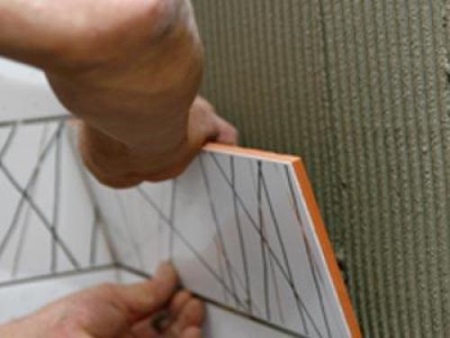
- Complex application of glue (on the wall and on the tile).
The secret of the master: When applying glue to both glued surfaces, the trowel teeth traces should turn out approximately perpendicular. With this arrangement, the tile is more mobile in the process of pressing on it. Do not forget: after applying the tiles, they must be pressed down, but the force must not be excessive to avoid warping or even breaking the tiles.
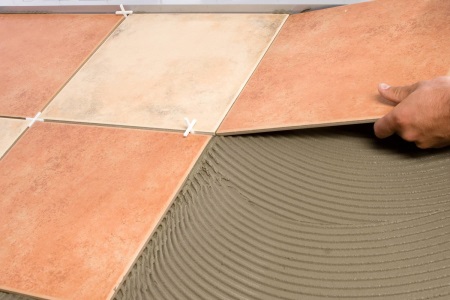
After the first tile is glued, the next rows are laid. To ensure that the seams have the same thickness, separating crosses are placed between the tiles. The size of the spacers depends on the size of the tiles.
After a complete installation, it should take at least 3-4 hours to pull out the auxiliary crosses, clean the cracks with a sharp blade and rub the grout into these cracks, matched in tone or contrast with the tiles.
When installing tiles on the floor, you must take care of the tightness of the surface. For this waterproofing layer is applied to the floor itself, as well as on the walls to a height of 10 centimeters from the floor.Tile adhesive is applied in a third way - on both surfaces. It is desirable to use a level to ensure that the floor is even.
Depending on the chosen pattern, the laying of tiles begins from the corner, located on the side of the entrance, or from the center. But with a full view of the floor and the impossibility of hiding the cut pieces behind furniture, start laying from the center, maintaining symmetry.
After 2-3 days and the glue finally dries, it remains to grout and seal the seams with a sealing compound and after it dries, remove the excess with a knife, and the surface itself can be cleaned with a wet sponge in a couple of hours after sealing the cracks.
Remember that "handmade" now - it's quite fashionable, it's an occasion to surprise friends and acquaintances with their own and unique variant. The main thing is to think through the process itself and get a good and friendly helper if possible. It is not superfluous before laying tiles to watch a few videos, where similar work is done by specialists.
Dare!


I bought ready-made glue. I will use it to install the tiles. This is a guaranteed result.