Waterproofing in a log house: rules, methods, materials
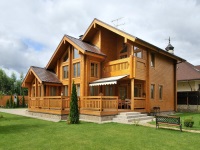
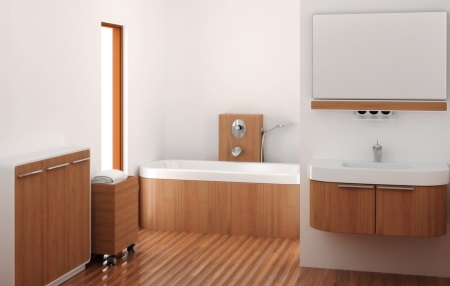
Design and construction of private houses made of wood allows you to freely plan the living space. In this type of construction there are no fundamental restrictions on the additional construction of partitions and laying of communications. Thanks to this approach, the bathroom is easy to place on any of the floors, expanding it at the expense of adjacent rooms or enclosing the shower area in a large room.
The construction of frame houses has its own nuances, and they will have to take into account in the arrangement of the bathroom:
- Wood both absorbs and evaporates moisture (breathes);
- Wood - the material is organic, on its surface and in the thickness actively reproduce fungus and mold, which leads to its destruction.
- In conditions of high humidity growth of harmful organisms intensifies, and the wood is more likely to fall into disrepair.
We advise under the future of the bathroom to allocate a room with a load-bearing wall and on the lower floor.
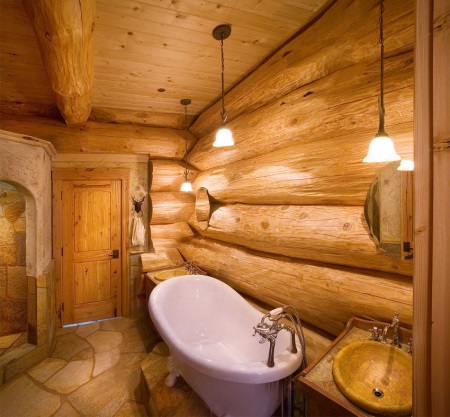
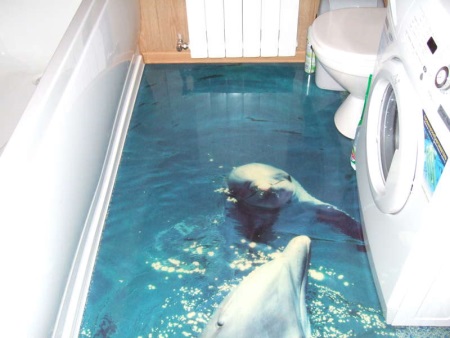
In the bathroom and toilet, where steam and condensation is always in excess, it is necessary to fully carry out work on waterproofing. They are carried out not only to preserve the walls, floor and ceiling from the negative effects of moisture. With their help you get rid of unpleasant odors, the feeling of dampness and maintain hygiene in the sanitary rooms.
The application of water-repellent coating on the floor - a must, but it will not give complete protection against moisture.
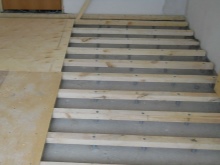
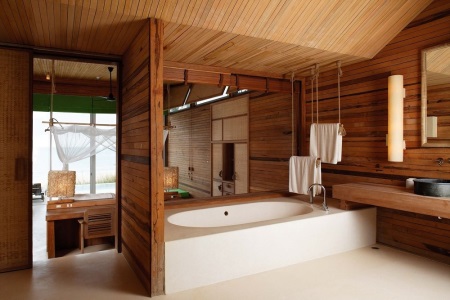
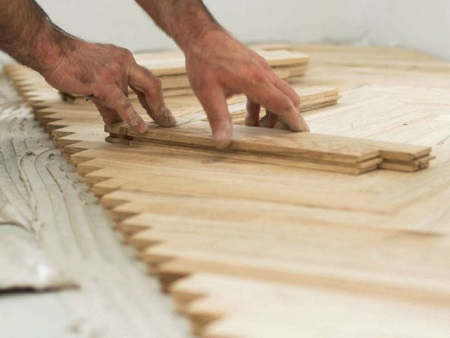
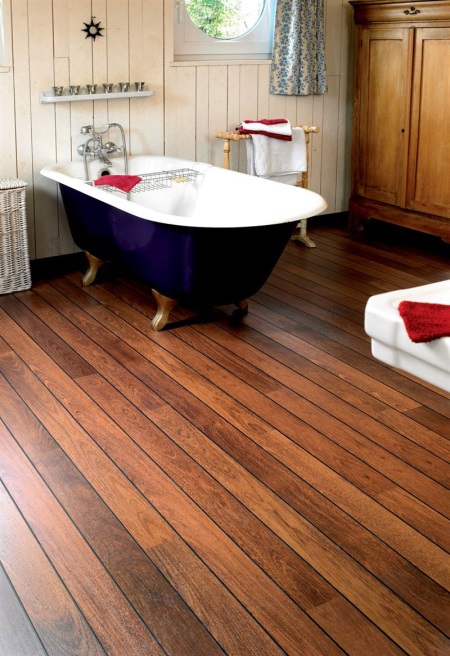
Wooden flooring in the bathroom in a log home
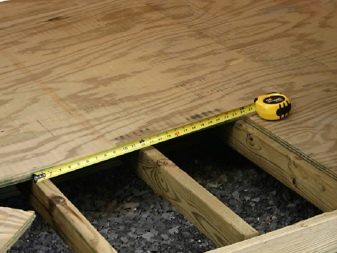
The basis for the floor will consist of sheets of particleboard, fixed on the joists.
If you are considering for yourself the option of locating the bathroom on the upper floors, you should provide additional reinforcement of the floor foundation.
Based on experience, this effect can be achieved by installing beams with a larger cross-section and laying them with smaller gaps. It is recommended to lower the level of laying beams by 10-12 cm to ensure that the floor height in all rooms is the same upon completion of the work.
The floor level will be compensated by pouring cement, installing a floor heating system and laying tiles. To prevent flooding in the bathroom and adjacent rooms, the height of the floor after installing the final coating should be below the threshold of 2-1.5 centimeters.
When the floor is laid on the second floor and above pouring concrete is not necessary, but in the case of the first floor without it can not do, because it is in it will be installed heating.
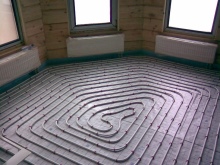
There are a number of solutions for heating with its advantages and disadvantages. This can be a heating cable, electric film or coil with water.
Experts more often advise to choose the principle of heating with water, as the least expensive.
Stages of work
- Stuff the beams at a distance of 30-50 cm from each other. Then between them spread a roll of insulating wool flush with the height of the joists. On the lag fasten sheets of chipboard. It is preferable to lay two layers overlapping. You can replace the wooden board with a ten-millimeter magnesite sheet.
- On the created flooring lay the vapor and water proofing, the joints are sealed with scotch tape. The subfloor is laid with an overlap of 20 cm on the walls.
Covering of magnesite sheets is more durable and withstands increased load.
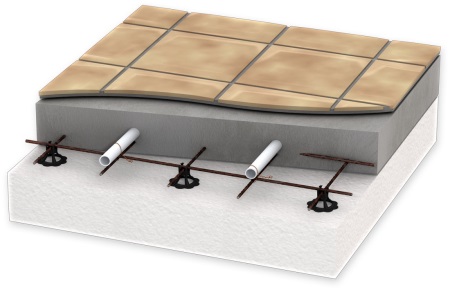
- Preparation for pouring the mortar. Self-tapping steel mesh is attached to the floor, clamps are fixed on it, through which the water heating pipes are pulled. For this purpose, we advise to buy polyethylene pipes. They are inexpensive and very durable. It is better to refuse metal-plastic - it can begin to leak at the connections over time. Polyethylene pipe can be laid in one continuous piece, it has no problem to bend at the turns, thus avoiding unwanted leaks in the heating system.
- Finished with the laying of the pipe, proceed to the pouring of concrete. To get a solid base, we recommend pouring the screed with a height of at least 4 centimeters.At this stage, the work with the floor is finished. You can start laying ceramic tiles not earlier than in 3 days.
We recommend resorting to tiling - it is more practical option for finishing. Tiles are easy to care for and durable. But it is quite possible to complete the finishing of the floor installation of laminate, parquet or other material with a wood texture.

Mandatory conditions
A set of measures for waterproofing of wooden floors of the lower floor and those that are above it is correct to carry out with the following requirements:
- For laying the joists need a well-dried and even timber with antiseptic impregnation;
- Treat with antiseptic and other protective products wooden elements of structures should be before laying, so that all the joints and ends were also covered by them. When you perform on-site trimming unsuitable for the size of parts, immediately treat the surface cut;
- At the points of attachment of the joists to the floor joists underlay roofing felt;
- To improve the ventilation of the basement in the foundation is worth making a few holes for 10-12 cm. In the winter, the holes are closed so that the heat is not consumed;
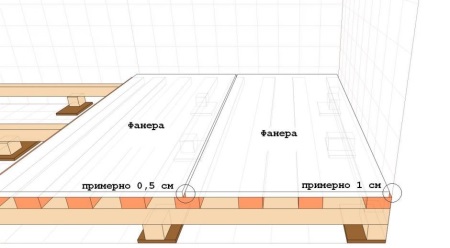
- Between the floor and walls on the second floor, be sure to leave a gap of a centimeter and a half for ventilation. Subsequently it will be closed with a baseboard and will not be noticeable.
The above measures are necessary to maintain proper ventilation in a wooden house. Without this, the normal vapor and waterproofing of the floors is simply impossible.
Engaging in insulation work in the living areas, it would be illogical to ignore the basement. Since the basement is mostly below ground level, there is a possibility of rain or snow entering the basement or flooding of the basement by groundwater through cracks and crevices at the joints of walls and floor.
To ensure protection against moisture and waterlogging, on top of the basement walls glued ruberoid or other waterproofing layer. You can also evenly apply a layer of waterproofing mastic, but not on the basis of bitumen, as it is flammable and emits toxic fumes when heated.
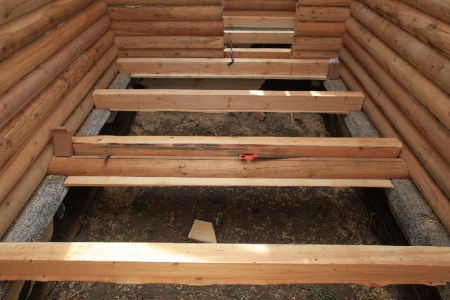
Wooden floors on joists
Such a design has a number of serious advantages in the construction, both in a private house and in an apartment. The joists form additional stiffening ribs and effectively distribute the loadapplied to the wooden boards, in the case of strong bumps they effectively dampen and absorb the entire framework.
For laying lines of communication and communication floor assembled in this way is very convenient. Nothing prevents the cables in any direction, while reliably hiding them.
The only disadvantage of floors on joists is that as a result the distance to the ceiling will be reduced by an additional 8-10 cm. Such a reduction in height is especially undesirable in the arrangement of the attic.
Beams of standard sizes are bars section of 25 * 30, 50 * 40, 50 * 50, 50 * 70 mm and a length of 3 or 2.5 m. You must choose the joists taking into account the thickness of the boards that will cover the floor frame. For the bathroom, taking into account the subsequent waterproofing, the formation of a concrete screed and tiling will need a beam height of at least 40 mm and a wooden board not less than 20 mm thick.

For the arrangement of the rough floor is suitable lag unbrushed. Using sanded economically unreasonable and pointless - the joists will still be hidden under the floor.
Beams are placed parallel to the floor at a distance of 50-60 cm one from the other and at a distance of 20 cm from the walls. They will be based on transverse wooden beams or fanned out on separate pillars, assembled from bricks. Under each masonry separately poured foundation - a square 40X40 cm.
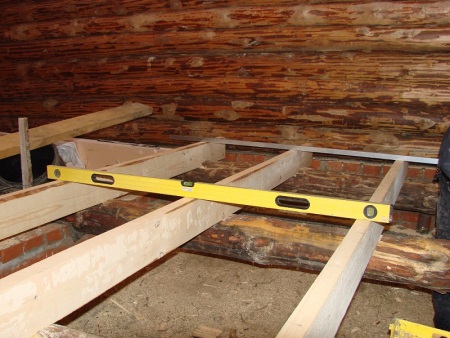
In both cases, to observe the horizontality, the building level is put on top of the bars and adjust the height of the installation with it. In areas of height differences, additional pieces of plywood or boards are put on the support.
The joists are clamped to the brick supports with dowels or anchors. The length of the fasteners is taken above the beam by 50-60 mm. It is convenient to fix the cross beams with self-tapping screws in the body of the beam by 30-50 mm.
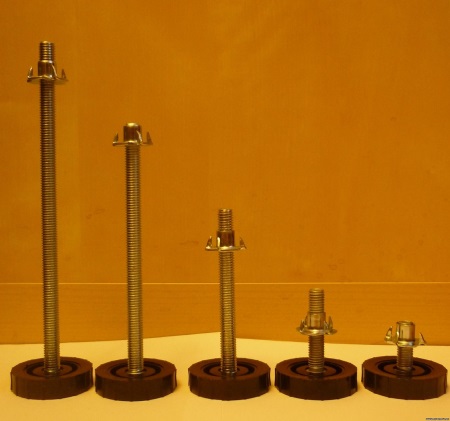
Adjustable Beams
A new trend in construction that has noticeably made life easier for the builder is adjustable joists. In fact, serious unevenness and differences in the screed or floor slabs - a frequent disease of high-rise buildings. And if we talk about wooden log houses, in them the floor joists often leads to one side or the other.
This is where the adjustable joist comes to the rescue, and with it its advantages:
- Installation time is reduced at times;
- You can adjust the height of the basement as you wish;
- Together with the gap from the boards to the floor, you can increase the layer of insulation to be laid;
- A beam with adjustable supports is less stressful on the supporting beams.
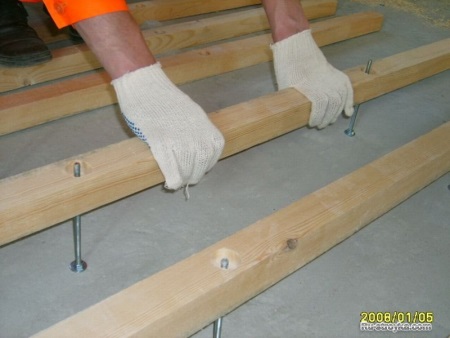
The height of each joist is regulated by bolts screwed into the footings. The assembly process is approximately as follows:
- Holes are drilled in the joists for the stanchion bolts. On the basis of the length of 2 meters there will be 5 such holes;
- The beams are placed with a spacing of 50-60 cm;
- In the floor drill holes under the hammer dowels. They will fasten the bolt-post.
- Hammering screws are hammered into the dowels to the stop, and then wrenches tighten the nut, dressed on the bolt to bring the racks of the beams at the same level. The parts of the bolt that protrude over the beam are cut off.
- The finished frame is covered with wood or magnesite board.
Materials
In the case of waterproofing the floor in the bathroom, its need is dictated by the use of a layer of insulation. Mineral wool, although it is not corroded by mold and fungus, but it absorbs and retains moisture. Being damped, it will not be able to protect the floor from freezing to the same extent.
Different types of water repellents are applied both to the finish surface of the floor and to the concrete substrate. Let's take a closer look at the characteristics of each of them.
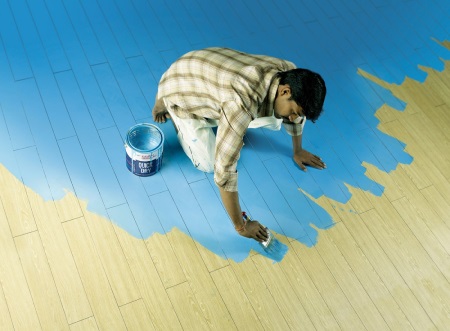
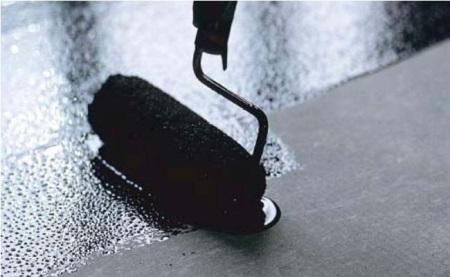
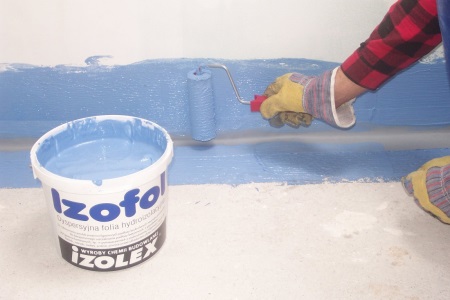
Waterproofing paint
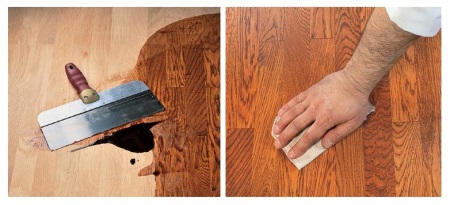
Painting is the easiest and least expensive way to waterproof a floor. Anyone can waterproof the floor with paint. Bituminous or polymeric compositions are used for the work, which are applied with a brush in several layers.
Before painting the wooden surface is ground, cleaned of grease and dirt and thoroughly dry. Then the floor and walls are varnished. Particular care should be taken in the corners and joints of the walls.
Painted waterproofing can not last long because of the appearance of cracks from temperature changes. The maximum you can count on is 5-6 years.
Waterproofing mastics.
A more dense kind of liquid insulation. Have a high plasticity, due to which are not damaged by mechanical stress and temperature differences.
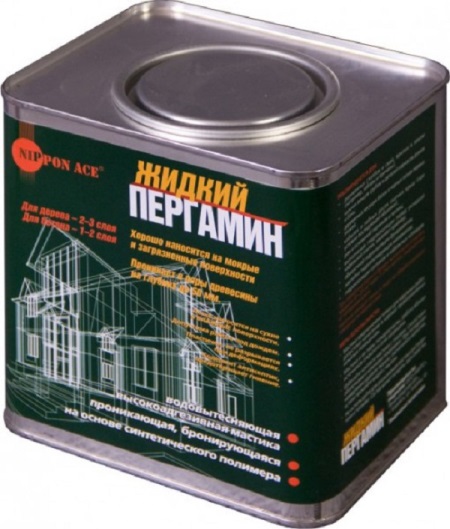
Insulating mastics made of parchment are best suited for the treatment of wooden substrates. There are, of course, mastics and cement composition, but they are fragile, and such a coating can quickly crack.
Liquid parchment is preferable for a number of reasons:
- It can be applied even to an undried surface. Pergamon seeps deep into the pores of the rock, pushing the moisture out and blocking it from entering later;
- You will save time on drying the wood;
- The composition is very flexible and durable.
Production form pargaminovoy insulation - cans or aerosol.
Insulating Pour
Pouring helps smooth out differences in height and unevenness at the joints of wood boards. Once the priming is completed, we get a uniform and durable base for tiling work. Pouring also shows a high quality of insulation against water and its creation takes little time.
The raw material for insulating poured floor is heated bitumen or asphalt concrete. Pouring is carried out in several steps. The final thickness of the insulation is about 2-2.5 cm.
Waterproofing by means of insulating pours is a costly procedure due to the high consumption of the product and its high cost.
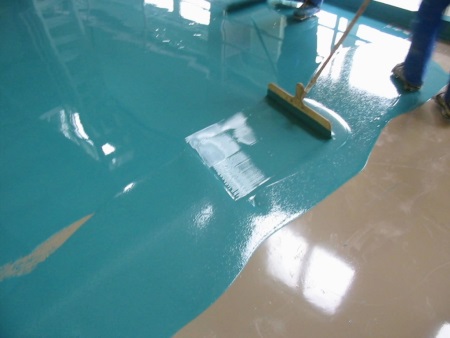
Preparation for the pouring begins with the fact that the boards are cleaned and the gaps between them are sealed. Along the walls, mount the formwork. Apply a small layer of hot mortar as a primer and let it harden.
Then the next layers are poured, which are better off from the corners and places where water pipes come out of the floor. To evenly distribute the mortar, use a toothed trowel. Air bubbles from the thickness of the filling is convenient to kick out a needle roller.
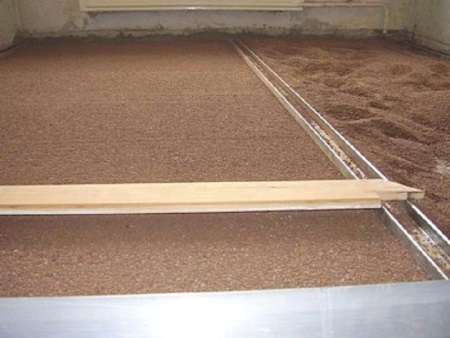
Backfill insulation
Backfill insulation for the floor is of particular interest. It will be convenient for use in private homes and cottages, as it is very simple to produce.
This will require special loose components - concretites. They are diluted with water in the proportion indicated on the package and form a water-resistant gel. The gel has a low thermal conductivity and at the same time serves as additional insulation.
Backfill insulation can be considered as an alternative to insulation wool. It will be much easier to place it between the joists, and under the level of chipboards smooth out with a rule. The material is not hygroscopic, unlike wool, and as a thermal insulation it is well worth it.
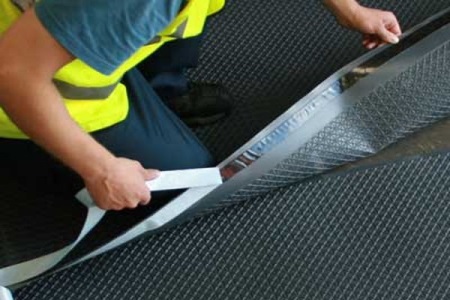
Roll-fed waterproofing
There is a great variety in the form and composition of rolls of waterproofing. As a rigid basis can be used polyethylene alloys, glass fabric and fiberglass. Bitumen may be the binding component, but modern products often contain synthetic substitutes. The lower layers of the roll can be with or without self-adhesive film.
If the fabric is not self-adhesive, it is fixed to the floor with mastic. Sheets of insulation are laid overlapping one another. For a complete sealing, the seams of the sheets will be additionally put on with a brush.
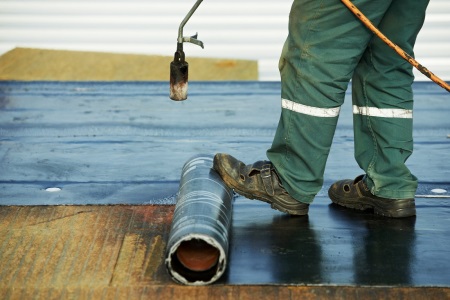
Work with roll-fed waterproofing is carried out in several steps:
- Sweep away construction debris and dust from the floor. Pass the bitumen mastic on all the gaps at the joints of the boards.
- For proper installation of rolls there should be no differences in the joints and irregularities. There will be gaps in such places under the damp-proofing foil, and the following layers will press the foil against the projecting edge of the board by their own weight. That is why it is essential to check the level of the joints with a spirit level.
- The roll is spread with an overlap on the walls at a height just above the future height of the concrete screed. In the corners of the insulation film will have to cut and put the edges overlapping. For convenience, we advise you to slightly round the corner with cement, so as not to leave a gap between the walls and the roll.
The main ways
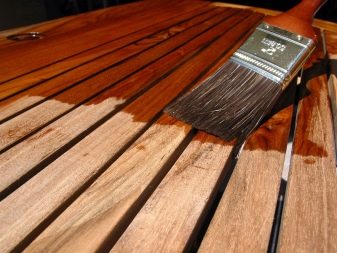
After completing the finishing work on the installation of the floor, we should pay attention to the waterproofing of the wood flooring. Often waterproofing agents also serve to protect the wood from mechanical damage and stubborn stains. A solid layer of lacquer reliably covers the natural wood, and you can safely carry out wet cleaning of the floor in the bathroom with detergents.
For the protective layer a single component or a combination of several layers can be used:
- Parquet varnish - well protects the boards from moisture penetration, gives a bright glossy appearance and has a variety of colors. The problem is that varnishes take a long time to dry and spread a pungent smell. They also react negatively to temperatures above 50 degrees (begin to peel).
- Bitumen varnish - Advantageous in terms of price and uncomplicated in application material. These varnishes are pre-diluted with a universal solvent in the proportion specified on the label and applied to a prepared clean surface. After curing, bitumen resins form a strong and elastic layer that penetrates very deeply into the structure of the wood and sets firmly. The bitumen varnish coating is very resistant to shocks and chips as well as to high temperatures.
- Priming varnish - A kind of starter coat for the subsequent application of parquet varnish. The primer will improve the adhesion and bonding of the parquet varnish. At the same time it can be used for tinting and staining wood if the basic varnish is colorless.
- Stainers - they do not actually perform the functions of waterproofing, and are used to give the wood the desired color. But in contrast to it give a brighter and more varied colors.
With the help of a stain, even the most ordinary pine can play with luxurious shades of mahogany or noble oak or walnut.
Features of finishing materials
Material for the finish coating in the bathroom in wooden houses is chosen taking into account the requirements for its durability, appearance and, of course, the price. You can stop at the following options:
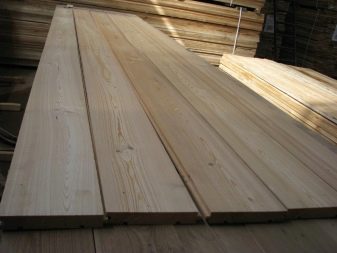
- Larch. Floorboard made of this species is highly durable, can withstand sanding and other types of treatment. On top of that, note its beautiful texture, pattern and affordable price.
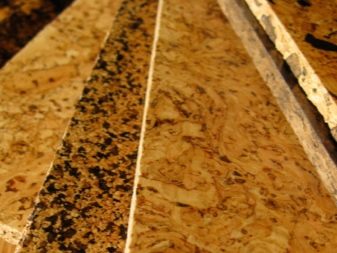
- Cork flooring. Also convenient and profitable option. It costs relatively inexpensive, warm to the touch. Its original pattern in combination with different kinds of coloring allows you to use it for the most daring design decisions.
- Teak. Came into home construction from shipbuilding (teak board has long been used to assemble decks). Teak has established itself as the most resistant to water and dampness. This property is explained by the high concentration of natural essential oils. In terms of price, teak board will not be the most affordable option, but it will retain its original shape and properties for a very long time.
It's also worth noting a fresh know-how for bathroom finishes - "thermo-wood." It is made from wood, which was thermally processed by hot steam in an autoclave at 220 degrees.
This specific treatment reduces the absorption of moisture five times and 10 times reduces the likelihood of fungus. ThermoWood is characterized by a homogeneous range of colors over the entire section area, the variability of colors and can be mounted on floors, both with and without heating.
Even such perfect and advanced materials do not give full protection against the harmful effects of the aquatic environment and microorganisms, so it is definitely worth to equip the bathroom with an exhaust ventilation system.


I choose larch. Both in terms of price and quality is satisfactory.