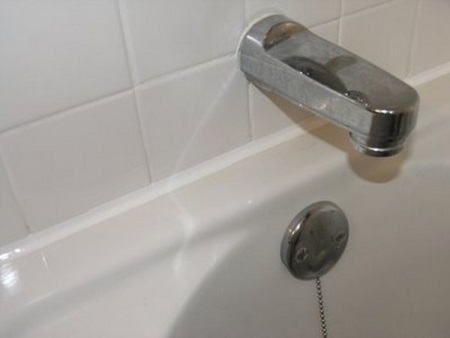
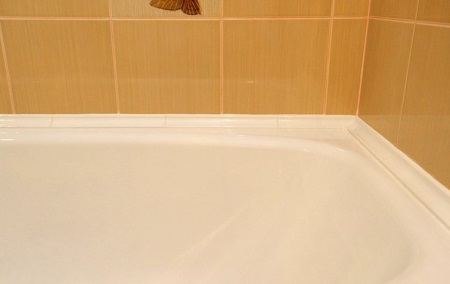
Sealing of the bathtub with the wall
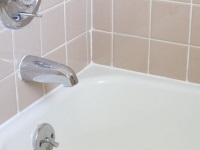
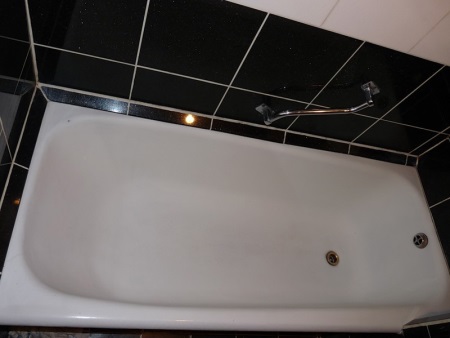
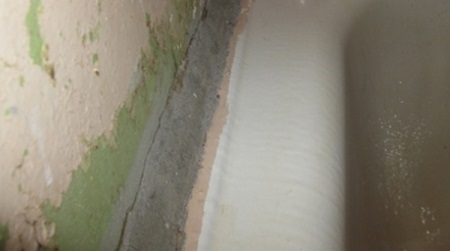
The gap formed between the wall and the bathtub - it is not always the fault of the master making repairs in the bathroom. Quite often it appears as a result of curved walls or because of non-standard dimensions of the room, not allowing to install a bath of the right length.
Since this problem is very common, mankind has come up with many ways to combat it. It is very important to eliminate the gap between the font and the wall. If this is not done in time, the consequences can be very unpleasant. This and mold, which inevitably appears at a constant accumulation of moisture, and puddles under the bath, requiring constant cleaning, and finally, a greater likelihood of a flood (because the moisture that has accumulated under the font, begins to gradually seep down to the neighbors).
In this article, we will look at the most popular ways of sealing the joint between the wall of the bathtub. By choosing one of them, you will be able to protect yourself from the big trouble that a small gap can cause.
Ways
There are several effective ways to seal a bathtub wall joint, from temporary solutions to permanent solutions. Which one to choose depends on your financial means and construction skills.
Sealant
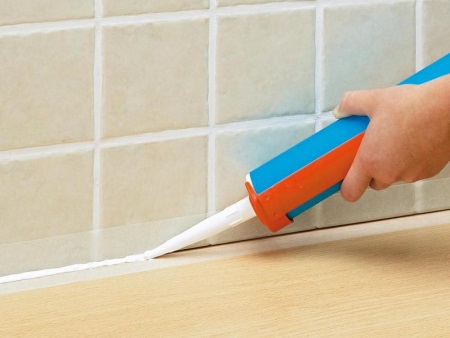
If the gap to be caulked is small in width, the best solution is a sealant. For bathrooms, there are special sanitary sealants that can be used in rooms with high levels of humidity. Here you have two possible options: silicone-based sealant or acrylic sealant.
Silicone sealant has all the qualities that allow you to use it in quite specific conditions of the bathroom: water resistance, elasticity, durability, resistance to temperature fluctuations and exposure to aggressive environments. Sealant on the basis of acrylic is not so good performance characteristics, but over it you can apply paint and enamel.
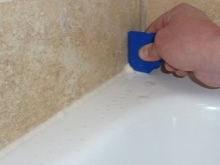
The sealant is poured into the gap with a special gun, in which the tube is tucked. Before sealing, the working surface must be cleaned of dirt and mold, degreased and wiped dry. Only after that can you fill the seam sealant. Remember that it takes at least 24 hours until the sealant dries completely. During this time, the bath can not be used.
Border
Bathtub curb is the most popular way to seal the font with the wall, as it is the most advantageous combination of price, durability and the amount of effort expended. In addition, the seam sealed with a curb looks neat, and sometimes even quite beautiful. As in the previous case, you need to choose one of two options - a curb from plastic or a curb from ceramic. Let's look at each of them separately.
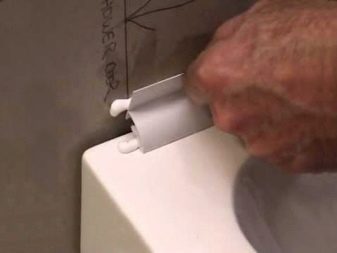
Plastic edging is considered one of the most budget-friendly ways to seal a seam. Its advantages are due to the peculiarities of the material: plastic bends well, so it can disguise even an uneven joint, in addition, plastic edging is not demanding in care and easily tolerates contact with aggressive cleaning agents. Plastic curb is glued over the seam with any waterproof building adhesive, and the joints between the parts are treated with sealant.
Ceramic edging is more expensive, but its durability is significantly longer. If it is carefully cared for, it will not lose its color and will retain its original appearance for decades. Ceramic edging is an elegant and beautiful solution for sealing a seam. Ceramic curb should be fixed in the corner between the wall and the basin with tile adhesive, in the same way as the tiles. The joints between the elements are filled with waterproof grout.
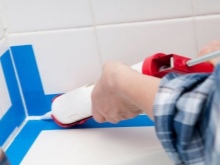
Tape
Tape for sealing the joint is rather a temporary or auxiliary means. It is advised to use it in conjunction with other materials such as sealant or assembly foam. By gluing the tape over the gap filled with these sealants, you will give the tub a finished and neat appearance.
Tape edging is a roll of synthetic material on a self-adhesive base. The adhesive composition used is water-resistant, so it does not lose its properties, even in prolonged contact with water. Many manufacturers impregnate the tape with antibacterial composition, which prevents the appearance of mold and mildew.
A roll of curb tape is not expensive, but it lasts for several uses. Edging should be renewed every two to three years. This procedure is very simple and will take you no more than an hour.
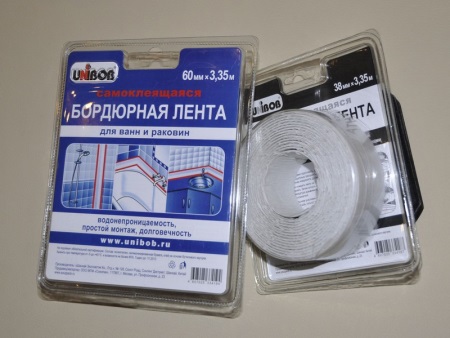
You should glue new curb tape to a surface that is free of glue residue and other contaminants.
For the tape to stick faster and last longer, it is better to treat the joint with a degreasing compound, such as an alcohol solution or acetone.
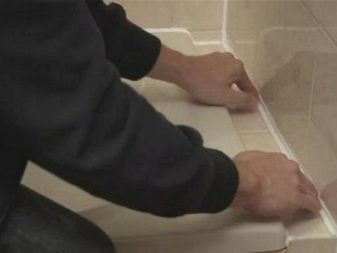
Cut off the desired amount of tape from the skein, heat a couple of minutes with a hair dryer along the entire length (for greater elasticity) and glue over the gap, moving from the corner of the bath. Before you begin the water procedures, be sure to wait a day - so glue composition to better seize.

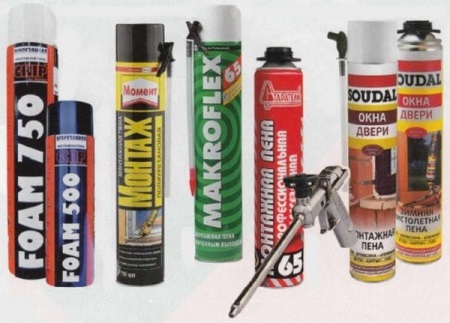
Assembling foam
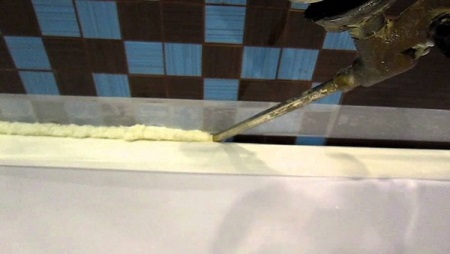
Assembling foam - this is almost universal building material, which an experienced craftsman can find many applications. One of them is the sealing of the bathtub with the wall. You can buy the foam at any construction store (do not forget to buy rubber gloves and masking tape) and immediately get to work, since no special preparatory work is required.
So, thoroughly clean and dry the work surface, then cover it with masking tape so that the foam does not stain the enamel of the font and ceramic tile. Shake the can well and very slowly and carefully fill the gap.
It should be borne in mind that the drying process significantly increases the volume of the compound, so we do the joint thinner than it seems necessary. We work with protective gloves, as it is not easy to wipe the foam from the hands.
When the foam hardens, take a sharp knife and cut it flush with the edge of the bath. The seam does not turn out very beautiful, so it is recommended to glue a border tape or lay a ceramic tile over it.
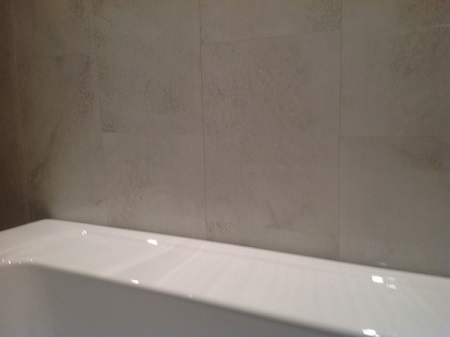
Tile
It also happens that the gap between the bathtub and the wall is so wide that none of the above methods can get rid of it. In this case, you will have to apply all your construction skills and build a border of tile. Tile is the most suitable material for finishing surfaces in the bathroom. It perfectly tolerates excessive moisture and sudden changes in temperature, it is not subject to corrosion and decay. In addition, ceramics for the bathroom is very durable, so this curb will last you until the next overhaul.
To seal the gap, it is best to use the remnants of ceramic tiles, which are facing the walls of the bathroom, and if they are not available, then try to find a tile close in color.
First, the gap should be filled with some kind of sealing compound. Since it is quite wide, the most suitable for this purpose is installation foam. When the foam dries, level the joint so that it was convenient to lay the tile on it. Then we prepare the tile adhesive according to the instructions and start laying tiles. Do not forget to insert plastic crosses between the tiles, so that you get even, neat seams. The next day we grout the seams with waterproofing agent.
For particularly large gaps we use another method, and instead of a curb we make a full shelf for soap and shampoo items. To do this, we construct a small formwork under the bathtub, which we then fill with cement mortar. After the mortar dries, tiling the resulting ledge of tile.
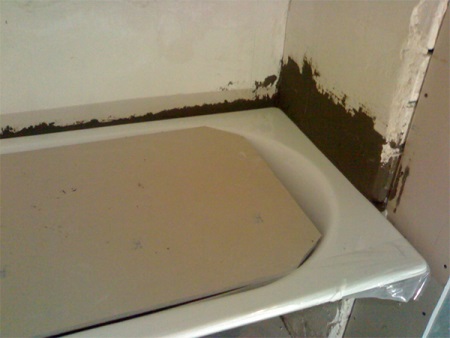
The mortar
Probably the oldest of all possible ways to seal the bathtub with the wall - sealing the joint with cement mortar. The mixture, consisting of water, sand and cement, hardens to form a hard and durable coating. This method was used in Soviet times, when the choice of building materials was limited. The joint was usually painted with oil paint. The result turned out, of course, not very aesthetically pleasing, but "for the ages".
First you need to prepare a cement mortar, mixing all the components in the right proportions. While the mixture is standing, clean out of the joint all the accumulated dirt there. To avoid flooding the floor under the tub with grout, install a container under the gap into which the mortar will drip.
If the gap is very wide, you can fill it with scraps of old rags soaked in grout. Specialists advise to pre-wet the work surface, so that it will adhere better to the grout. Then fill the gap with cement mortar, trying to make the seam as even as possible.
You can disguise the seam by gluing a curb tile or tiling on top of the dried cement.
What is the best sealant to choose?
Most of the above methods of caulking the joint between the wall and the bathroom involve the use of sealant - as the main or auxiliary means. Sanitary sealant is designed specifically for use in the bathroom, so it is difficult to think of a better tool to protect the surface from moisture and dirt.
It is very important to choose the right type of sealant. As we said before, bath sealants are available on acrylic and silicone basis.
We recommend using the latter, which, in turn, are divided into neutral and acidic.
Acidic sealants are budget-friendly. They have a pungent vinegar odor and, when applied, are dangerous to the skin, mucous membranes and respiratory tract. This type of sealant is not recommended for expensive, "delicate" materials.
Neutral sealants are more expensive, but they are of higher quality. They do not smell and are completely harmless to humans. They do not react with the material of the work surface and with cleaning agents. Professionals recommend choosing this type of silicone sealants for sealing the seam.
In the store, pay attention to the composition of the sealant. The content of silicone should be about half, about the same amount allocated to the filler, and the rest - the dyes, fungicidal additives, etc.
Rules
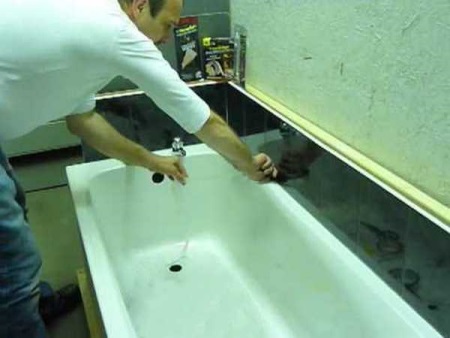
- Before you start caulking, it is recommended to fill the font with water. This way the tub will give shrinkage, which must be taken into account when filling the gap with sealing materials.
- To make the plastic curb fit tighter to the surface, it should be trimmed at a 45-degree angle on the inside.
- If you decide to seal the bathtub with the wall using cement mortar, it is better to additionally strengthen the font - for the reliability of the construction. You can do this by fixing small pieces of reinforcement in the wall every 15 cm.
- When working with cement or tile adhesive, do not allow the mortar to get into the drain of the bath. Experts advise to cover the bottom of the font with cellophane before starting work.