Bathroom sealants - choose the best, the correct application technique
Bathroom sealants are quite widespread. They perfectly seal seams, joints, gaps between tiles and plumbing, protecting them from moisture accumulation. Water splashes and condensation entering such openings create a favorable environment for the development of microscopic fungi and bacteria, including pathogenic ones. For example, black mold spores affect the respiratory organs and cause asthma attacks. Therefore, in the sealant for the bathroom often add fungicide - a special antibacterial substance that inhibits the growth of mold.
Types of sealants
Sealant is a mixture of polymer, hardener, filler, dye and other substances.
Basically, bathroom sealants are applied only to a dry and clean surface. The exception is silicone sealants, which are used on a slightly wet surface.
According to the type of polymer used, sealants are divided into the following types.
Silicone
The most popular, but also the most expensive. It has excellent adhesion to almost all materials, so it is suitable for any type of bath and exterior finish of the room itself. It is impervious to moisture, not afraid of UV rays, withstands high amplitudes of temperature fluctuations (from -50 to +200 degrees), has a long service life. Gives the shrinkage not more than 2%.
It is divided into:
- acidic;
- neutral.
Acidic still have a second name - vinegar, because of the characteristic smell. They are relatively cheaper than neutral, but not suitable for all metal baths, because, vulcanizing, can oxidize some metals and alloys. Acidic silicone sealants are used when working with plastics, wood and ceramics.
In other cases, a neutral sealant is preferred. It is excellent for caulking joints and gaps after repair work.
Acrylic .
Practically as long-lasting as silicone, also characterized by excellent adhesion to various materials, but costs much less. It is easy to use, UV-resistant, does not burn out, withstands temperatures from -25 to +80°C, but the joint is not highly elastic. Therefore, its use is not recommended for joints that are subject to deformation.
Instead, these joints can be covered with varnish, paint or a layer of plaster. Since the scope of application of the sealant is very wide, there are also non-water-resistant. When buying, you should definitely pay attention to this.
Polyurethane
The joint is smooth and elastic, resistant to mechanical damage. Also has excellent adhesion to various materials. Not seldom used when replacing old seams, in particular silicone seams. On top, if desired, is covered with a layer of varnish or paint. It is mandatory to work with a mask and gloves.
Silicone-Acrylic
This is a hybrid of both kinds, absorbing all the best properties of both - durability and strength. It can be used as an adhesive, for joining surfaces.
Choosing the best
Sanitary is considered the most preferred, i.e. with the addition of fungicides, silicone. It perfectly caulk joints, seals joints between plumbing fixtures and walls, fixtures, outlets and inlets of the distribution of pipes of sewage piping. In addition, they are ideal for updating old seams.
If the bath is metal, the silicone sealant should be neutral. For acrylic bathtubs, it is preferable to use acrylic, as it is closer in composition.
Properties
In addition to the basic polymer, the composition may include various additives. Some are added to improve performance, others to make it cheaper.
For example, it may be extenders (expanders), various fillers (chalk, silica flour) used to fill the wide seams, fungicide, organic solvents, dyes, mineral oils, instead of silicone plasticizers, rubber, etc. In any case, the presence of additives not more than 10% in the composition is allowed.
If such additives in the bathroom sealant more than 10%, you should refuse to buy, because you can buy a product of dubious quality with a short service life.
The main properties that any sealant must have: water resistance, durability and safety.
Best manufacturers
On the construction market there are many brands that produce sealants for the bathroom. It is not difficult to get confused. Let's consider the most popular ones.
Tytan (Titan).
Produces the Polish company "Selena" - inexpensive, excellent quality, often used for shower cabins. Available as acrylic and silicone. The only drawback: it comes in tubes of 310 ml.

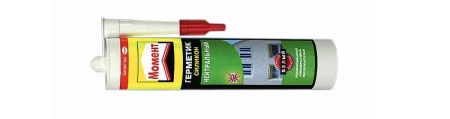
Moment
Another brand that is on everyone's lips. The country of manufacturer can be specified Germany, Belgium, the Czech Republic or Russia. This is a group of silicone sealants for various purposes. It is available in tubes of different sizes.
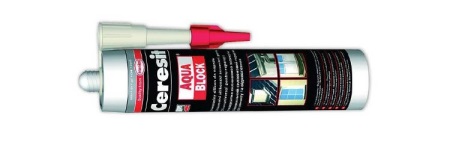
Ceresit
This branch of the German chemical giant Henkel - has also proven its worth. It can be used as an adhesive for attaching decorative elements, but it is not suitable for sealing aquariums as well as food surfaces.
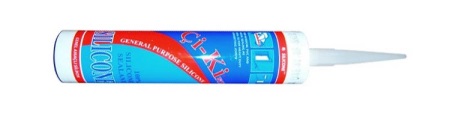
CIKI FIX
A sealant from a Turkish company, has a low cost, but good quality. Like Ceresit, can be used as an adhesive.
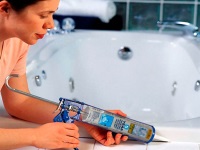
Application technique
Bathroom sealants can be produced with special applicators built into the tube for application. If they are not available, you will need to purchase an additional special gun. It comes in cordless and mechanical. The latter is inexpensive (150-500 p.) and excellent for domestic use.
You will also need:
- clean rags;
- Alcohol or acetone;
- A soft, narrow spatula;
- masking tape;
- Gloves and a mask for protection.
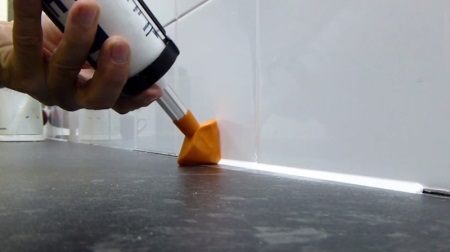
If you wish, you can purchase a special nozzle that is put on the tube. It allows the sealant to be applied and smoothed at the same time.
The surface is wiped dry with a clean rag and degreased with alcohol or acetone.
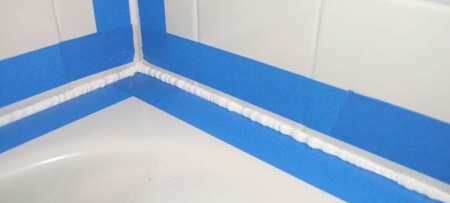
For the seam to be even and beautiful, and the sealant itself did not stain the surface, along it glued masking tape. In principle, it is not required, but desirable.
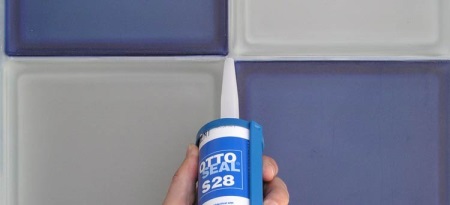
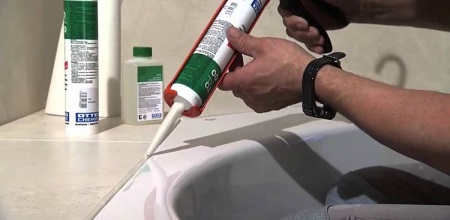
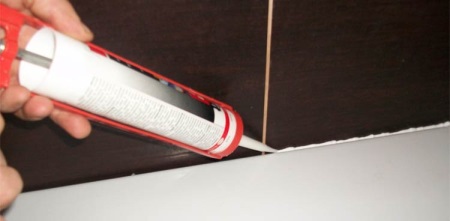
Now the sealant for the bathroom is prepared for work. At an angle of 45 ° cut off the tip of a tube, put a cap from the kit. Then the tube is inserted into the gun. If it comes with a special applicator, you do not need a gun.
It is important to squeeze the sealant smoothly with equal pressure on the trigger. If the seam is interrupted, it can leave voids where dirt and moisture will enter.
To make the seam smooth, run a damp silicone spatula over it. It can also be used to correct a seam if it is crooked. However, some professionals can successfully do without a trowel, just by gently running a finger over the joint.
After that, it remains to let the sealant dry and ventilate the room well. You should distinguish between curing time and drying time. These are completely different indicators. Curing time indicates how long it takes for the sealant to "cure," i.e. stop being sticky to the hands and harden. Drying time indicates how many hours it takes for the sealant to dry completely.
Replacing an old seam
Despite all the laudatory reviews about silicone sealant for the bath, over time it can form a layer of mold, and in the joint itself - microcracks. Such joints require replacement.
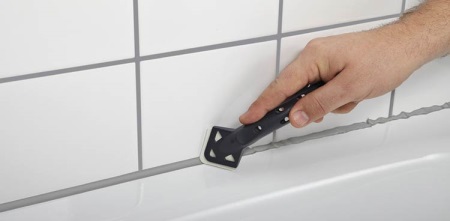
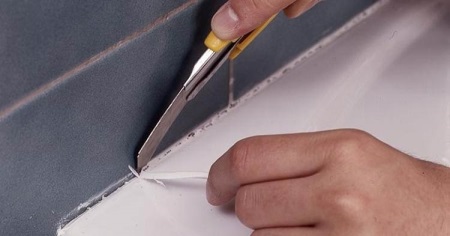
First it is necessary to get rid of the old joint. To do this, the silicone is scraped off with a knife, you can use a regular one or buy a special one for such work. This is the most time-consuming and labor-intensive work.
It is very important to remove the entire old layer. If a little silicone remains, a new layer of similar sealant will not lay well and the work will have to be repeated. Therefore, to replace the old silicone joints most often used sanitary polyurethane sealant. And to get rid of mold spores, the surface is additionally treated with antiseptic.
Be sure to check the wall between the bathtub and the wall. If there is mold there, from the treatment is subjected not only to the joint, but also to the entire wall. Because of the difficult accessibility, it is recommended to use products that can be sprayed.
Next, the seam is applied according to standard techniques. For reliability, you can use a plastic or ceramic curb, which is easily attached to the same sealant. In total, the work takes about 2 hours.
Another good and easy way to remove old sealant is to use special chemicals or silicone removers.
A layer of cleaner is applied to the old silicone sealant layer, which should be 2 to 3 times thicker than the layer of silicone. The waiting time to dissolve the old joint is 1 to 8 hours. To shorten the time, the available layer of the old silicone joint can be cut off with a knife. Once the procedure is complete, the silicone is removed with a cloth.
Safety Precautions
To protect the tiles and other surfaces from the substance is used painter's tape.
All work should be performed with protective gloves and a mask. It is important to remember that inhaled chemical fumes are very harmful, especially with polyurethane sealant. After caulking, the bathroom should be left open to allow ventilation.
Application Tips
The joints between the bathtub and the wall, as well as the joints of pipes are sealed on a mandatory basis.
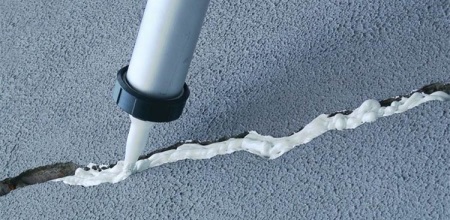
The width of the cracks also matters when choosing a bathtub sealant. Acrylics are best suited for wide jointsbut silicone, on the contrary, is preferable for sealing narrow.
Sometimes the sealant gets on the walls of the bathroom or tile. You can remove it by rubbing it with a rag soaked in solvent for paints and varnishes or purified gasoline. To do this, moisten a rag with it and gently rub the dirt. Do not pour too much cleaner on the rag, or it will leave streaks.
To renew old seams, it is better to use sanitary sealants. And if the problem of mold appearance is always relevant, you should check the ventilation system. Otherwise, you will have to conduct antifungal treatment of the entire room several times a year.

Tubes come in different sizes (80, 280 and 310 ml). For small household jobs, it is better to buy 2-3 small ones than one large one. It's much more convenient to work with them, and it's easier to calculate the flow rate.
And, finally, you should not save on bathroom sealant. The cheap one will not last long, which means that over time you will have to renew the seams. This is an extra cost and labor. Remember, the miser pays twice!


How long after you can use silicone sealant after caulking the seams of the bathroom? Nowhere could I find this information.
Svetlana, the curing time depends on the manufacturer. As a rule, the surface curing time is 10 minutes. Full curing time depends on the thickness of the layer applied: with a layer of 4 mm. to dry about 24 hours.