The gap between the bathroom and the wall: the easiest and most effective ways of sealing the gap
Even a small gap between the wall and the bathtub can cause major trouble. In the worst case, you will have to pay for repairs in the bathroom of your neighbor from downstairs, and in the best case - to watch as mold grows under your bathroom and various unsympathetic insects appear. You can avoid these consequences even at the initial stage of repair, because the main reason for the appearance of the gap lies in the uneven surfaces.
Causes
The walls in the bathroom must necessarily converge at an angle of 90 degrees, otherwise the gap is inevitable. If in the process of repair you noticed that the angle of convergence is wider than necessary, the walls must be aligned.The same with the floor: it must be perfectly flat.
It also happens that on an even floor, the bathtub itself is crooked. In this case, the situation can be corrected with the help of adjustable legs.

There is another reason for the gap.
If the bathtub is shorter than the wall along which it is installed, then the gap is unavoidable.
In this case, you will have to either:
- Install an additional false wall made of plasterboard;
- If the first option "eats up" too much usable space, punch through the walls and install a longer bathtub.
However, if the repair is already completed and there is no desire to dismantle the finish and start all over again, you can try to get rid of the gap after the fact. In most cases, this is not difficult, you just need to choose the most appropriate way.
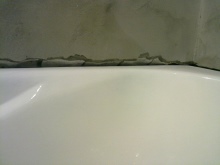
Mortar for caulking the gap
Cement mortar is an almost universal remedy that can solve many household problems. This is one of the most reliable, but far from being the most aesthetic solution, so, after all the work is completed, you will need to take care To give the sealed gap a more aesthetic appearance:
- Clean the crack of dirt and slime, and if necessary, remove the old trim.
- Prepare the mortar. When mixing, try to get the consistency of thick sour cream.
- Evaluate the size of the gap: if it's wide enough, the grout will spill onto the floor. To avoid this, first soak old rags in the mixture and fill the gap with them.
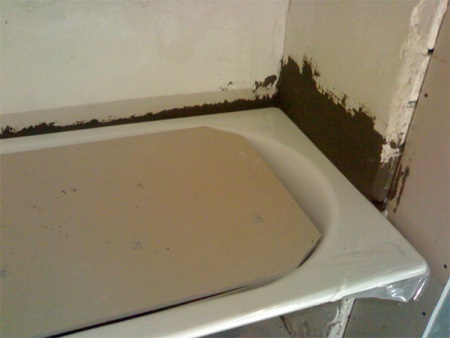
When the rags have dried a little, moisten the gap and begin slowly and carefully pouring the mortar into it. Make sure that the outside of the seam is as narrow as possible.

The method of masking the joint should be chosen based on the materials used to finish the walls. If it is tile, you can lay a curb on the edge from its remnants, which remained after the repair. If it is plastic panels, then simply lay a plastic curb on top of the seam. If the walls are painted, then the same paint and paint the seam, pre-patched it.
Assembling Foam
A faster, but no less versatile than cement mortar is assembly foam. With its help it is possible to fill the gap between the wall and the bathtub in a few minutes. Unlike mortar, installation foam can only be placed on a dry surface. Therefore, after you clean and degrease the gap, blot it from the inside with a dry rag and leave it to dry for a while.
It is best to work with gloves on, as the foam is very difficult to remove from the skin. And with all other surfaces, too, so pouring it into the gap, make sure that the splashes do not fall on the walls and bathtub.
To work in the bathroom, choose moisture-resistant assembly foam, this information is shown on the packaging.
Sequence of steps:
- Shake the can several times, insert the spout into the gap and begin to pour gently. Remember that as the foam dries, it expands very strongly, sometimes a few dozen times, so do not try to fill the gap to the edges. The installation foam dries for about an hour.
- At the end of the drying time, use a sharp knife to trim the edges so that the surface is as flat as possible.
- It can be masked using the same methods as in the previous case - with tiles, PVC edging or water-resistant paint.
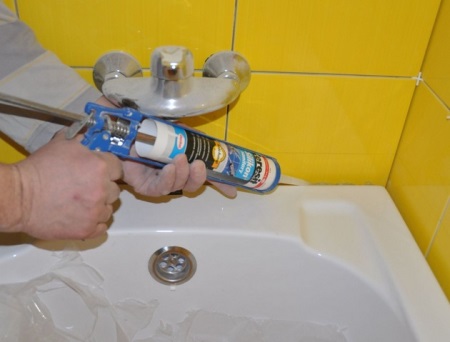
Sealant
The most modern means is a silicone sealant. In stores there is a large selection of sealants designed for different purposes of use. Among them you need to find sealant for the bathroomAs its composition has antibacterial substances that prevent the formation of mold. Sealants come in different colors, but we advise you to buy transparent, as the most universal option.
Sequence of steps:
- Remove any building material residue, dirt and slime.
- Treat the gap with a degreasing solution such as alcohol or acetone and wipe dry.
- Open the spout on the tube of silicone sealant and fill the gap with its contents, using an installation gun. The angle at which the spout is cut determines how wide the line will be. The sharper the angle, the narrower it will be. Make sure the line is straight and not interrupted.
- Before the seam dries, trim it by moistening your finger with a soapy solution.
- For more aesthetics, the seam can be masked. We described the methods in detail above.
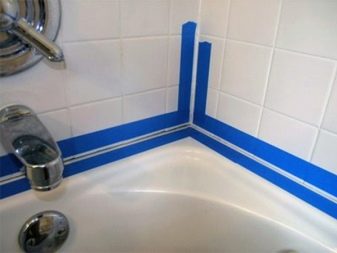
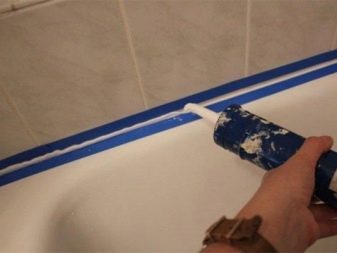
Within a day after sealing the seam with silicone sealant, you can not use the bathroom, otherwise all the work will be useless and the seam will quickly fall into disrepair.
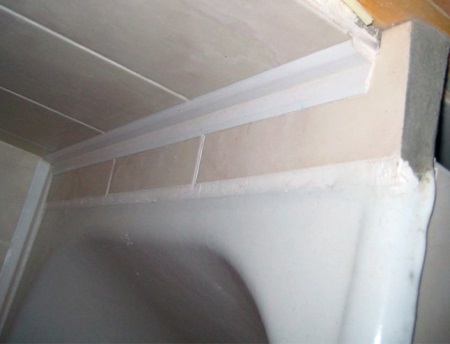
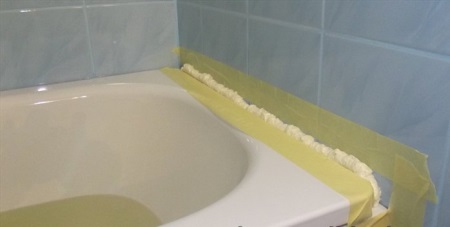
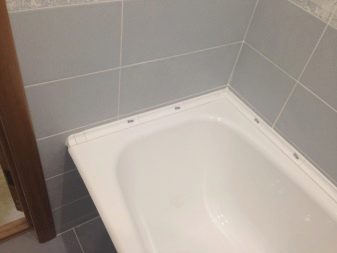
Plastic baseboards
Baseboards made of plastic - are the most popular of all skirting boards for the bathroom. They are successfully used to seal the gap between the wall and the bathroom. PVC skirting boards can be quickly and easily installed and just as easily dismantled. In addition, plastic is quite soft and elastic material, so this skirting can be easily adjusted to the size of the bath.
In stores, you can find plastic skirting boards with an already prepared adhesive base. We do not recommend using them in the conditions of the bathroom, as the glue applied to them is usually not water-resistant. It is better to use a water-resistant adhesive designed for plastic. It should be white, or better yet, colorless. Be sure to choose a fast-drying composition, as you will have to press the baseboard until the glue sets.
Sequence of steps:
- Clean, degrease and dry the gap.
- Take all necessary measurements and trim the baseboard at a 45 degree angle.
- Apply the plastic baseboard to the joint between the bathtub and the wall, without glue yet, and glue the painter's tape to the areas of the wall and the bathtub that are joined to it.
- Remove the baseboard and lubricate the gap with adhesive.
- Fix the baseboard in place and press it down for a few minutes.
- After the adhesive dries completely, you can remove the tape.
- Be sure to treat the joint between the plastic baseboard and the wall with bathroom sealant.
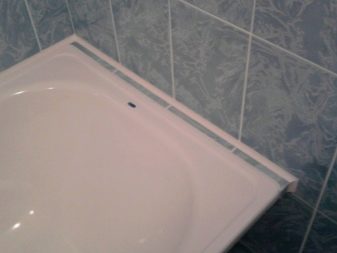
Tape edging.
Another inexpensive modern method that does not require much effort is the use of border tape. It is made of polypropylene and impregnated with a special compound that prevents mold.
Pros:
- does not require additional decoration;
- is characterized by high water resistance, so it can be safely used in conditions of high humidity.
The only disadvantage of this method is that even the highest quality curb tape will not last more than two years. But with active use of the bathroom, you will have to change it every year.
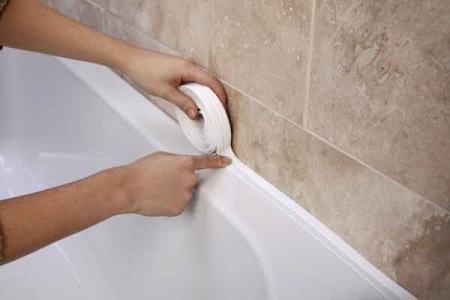
The width and thickness of the tape will depend on the size of the gap. Fill the pre-cleaned, degreased and dried gap with colorless silicone sealant. Next, cut a piece of tape, the appropriate size and apply liquid nails to it. Now you can glue the tape over the gap. You need to wait at least a day before you start using the tub.
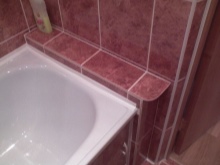
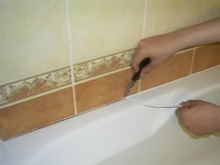
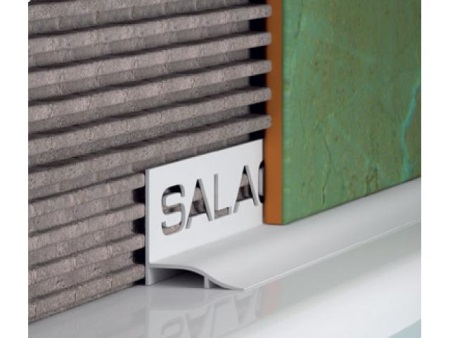
Ceramic tiles
All of the above methods of getting rid of the gap between the wall and the edge of the bathtub are suitable only if we are talking about a small gap, the width of which does not exceed 3 cm. If you are dealing with a wider gap, you will have to stock up on finishing materials and use building skills.
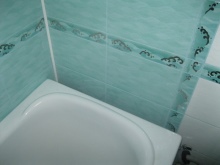
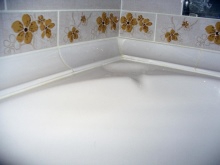
The gap can be sealed with tile. It is best to use the one that was left after tiling the walls. If there is nothing left over, simply purchase white tile of the appropriate size, so that a minimum of trimming is required. The white tiles will blend in with the white tub, provided you have a white tub and therefore the border will be almost invisible. If you used a decorative border when decorating the walls with tiles, you can also decorate the joint with the same border.

We begin with preparatory work:
- If there is an opportunity to get under the bathtub, install a wooden frame directly under the gap to prevent the cement mortar from getting on the floor.
- If this is not possible, seal the gap with a cloth soaked in mortar, as in the first method.
- Pour the grout into the gap and wait for it to dry a little.
- Then lay the tiles, adjusting the distance between the pieces with special plastic crosses.
- After a day, treat the joints with a matching color grout.
Combined method of caulking the joint
There are a huge number of options for sealing the joint between the wall and the bathroom. Above we have listed only standard solutions. But there is no limit to human imagination, so descriptions of "folk" ways of getting rid of this trouble constantly appear on the web. They offer both completely new solutions using original materials, and methods that are a combination of those described in this article.
Here is one such combined method:
- Fill the gap with installation foam and let it dry completely.
- Then you need to carefully cut off the excess and seal the seam with silicone sealant. This will make the surface more even and in addition will increase the water resistance of the construction.
- After the sealant dries, glue a curb tape over it. So, combined from the three different methods, this method should be three times more reliable.
You can come up with your own method of solving this problem. The main requirements are that it is waterproof and aesthetically pleasing.


Sealant will turn yellow over time. I have it that way. Gotta buy baseboards.