Bathroom curb - types, choice and installation
As you know, the main thing in the bathroom is to prevent the accumulation of moisture in the room. For this purpose, an additional ventilation system is installed in the bathroom, materials with water-repellent coating are used, and all joints are carefully caulked and sealed. In the Soviet Union, the problem was solved radically by covering all the seams and cavities with concrete mortar. It also used to grout the tub and the joints between the tub and the walls it was adjacent to. Dismantling a bathtub after that was an almost impossible task that required an enormous effort.

Now the choice is made in favor of more modern, but no less durable materials. In this article, we will tell you what you can close the seams between the bathtub and the wall, so that water does not fall under the tub and does not accumulate excessive moisture and dirt, with the help of curbs.
Features and requirements
In general, the same requirements apply to bathroom curbs as for any other bathroom finishes. Curbs must:
- provide tightness
- Have water-repellent properties
- be resistant to deformation
- be environmentally friendly and do not create an environment for the development of microbes and mold
- be resistant to detergents and brushes
- Combine well with other materials in the bathroom.
Materials
The main criterion by which they choose curbs for bathtubs and sinks is the material of manufacture.
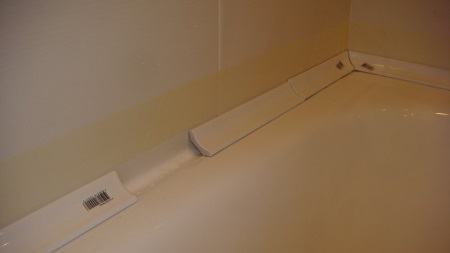
Polyethylene tape curbs for sinks and bathtubs
Reliably seal holes from moisture ingress. They are easy to use and cheap compared to other materials. There is a rich assortment of curb tapes in different widths, lengths and colors. Tape has a self-adhesive base, so even a child can cope with the pasting of such a curb.
A significant disadvantage of such a border is its short life. Such curbs, as a rule, are used as a temporary solution to the problem. If you want to extend the life of the curb tape and provide better protection from moisture, you can additionally use a sealant under the tape. However, even with this method of use, the tape will last you a few months at most.
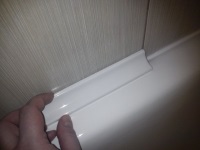
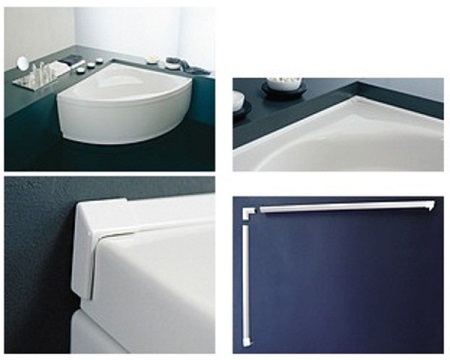
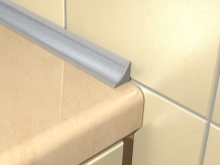
Plastic
The next long-lasting curb is a plastic curb. Made of a very practical and at the same time inexpensive plastic, such a curb is securely attached to the bath and wall with a special adhesive. At the same time plastic curbs are very light and do not weigh down the construction, they are easy to install and easy to clean. They combine well with any material. However, these curbs also have their disadvantages - plastic over time can dull and darken, it easily leaves scratches, and soon you will also have to replace it.
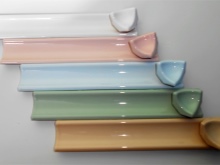
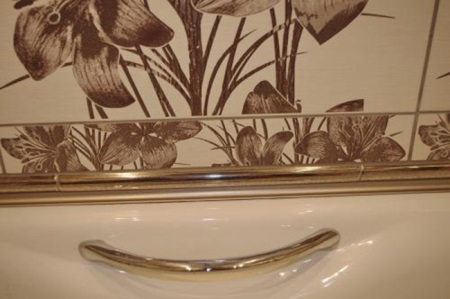
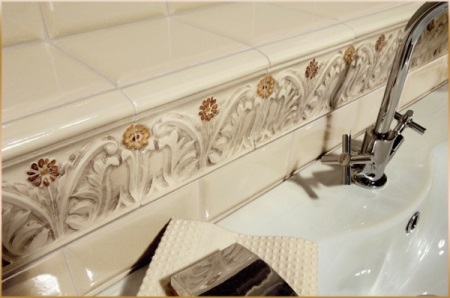
Ceramic
It should be matched with the tiles used in the finishing of the bathroom. Such curbs are much more durable than those described above, and can last you for decades. Ceramic provides a good seal and is durable in itself. However, you need to be careful - if installed improperly, ceramic edging can crack.
Installation of ceramic curbs involves the use of special equipment and certain skills.
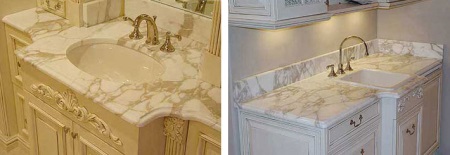
Natural Stone
Such borders, of course, require an appropriate interior. Marble and granite borders are almost eternal, but in a small bathroom, lined with regular ceramic tiles, they will look ridiculous. They are quite bulky and require certain skills during installation.
Calculate the quantity
To calculate the number of borders, you need to take the total length of the sides of the bath, touching the wall (better with a reserve) and divide this length by the length of the border.
Some people prefer to save money and buy the necessary length of curbs, and then, when something goes wrong, they search all over town for leftover curbs of the desired texture and color.
We recommend that you buy a couple of curbs to spare Just in case one of them cracks or you cut something wrong during the job.
In addition to the length, you also need to consider the width of the gaps between the tub and the walls. The fact is that when buying, you will need to determine not only the length, but also the width of the material used. If the gaps between the bathtub and the wall will be too wide, compared to the purchased curb, water will flow into them anyway and then the point of using the curb will be lost.
If you are going to buy a curb of ceramic or natural stones, measure the length of each curb line as accurately as possible, as it will be very difficult to correct it at home on the spot.
Installing the curb with your own hands
Plastic
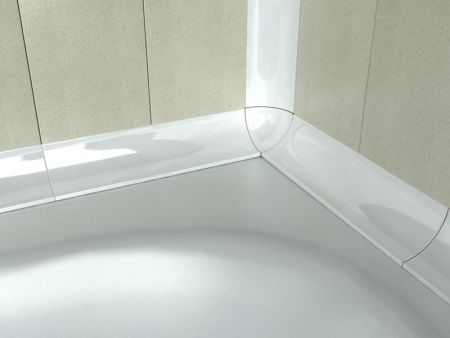
Installing a plastic curb is simple enough. In addition to the curb itself, we advise you to buy a plastic corner. This will not only save you from the need to fit butt edging, but also help hide traces of sealant and glue.
Sequence of steps:
- Clean dirt and water from the surface of the walls and bathtub to which you will be attaching the curbs. Wipe dry with a rag.
- Take sealantFill the gap, smooth it over the top with a spatula and wait until it is completely dry.
- From one end of the curb set aside a value equal to the length of one of the sides of the bath, which is adjacent to the wall, and carefully cut off the necessary piece.
- Cover the curb with tape so as not to ruin its appearance with glue.
- The tile around the place where you will glue the curb, it is also better to protect with something. For example, with masking tape.
- Press the curb firmly against the surface and fill the space behind the curb with sealant.
- Repeat the above steps for each side.
- Wait for the sealant to dry and remove the protective layer of tape.
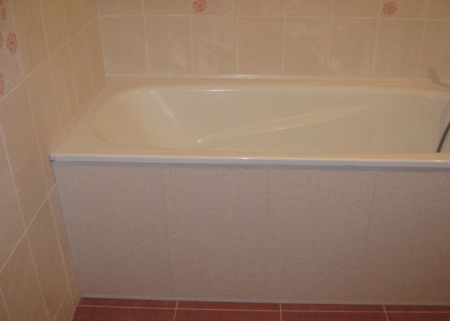
It is best to attach the plastic curb on top of the tiles rather than underneath them, as plastic is not long-lasting. Then later to replace the plastic curb you will not need to dismantle the tile as well.
Ceramic
Ceramic edging can be installed both under the tiles and on top of the tiles. The first method is considered more reliable, as it provides a better seal, but it is only suitable for those who have thought about the need to install edging in advance.
The order of installation of ceramic curbs for the bathroom:
- Clean the surface of the walls and bathtub to which you will be attaching the curbs of dirt and water. Wipe dry with a cloth.
- Fill the gap with sealant, smooth over the top with a trowel and wait for it to dry completely.
- From one end of the curb set aside an amount equal to the length of one of the sides of the bath, which is adjacent to the wall, and carefully cut off the necessary piece at an angle of 45 ° with a grinder with a diamond disk or carefully break off the extra piece with pliers. Grind the edges with a sharpening stone.
- Mix the tile adhesive according to the instructions.
- Apply the adhesive to the curb from the back side carefully with a trowel.
- Press the curb to the surface and remove any excess adhesive. Check that the curb is level by using a spirit level.
- Repeat the above steps for each side.
- When the adhesive dries, fill any remaining cracks with sealant or purchase a special tile grout to match the color.
To install a ceramic border on top of the tiles, you need to:
- Clean dirt and grease from the surfaces to which the curb will be attached
- Measure and cut pieces of curb of necessary length at an angle of 45°
- fill the space between the walls and the bathtub with sealant
- Apply water-repellent glue to the surface of the tiles
- Apply glue to the backside of the edging
- Press the edging firmly down
- Check if it is glued evenly with the help of the level and if everything is straight, glue the rest of the pieces of curb.
If you want to prolong the life of ceramic curbs, you can treat them with a hydrophobic agent.
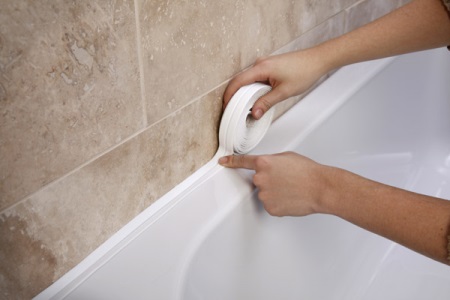
Self-adhesive curb tape
Installation steps:
- Purchase a roll of curb tape of the desired width and length.
- Clean and degrease the surface on which you will glue the tape. Allow it to dry.
- Open the package, take out the tape and remove the protective layer from the adhesive side.
- Carefully glue and flatten the tape with a rubber spatula.
- At the corners of the bathtub, attach the tape with an overlap to prevent leaks.


Ceramic curbs for the bathroom will buy. I'll have to get professionals to install them.