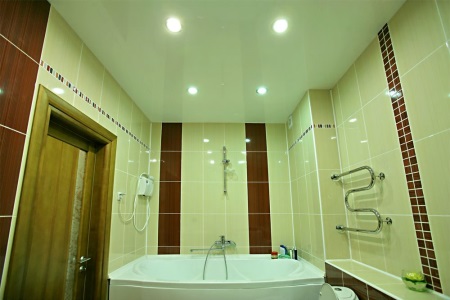
Recessed ceiling in the bathroom
The owners of bathrooms can breathe a sigh of relief: the nightmarish ceilings with permanent peeling of paint and plaster and the invariable red stains can say goodbye! Now we have a modern, aesthetic and affordable suspended ceilings, which are varied in design.
Advantages
Suspended ceilings can certainly be called a helping hand in the repair of the bathroom. They can solve not only the design component of finishing, but also a number of technical issues:
- Align the surface. If the bathroom ceilings are uneven, and you have long dreamed of eliminating this construction flaw, then a suspended ceiling is ideal for the realization of your desires. It is enough to correctly mark the level and on it mount the frame on special hangers. That's all! Even a novice can easily fix the panels on the frame. And in two days maximum, the bathroom will shine with a new, perfectly flat ceiling.
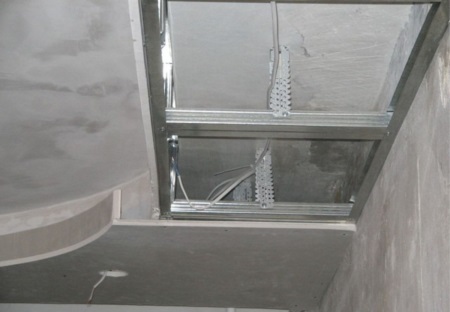
- Conceal the wiring. For any ceiling is a sore subject protruding wires. Ineptly concealed electrical wiring can ruin any artistic design. But a suspended ceiling allows you to avoid "kolhoza". The wiring can easily fit inside the frame between the old and new ceiling. Mounting a lighting system of several spotlights in general is only possible in a hinged design.
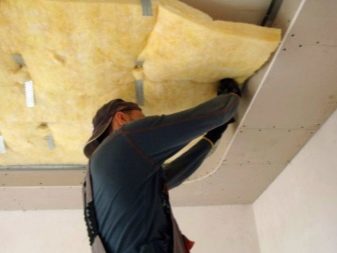
- Insulate the room. The suspended ceiling can be called a universal solution for the insulation of any room. In itself, the air layer will perform insulating function. If the room needs capital insulation, then mineral wool or any other insulator can be laid inside the frame.
Types
According to the method of installation and the materials used, suspended ceilings are divided into several types. For finishing the bathroom, 4 types are best suited, which we will now consider in more detail.
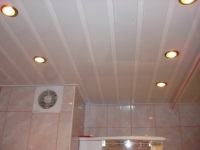
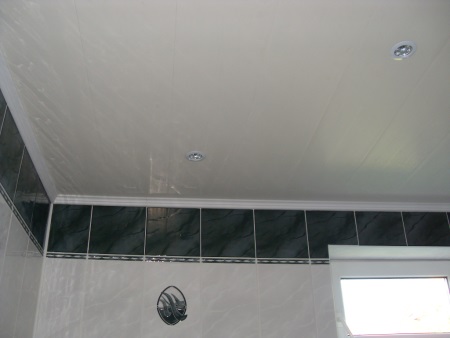
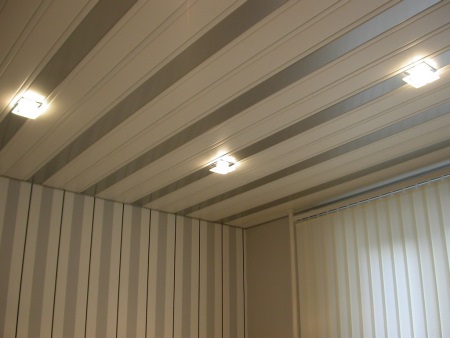
Of PVC panels.
Claim to be the most budget ceilings, preserving high aesthetic qualities.
The panels have a length of 2.5 - 3 m and a width of 10 to 40 cm. This finishing material is relatively new, but already has a strong position in the construction market. The low cost in combination with a variety of colors and textures allows you to implement any design ideas. In addition, the material is not afraid of moisture and is easy to clean. In construction stores a wide range of panels from the budget collection to the exclusive.
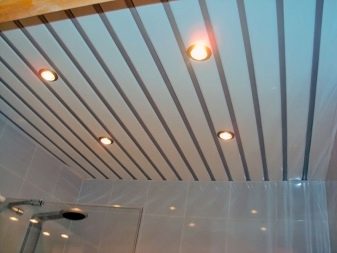
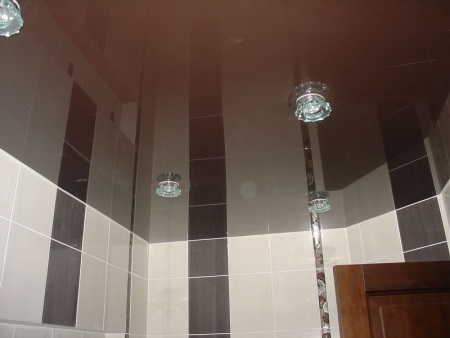
Rack and pinion
In their design steel or aluminum slats with special coating are used. The mirror-like steel surface of the laths gives the interior strictness and solidity. The material is durable, easy to handle and allows the construction of complex ceiling compositions of different levels. However, a grid ceiling will not be cheap.
Tile
This type of ceilings has become common in the finishing of offices and other public institutions. But for the repair of the bathroom, a tile ceiling is also appropriate.
The design is easy to install: a framework is mounted on the ceiling, in the cells of which square tiles of the appropriate size are installed.
Tiled ceilings are made of moisture-resistant materials: plastic, moisture-resistant plasterboard, metal and even mirrors.

Made of plasterboard or gypsum fiberboard
Pros: Plasterboard and gypsum fiberboard do not require special skills for cutting and installation, but with their help you can implement the most incredible architectural ideas and designs. It looks expensive and stylish.
The disadvantage of Is that plasterboard has a fairly large weight (sheet thickness of 9.5 mm will weigh about 22 kg), and installation of the ceiling of plasterboard under force only 2, and even 3 masters. Also, such a ceiling requires professional finishing. Puttying and priming - time-consuming and dusty processes, and to achieve an ideal surface quality, each layer must be dried for 1 - 2 days and sanded.
The use of moisture-resistant brands of these materials is mandatory.
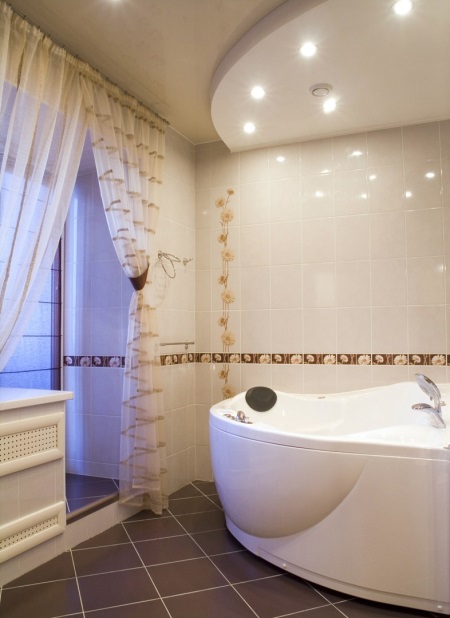
Tensioned
Gaining in popularity, and this is no accident.
You can choose a ready-made solution, or you can order a print of your own pattern on the material. Therefore, stretch ceilings open up truly endless possibilities in the design of the bathroom.
But this type of suspended ceiling is hardly suitable for independent installation, as it requires special skills.
Choice of material
The choice of material is determined by the type of suspended ceiling that you have decided to mount in your bathroom. The main requirement - all elements of construction and finishing must be moisture-resistant. In addition, pay attention to the appearance of the material and choose a suitable color to match the design of the entire bathroom.
In addition to suspended ceilings, there is a huge selection of other types of ceilings. If you are still in search and do not know what to choose, we advise you to read our article on choosing a ceiling in the bathroom.
Installing
The most affordable and easy to install is a suspended ceiling made of PVC panels. Therefore, in detail, we will consider exactly the installation of a suspended ceiling of PVC.
A minimum set of tools is required:
- hydro-level,
- cord for marking,
- screwdriver or construction stapler (if a wooden frame is mounted, the panels can be fixed with staples).
Before you begin installing the frame, you should carefully prepare the surface. The right thing to do is to remove old layers of plaster or paint, exposing the concrete slab. Then clean the surface from dust and treat it with a special septic solution. Pay special attention to places with leaks. Of course, the suspended ceiling will hide all the cosmetic flaws, but if you leave the old ceiling "as is", there is a great risk of the development of mold fungi.
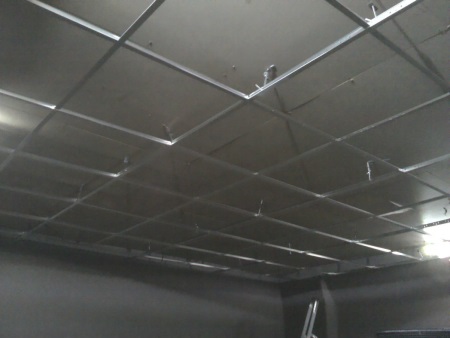
The first step in the installation of a suspended ceiling is marking. This is done using a water level and chalking cord (chockline). Having determined the lowest point of the ceiling, a mark is made on the wall. Then from this mark step down at least 3 cm (this is the width of the profile) and transfer the level to all walls. With the help of a chockline on the marks are hammered out lines.
Along the perimeter of the room on dowel nails mount the starting profile (UD). The lower edge of the profile must coincide with the beaten off line. Further on the ceiling with a step of 40-50 cm also with the help of cord to mark the ceiling profile CD. To fix the profile on the marked lines at a distance of 50-60 cm from each other hangers, they also n-brackets (sticks).
From the distance between the opposite starting profiles must be subtracted 1 cm - this will be the length of the guiding profile (CD). Guiding profiles of the required length are inserted into the starter profile. Hangers are bent down on both sides (the hanger takes the shape of the letter "U") and by means of small self-tapping screws fix the profile to them. The ends of the hanger, protruding below the profile, bend upwards.
If the differences in the ceiling are significant, "sticks" are used for the entire length, fixing one side of the ceiling on two hangers for each point of fixation of the profile. In large rooms, to avoid sagging ceilings in the center of the room across the direction of the profiles pull a cord. The height of the profile is regulated by the p-shaped fasteners.

Procedure:
- Under the mounted frame around the perimeter of the room fix p-shaped plastic profiles for the ends or PVC ceiling plinth with fillets. Panels are mounted on a frame one after another, screwing each one to the profiles with screws with a wide flat head.
- When installing the last panel in the polyurethane skirting board, there is a small trick: The panel is reduced in width exactly by the width of the lock, and in length - by the depth of the groove of the fillet. That is, if the width of the lock is 1 cm, and the depth of the fillet is 2 cm, then the panel is made narrower by 1 cm and shorter by 2 cm. This makes it easy to insert the panel into the skirting board, and then simply slide it in the right directions, until the gaps are completely eliminated. In the corners, use special joints or saw the skirting at a 45 degree angle.
- As the panels are installed, holes are made in them to install ceiling lights. After fixing the panel, the wiring is immediately inserted into the hole under the soffits.
Installation of the rack and pinion suspended ceilings or plasterboard ceilings is practically the same as the installation of PVC panels.
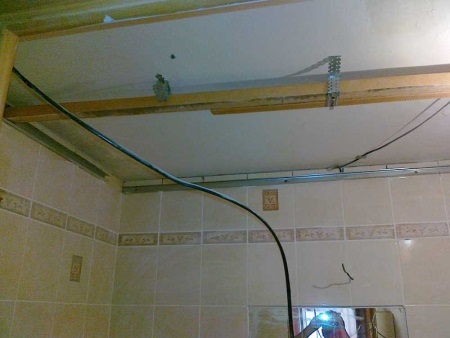
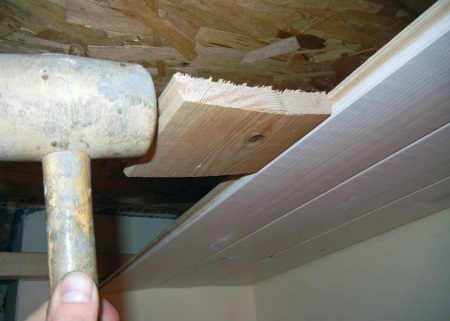
In some cases, wooden laths are used for the frame under the suspended ceiling. But in the bathroom, it is better to abandon them. Under the influence of humid environment, the laths are sure to deform, and the ceiling will hang.
Suspended ceilings are excellent for the bathroom. The choice of ceiling type and materials depends only on your preferences and financial capabilities. However, even a ceiling made of inexpensive PVC panels will look decent and allow you to save additional money on the crew of craftsmen.


A suspended ceiling is probably the most popular option. Especially when you need to save money. I installed everything quickly. Thanks to your recommendations - no problems with the installation of the suspended panels.