Whitewashing the ceiling in the bathroom
Whitewashing - this is the most traditional way of keeping the ceiling clean and white. For many centuries before us in Russia whitewashed huts special mixture based on limestone. Lime - an environmentally friendly and completely harmless to humans. It has disinfectant properties, which is especially important for the bathroom, because high humidity is the most favorable condition for the emergence of fungus and bacteria growth. In addition, this type of coating is good air permeability and absorbs moisture.
Whitewashing the ceiling is very easy, in the bathroom it can be done in just a few minutes. As a result, with a minimum of effort and money, you will get a fresh, beautiful ceiling covering, which, if necessary, can be updated very quickly.
Of course, this method also has its disadvantages. First, a whitewashed ceiling must be refreshed from time to time, because, covered with dust, the lime loses its original whiteness quite quickly. Secondly, the coating of lime is quite fragile, so when mechanical damage or because of poorly prepared work surface, it can flake off.

Preparing
Before you start the work, all surfaces and furniture are usually covered with plastic wrap to prevent them from getting into the whitewashing compound. When whitewashing the bathroom ceiling, there is no special need for this, as lime is easily enough to wash off from the tile. However, if in your bathroom is furniture and plumbing, made of expensive natural materials, it is better still to reinsure and cover it with plastic, and if possible - take it out of the room.
Next, it is necessary to clean the ceiling from the previous layer of whitewash. If the surface is fairly even and light, then you only need to refresh the coating. To do this, it is enough to collect the accumulated dust with a brush or vacuum cleaner.
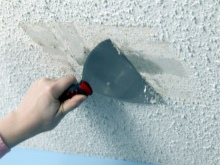
If the ceiling has not been whitewashed for a long time, the previous coating has darkened and begun to peel off, then you will have to scrape everything down to the plaster. Do it as follows: using a sprayer or a wet sponge, moisten the old whitewash, then collect the soaked lime with a spatula, and what remains - wash off with the same sponge. You should not apply too much force, otherwise the plaster will be left with scratches and dents, which will have to be sealed.
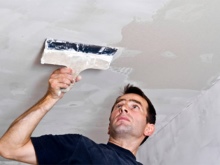
When the ceiling dries, treat it with primer. Composition for priming choose depending on the material we will use for whitewashing.
The choice of material
Usually for whitewashing the ceiling use lime, chalk or water-based paint. We have already talked about the advantages of lime above. The characteristics of chalk are almost identical. The advantages of whitewashing with water emulsion paint are that it dries quickly, is easy to clean and lies well even on unprepared surfaces.
Paint for the ceiling in the bathroom We discussed in detail in another article.
Nevertheless, for whitewashing the ceiling in the bathroom, experts recommend using acrylic-based paint. Such paint is excellent for use in rooms, which are characterized by high humidity and temperature fluctuations. Some manufacturers add to the acrylic paint components that prevent mold and mildew. True, covering the ceiling with acrylic-based paint will cost you significantly more than the traditional whitewashing with chalk or lime.

Thus, there are several options for whitewashing the ceiling, each with its own advantages and disadvantages. Which of them to choose - it is up to you to decide.
Preparing the composition
If you decide to whitewash the ceiling with water-emulsion or acrylic paint, then you do not need any preliminary preparation of the material. But with the preparation of the composition for whitewashing with lime or chalk will have to tinker.
Preparation of lime whitewash. To prepare the solution you will need:
- 10 liters of warm water, preferably filtered or decanted water;
- about 3 kg of quicklime;
- 3 to 4 tablespoons of coarse ground food salt;
- 0.5 kg of dye diluted in water;
- 0.2 kg of aluminium alum, available at the drugstore.
Pour a little water into a deep container, then add all the ingredients one by one. Add the rest of the water and mix well.
Preparation of chalk whitewash. You will need the following components:
- 5 liters of warm water, also filtered or distilled;
- 3 kg of sifted chalk powder;
- 1 tbsp of carpenter's glue.
Dissolve the joiner's glue in a container with warm water, then add the chalk powder in the resulting solution. Stir well.
To make the chalk whitewash look even brighter, add a little blue to it before it is applied to the ceiling. The result is a bubbly white color with a subtle bluish cast.
Tools and implements needed
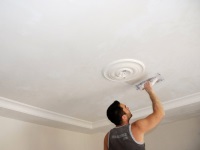
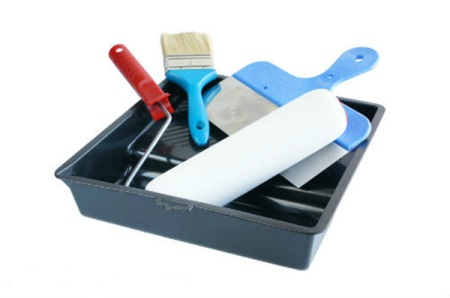
In addition to a large container and a device for mixing the solution, for whitewashing you will need: a stepladder, or a stable stool if the ceilings are low, several brushes of different sizes, a paint roller or a vacuum cleaner with a spray nozzle.
It is necessary to wear safety glasses, because the composition for whitewashing can strongly damage the eyes. Wear rubber gloves on your hands and hide your hair under a hat. Protect your airways with a respirator or a regular medical mask.
Applying
So, whitewash on the ceiling can be applied in three different ways:
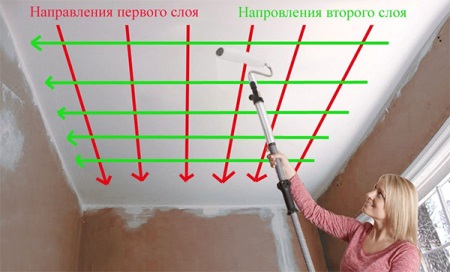
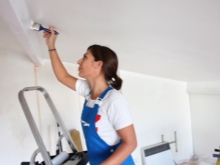
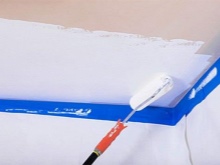
- With a paint brush. For the main work you will need a brush with a width of 20-25 cm, and hard-to-reach areas and corners can be daubed with a brush narrower. If the handle of the brush is not long enough, attach it to any light stick (for example, from a plastic mop). Work with the brush in a reciprocating motion, moving it in one direction. After the first layer of whitewash has dried, apply the next layer. The second layer should be applied perpendicular to the first.
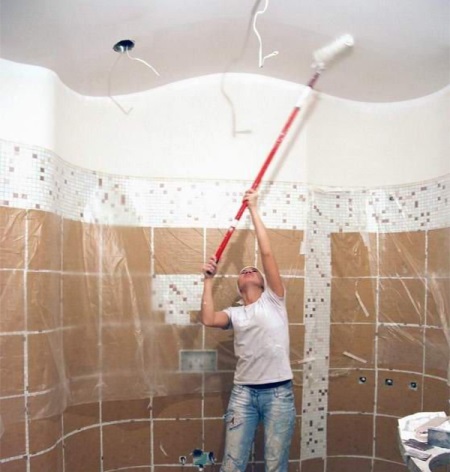
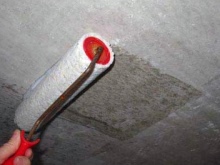
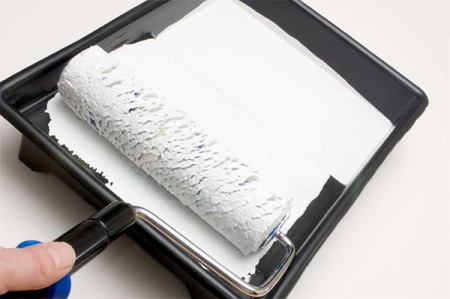
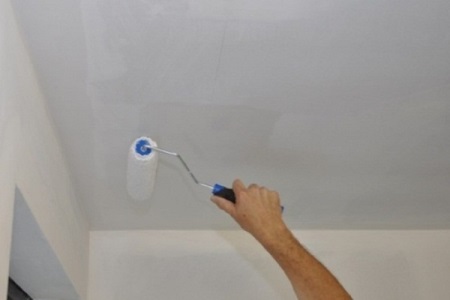
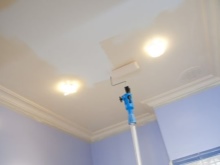
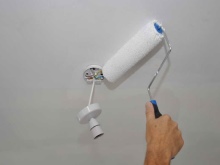
- Using a roller. It is much more convenient to work with a paint roller, as it distributes the paint over the surface in a thinner and more even layer. If you prefer to work with a roller, you will need a paint tray. Pour some solution into it, dip the roller and begin to apply the whitewash to the ceiling in wide strokes. You can work in different directions, most importantly, make sure that the coating is even.
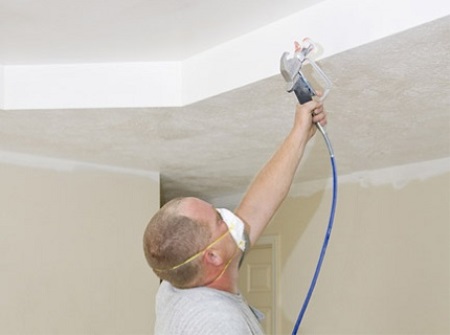
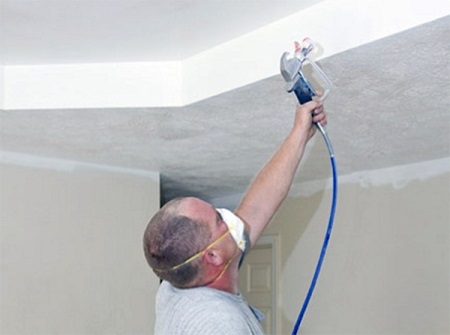
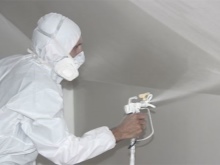
- Using a vacuum cleaner. You will need a spray nozzle, which is also called a "spray gun". To do this, you need to choose a mode of operation in which the jet length will be about a meter. In the settings, set the pressure of 3 or 4 atmospheres. Paint on the ceiling should be applied in a circular motion, avoiding runoff. If necessary, you can apply a second coat.
To achieve a perfectly even finish, you can combine the first and third methods. Apply the first layer of whitewash with a paint brush and the second with a vacuum cleaner with a sprayer.
Tips
- To make the coverage as even as possible, you should not be limited to one layer of whitewash. The optimal number of layers is from 2 to 4. At the same time, each subsequent layer should be applied to a completely dry surface.
- During the whitewashing, pay attention to the location of lighting fixtures. The first and penultimate layers of coating should be applied perpendicular to the light source, and the last - parallel. In this case, traces from the roller or brush will not be visible.
- The coating will be durable and will not lose its original appearance for a long time if you let it dry on its own without using heaters, fans, hair dryers, etc. You should also take care of a freshly whitewashed ceiling from sunlight, but in the bathroom it is not a problem.
- If you whitewashed the ceiling with lime last time, you cannot use another type of coating next time, and vice versa. You can only use lime on top of lime, and only chalk on top of chalk. Otherwise, the ceiling will be covered with unsightly stains and streaks.
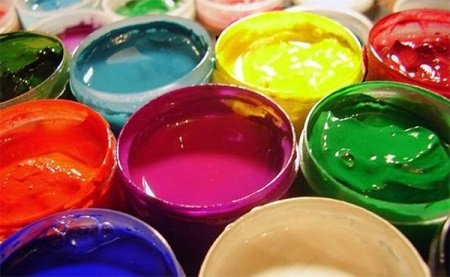
- If you do not like a snow-white ceiling, you can add color pigments to the whitewash, achieving various shades. For example, to give the coating a greenish hue, you can use chromium oxide. To give a milky or beige hue usually use burnt sienna or umber, natural pigments. Ochre helps to achieve ivory color, and minium is used for pinkish and reddish shades.


The ceiling is most evenly sprayed with a sprayer. Tested.