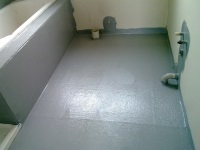
Floor screed in the bathroom
Any major repair of the premises begins with the preparation of the floors for finishing. Many who have just purchased an apartment, faced with the fact that the floors in it do not look the best way. Concrete slabs lie unevenly, there are numerous potholes and bumps, and in some places there may even be pieces of rebar sticking out of them. That is why it is so important to perform a quality floor screed in the bathroom - the application of an intermediate floor coating between the base and the final finishing.
Screed allows:
- hide unevenness,
- Provide additional thermal and sound insulation,
- Creates the necessary degree of technological slope of the floor,
- evenly distributes the load on the base,
- makes it possible to hide some communications,
- Gives the opportunity to raise the floor to the desired level.
Make a screed floor in the bathroom by yourself is difficult, but we will try to help you, after reading our article, you will be able to carry out these works without involving professionals. But first, we want to draw your attention to the fact that it is necessary to calculate the height of the floor in the bathroom, taking into account that it should be a few centimeters lower than in other rooms.
If there is a flood in the bathroom, the water will not immediately flood the rest of the apartment and you have more time to eliminate the consequences.
Varieties of
The main components of screed are water, sand, cement and crushed stone. If you need to level significant differences in the height of the floor, or if the floor base is not strong enough and it needs to be strengthened, keramsite or perlite is added to the mixture.
Screed can be:
- wet,
- dry,
- semi-dry.
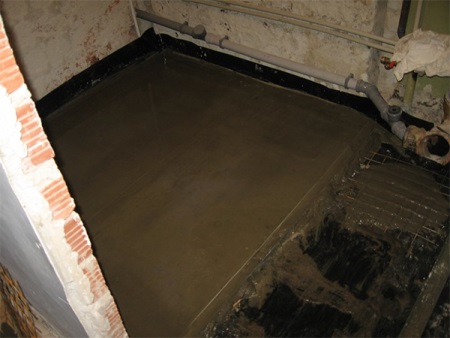
Wet
Wet screed is considered ideal for rooms with high humidity. When using a wet screed, you should remember that its thickness should be at least 3 centimeters. Therefore, if you have ceilings in the bathroom are already low, it is not recommended to use it.
The waterproofing layer can be performed both on top of the wet screed (in this case we are talking about the so-called knitted screed), as well as under it. In addition, you can also lay an additional thermal insulation layer under the screed. If you plan to use decorative flooring in the bathroom, which is sensitive to the slightest differences in height, over the screed or instead of it is done pouring floor - a special coating that makes the floors perfectly smooth and even.
Dry
When using dry screed in the bathroom, you need to exercise caution, as there is a probability that over time, such a screed will crack under the influence of moisture. Therefore, in the bathroom, such screed is rarely done. In addition, it will cost an order of magnitude more expensive than other types of screeds, as the consumption of construction materials will increase.
When performing dry floor screed, first lay a layer of expanded clay or crushed stone, then the dry mixture is evenly distributed, and moisture-resistant gypsum board sheets are placed on top.
Among the advantages of this type of screed is the fact that it does not require any special labor costs, and it will be the least dirty in the apartment. In addition, on top of the dry screed is not necessary to lay any additional coating, except directly decorative.

Semi-dry
When making a semi-dry screed, lightweight aggregates are added to the solution, which reduces the load on the floors, reducing the weight of the coating, and also dries much faster, compared to the wet screed.
This screed will cost more than a wet screed, and also requires special skills and the use of additional equipment. So, first you need to knead the screed mixture by mixing water with the necessary components in the right proportion, and then, after drying, the screed must be grouted to get rid of any irregularities and bumps.
There is another qualification of screeds, which is based on which layers separate the screed from the base.
- If the screed is made directly on the substrate, we are talking about the so-called bound screed.
- If a separating layer is used between the screed and the base: a polyethylene film or other waterproofing material, then this screed is called a separating screed.
- If the room requires additional noise or heat insulation, then between the screed and waterproofing layer is laid additional noise or thermal insulation layer. In this case it is a so-called floating screed.
Subfloor preparation
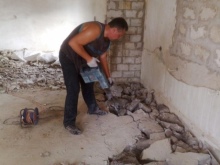
Before you lay any of the above types of screed, it is necessary to prepare the substrate under it. If previously in the bathroom has already been done screed, its old layer must be completely removed.
Screed is a monolithic layer, which must be distributed evenly across the surface. Otherwise it will quickly crack and cause you a lot of trouble. After removing the old screed, you should thoroughly sweep the floors and grout any cracks in the subfloor, if any. Some builders recommend additional priming of the subfloor before screeding.
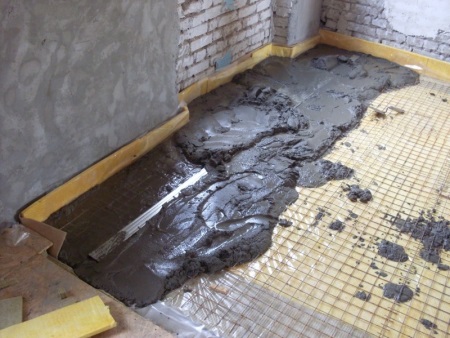
Then it is necessary to carry out the installation and wiring of communication pipes. As we have mentioned, all communications are hidden under the screed, and heat and waterproofing is done bypassing them.
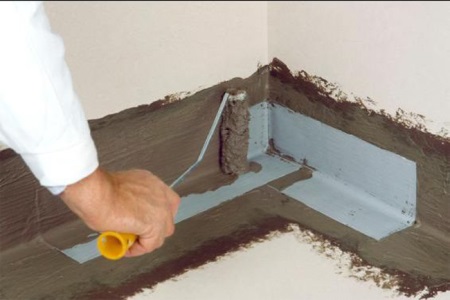
Extremely important stage of preparatory work is the laying of waterproofing. Experienced craftsmen advise to use in the bathroom bitumen mastic and various roll waterproofing materials. Such waterproofing will help protect not only the floor, but also the bases of the walls, as it captures the walls to a height of 15-20 cm from the floor.
Preparation of the mixture
Regardless of which screed you will use, you first need to Calculate the average consumption of mixture per square meter of area, as well as to determine how thick the screed will be in different areas.
Sequence of steps:
- To do this, using a leveler, find the lowest and the highest points of the floor.
- Add to the highest point the minimum height of the screed that is allowed in the room and calculate how thick the screed will be at the lowest point.
- Find the average value and multiply it by the amount of mixture consumption per square meter.
If the difference in height in different areas is quite large, the mixture should be bought with a reserve. Otherwise, follow the instructions on the package with the mixture.
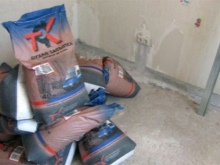
Here is an example: Let's say you are using a cement mixture for screed, which has a consumption of 13-15 kg per 1 square meter at a thickness of 1 cm.
If the area of the bathroom is 15 sq. m. and the average thickness of the screed is 5 cm, you will need to multiply the average consumption of the mixture by 14 kg/m2*5 cm*15 m2. So you only need about 1,050 kg of mix in total. That's 42 standard 25 kg bags.
Such calculations are convenient when using ready-made floor screed mix. If you are planning to use a cement-sand screed, then you need to start from the fact that for 1 part of cement is usually used 3 parts of sand.
The average consumption of cement for a cement-sand floor screed of 1 cm per 1 m2 - 5 kg, and sand - 15 kg.
If you plan to perform a cement screed, it is better to take ready-made concrete. In any case, the amount of consumption of cement mixture or concrete per square meter of area should be clarified with the seller or the manufacturer.
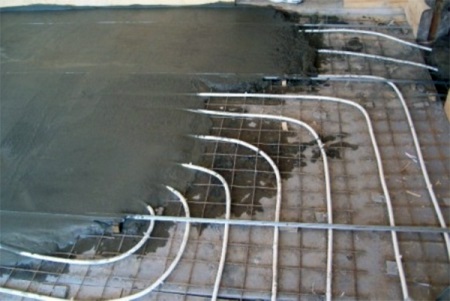
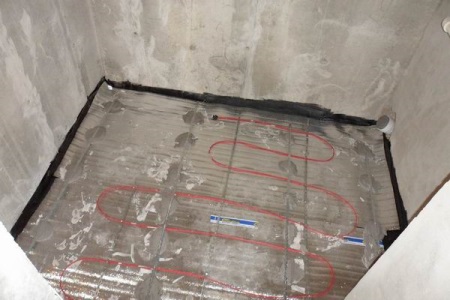
In some cases, builders also add special additives to the mixture, which minimize the amount of water required to prepare the mixture. At the same time, the mixture remains malleable and easy to apply. Plasticizers for concrete screed are used when installing a floor heating system in the bathroom.
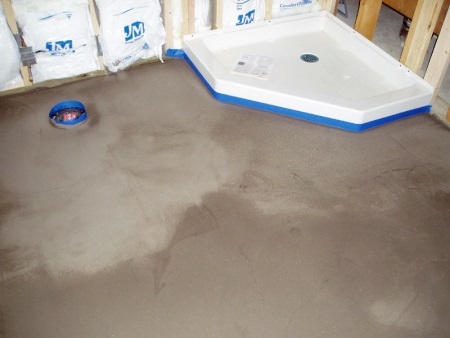
Installation of thermal and moisture insulation
Moisture insulation in the room with high humidity is always needed. There are coating, plaster, cast, roll and fill varieties of moisture insulating materials.
Floor insulation is necessary in homes with a cold base. As a rule, these are private houses, as well as apartments that are located on the first floors of buildings.
The need for a thermal insulation layer is eliminated in the case if you are planning to install a system of "warm floor" in the apartment. A layer of expanded clay, foam plastic, polystyrene concrete, cork material, glass wool or mineral wool can be used to insulate the floor.
Installing beacons
To screed the floor as evenly as possible, install special beacons - guides from a T-shaped profile or wooden bars. All beacons must be placed at the same level - where the height of the screed above the floor will end. Beacons can be both left in the screed and removed after the screed is done. If you plan to leave the screed beacons inside, they must necessarily be treated with an anti-corrosive or water repellent, so that over time they do not rot and because of them do not form cracks.
Work steps:
- First measure out about 20-25 cm from the wall. This will be where the first lighthouse will be located. The others will be located at a distance of about 40 cm from it.
- In the place where you plan to place the lighthouse, at a certain distance from each other, dot a few tubercles of cement. These will hold the beacon in place.
- Place beacons throughout the room and allow the cement mortar to harden. Only then proceed directly to the execution of the screed.
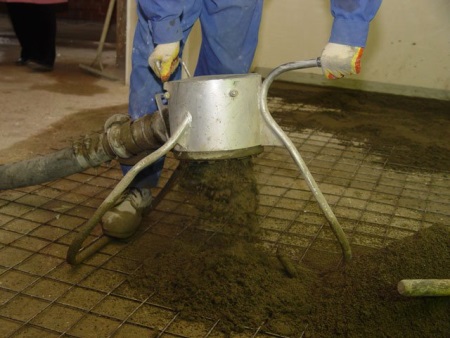
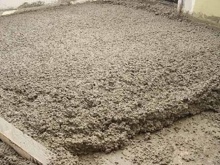
Screeding technology
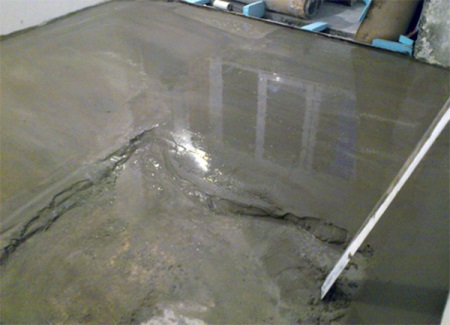
It is recommended to pour the screed all at once over the entire area of the room.
Water-based screed mortar hardens after 1-1.5 hours. Therefore, it is necessary to work with it at a fast pace.
Pouring is carried out in strips, between the established beacons. If you are not planning to leave beacons in the pouring, then you fill in the strips between them one by one. After the mortar dries, the lighthouses will need to be removed, and the distance between the strips filled with the remaining mortar.
Here are a few tips for pouring the floor:
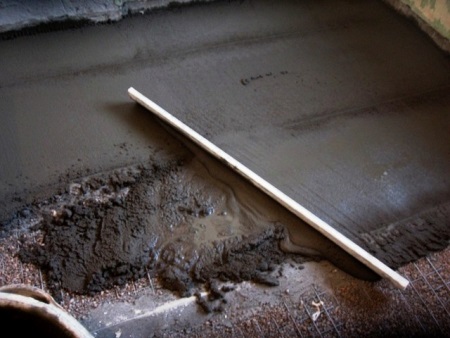
- Pouring should be started from the farthest corner from the entrance door.
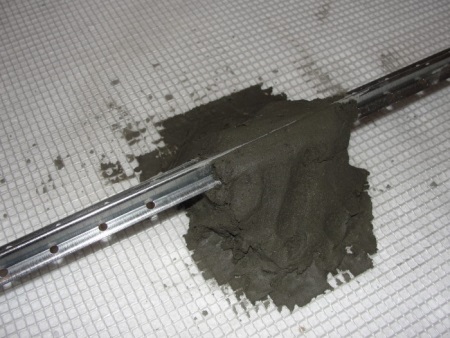
- The mortar is poured slightly above the level of the screeds, and then tamped down and leveled with a special tool - a rule. The rule is placed with its ends on the screeds, close to the wall, and, by constantly moving it from side to side, it is gradually pushed forward. Surplus mortar is used to pour the next strip.
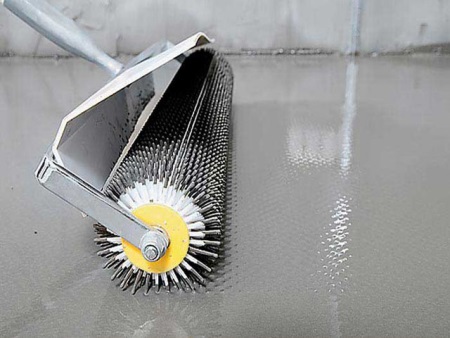
- Wet and semi-dry screeds will need to be additionally grouted after pouring, so that the surface is perfectly flat. This can be done both manually, making circular movements with the tool, and with a special machine for grouting floors. The surface of the screed in this case it is necessary to slightly moisten with a sprayer.
- After grouting, you should once again check the level, how evenly you have distributed the screed, whether there are any misalignments. If everything is even, the screed is covered with a polyethylene film for two weeks, periodically checking its condition and maintaining the proper level of humidity.
- Some experts advise in the process of pouring the floor to pierce the mixture with a thin metal rod. This is done to avoid the formation of voids with air in the screed, which can later lead to cracks.
- Complete drying of the screed takes up to 28 days.
Now you can find on sale mixes for the so-called self-leveling floor. Work with them is really easier - you will not need to install beacons or grind screed.
Sequence of operations:
- The mixture is distributed over the surface in an even layer, starting from the far corner of the room.
- Once the mixture covers the surface of the floor, it will need to be evenly distributed with a squeegee or trowel and pierced with a special needle roller to prevent air bubbles in the solution.
Such mixes are really more convenient than classic mixes, but they will cost you considerably more. In addition, on large areas, self-leveling floor is not very convenient to use - whether or not you have to divide the room into several sectors and pour them in stages.
Reinforcing the top layer
Some to give strength to the floors additionally use the so-called topping - a special mixture, which is applied over the screed to strengthen it. This mixture may have a quartz or metal filler, or contain corundum.
The topping is spread evenly over the surface and rubbed directly into the screed. It is then treated with a special compound.
Using the topping to strengthen the screed is justified if you are not planning to cover the screed with any additional decorative coating. If you plan to lay tiles, laminate or other materials in the bathroom, there is no need to use additives.


Screed - the most important stage in the repair of the floor. If it's even, you can put any kind of flooring on it. Our flooring was not very even. We put the laminate - it squeaks((. And in general, it is better to buy an apartment, so that the difference in the level of the floor was minimal. We had a skew in one of the rooms as much as 7 cm.
Example: 15 sq. m. bathtub - is that like a room?
Actually the article is interesting, but opinions on the dry screed with Keraflur dry filler are directly proportional. Some like it, others who have tried this innovation, respond negatively. Of course, in an apartment somewhere on the upper floors dry screed is the best option.