3D poured floors - durable and beautiful
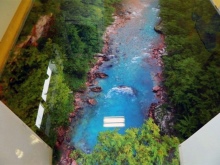
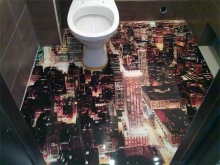
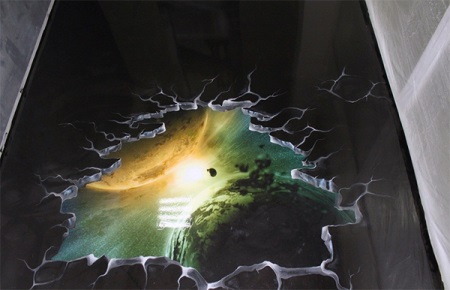
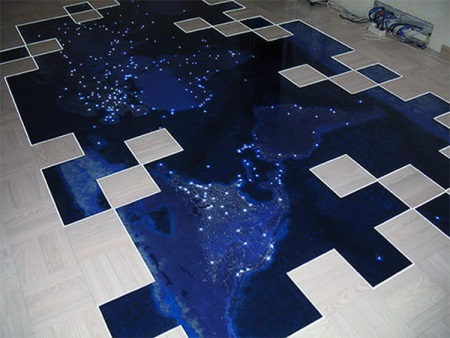
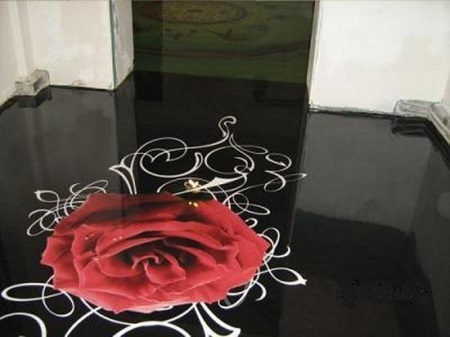
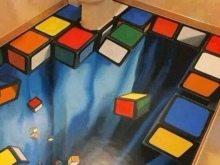
Making repairs, for some reason, many people focus on the walls and ceilings, forgetting that modern design ideas allow you to realize absolutely any fantasy. One such idea is the 3D poured floors. They allow you to create individual compositions of drawings, flat and volumetric objects, mesmerizing the eye. The images are so realistic that they look like they are about to come to life. The technology of poured floors is not so difficult if you follow all the steps of their installation accurately. At the same time, they can last for several decades.

What are hardwood floors?
Poured flooring is a polymer filler that is applied to a pattern or image and subsequently hardens. This creates a seamless coating. The drawing itself is applied over a base layer, and it is the finishing polymer filler that allows you to achieve the 3D effect. The thicker the transparent top layer, the more realistic the effect. It is not necessary to use ready-made drawings, you can make a decorative layer of sand or other natural materials inside the surface.
Experts advise to trust the professionals in the laying of poured floors, but everything can be done with your own hands, it is not so difficult. But it will have to observe the technology quite accurately.
Advantages and disadvantages
Poured floors are very reliable and practical, but the list of their advantages does not end there.
You can highlight the main advantages of such flooring:
- The surface of the floor is perfectly flat and smooth;
- Coating seamless, so there is no risk of water accumulation and mold formation, as in the joints connected to each other coverings;
- Influent floors do not rub off, so they can serve for decades;
- The coating has a high waterproofing, and this is an important point in the laying of the filler floor in the bathroom;
- reliability, practicality, and impact resistance. The risk of chips and scratches is minimal. At the same time, a high resistance to chemical attack is also provided;
- environmentally friendly and non-toxic;
- ease of cleaning and uncomplicated installation technology;
- resistance to UV radiation;
- wide scope for the realization of design solutions.
Poured 3D floors have some disadvantages:
- long drying time (up to a week);
- expensive maintenance;
- the price of poured floors "bite";
- It is difficult to dismantle the floor;
- if the floor is wet, there is a very high risk of slipping.

But all the disadvantages are outweighed by the pros, because the poured floors have a very long service life. Yes, and most of the cost goes precisely on the preparation of the image and the floor base.

Types
All poured coatings are divided into two types:
- One-component .. These floors are needed only to create a completely flat surface to later finish it. To obtain such coatings are used dry mixtures, which are dissolved in water strictly according to the instructions. The resulting solution is applied to the prepared base and is smoothed.
- Two-component. Such coatings are already used for decorative purposes. The floors are made with the help of a resin and a hardener. Sometimes silica sand is added to the mixture, which gives the property of increased strength. The resulting mortar is applied to the prepared substrate and smoothed.
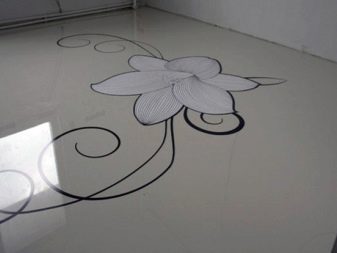

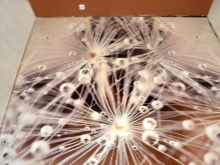
3D effect
In essence, 3D floors are laid in much the same way as conventional poured flooring, but just take into account some nuances. Either the image is applied to the base layer with acrylic paints, or a banner or vinyl film with a ready-made picture is used. Print the image on such a film can be in the appropriate firm, which has similar equipment. Of course, the second method of obtaining the image will be significantly cheaper than the first, where it is necessary to use the services of an artist. How the 3D effect is achieved will be described below.
Technology
The technology of laying such a floor is not so difficult, but to achieve the 3D effect, you need to take into account certain details. The air temperature in the room where the floors will be laid should not be lower than 10 degrees Celsius.
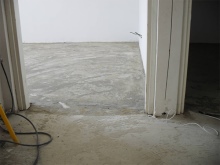
Preparation of the base. The base must be perfectly level.
The concrete screed must be prepared in advance. To do this you must:
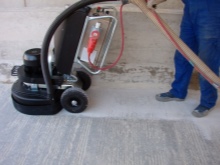
- grind the concrete base with a special machine, and carefully remove all protrusions with a chisel or hole punch;
- get rid of all cracks and possible chips. To do this, they are filled with cement mortar or epoxy resin;
- thoroughly clean dirt from the screed, and remove accumulated dust with a vacuum cleaner designed for industrial purposes;
- Make sure there are no oil stains on the surface, otherwise the floor will eventually flake off. If you have stains, you must get rid of them.
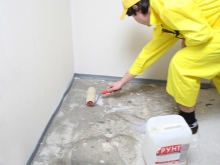
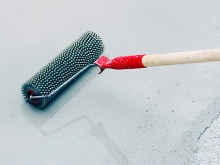
Priming the substrate. After a complete cleaning of the concrete screed is applied primer. It is needed to fill all the pores in the concrete, ensuring perfect adhesion of the screed to the materials. The primer can be applied with a brush, roller or spatula. It is applied in two layers with short time intervals. After the surface is primed, you must wait at least 4 hours, but no more than a day.
Applying the base coat
The base layer can serve as a concrete base. And you can use for this purpose and the polymer surface itself. But if the poured floors will include only natural materials, the base layer will serve as a background, so it must be set to the highest quality and appropriately painted.
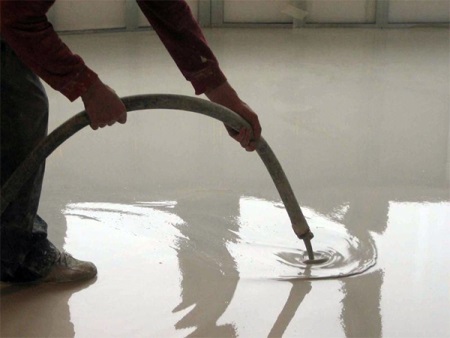
If you use the polymer floor itself as a base layer, you need to fix a damping tape along the walls and prepare a solution. It is distributed over the substrate and leveled. To avoid air bubbles on the surface, it is treated with a needle roller. Use a level to check how even the base is.
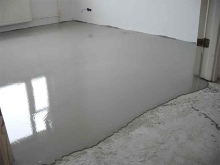
Conducted work requires a complete lack of drafts and the sunlight on the floor. The base layer dries for at least 5 days.
Applying a decor or a picture
As mentioned above, the image is applied in two ways: with acrylic paints or by using a canvas. If you use a ready-made canvas with a picture, it should be slightly larger than the size of the room, so that there is a small reserve, which is much easier to cut off later. When using a vinyl film, it is simply glued to the base. Of course, it must be carefully smoothed so that there are no air bubbles under it.
When using banner fabric, it is glued with a very thin layer of the mixture used for the finish. Also, no air bubbles are allowed to form under the fabric.
Finishing and protective coating
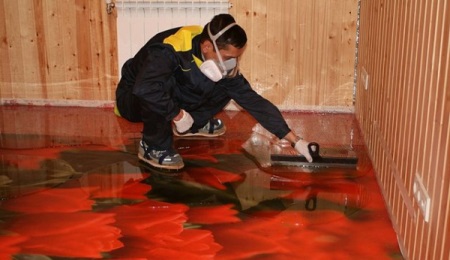
The finishing coat requires a polymer compound, the volume of which is calculated based on the thickness of the layer. The minimum thickness should be 3 mm. The final coat is applied as follows:
- first mix all the components of the two-component mortar;
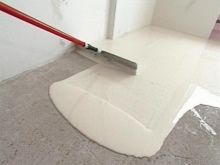
- The resulting mixture is poured onto the drawing and smoothed over the surface;
- until the mixture thickens, it is necessary to roll the surface with a roller, removing air bubbles.
Curing time of the mixture is different, it depends on the temperature in the room and humidity, as well as the thickness of the coating itself. In the process of working on the stage should move on the floor in special shoes.
Protective varnish is applied over the finishing layer after its final curing. It will protect the floor from various damages and increase its service life. Special lacquer can also be used to make the surface non-slip. In addition, the applied varnish will make it easier to care for the floor, without fear of the negative effects of detergents.
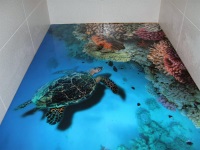
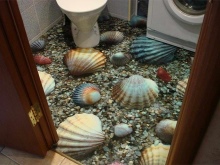
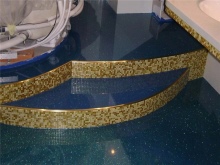
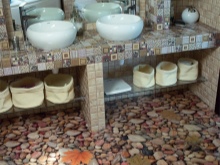
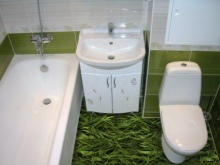
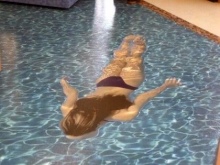
For the bathroom
The choice of the image for liquid floors in the bathroom depends on the overall design of the room.

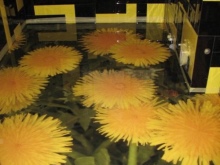
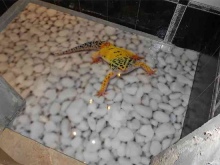
Most often resorted to create a marine theme, for which as a picture applied images of seashells, the seabed, dolphins, algae. You can stop at the image of the water surface, and then it will seem that you're walking on the surface of the water. Quite interesting to look underfoot pebbles from the sea floor. You can recreate the illusion of the beach, adding a sandy shore to the image.The choice of the optimal pattern is limited only by your imagination.


The minus of 3D flooring and, in my opinion, the important one, is that this pattern will get boring very quickly. My wife wants it, but I have my doubts.