Laying Tiles on the Wooden Floor - Advice from the Masters
Half the success of repairs in the bathroom and long life of the floor covering, tiled with ceramic tiles depends on compliance with technology and proper preparation of the base for tiling.
Wood is a living material and can change its qualities, properties and shape depending on the environment. This was the main reason why laying tile on wooden floor considered undesirable.
Today, real professional tilers will cope with any difficulties, because they have in their arsenal the most modern building materials and advanced technology. In this article, we will reveal the secrets and give tips on laying tile on a wooden floor.

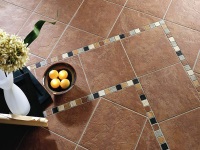
Wooden floor and ceramic - everything will work out!
Wood is a material of organic origin, it reacts differently to a lack or excess of moisture in the room.
Usually after laying a wooden floor for shrinkage takes about a year, depending on the number of floors and the structural features of the house, but even after this period is still an imperceptible movement. Therefore, if you lay tiles directly on the wooden surface can compromise the integrity of the coating, loss of bond between the tiles, which leads to cracking or peeling.
In order to avoid this, the main task is to create a special cushioning layer between the wood and the ceramic, which will act as a shock absorber for possible movements of the wooden base. The hard side of the layer should connect to the ceramic tiles, and the elastic bottom should be placed on the wood to cushion the movement of the planks and boards. Creating a layer will help prevent fungus and mold, because the wood can breathe.
The preparatory stage - preparing the base
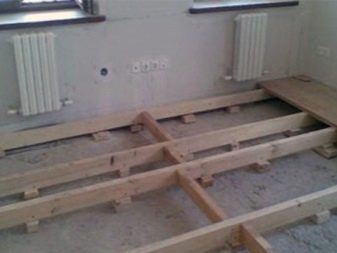
A wooden floor is quite a complex construction. It consists not only of plank floorboards, which are visible from the outside, but also characterized by the presence of strong beams, substrate and joists.
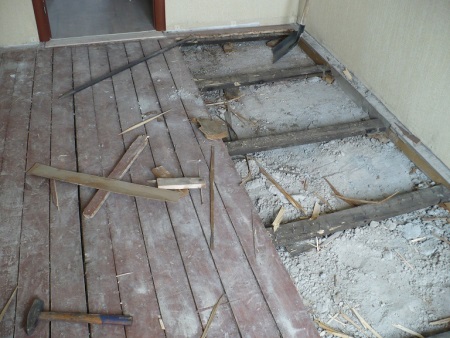
Before performing a ceramic tile installation on a wood floor, all of its layers must be thoroughly checked.
It is highly recommended to use tongue and groove boards for a quality finish on a new floor, and before laying these boards, an inspection of all the layers of the wooden floor should be made as a matter of course. The absence of creaking and wobbling of the boards cannot guarantee the reliability of the floor, so it is imperative that the floor is dismantled to prevent possible problems.
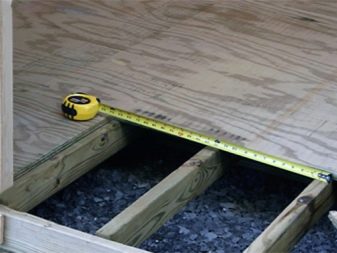
Please note that laying joists with a spacing of more than 0.5 meters is not suitable for further installation of ceramic tiles, as the floor simply will not withstand the weight of the screed. In this case, it is necessary to add the number of joists.
In order to fully prepare the floor structure for screed and further finishing work, you should follow this sequence of actions:
- Removing the floor covering is made.
- Carried out inspection and detailed analysis of beams and joists.
- If necessary, the elements that have fallen into disrepair over time are replaced.
- The level is used to check if the floor is level.. If necessary, level the flooring. To raise the beams, use special wedges from scraps of lumber. If this method is impossible to implement, then the boards are stitched on the joists, and then it is necessary to level out all the excesses.
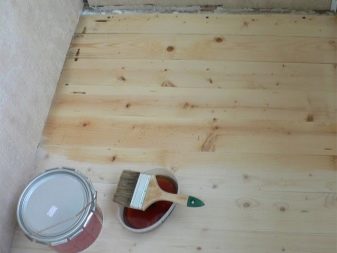
- Wooden boards are treated with special antiseptic impregnation. The best option will be to use mastic, which is suitable for rooms with high humidity.
- When the impregnation is completely dry, fill in fine claydite to fill all the remaining space between the joists. Claydite acts as insulation and noise insulation. The expanded clay is not poured up to the edge of the joists, and leave about five centimeters to the edge and create an air cushion, which allows air to circulate freely.
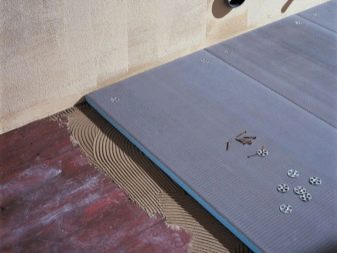
- Next, we lay the floorboards, which will serve as a rough base. Many manufacturers recommend using water-resistant plywood or gypsum plasterboard sheets in green. These materials can withstand high humidity and constant temperature fluctuations, but it is necessary to take into account that the layer of screed and glue in this case should be quite thin.
- If you decide to use to create a subfloor old docks, then first you need to remove paint or varnish from their surface. To do this, you can use special chemical flushes or a construction hair dryer can also remove the old layer with an emery board.
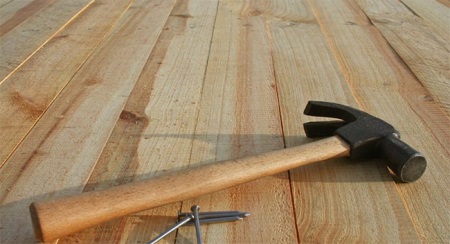
- After the paint or varnish is removed, the boards are laid back, The gap between the planks should be about 3 to 5 mm. This gap is needed for possible expansion of the floor. Boards are fastened with galvanized self-tapping screws. One self-tapping screw is used for each lag, and two screws are used for the outermost lags.
- Next, it is necessary to putty all the holes, that remained from the previous fasteners.
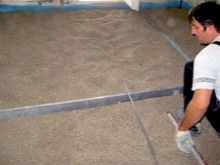
- To level the subfloor is used a special grinder, or simply sanded coating, if the floor is flat.
- Next, filling the technological gap around the perimeter of the floor. To do this, you can use foam.
- Thoroughly treated the entire subfloor with heated olive oil or a special latex impregnation. This action will help to create a reliable insulating layer. Then another layer is applied.
Screed options
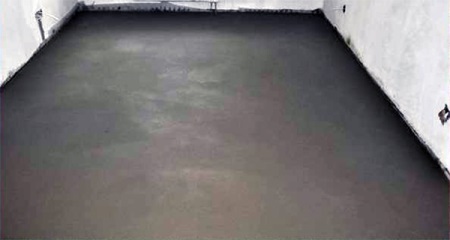
It is necessary to create a solid and rigid base before laying ceramic tiles on the wood floor. To do this, a standard screed is used, but it must be lightweight, because the wood floor may not withstand heavy loads. Screed on a wooden floor for further installation of tile, clinker or porcelain tile can be made in several ways:
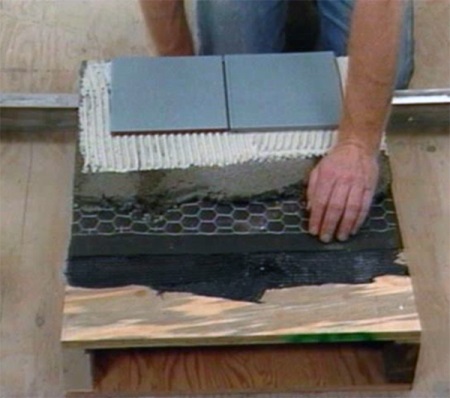
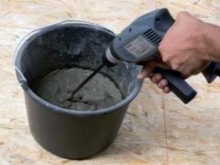
- With a standard cement screed, the layer of which should not be more than 3 cm. To begin with, it is necessary to fix a metal mesh to the subfloor with self-tapping screws. Then the cement mortar or polymer screed is poured.
- With the help of universal construction adhesive as a screed, which is made on the basis of liquid glass. And you can also use a special polyurethane glue. The above options of glue will help to create an elastic screed, which will prevent the negative impact of the movement of the wooden base and the appearance of cracks on the ceramic tiles or its peeling off. Mortar based on liquid glass can be made by yourself. All you need is water, clean coarse sand, liquid glass in a ratio of 1:2:2.
- For rooms with a low level of humidity you can use another type of screed - cement-bonded particle boards or moisture-resistant gypsum board. They should be laid "in a row" and at an angle of 30 degrees in the direction of laying the subfloor boards. Joints at the joints should not coincide. Then the joints should be coated with a special product that is used for gypsum board.
How to remove varnish or paint from an old base
To remove varnish or paint from a wooden floor, several methods are used:
- The thermal method consists in the fact that the layer of paint or varnish must be softened with a special construction hair dryer. When the surface is well heated, you should use a spatula to scrape off the entire top layer.
- The basis of the chemical method is used a special rinse, which is rubbed into the floor. Thus, it is only necessary to wipe the wooden boards and the old coating will remove itself.
- The mechanical method is to take an ordinary sandpaper or metal brush and thus erase the entire top coating.
О options for decorating the bathroom with tiles we wrote about in another article.
Description of the technology of laying tiles
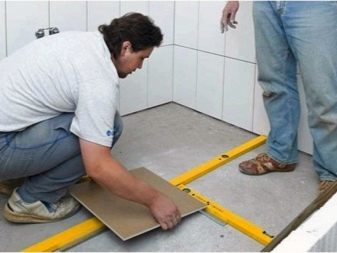
When laying tile on a wooden floor, it is necessary to follow some rules and perform sequential actions. But first you need to make sure that the floor surface is flat and solid. If the floor surface will be uneven, it is necessary to apply an underlayment to level the entire floor.
So, to make a tile installation on a wooden floor, it is necessary to follow the following instructions:
- First you need to think about the way in which you will lay tiles. To arrange the tiles evenly, you should draw a line from the center of the wall across the room at an angle of 90 degrees. Then draw another line across the room from the other wall of the room. Remember to remove all door jambs and baseboards before installing the ceramic tiles.
- The tiles should be laid with two crossed lines in mind. Sometimes the lines can be shifted, because the main thing is that fewer tiles can be cut near the walls. Cropped tiles spoil the appearance of the whole room. If there are large objects in the room, then near them you should lay ceramic tiles symmetrically. Important elements are the bathtub in the bathroom or the fireplace in the living room.
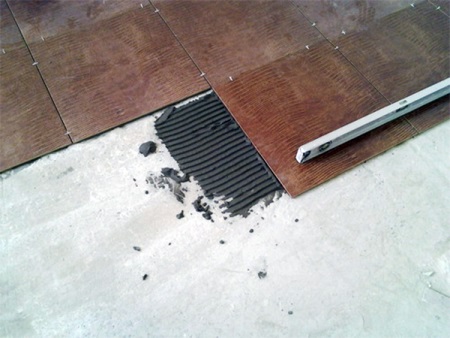
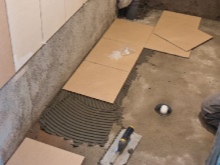
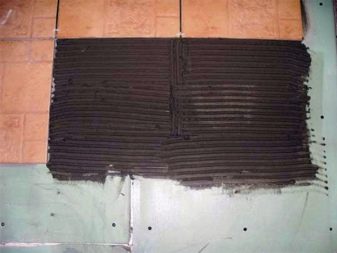
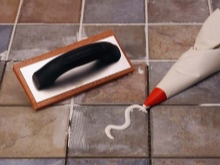
- Glue is applied to a small area of the room of about 1 m² or you can use the corner that is formed by the intersection of two lines. To apply the adhesive evenly, it is necessary to use a trowel or a special spatula.Next, fix the tiles to the flooring. The tile is attached rough side of the adhesive, and then strongly pressed to the floor. This action is performed with each tile. The marking lines remain the reference point for tile placement. It is necessary to lay tiles along one of the lines until the entire area, which has been treated with glue, is covered with ceramic tiles.
- Then the tiles should be laid, moving from the center of the room to the walls, orienting on the two crossed lines. When half of the room is ready, you can move on to laying tiles on the second part of the floor.Make sure that the tiles are laid at the same level. If some of the tiles are less thick, this defect is corrected with an adhesive base under the tiles.
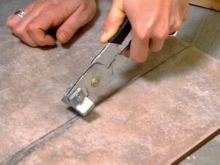
- When the entire floor surface is tiled, you can move on to filling the gap between the ceramic floor and the wall. The voids are filled with cut tiles, which are cut with a special cutter. Remember that when cutting the ceramic, you need to consider some distance to make further priming. If the tile cuts are used for laying around a specific object (for example, a door), then a profile should be used. With it you can draw the necessary contours on the tiles, and the cutting is done with a special saw.
- When the adhesive under the ceramic tile is completely dry, you can cover the tile with primer. It should be known that some types of ceramics already have a primer coating. Therefore, it is first necessary to read the instructions.
- Then a special solution fills all the gaps between the ceramic tiles, At the same time use a scraper with a rubber pad. Such a scraper allows you to create a solution that is evenly distributed between the tiles. You can also use the sharp corner of a trowel to apply the mortar. While the mortar is still fresh, it is necessary to remove all the excess, using a damp sponge. And then a dry sponge is used to polish the ceramic tiles.
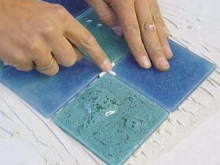
It is worth noting that some types of ceramics when laying need to maintain the necessary distance between the tiles. Plastic spacers can act as separators, because with their help, the gap between the tiles remains the same.


Laying tiles is quite a venture, especially when the floor is uneven. We will do everything according to the recommendations. I'll let you know how it's done.