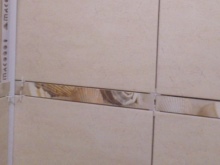
Corner for tiles
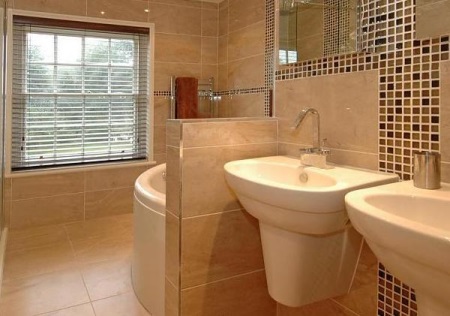
Tile - one of the most popular, practical and inexpensive finishing materials. That is why tiles can so often be found on the walls, floor and ceiling in the kitchen, bathroom or toilet room. But when tiling, you can't do without tiles alone. To the interior looked beautiful and complete, it will be necessary to use additional elements, including the corner.
Advantages
Corner for tiles is not a mandatory element of tiling, but, nevertheless, solves a very important functional and decorative problem.
To fully appreciate the benefit of the corner, it is necessary to carefully consider its benefits:
- The possibility of decorating complex geometric surfaces. It is very difficult, and sometimes impossible, to cut a tile at an angle of 45°. Using the corner allows you to solve this problem and do without sawing at all.
- Disguise irregularities and roughness of tile edges. The cut, designed with the help of a corner, is perfectly flat and smooth.
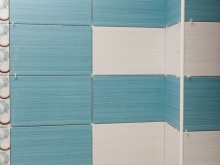
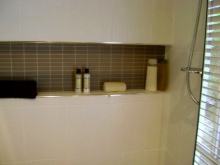
- Decorative factor. The corner, made in a contrasting color, gives the finished cloth a finished and neat look.
- Waterproofing. Using a corner is the perfect solution to the issue of moisture in the joints between the tiles. Corner prevents the formation of mold and mildew, significantly increasing the life of the coating itself.
- Safety. Using a corner prevents possible injuries from slipping on a wet floor. Corners and ends of the tiles may have chips or irregularities, which can lead to various cuts or injuries.
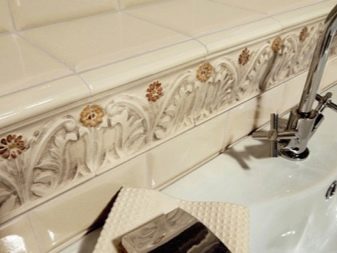
If the design involves facing the bathroom or other room in a complex stylistic solution, such as baroque, folklore, ethnics, the corner can be an obligatory part of the composition.
Types and types
Corner serves to design corners, the joint between tiles, complex surfaces, places of connection of plumbing with the wall, etc. According to its form, it is divided into two groups: external and internal.
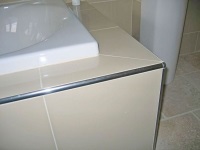
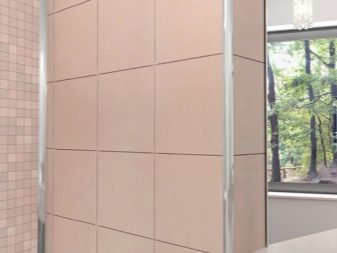
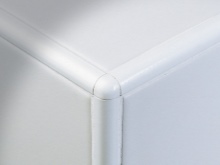
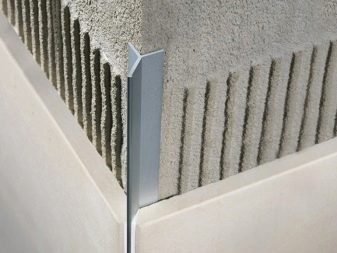
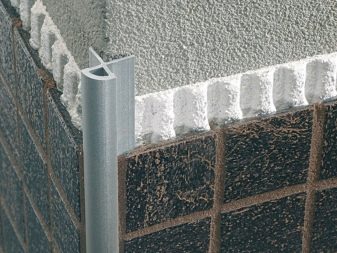
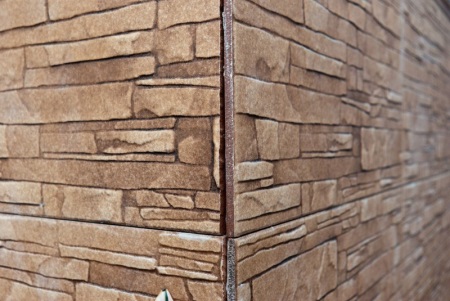
- External corner. It is used to decorate the protrusions of the walls. This is necessary because this part of the coating is under constant mechanical stress. Closed corner sharp ends of tiles completely eliminates the danger to people nearby. In this case, the corner also serves a purely protective function. Outdoor corner can be put immediately at the laying of tiles or after work on the finished coating.
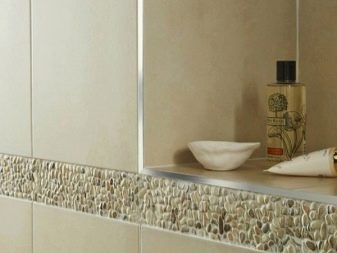
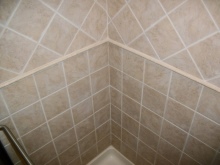
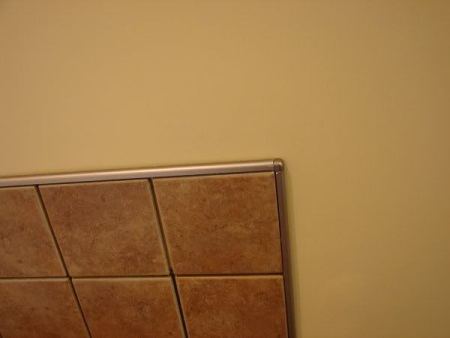
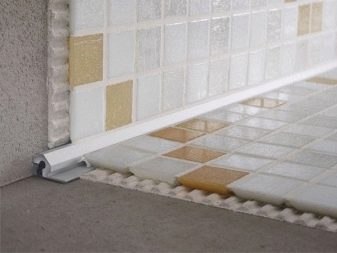
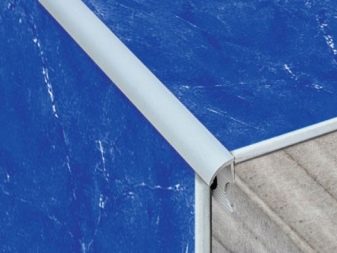
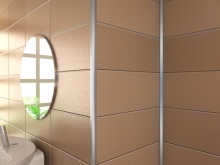
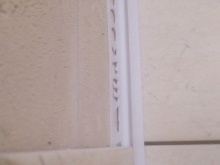
- Internal corner. Used to decorate the corner joints of tiles at the intersection of adjacent planes, such as the wall and ceiling, as well as the junction of the shower and the wall. Such a corner has a somewhat rounded, concave shape. The use of an inner corner prevents moisture from getting into the joints between tiles or tiles and the wall.
Depending on the function performed, corners can be decorative or functional. Decorative corner is used purely for aesthetic purposes. A contrasting or the same color as the main panel gives the interior a more harmonious and stylish appearance. A functional corner takes on a serious mechanical load.
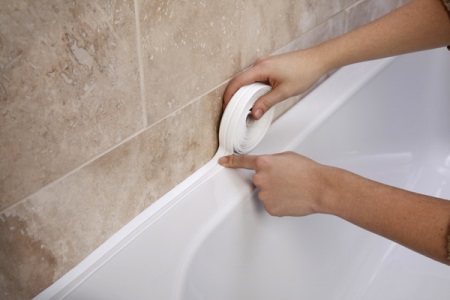
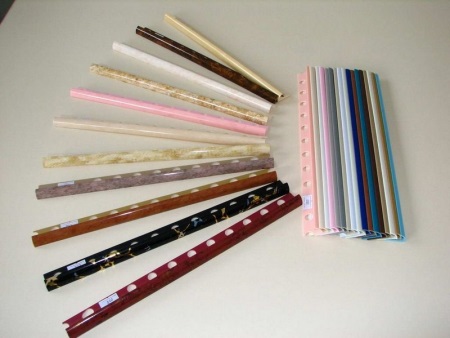
Most often the corners are made of plastic, metal or ceramic. However, the fastest, cheapest, but also short-lived and less attractive version of the design of the joints is a strip edging. Most often such a corner is self-adhesive. Some models are pre-treated with a fungicidal composition to prevent mold and fungus. Such a corner is very easy to use, it bends well and does not crack.
Material
The following materials are used for the manufacture of corners:
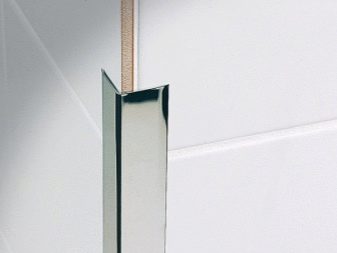
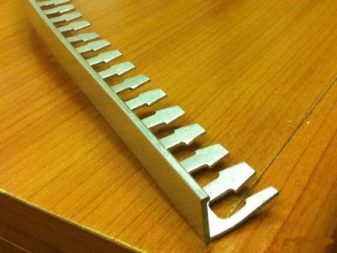
- Metal (aluminum). Universal material, the shade of which blends harmoniously with any interior color scheme. In addition, aluminum is perfectly combined with other metal structures of the room, such as a shower stall or other plumbing fixtures. The advantages of such a corner can include its lightness, high strength, durability, resistance to corrosion.
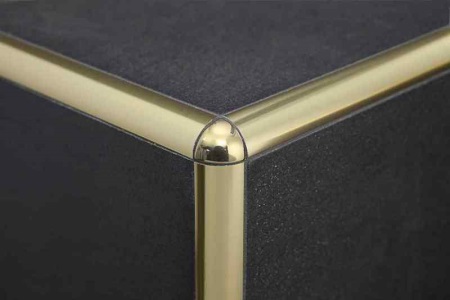
- Corners are often made of metal alloys. Most often they are covered with gold or silver paint (such options are considered universally suitable for different interior colors). Corners can be nickel-plated or chrome-plated.
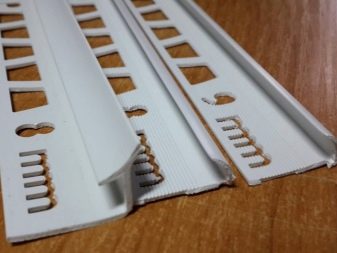
- Corner made of pvc (polyvinyl chloride) has a number of advantages. It is very light, durable enough, has excellent water resistance, and is available in a huge range of colors, which makes it easy to find a suitable option even for the most sophisticated interior.
- Ceramic corner (or profile "ceramic") - one of the best options in terms of aesthetic integrity of the interior. Often a ceramic corner is part of a tile collection, so it is best to buy just such a model.
If you compare corners from different materials on several criteria, not the first place in terms of durability will come out, of course, metal. The materials with the shortest lifespan are polyethylene and PVC.
Metal corners also provide the greatest tightness. The worst indicator in this list has plastic.
The advantages of polyethylene tape can be attributed to the simplicity of its installation and the lowest cost of the materials presented above. However, the constant exposure to moisture leads to the fact that after a couple of years the tape will have to be replaced. Plastic - a very affordable material, it is easy to install, resistant to fungus and mold, it is quite elastic.
The advantages of the ceramic corner, in addition to high strength and water resistance, can also include low thermal conductivity and impeccable aesthetic appearance for a long time of service. Of the disadvantages are the high cost, the complexity of installation, especially in interiors with non-standard architectural design. Perhaps the only factor in the wear and tear of ceramics is impact resistance. After a strong blow, ceramic can quickly begin to crumble, so it should be replaced as soon as possible.
How to choose?
The choice of a tile corner depends on several factors:
- The thickness of the tile. Depending on this indicator, the corner can also have a number of different thicknesses. Professional builders recommend choosing a corner with a size of 1 mm more than the thickness of the purchased tiles.
- Design features. According to the type of hardness corners are divided into 3 groups (hard, semi-rigid and soft). Depending on the complexity of the architecture, the most suitable corner can be selected. Plastic is perfectly cut and suitable for complex geometric designs, including curved designs. Metal profile is ideal for geometrically clear and straight spaces.
- Before you buy a corner, it is best to take a sample of tile that you plan to use for tiling to the store. That way you can pick up a corner that best suits the color. This applies, of course, when the corner and tile are purchased from different collections.
Laying options
Before choosing a laying option, it is necessary to determine which ceiling covering will be used. If the ceiling is made of gypsum plasterboard or it is suspended, this is the ideal option. The corners are installed exactly to the mark where the ceiling covering will go. Before installing the corner, the necessary measurements must be taken and trimmed.
There is no unambiguous decision about what to lay first - tile or tile.
- The first option - laying corners on a pre-marked surface. Then the main cloth is laid, and the tiles at the joints with the corner is trimmed.
- The second option - tiling the walls and laying the corners. This method is a little more simple than the first, but with the first finished coating looks neater.

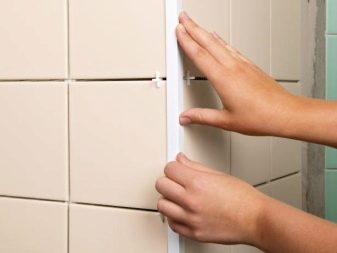
Before you begin laying, experts advise to perform thorough measurements and make a marking of the walls, as well as filing the corners at the joints. The appearance of the finished interior depends on how correctly and accurately this stage of the work is performed.
How to install?
Usually the laying of tiles begins with the place around the bathtub.
Laying the corner over the tiles is performed as follows:
- The surface of the tiles must be carefully prepared, cleaned and degreased.
- Then, sealant is processed at the points of contact of the bathtub with the wall. Even if the bathtub is close to the wall, there are still gaps. Moisture can get in there, and provoke the appearance of fungus and mold. After sealing the joint, the corner is treated with an adhesive solution (liquid nails) and laid to the surface of the bath. At the same bar must be pressed tightly over the entire surface.
- Next, lay the tiles in the vertical direction, and then mount the inner and outer corners.

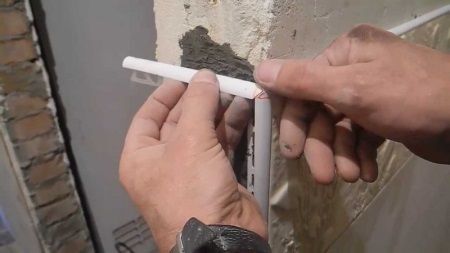
Laying the corner under the tile. This method is somewhat more complicated and requires from the installer certain professional skills. Installation of the corner is made simultaneously with the installation of plumbing: first a bath or shower cabin, then the corner and only then the rest of the tiles.
The technology is the same: cut the corner of the required length, then a thin layer of glue is applied to the wall at the place of installation. The corner is pressed firmly against the wall. After the entire corner has been installed, you can proceed to tiling. The glue is applied to the surface of the tile, it is inserted into the grooves of the corner and pressed firmly against the wall.
The advantages of this option include a more attractive appearance and almost complete sealing. But, if over time you need to replace the corner, you will also have to dismantle part of the tile covering.
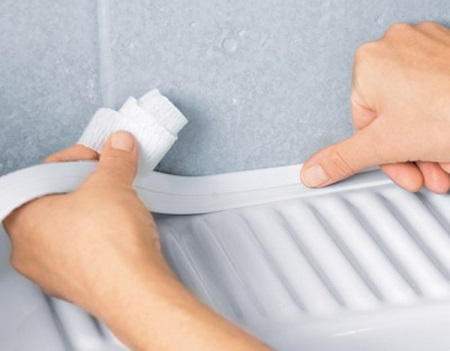
Installation of tape curb is much easier and faster. First choose a strip of the desired width and length. Then the working surface is prepared, the joints between the bathtub and the wall are sealed, and then the tape is laid. Most often, the tape is available with an adhesive layer, but for greater strength you can use liquid nails. It is better to glue the tape from the corner, gently and firmly pressing it across the entire surface.
For laying ceramic corners, a special adhesive is used. After laying, the excess glue should simply be removed with a flap of soft cloth or gauze. For a stronger fixation, the glued fragments of the corners can be attached with a construction adhesive tape until they are completely dry. If desired, the edges of the corners can be smeared with sealant.

Tips
If the tiling is done by your own efforts, it is best to use the advice of professional builders, who will help to perform repairs quickly, efficiently and accurately.
- When installing a metal corner, it is necessary to ensure that the structures are perfectly flat and smooth. The slightest bend will have an extremely negative impact on the result of the entire work.
- Before you begin assembling it is necessary to calculate very accurately the number of corners and the necessary trim, as well as marking the surface.
- Start the work with the most visible corner of the room, so that the protruding part was tiled as neatly as possible.
- It is not necessary to match the corners to the tone of the cladding. Sometimes contrasting or versatile solutions allow you to play with a classic interior in a very interesting way.
See the following video about installing tile corners.


