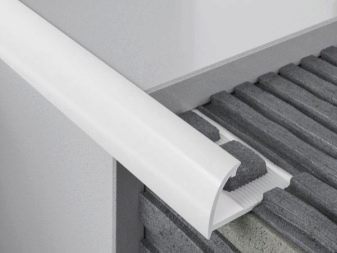
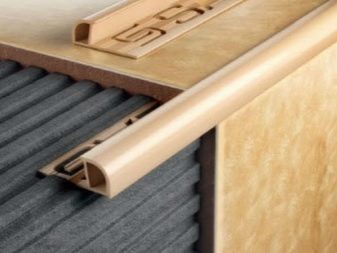
Plastic exterior tile corner
Outdoor corner for tile is not a mandatory element for installation. However, in order to get a beautiful, even and aesthetically attractive coating, you can not do without it. Corners can be made of different materials: aluminum, plastic, stainless steel, ceramic. Each of them has its own advantages and disadvantages.
This article will talk about the pros and cons of using a plastic outdoor corner.
Advantages
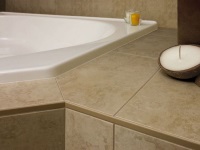
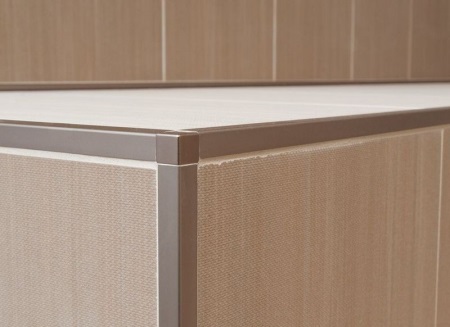
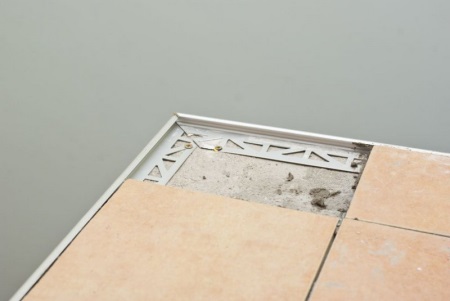
External corner is a profile L-shaped, used in finishing works when installing tile. It is used for design of external corners of tiled walls. Plastic corner simultaneously performs several functions.
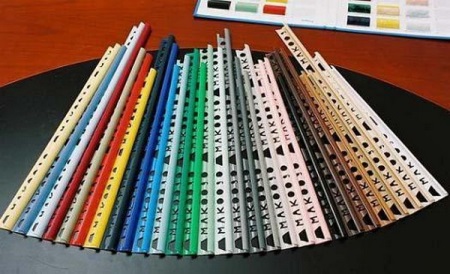
Firstly, purely aesthetic. Facing tiles is rather time consuming, requiring care and attention. Nevertheless, during the work there are often small errors. Hide them and give the cloth a beautiful, smooth and finished look just and help plastic outer corners. In addition, a fairly wide range of shades of plastic, allows you to choose a suitable option for tile design of almost any color. Corner can be in tone with the main cloth or have a contrasting shade.
Secondly, the corners have a tangible functional load. The use of corners can significantly increase the service life of the tile itself. The outer corner takes on a significant mechanical load, allowing you to prevent chips and cracks in the tile from external impacts. In the case of mechanical damage, it is much faster and cheaper to replace the corner than to dismantle the entire or partially tiled surface.
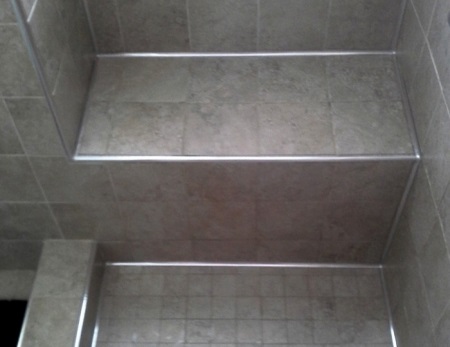
Thirdly, the corner connection of tiles has a rather sharp or even jagged surface, especially if the tiles are undercut. To avoid possible injury or cuts, an outside corner is used. This point is especially relevant if there are children nearby.
In addition, the outer corner allows you to maximize the sealing of joints at the joints of tiles. This prevents the appearance and spread of mold and mildew. Another advantage of the outer corner of the plastic is sufficient softness and malleability of the plastic construction.
Angles by type of rigidity can be divided into three groups: rigid, semi-rigid and soft. The first two types are made of metal and polyvinyl chloride. They can be stronger and much more durable, but with their help it is very difficult to clad a surface that has a complex geometric shape. With a plastic corner it is much easier and faster. They are used for finishing, both straight and curved surfaces.
How to choose the size?
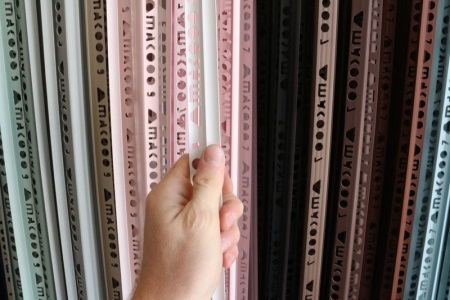
When choosing a suitable corner (if it is not provided in the collection of tiles used for tiling), it is best to take a sample of tiles with you to the store. This way it will be easier to choose a suitable profile in terms of color.
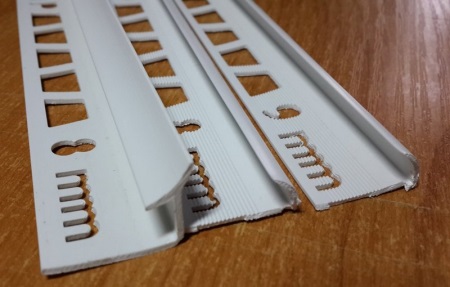
To make the finished tiled surface look as spectacular and harmonious as possible, the corners should be selected not so much by color as by size. The choice of a suitable size corner depends directly on the thickness of the tile used. The tile must fit into the corner tightly enough, and the plastic profile should not be too high above the surface of the tile.
In addition, when choosing a corner, you need to know what kind of tile will be on the edge of the corner - a whole or trimmed. This point is fundamental. The difference in thickness between the middle and the edge of the cut tiles can be from 1 to 2 mm, depending on its shape. Therefore, it is best to determine this point in advance, because the corner must perfectly hide all the irregularities and roughness of the tiles. For this purpose, and it is used.
Each corner has its own marking, and it can be oriented by comparing the number with the thickness of the tile, which will be used for decoration.
How to install?
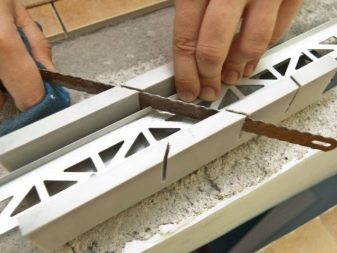
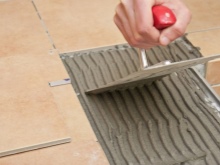
Before installing a corner, you need to take all the necessary measurements and cut the corner exactly at the height of the row. Then you need to insert one or two tiles into the groove of the corner, check the tightness of their connection and make the necessary markings. This is done to ensure that the entire tile row is mounted with a corner as even and clear as possible.
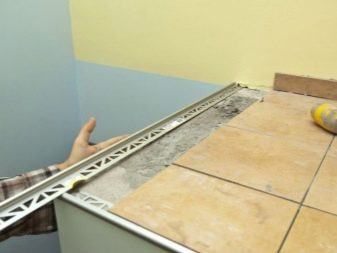
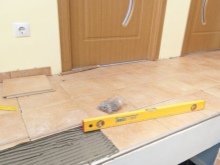
The installation of the corner is as follows. First, glue is applied to the corner of the wall, the corner is carefully laid on the mark and pressed firmly against the wall. As another option, you can mount the corner. Glue is applied to the tile, the tile is inserted into the groove of the corner and pressed down firmly. The same happens with the second and subsequent tiles. In the process of tiling it is necessary to check the evenness of the laying periodically with a level. Excess glue must be removed immediately. The laid row of tiles is wiped dry with a clean rag.
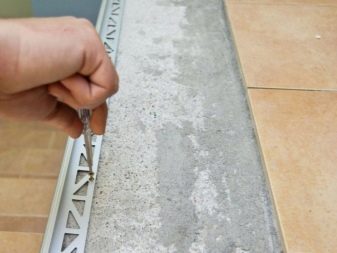
To make the fastening very tight and reliable, you should additionally tighten the tiles with masking tape. You can take it off after the mortar has dried completely, in about a day.
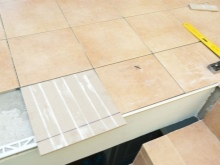
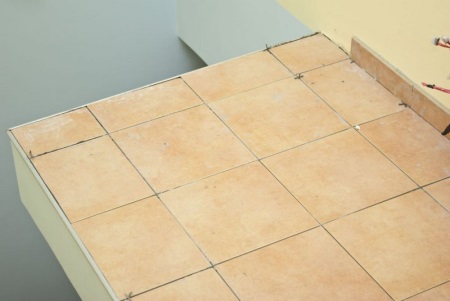
If you decorate a wall with a corner, it is best to install it from the ceiling to the floor. The part of the wall that comes into view should be designed very neatly and beautifully. Trimmed tiles or a corner will look much more inconspicuous in the lower part of the room.
Installing the corner - a fairly simple process, but requiring care and some skill. Sometimes it is impossible to hermetically connect the tile with a corner. This can be due to the peculiarities of the geometry of the tile or profile. In this case, it is necessary to provide in advance the possibility of a small gap between them, which in the future will be closed with grout for joints.
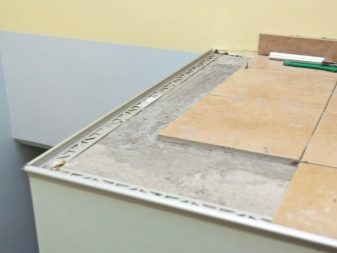
For the corner to look neat and beautiful tile, adjacent to the outer side of the corner, must necessarily be intact. It is best to install the cut tiles into the corner itself.
In addition, the quality of the finished coating affects the quality of the corner itself. It should be flat, smooth and rigid enough. Its shade should not stand out from the overall interior background, but should elegantly emphasize it. If you follow all these rules, you can be sure that the finished coating will turn out perfectly flat, smooth, beautiful and will last for many years.
For more information about installing a corner on a tile, see the following video.


