How to drill tile so that it does not crack?
Despite its high strength, ceramic tiles are easy to damage, so during the repair all manipulations with it should be carried out carefully. To work with tile, it is important to have the appropriate knowledge, especially when it comes to not only laying it, but also drilling holes. Otherwise, you can incur great losses because of the spoiled material, and in some cases you have to make repairs all over again.
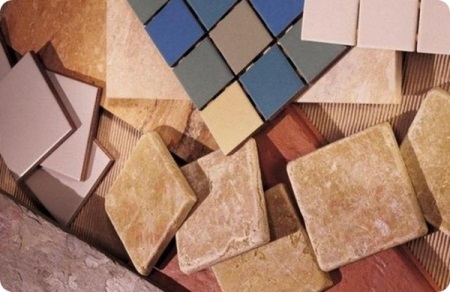
Peculiarities of glazed tiles
Facing tile is a universal material, because it can be used in different rooms, whether it is a bathroom, toilet, kitchen or even non-residential premises. Through tiles you can create original and practical interior designs, change the geometry of the room and the height of walls. But like any other material, ceramic tiles have disadvantages - fragility and slippery surface, which significantly complicates the process of drilling holes.
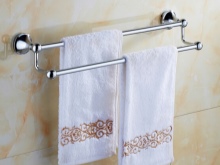
During the repair work it is not uncommon to need to drill tiles in order to later hang a shelf, a holder for towels or others. It should be noted that the need for this manipulation may arise not only before the material is laid, and after. In both cases, the procedure must be carried out as carefully as possible to prevent the tiles from splitting. In addition, it is important to use the right tools, which will allow you to quickly and well cope with the task.
What to drill with?
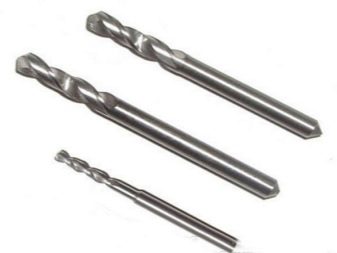
To drill holes in tile, different types of tools are used: a perforator, a screwdriver, a hand drill or an electric drill. The choice of tool will depend not only on preferences, but also on the diameter of the hole to be made. For example, for making small holes a manual drill will do, as its speed can be easily controlled, which will avoid splitting the material. Also suitable is a screwdriver, which has a small number of revolutions.
For drilling holes of large diameters, it is advisable to use a rotary drill or an electric drill with drill bits. When working with tools, it is important to turn off the impact mode, and to use the minimum speed. Among other things, you will need tools such as a drill guide, drill bits, a level, a pencil, masking tape, or duct tape.
Choosing a drill bit
Having decided on the tool, it is necessary to choose a suitable drill that will best cope with the task. It is important to consider the characteristics of the tiles - the hardness, the degree of porosity, the thickness. Drills are presented in a large variety, they differ in material, diameter and purpose.
To choose a suitable product, it is recommended to get acquainted with the most common options:
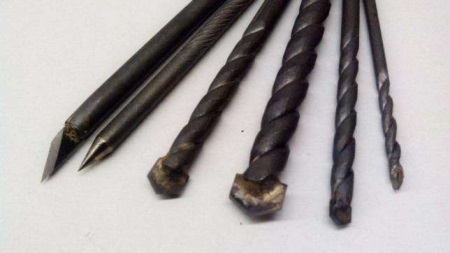
- Lance-shaped. The most common drill, suitable for making small holes under the dowel. It has a long service life and affordable cost.
- Carbide, sharpened on one side. Suitable for any type of tiles, except for porcelain tiles. It can be used to drill holes up to 12 mm in diameter.
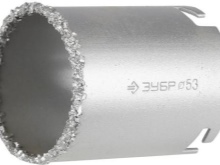
- Diamond drill bits. Necessary for creating large holes - 10-70 mm. These products cope with any material, both fragile tiles and porcelain tiles. One bit is enough for 20-50 cycles.
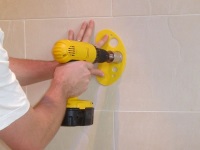
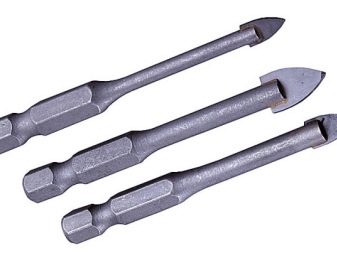
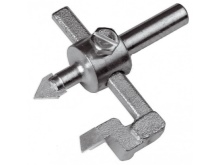
- Ballerina. The product is an adjustable circular drill, designed for drilling holes up to 90 mm in diameter. Ballerina consists of 2 disks arranged in parallel, and the distance between them corresponds to the radius of the future hole.
- Teeth with tungsten carbide sputtering. They are excellent for working not only with tiles, but also with such materials as porcelain tiles, marble and bricks. With the help of drill bits make holes for cabinets, outlets and towel rails and other things.
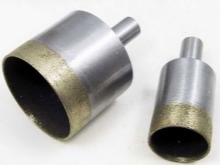
As practice shows, it is best to choose diamond-powdered drills, because they allow you to make the most even and accurate holes, while during the work the risk of cracking the tiles is significantly reduced.
How to drill correctly?
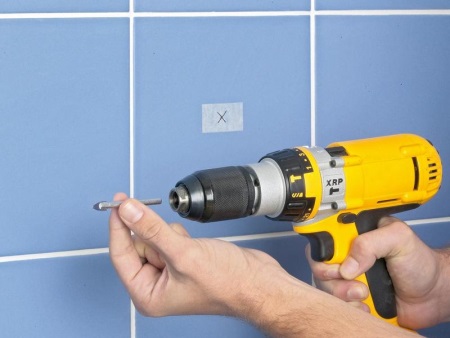
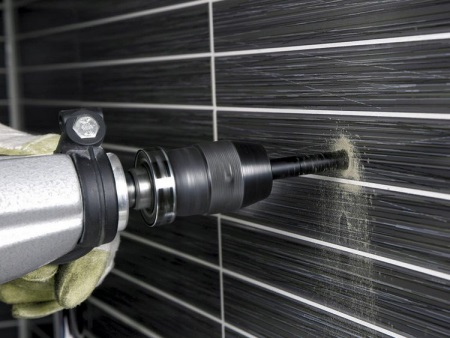
Often drilling holes is required when the tiles have already been laid on the wall, so this option is recommended to consider in the first place. The work begins with the preparation of tools, and drawing a marking on the tile. To prevent the slip of the drill, you can glue a construction adhesive tape on the tile, and put a mark on it. Start drilling at minimum speed, and then gradually increase it. Reaching the base of the wall, it is recommended to replace the tile drill bit with a more suitable one, for example, to work with concrete or stone.
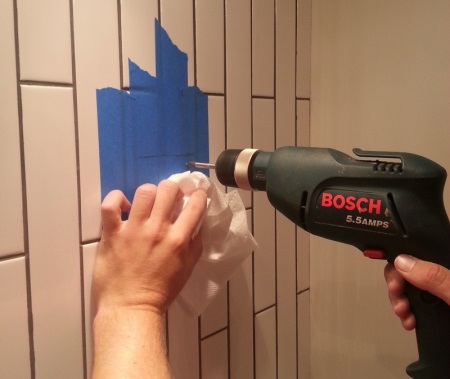
During the work, the tool should be held strictly at an angle of 90 degrees with respect to the wall, and you should not put pressure on the surface. For better visibility, you can use an additional lighting device, or a special LED nozzle for a drill or screwdriver.
If the ceramic tiles have not yet been laid, they should be put in a container of water for a while, then take out, wipe, place on a wooden substrate, and apply a marking. In this case, you can also use scotch tape to eliminate slipping. The further drilling process is done in the same way as described above, but the drill bit does not need to be changed.
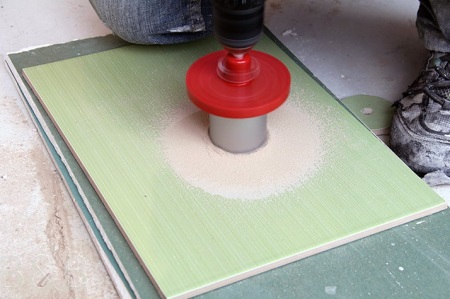
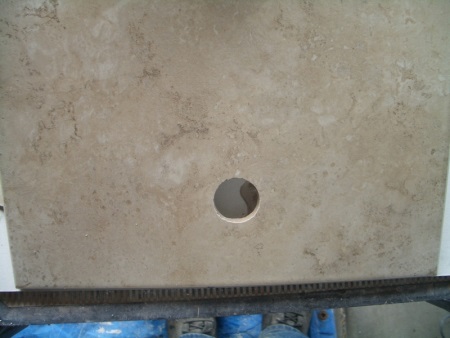
Large diameter holes can only be made with a drill bit or ballerina, and this should be done before laying the tiles. First, it is necessary to draw a marking on the tile, then set the tool in the right position, and with light pressure start drilling at low speed. It is recommended to wet the tile with water during the work in order to reduce dust formation.
Masters do not recommend making holes in the seams of the tiles, as there is a high probability of formation of chips and cracking of the material. But if there is still a need for this, then you should choose a drill, the width of which will correspond to the size of the joint. Thus, the hole will be exactly between the tiles, and the probability of their damage will be minimized.
Useful tips
Drilling holes in tile tiles - a complex task that requires skills in working with construction tools and materials. But still, with desire and a little practice, the work can be performed well without the participation of a professional craftsman.
In this difficult case, it is recommended to heed a few important tips:
- It is important to choose the right tool, which will not only be practical, but also convenient, because the master must confidently hold it in his hands.
- It is necessary to work at minimum speed - no more than 1000 revolutions per minute.
- Do not press the tool or change the holding angle, as this will cause cracking.
- When drilling holes in the joints, you should use a thin drill bit, and it can be designed not for tile, but for concrete. Still, if possible, it is recommended to drill directly through the material, not through the joints.
- Ceramic tiles that have not been laid should be soaked in water for 1 hour before drilling - this will reduce the likelihood of cracking.
- It is not recommended to make holes close to the edges of the tile, as in these areas it is the most fragile.
Before you start drilling a tiled wall, it is better to practice first. The master must "feel" the tool and how the drill penetrates the tile. Professionals always feel the likelihood of tile breakage and at the right moment reduce the speed of drilling.
Safety precautions
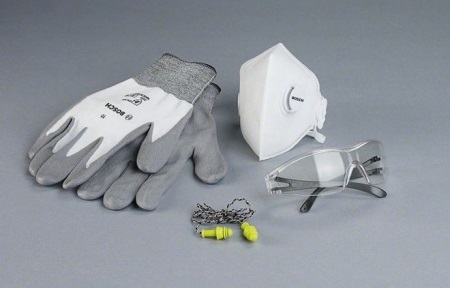
When performing work with tile and power tools, it is necessary to observe safety techniques. First of all, you must wear protective clothing, namely gloves, goggles, closed shoes, which will protect the skin in the case of splitting the material. In addition, the process of drilling holes in ceramic tiles belongs to the dirty work because of the formation of large amounts of dust, so it does not hurt a respirator, a robe and a headgear.
See the following video on how to neatly drill through tile tiles.


