All about the tiles on the floor in the bath
Many people, arranging on their plots of bathing rooms, finish the floor covering in it with tiles. In construction stores, any buyer will be able to see a large variety of this material, suitable for finishing. Today we will talk about the important features of this material and what types it comes in.
Features
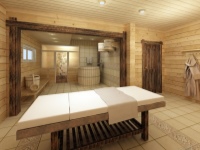
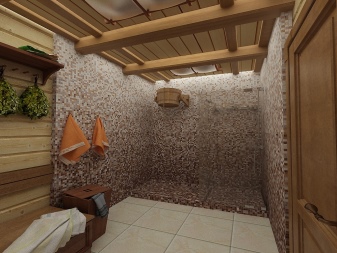
Floor tiles for finishing the bath must meet some special requirements, because in such rooms are created non-standard operating conditions. This is especially true for the steam room. After all, it is in this part of the construction that the material will be most strongly exposed to the negative effects of a large amount of moisture, high temperature regime, mechanical action.
Tiles for the floor in the bath must be the most resistant to condensation, high temperatures, wear and tear and mechanical stress, so most often when finishing using ceramic material that can withstand all these factors. In this case, under the coating must be laid a solid base. But you can also use other substrates, including porcelain stoneware.
Such tiles have a low level of moisture absorption, which allows them to maintain their quality and appearance for a long time. The individual elements of this flooring, including the corner pieces, should fit together as tightly as possible. Otherwise, the tiles will not be able to last long and will soon begin to deteriorate in such a structure.
Overview of types
Nowadays, in construction stores you can find a huge variety of flooring for bath rooms.
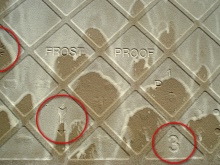
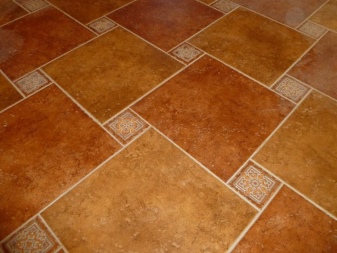
- Ceramic. This ceramic base for the bath has a special level of durability and strength. It can easily withstand significant loads. In addition, tiled material is particularly heat-resistant, models marked "T" are the most resistant to temperature changes. If the bath will not be heated during the cold season, it is better to find a sample with a marking in the form of a small snowflake. All individual ceramic elements should be of equal thickness. It is recommended to choose samples with embossed surface, which will make the floor covering anti-slip and safer for people. Ceramic tiles can be used for both the steam room and the shower room. It is considered the most hygienic option, it is easy to clean dirt, and you can use almost any detergents, as it is resistant to such compounds. The material is safe for humans and their health, in operation it does not emit harmful substances. This basis can be decorated in a variety of designs and colors.
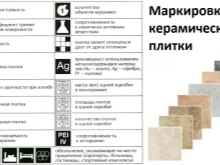
- Porcelain stoneware. This material is a special fine-pored tile base. In the manufacture it is fired at a temperature of about +1250 degrees, the number of firing procedures is indicated on the label. For baths, it is recommended to choose unpolished porcelain stoneware with a matte finish. This option will not be too slippery. This tile is not afraid of an excessive amount of moisture. Glazed types of material are characterized by an increased level of moisture resistance and durability.
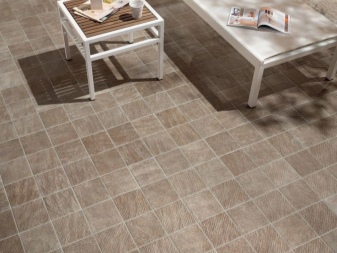
With porcelain stoneware you can create a variety of beautiful imitations of different types of wood and stone, but in such cases and the cost of finishing will be much higher compared to standard options. Porcelain tile with a slight relief makes it even safer for humans, it will not be slippery.
- Clinker tile. It is a material consisting of several types of clay, in the production they are fired. This procedure allows you to give the material high temperature resistance, resistance to possible mechanical and chemical effects. In terms of moisture resistance clinker tiles can be equated to porcelain stoneware. Most often it is laid flooring in the washroom.

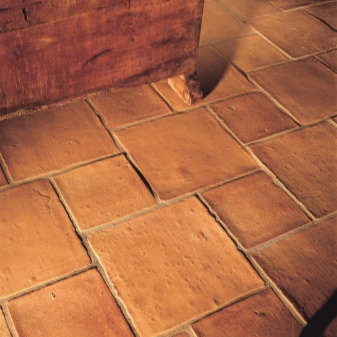
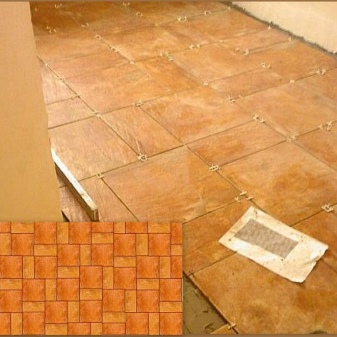
- Terracotta tiles. This finishing material has a porous structure. It is distinguished by a rich brown appearance. Terracotta base can not be glazed, so it always looks as natural as possible. The structure of the material allows the tile to withstand high temperature differences, while it does not deform and does not lose its appearance. For the finishing of the bath most often use species with a thickness of not less than 8 millimeters. Often in the production of tiles for the bath in it additionally add refractory clay and quartz sand, which makes it even more durable and long-lasting.
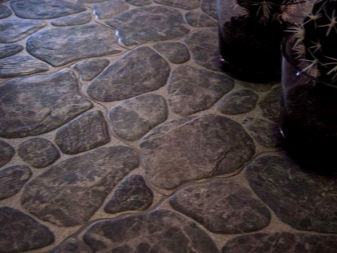
- Serpentine tiles. It has the appearance of a base of semi-precious mineral, colored in a rich and bright green coloring. Serpentine has a beautiful and unusual pattern, so it is also more valuable than other options. Such tiles also have some healing properties, which can be fully disclosed after careful heating. But the price of this finish will be quite high, in addition, direct exposure to too much water on the material can cause calcium leaching, and this will eventually destroy the stone.
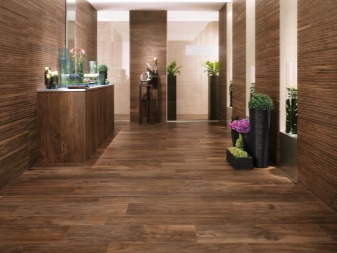
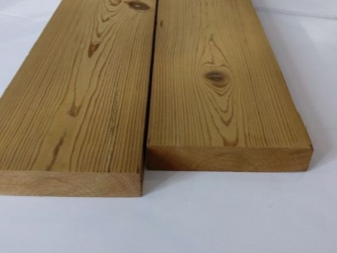
Today, a beautiful tile for the bath, made to look like wood, is gaining popularity. This option is often referred to as "thermo-birch" or "thermo-aspen." Wood with a special treatment can become a durable material with excellent moisture and heat-resistant characteristics.
The treatment is done with wet steam in a special sealed chamber. The wood after that does not absorb water, does not corrode under the influence of ultraviolet radiation, does not deform and does not lose its rich color. At the same time in the process of treatment all the moisture from the material escapes, which makes the tiles lighter. In addition, it takes on a beautiful and rich brown hue. It is necessary to lay the wooden covering on a waterproofing layer.
What to choose?
Before buying tile flooring for the bath, you should take into account some important aspects. First, consider the main characteristics of the finishing base.
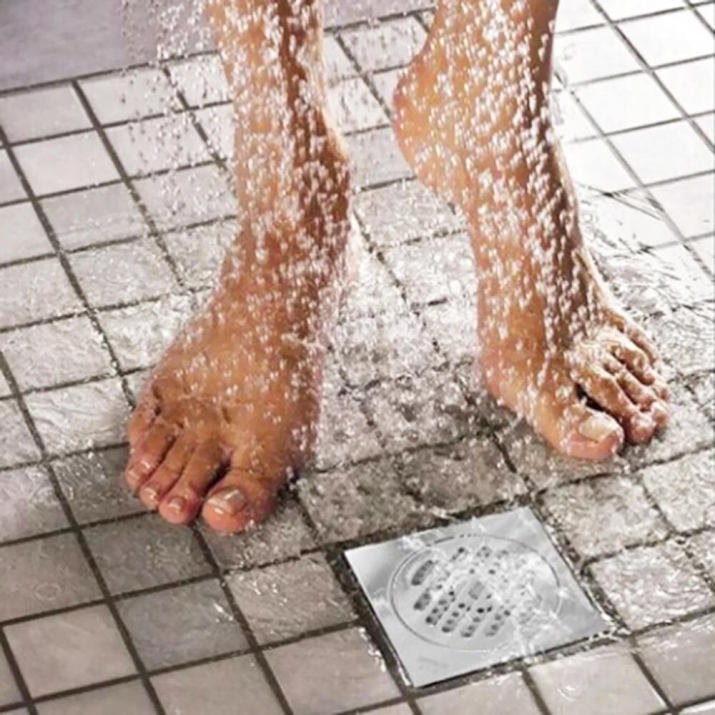
It should be as resistant to moisture, high temperature values as possible. Tiles should be non-slip, such finishing models will be safe for users.
When water hits a smooth and glossy material, a person can easily slip on such a floor.
An important role is also played by the form, color coating. This criterion plays a role not only in creating a suitable external design in the room, but also during installation. After all, models with complex shapes and patterns will be much more difficult to lay.
How to put?
It is possible to properly lay tiles in such a structure, and you can do it yourself. This work includes several basic steps.
Preparing .
To begin with, you should prepare all the necessary materials and tools, which in addition to the tiles themselves can include the following products:
- Adhesive mortar;
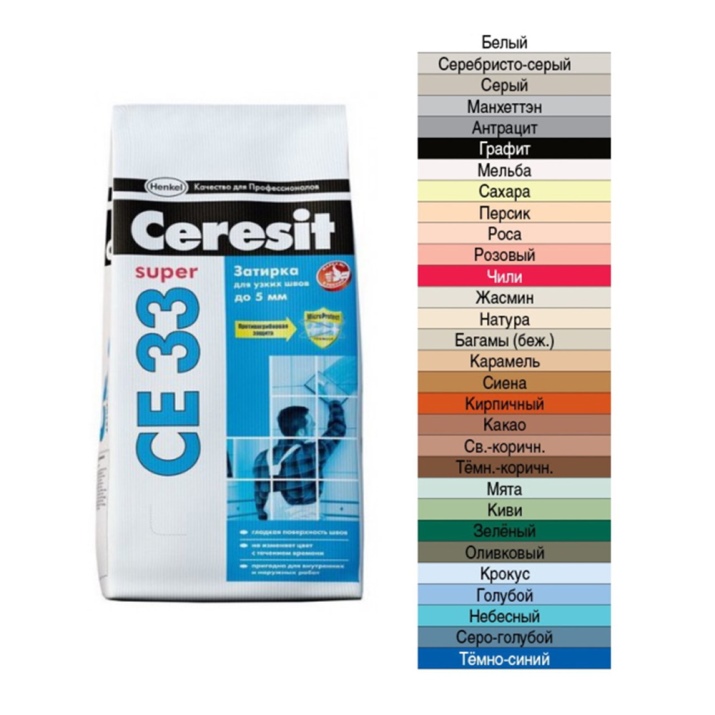
- grout for joints;
- primer for the floor;
- waterproofing compound for the floor;
- trowel (regular and toothed);
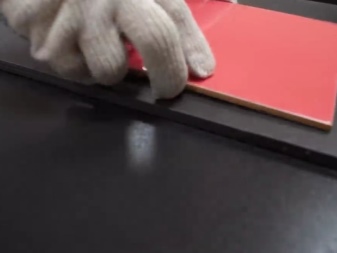
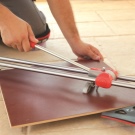
- tile cutter;
- construction level;
- hammer;
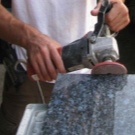
- abrasive stone (needed to smooth the cut tiles);
- drill with attachments;
- roller or brush;
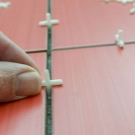
- Construction plastic crosses (for the uniform thickness of the joints formed between the individual tiles).


When all the necessary tools and materials are set aside, you can begin preparing the surface. Floors in the washing room and steam room should be made with a slight slope towards one of the corners or simply to the central part. Masonry should be carried out in such a way that the water can independently drain away, not lingering on the surface.
In the lowest place make a small hole for water. A drainage pipe is routed to it and a special drainage ladder is fastened.

All debris is removed from the surface, it is better to do it with a vacuum cleaner. After cleaning, on the surface of the old flooring, you can notice small cracks and crevices. They must first be sealed, for this purpose, you can use a building sealant. When it dries completely, and all the excess is cut off, you can proceed to priming the floor.
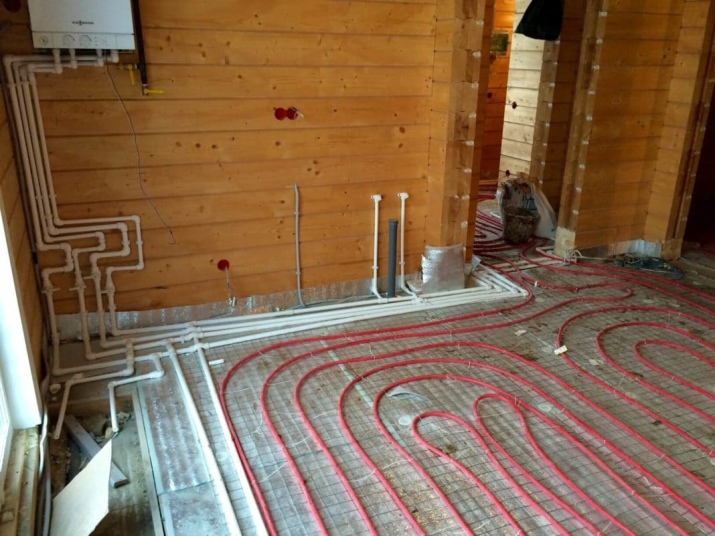
The coating is poured with a ready-made priming solution. When the primer dries, you should carry out waterproofing procedures, for this it is recommended to use a special rubber or liquid glass. These compositions are applied with a broad brush to the base, it is also better to apply them to the walls. The substance should be applied in 2 or 3 thick layers. At the stage of preparation for work, you can also install additional systems with heating under the tile coating
Laying
When all the preparations are made, you can start laying. If you have chosen tiles with pictures, then you will have to first make a marking on the base and lay a special structure as a support, so as not to glue the tiles directly on the concrete base, most often such frameworks are made of aluminum or wood. Installation of flooring on such planks will be more accurate and even.
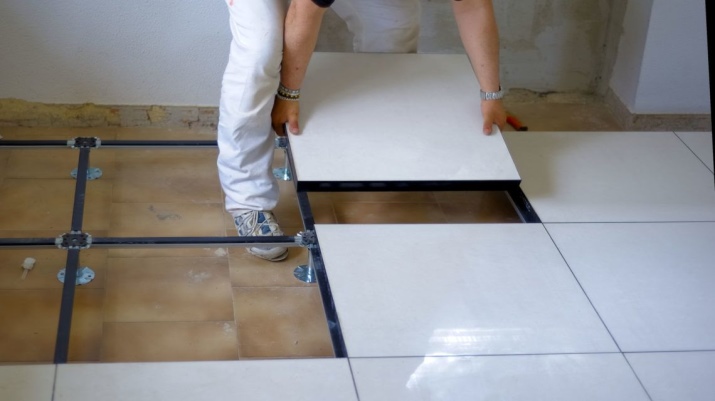
The laying of tiles should start from the front corner of the room, the first time you put the material on a dry surface to try it on, and then lay the elements, pre-lubricating the base with adhesive mortar. To ensure that the tiles can be fixed as evenly as possible, you can use auxiliary metal guides for laying, they are fixed to the flooring itself. Also suitable for this purpose is a wooden rail.
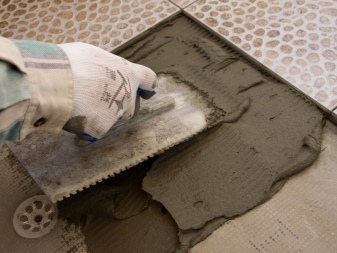
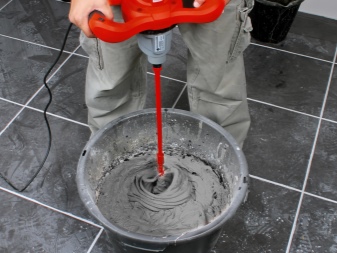
The glue for laying is diluted with ordinary water in the proportions prescribed in the instructions. Mix the adhesive mixture with a construction mixer. As a result, you should get a homogeneous adhesive mass, in this form, leave it for five minutes. After that, it is applied with a regular trowel, and then evenly distributed with a notched trowel.
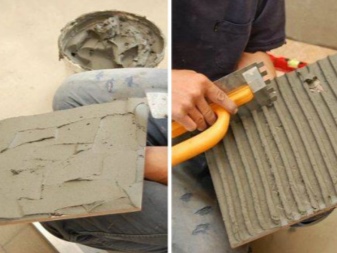
When laying, it is recommended to apply glue not only to the base, but also to the back of each tile. The grooves that are formed after gluing should be perpendicular to each other.
After fixing each individual tile, a cross between the elements is sure to be fixed. You can adjust the position of the material with a rubber mallet.

Always lay the solid pieces first and only then the individual pieces for the rest of the room. To slightly undercut the last tile that will be in contact with the wall, it should be placed on such a piece of the last row. Make sure that there is no glue residue on the floor surface. They should be removed immediately. This can be done with an ordinary rag. It is better to check the evenness of the new flooring periodically with a construction level.
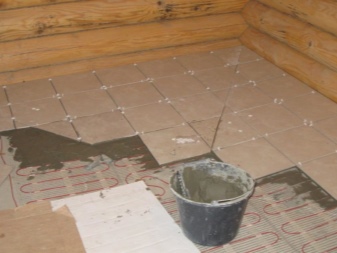
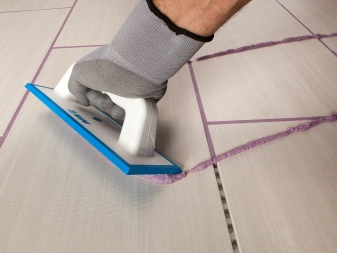
When all the tiles will be fixed to the base, and the glue will dry well (it will take 2 or 3 days), you can proceed to grouting the joints. Before this, carefully remove all the plastic crosses between the individual parts.
If in the future you plan to lay the same tiles on the wall covering as a border, then the material is carefully cut and pasted butt joints with the floor surface. Then the resulting seams are also grouted.

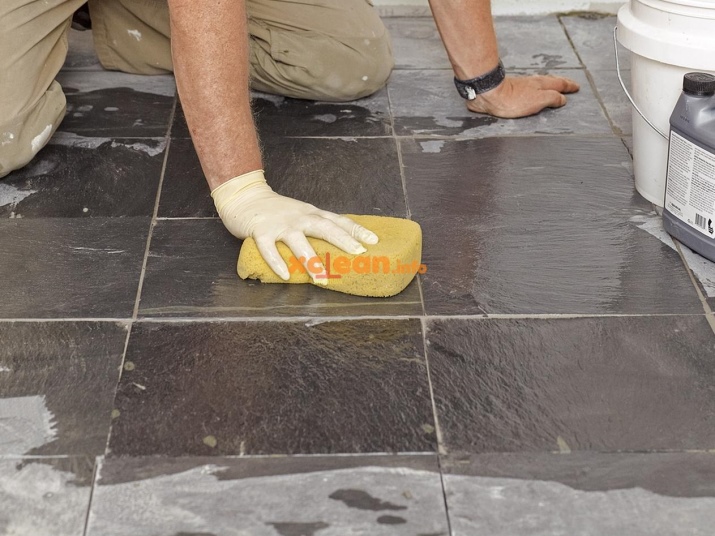
When the adhesive is completely dry, it is recommended to wipe the tiles with clean and warm water. This should be done as gently as possible with a soft sponge. Such a procedure will make it possible to finally remove all the excess adhesive mixture.
On laying tiles in the bath can be seen in the following video.


