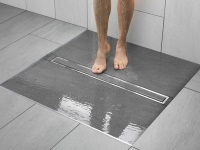
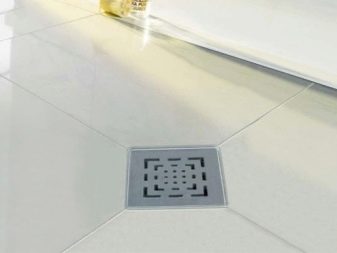
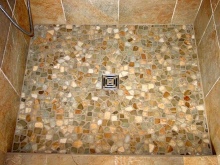
Floor shower drain under tile
Not everyone likes or can for health reasons take a bath. And those who do and can, do not always have a bathroom large enough to accommodate them. When a few years ago there was a real boom in installing shower enclosures instead of regular bathtubs, it was a great way out of the situation. However, gradually we got used to them and began to notice that the shower cabins are also quite cumbersome, not distinguished by elegance, are often equipped with "frills", which greatly increase the cost of design, but in little demand in real life, because of the high side they are difficult for elderly people to use. And now we are more and more often interested in a new, which, as it often happens, is a well-forgotten old, equipment for the bathroom - shower ladder.
What is a drain?
Drain or shower drain is one of the elements of plumbing devices, designed to organize a shower stall without any tray and perform several additional functions:
- drainage of water into the sewage system;
- filtration of discharged water from various objects, as well as debris;
- Preventing unpleasant odors from the sewage system into the bathroom and living areas;
- allowing the sewage drain to be cleaned.
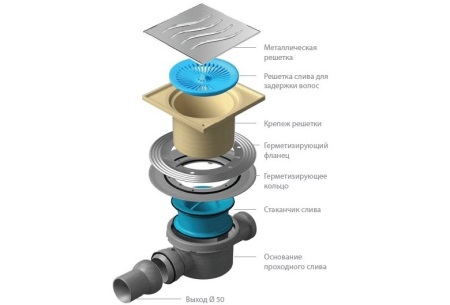
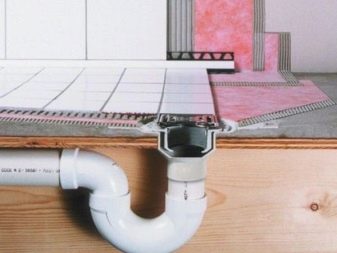
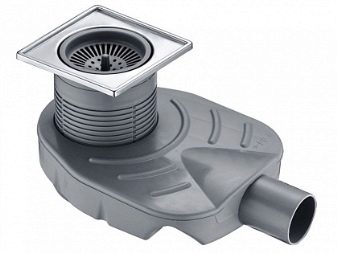
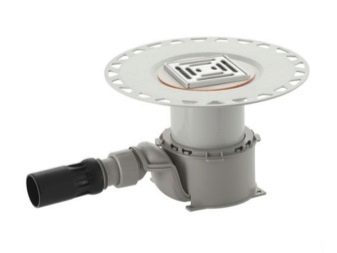
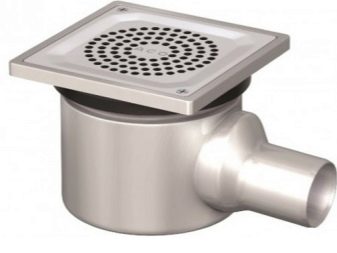
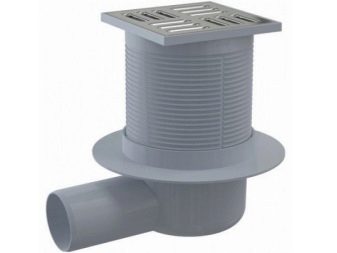
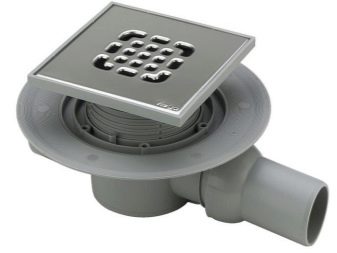
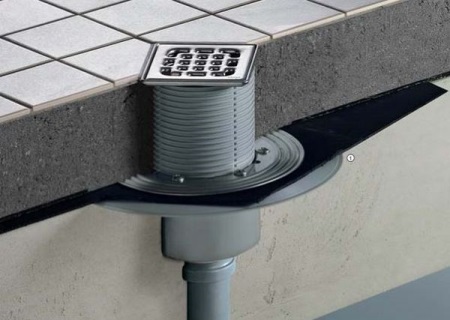
The construction of the shower drain consists of:
- body;
- siphon;
- outlet pipe;
- stopper;
- clamping flange;
- decorative grating.
Advantages
When choosing a shower stall with a drain, usually guided by a number of benefits that can provide this small plumbing device:
- Individual design of the bathroom, in general, and the shower enclosure, in particular;
- the possibility of better organization of the space of a non-standard room, including a bathroom of modest size;
- much better adaptability to the needs of people with disabilities;
- protection against accidental flooding, which is especially important for multi-storey buildings;
- ease of cleaning.
Types
Modern industry provides the possibility of a wide choice of drain drains, which can be divided into several types.
1. According to the type of construction
- Standard shower drain;
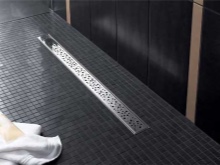
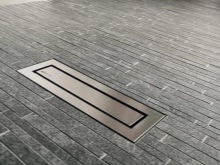
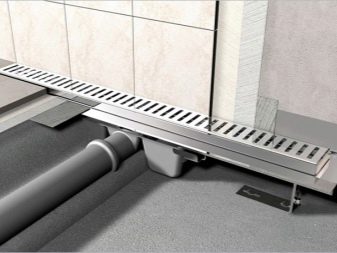
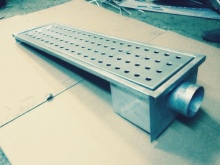
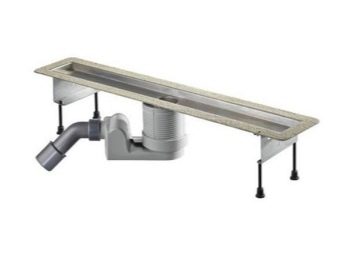
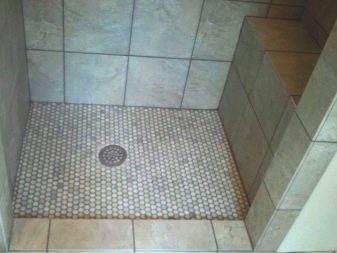
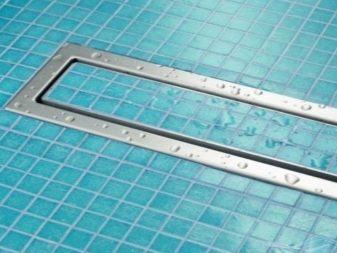
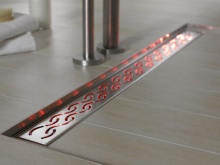
- Shower tray or drainage channel.
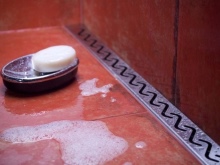
Drainage channels perform the same functions as shower drains, but differ from them in design and appearance. They look like long narrow slots in the floor, closed by decorative grids, usually mounted along the entire length or width of the shower cabin.
2. According to the material of manufacture
- made of sanitary plastic;
- Certain types of stainless steel;
- A combination of plastic and stainless steel.


3. According to the type of shutter
1) hydraulic;
2) universal, with a built-in check valve - allows you to avoid the rise of water in case of clogged drains or overflow in the wastewater pits in a private home;
3) mechanical - allowing operation in unheated rooms;
4) dry, in turn, can be of several types:
- diaphragm - with a movable membrane installed, which, in the absence of water, closes the hole of the drain, and in its presence goes down;
- material with "molecular memory", i.e. tending to return to its original position after deformation;
- Float - with a float that rises or falls depending on the amount of water;
- pendular - acting on the use of gravity.

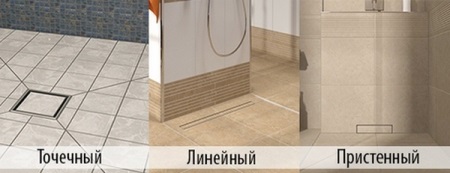
4. by type of installation
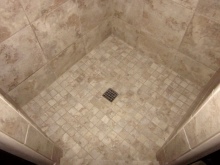
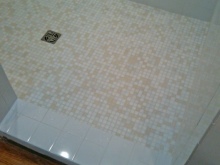
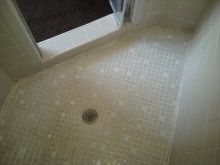
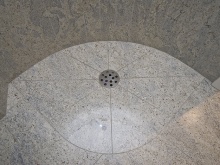
- point
- linear;
- wall-mounted.
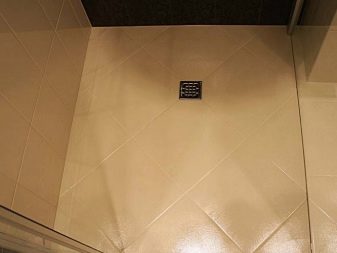
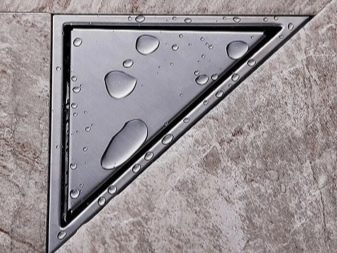
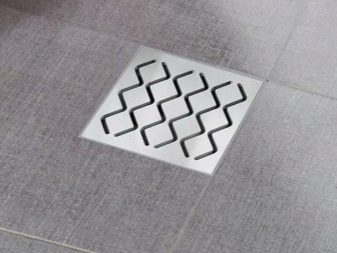
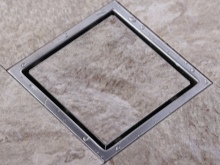
5. According to shape
- circle;
- square;
- triangle;
- rectangle.
6. Height
- non-adjustable;
- adjustable.
The ability to adjust the height of the drain makes it much easier to install.
7. According to the type of drainage branch pipes
- Single;
- Through-jets.
The size of the outlets also vary and are selected according to the diameter of the inlet hole in the sewer pipe of your bathroom.

8. According to the material and design of decorative linings
- plastic;
- stainless steel;
- composite materials;
- glass;
- with LEDs.

Location
One of the advantages of shower drains is that by choosing the appropriate type of this sanitary device, it can be installed almost anywhere convenient for you bathroom:
- point drain is placed anywhere in the bathroom, and you should ensure the slope of the floor on all four sides;
- a drain with a linear inlet will be almost invisible if placed in a corner; in this case the floor surface must be inclined on both sides so that the water drains in the direction of the drain
- The wall drain is a slotted type; such drains are located near one of the walls and have a large capacity; the floor slope in this case is made in one plane, in the direction of the wall. It should also be noted that the installation of a drain of this type is possible only at the stage of the initial arrangement of the bathroom or in the case of major repairs.
How to choose?
When choosing a bathroom drain, there are a number of conditions to consider:
1. Place of residence - in the case of installing a shower with a drain in a private home, you can afford to consider absolutely all options, especially if this decision is made at the stage of construction; if such a design is planned to install in an apartment, there will be a number of restrictions, one of which is the lateral location of sewage lines, as a result of which the choice of vertical drains will be rational.
2. Diameter of the outlet, which depends on the diameter of the installed sewer pipes.
3. Height of the drain itself, which depends on the height to which the floor will be raised.
The required drainage capacity depends on the type of shower, e.g. tropical shower or waterfall, as well as the drainage area; vertical shower drains and floor drains have the highest drainage capacity.
5. The choice of a water trap depends on the frequency and regularity of use in the bathroom:
- If you plan to use the shower constantly, you can opt for a water seal;
- If the use of the shower is not regular or if the bathroom is equipped with a heated floor, a dry odour trap is preferable;
- A universal type of odour trap (float-type check valve) will not only ensure water drainage and absence of odour from drains, but will also help to protect against flooding if the sewer nevertheless becomes clogged.
6. Price limits - from inexpensive standard plastic point drains to drainage channels made entirely of stainless steel.
7. The overall design of the bathroom - depending on this, not only the placement of the drain (from standard point drains to almost invisible wall drains) is chosen, but also the type as well as the material of the decorative overlay (as an option, the absence of a decorative grid).

Instructions for installation
In case you prefer to deal with the arrangement of the bathroom by yourself and have chosen to use a drain shower drain, it makes sense to install this sanitary equipment with your own hands.
The entire technological process for its installation can be divided into several stages.
1. Choosing the optimal type of drain for your bathroom.
Determining the type of screed:
- cement-sand - characterized by heavy weight, poorly suited for houses with old floors;
- expanded clay + cement-sand screed of a smaller thickness - a lighter option;
- floating screed with a heater, can be combined with the installation of underfloor heating;
- lightweight concrete - a good option for underlayment, which allows to reduce the overall weight.
3. Preparation of the necessary tools:
- Drill, chisel, hammer - you will need them in case you need to pre-demolish the old coating;
- containers for mixing mortar and adhesive;
- Drill with a nozzle or a mixer;
- spatulas, trowels;
- tools for marking: a level (it is most convenient in this case to work with a laser level, which has the function of building levels), rule, tape measure, ruler, marker;
- construction knife;
- tile cutter;
- wire cutters.

4. Preparing the necessary accessories and materials:
- Thermal insulation material, such as extruded polystyrene foam sheet;
- waterproofing membrane;
- bitumen mastic;
- buffer tape, thin foam plastic or corrugated cardboard;
- Sewer pipes (preferably plastic);
- a set of drains;
- tile adhesive;
- mortar;
- grout;
- sealant;
- ceramic tiles.
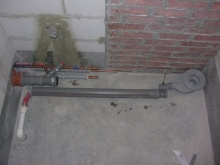
5. Creating a branch from the sewer riser and laying the sewer pipe with the required level of slope.
6. Preparation of the substrate:
- Caulking all gaps, damages and irregularities in the floor;
- cleaning of the base surface from debris;
- pouring a rough layer of screed of foam concrete or expanded clay concrete, the thickness of which should be about 4 cm with the installation of the perimeter damper tape, corrugated cardboard or thin foam board to create a "floating" board.
- Screed drying within a week.
7. Marking the required height of the screed:
- A laser level is placed so that the axis of the sewer pipe is marked;
- shower trap is installed at a height of about 1.5-2 cm above the axis of the sewer pipe;
- the laser beam is lifted to the height of the decorative grid, taking into account its thickness;
- another 1,5-2 cm from the line of grating installation;
- the obtained height is marked on the walls with a marker.
In the video below, see how to properly make a marking for the screed.
8. Processing the joints of the walls and floor with waterproofing mastic in order to prevent water seepage and mold formation; corners, if necessary, you can additionally lay segments of roll waterproofing with the subsequent third layer of mastic coating and overlap the walls to 30 cm.
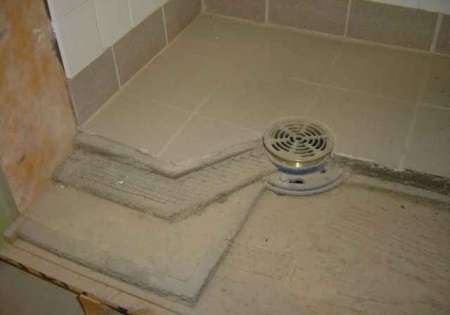
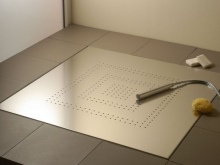
9. The choice of location of the drain, taking into account the task of minimal undercutting of the facing material. The best option for this will be the layout of tiles on the floor, taking into account the indentation from the walls.
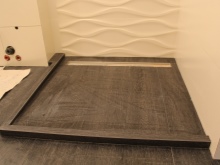
10. Installing the gangway:
- Forming the frame (manually from boards or using a prefabricated system consisting of slats of varying thickness, decreasing as you get closer to the drain hole and thus provide the necessary slope of the surface);
- Installing the shower drain - assembling the drain, securing it to the floor, inserting the pipe into the drainage pipe.
11. 11. Laying of thermal insulation sheets, providing openings for all drainage elements. If there is no need for additional thermal insulation measures, the frame can be filled with a sand-cement screed.
The following video shows the installation of the drain and the insulation of the tray.
12. Pouring the second layer of screed, which provides slope of the floor, also performed in several steps:
- a reinforced mesh is put on the laid insulation;
- for the creation of the slope are placed beacon strips;
- mortar is mixed in a container, which is spread on the insulating material in an even layer, the thickness of which can vary from 3 to 4 cm
- at the joints of the walls and floor is placed damping tape;
- laying of the cement mortar so that only the flange circle of the drain remains visible on the surface, while providing the necessary slope to the location of the drain;
- Screed drying for 3-4 days.
In the following video see the process of pouring the screed.
13. Floor waterproofing:
- laying a sheet of waterproofing membrane of the right size with a hole for the drainage hole and fixing it with screws;
- additional waterproofing by warming the joints between the walls and the floor, paying special attention to the corners;
- Installation of a siphon, rubber sealing ring, decorative grid on the flange of the drain.
The nuances of waterproofing of the future tray are discussed in the following videos.
14. The third layer of screed. Drying, the time of which is calculated based on the formula for drying: 10 mm = 7 days. It is important to maintain the temperature in the room at 20-25 degrees, humidity 65%, avoid direct sunlight and drafts. The first few days it is recommended to wet the screed
15. Tile laying:
- laying tiles using tile adhesive and a trowel in the direction from the trap to the walls with trimming in accordance with the designed layout scheme and the shape of the decorative overlay on the drainage hole;
- drying within a day;
- grouting joints with water-resistant materials, as a result of which the drain grid and the laid tiles should be at the same level.
The following video examines one of the options for laying tiles and describes some of the nuances of grouting joints.
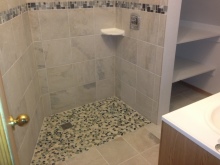
The rest of the work on the arrangement of the shower (the choice of sanitary equipment, curtains or a glass wall separating the stall from the rest of the room) are made according to your taste and capabilities.
The last video review with the finished tray.


