Is it possible to put tiles under the tiles?
The vast majority of apartment owners have a tiled bathroom. This material is the best fit, thanks to its remarkable qualities, primarily strength and moisture resistance. These same qualities create certain difficulties when you want to make repairs in the bathroom.
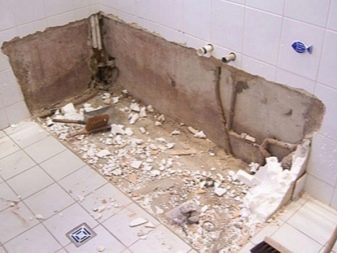
Despite the fact that the bathroom is often the smallest room in the apartment or house, the cost of its repair can be many times higher than for any other living space. First of all, this is associated with a complicated dismantling of tiles or ceramic tiles. That's why many put off to the last minute repairs, even very necessary in the bathroom, fearing that the cost of effort, money and time will be exorbitant.
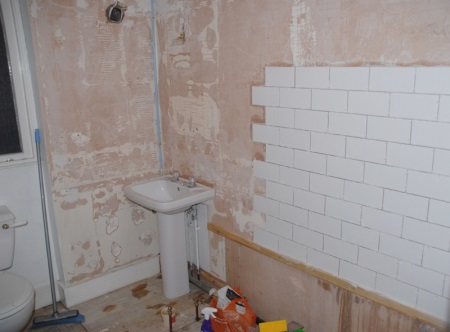
In most cases this process can be simplified if you do not knock down the old tiles from the walls, ceiling and floor in the bathroom, but lay new tiles immediately on top of them. Experienced masters-finishers advise: do not be afraid to lay freshly purchased tiles on top of the old, because sometimes this even has its own advantages.

Advantages of the method
There are a number of advantages that justify laying a new tile or porcelain tile on top of the old one. First of all, it is less costly in terms of effort. Knock off the old tile from the wall when it is glued to the conscience - not an occupation for a day. The work will be noisy and dirty. Secondly, it will save a lot of time that you will spend on cleaning and garbage removal after the dismantling of the old tile. In third, it is less cost for the preparation and alignment of the surface.
But there are a number of nuances in which this method is not possible. Let's understand this in detail.
When can you lay tiles on top of the old?
In addition to the fact that the dismantling of the old tile - it is noisy, long-term and very dusty business, after that it will be necessary to prepare the walls again for tiling: priming and waterproofing. To avoid this, the old layer can not be removed.
This is done if:
- The old tiles hold up very well, are in perfect condition, all tiles fit together tightly, the grout is in place and does not fall out of the joints.
- Plumbing fixtures and bathroom furniture are removed without damaging the old coating.
- If the removal of old tiles (even some of the masonry) can partially or even completely collapse the wall.
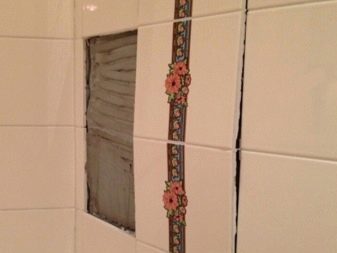
In addition, the old tile or ceramic tile itself is a waterproofing agent, and will additionally provide protection against leaks. But if the same coating is crumbling or loose, has cracks and chips. and some tiles and even fall out, so simply put on top of a new tile will not work. In this case, when the work will be done on the floor, the base will be uneven and unreliable, will "float" under your feet and crumble. If wall or ceiling tiles are glued on top of the old useless tiles, they can collapse on your head at any time!
In addition, you should pay attention to the fact that the layer of old tiles together with the tile adhesive can be a solid thickness, and another such layer can not only lower the ceiling or narrow the walls, but also raise the floor level, which is not always acceptable. Note that the floor in the bathroom should be lower than the floor in the rest of the apartment, so that if water leaks, it will not flood the other rooms.
How to understand that you can use an old tile?
Before you take up the purchase and installation of new tiles, it is definitely worth a thorough inspection of the state of the old coating. First you need to visually inspect it: on the walls, floor or ceiling there should be no cracks or chips, fallen tiles or their fragments.
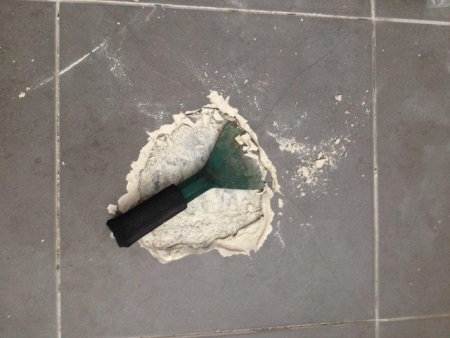
Next, the tiles should be a good probe - It should not "walk", wobble or separate from the main surface. Joints should not crumble and fall out. After a manual inspection, you should arm yourself with a rubber mallet and tap the entire finish. If you hear a distinct ringing sound, it means that the tiles have delaminated from the base, and will be a poor base for a new finish.
The last step is to check the level of the ceiling, floor and walls. If the walls are "drooping" and the floor or ceiling has a strong bevel, it will be impossible to fix it with just the tile adhesive and the tiles themselves.
When can not put a new tile on top of the old one?
There are situations when it is extremely undesirable to lay new tile over the old, and it is easy to determine even before the installation work begins.
- Tile when tapping produces a non-uniform sound. Tapping tiles with a hammer, pay attention - if in different places it "sounds" differently, then there is an air "cushion" under it - voids. The tile, which will be placed on top, will overload it, and only fall off and the new, and the old coating together with the mortar.
- The bathroom is too small or the walls are crooked. Laying another layer of tiles will create too thick "sandwich", which will greatly reduce the useful size of the bathroom. In this situation, tiling should be done according to all the rules, with the removal of the old - every inch counts.
- The floor or ceiling under the old tiles have a visible "hill" or a large slope. In this case, it is advisable to remove not only the first layer of tile, but also the old screed, to level the surface with a thinner layer.
- Under the old tile pass utilities, to which there is no access. If the wall or under the tiles "immured" pipes, in case of a breakthrough will have to remove both layers of tiles, which will greatly complicate the repair work.
If during the revision of the old coating, you found that you need to podklyuyut two or three tiles, this is not a big deal. But if more than fifteen percent of the entire area is damaged or has obvious defects, it is more rational to remove the old finish completely.
Preparation work
Even if the old surface looks perfect, you can't just apply an adhesive solution to it and glue a new tile. Beforehand, it is necessary to carry out a number of preparatory works.
Here's what you need to do before tiling:
- Thoroughly wash the old tile from water plaque, grease and stale dirt. Carry out cleaning can be carried out with the help of special cleaners for tiles or use baking soda. The surface should be cleaned with a rough brush, even a metal brush is possible. If you skip this procedure, the adhesion between the layers will greatly deteriorate.
- Places where there were old tiles that have fallen out, you can seal with water-resistant plaster or cement mortar mixed with sand according to technology - so the surface will have a uniform level.
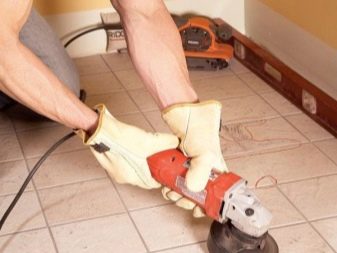
- The previous point can be limited if the surface of the old tile is rough and uneven in itself. If the tile is glazed or simply smooth, you will have to knock down this layer. To do this, you can use a hole punch, drill or diamond drill bit. It is not necessary that the surface after that is perfectly flat - the main thing is to remove the gloss and get to the ceramic rough base of the tile. You can also increase adhesion by drilling notches or shallow holes in the tile.
- Joints between tiles, if they are crumbling or falling out, are removed completely, and the resulting gaps are sealed with mortar.
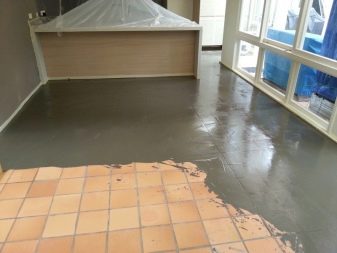
- After all the procedures, the surface is coated twice with "Concrete Contact" primer, which will further increase the adhesion of the adhesive and the old tile. After that, the base will look like sandpaper - it will be rough and coarse, but nevertheless, the adhesive for the new tiles should be particularly strong (for example, for porcelain tiles).
Laying tile on tile: technology
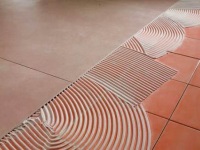
Once all the preparatory work is completed and after applying the last layer of "Concreteontakt" has passed the due time, you can begin tiling. To do this, tile adhesive is applied to the surface, which gives "relief" with a toothed trowel. Experts advise: it is better to choose a trowel, the height of the teeth of which is one and a half centimeters. There are also recommendations about glue - you need to buy thick, elastic glue, which does not allow for shrinkage.
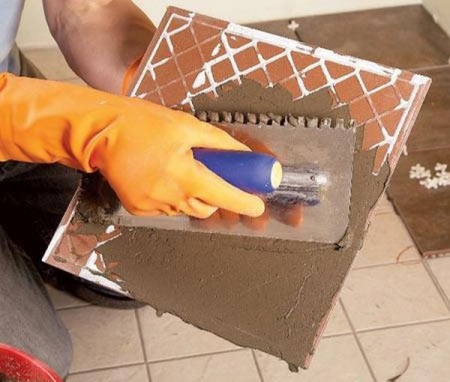
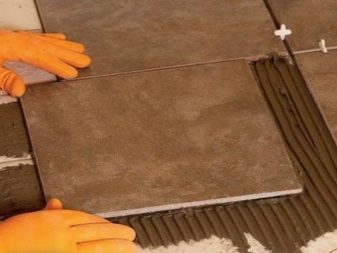
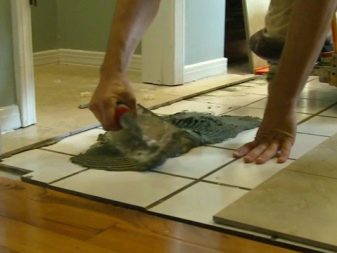
Next, the tiles are laid according to the usual technology: a small portion of glue is applied to the surface (two or three tiles), flattened with a trowel and give a wavy shape, then the tiles are placed on top, tapping it with a rubber hammer in all corners and measuring the level. If everything turned out, proceed to the second and subsequent tiles.
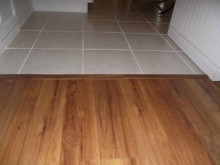
But there are nuances: laying the first row, you need to ensure that the seams on the old and new masonry do not coincide. In the case of a leak, water will "escape" through these channels inside. Do not forget that when you lay tiles on the floor its level will rise, which can lead to a change in the fixtures of bathroom fixtures and furniture.
It is also worth bearing in mind that with this method of laying, the tiles will take longer to dry than usual. Therefore, it is better to proceed to grouting of seams not earlier than three days after installation. Another important point is that since the base of the old tile absorbs moisture worse and the adhesive, respectively, dries longer, the finished masonry can "float". To prevent this from happening, especially on vertical surfaces, you need to use special supports from below.
Reviews
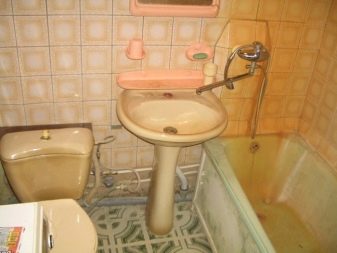
In the Network, you can meet a lot of reviews of both masters and apartment owners who have tried the technology of laying tiles on the tiles. Most often there are such stories, when in the bathroom laid tiles of the Soviet sample, strong and perfectly even, but not modern. According to some users, new tiles laid on top of these tiles have lasted more than ten years without any problems!
Most often, the new tiles are laid on the floor - this eliminates the need to re-level the floor and pour a screed. There are reviews in which users tell us that between the old and new tile also laid a warm floor, and the result will be very successful.
One of the most important points and the main criterion for successful repair all users name exactly the original state of the old coating and the strict adherence to all stages of surface preparation. But there are also reports where people say that they neglected this information, and placed new tiles on a defective surface. As a result, the repair they had to redo.

You can see the process of laying new tiles on the old one in the following video.


