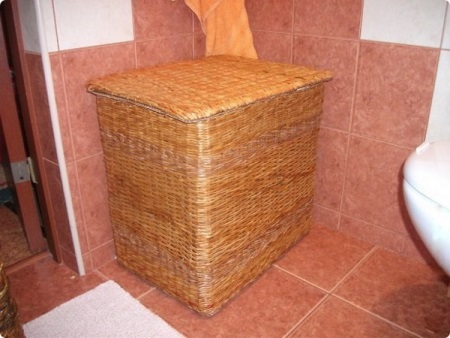
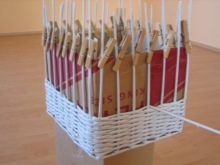
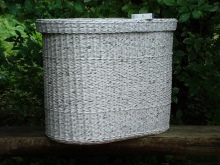
Basket for laundry from newspaper tubes
Today a new kind of needlework is successfully developing - weaving from newspapers. This activity for many has already become a hobby, which is simply impossible to abandon. This kind of creativity helps to take a break from the daily hustle and bustle, switch your attention and make your own useful things to create home comfort. The laundry basket made of newspaper tubes will be an interesting decoration in the interior of the bathroom.
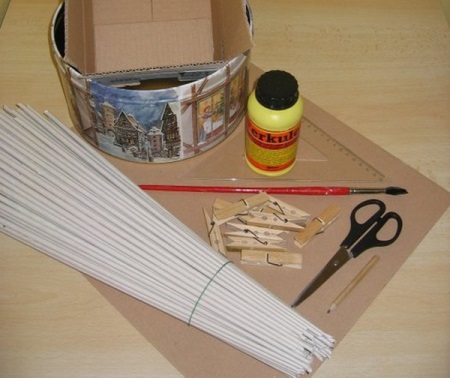
Materials
To weave a basket, it is necessary to have the following tools:
- ordinary newspapers, which everyone has at home;
- Dye to create the color of the future basket. Often a water-based stain is used;
- A utility knife and scissors;
- A long needle, the diameter of which should be 2.5 ml;
- PVA glue with a thin brush or glue in the form of a pencil;
- regular clothespins to hold it securely in place;
- ruler;
- a simple pencil;
- acrylic varnish;
- brush;
- weight for the burden.
Before you start weaving a basket, it is necessary to imagine what it should be. It is necessary to take into account such parameters as shape, height and density of the weaving. If there are difficulties with this, then you can take as a model a bucket or a box of the required size.
How to make newspaper tubes?
When creating a laundry basket, paper is used, which is a substitute for the vine. Therefore, before starting work, it is necessary to prepare newspaper tubes. Sequence of actions:
- Sheets of newspaper must be made in A4 format. It is the size of the album sheet is optimal and is 21x30 cm.
- Each prepared sheet should still be cut into three sheets lengthwise, then the size of one sheet will have 7x30 cm.
- Through the use of a letter opener, you can quickly and accurately make a large number of sheets of the required size. Such a knife will allow you to make smooth edges, eliminate traces of paper fibers. In the future, each strip will become a tube.
- It is necessary to make a sorting of the sheets. Separate them into two stacks: one with printed text and one with white stripes, which are always on the edges of the newspaper sheets. This preparation will allow you to make white tubes from those strips that were on the edges of the newsprint sheet, the rest of the tubes will need to be colored.
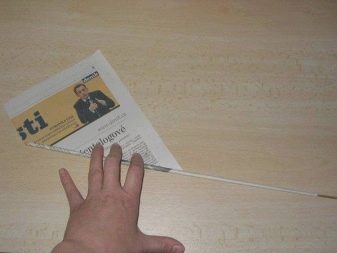
- Take one strip and place it vertically, with the white side to the right.
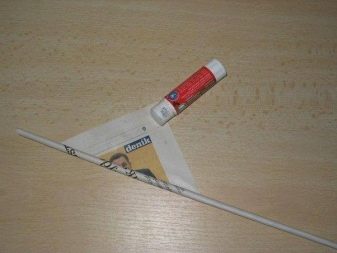
- Place a needle on the bottom left at an angle of about 30 degrees, and start twisting the sheet on it. When only 1 cm of the strip remains, use glue to fasten the tube.
- Then do the same with colored newsprint. The only thing is that you should try to hide all the dark areas in the middle.
- After the work, you will get the same paper tubes, the length of which will be a little more than 30 cm.
- The distinctive feature of each tube will be one pointed and the other edge in the form of a socket. This allows you to connect several tubes together by using glue to make a long stick that resembles a vine.
Watch a short video tutorial on how to make newspaper tubes.
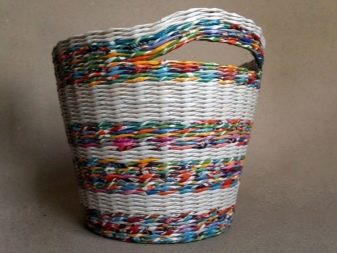
Painting the tubes
Before you start painting the tubes, you need to prepare the workplace. Take a small tray and put plastic on it. On it you will be able to dry the "vine" after painting. Prepare the stain and put gloves on your hands.
You can work with 10 tubes at once. Dip them in the stain for 3-5 seconds. Then dip the other end. Each tube after the paint should be carefully laid out on the tray, leaving some distance between the "vines". When the tray is full, then you can lay the tubes on top of the "stack".
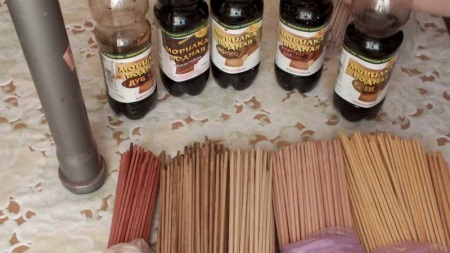
Leave the tray with the tubes for 12 hours to dry completely. It is better to avoid additional sources of heat, as a sharp drying can make the tubes dry out, they will lose their plasticity.
Weaving baskets of different shapes
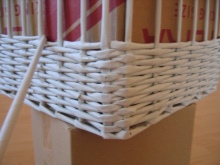
Square
To create a wicker basket out of newspaper tubes square shape, it is necessary to begin with the formation of the bottom in the form of a square.
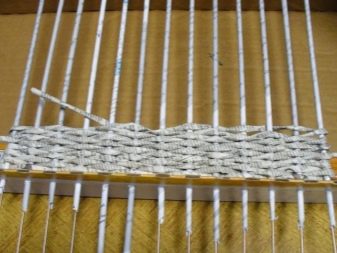
So, to begin with you need to take a strip of cardboard, taking into account that the bottom of the basket will be a little less than the size of the cardboard. Then fold it in half. Using a hole punch to make a small hole in the cardboard, the distance between them should not be more than 2 cm. It is necessary to insert a long "working vine" into the holes.
Now you can start weaving the bottom of the basket. The elongated tube should be woven next to the cardboard paper. When the weaving reaches the edge, then it is necessary to make a turn, and weave in the opposite direction. So that the "working vine" does not end, it is constantly necessary to lengthen it - to glue newspaper tubes. The size of the bottom must be kept under special control, as its width can narrow. Thus, creates a square bottom of the right size.
See clearly, this process, see the video below.
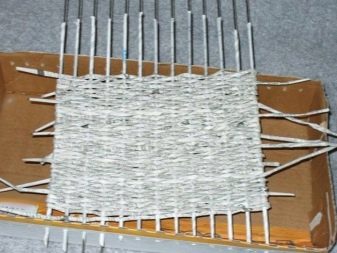
Next, you can move on to weaving the sides of the basket. There are already two vines of the future frame, so it is necessary to make two more walls. To do this, you need to take a long newspaper tube, bend it in half and slip the two ends into the bottom of the basket. The tails, which will appear on the back side of the bottom, you need to bend upwards and fasten. In this way, you get a sturdy frame. Depending on the desired height of the basket, it is necessary to create a "working vine" of the desired size.
For a reliable fixation of the walls of the basket you need to take a heavy object of the shape of the future product and put it in the center. Next, use a rubber band to attach the tubes of the frame to it. For a square basket, it is very important to create even edges. When weaving a different shape, you can do without the pattern inside.
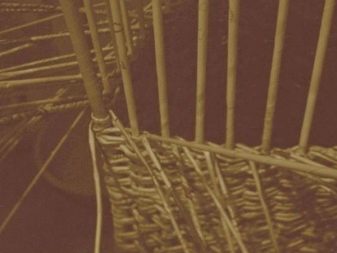
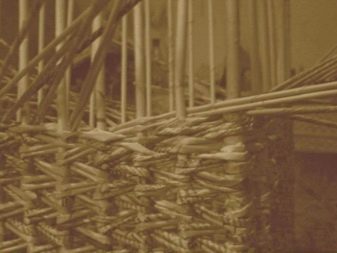
Weaving should start from the bottom of the basket. It is necessary to take a long tube and weave it into one of the sides, while alternating the position of the vertical tubes, to lead the front and back. In this way it is necessary to form all the walls.
At the beginning of weaving the end of the "working vine" remains, in the future it will be used as one of the elements of the frame. It allows you to create an odd number of vertical tubes. After each row the free end must be braided. The process of weaving the side walls goes in a circle, until you get a basket of the right size.
A simple way to weave the walls of the "rope" pattern, see the video below.
Rectangular
To create a basket of rectangular shape it is necessary to begin with weaving a rectangular bottom. It is necessary to create a pattern from cardboard for the bottom of the basket. Then place it on the edge of the finished tube and secure the construction with clothespins. Next, the paper tubes should be placed across the base, with each "vine" going under or over the base in turn, adhering to the required density of the weaving. For the time being, the construction should be covered with another newspaper tube and fixed with clothespins. The bottom will be commemorating the comb, so further it is necessary to weave in new tubes, adhering to the staggered order, to create the necessary density of the bottom. When the bottom acquires the necessary density, the clothespins can be removed, because it will already hold its own shape. The width of the bottom depends entirely on the size of the pattern. When weaving the bottom, the so-called rays will remain, which in the future will be used as the basis of the frame. Already with their help it will be possible to create the side walls of the frame.
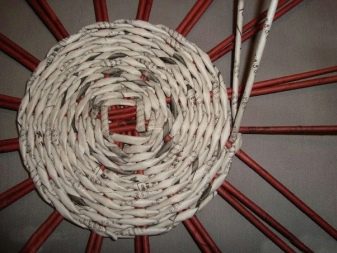
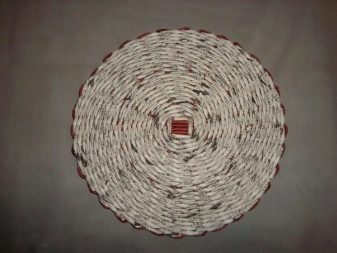
Round
The round basket is the most difficult to make, because it is necessary to make every effort to form a round bottom. The simplest method is the "rope method. It is necessary to take six tubes and connect them to each other with clothespins to create a single plane. Then this action should be repeated. Ready-made planes should be put crosswise.
Next, a "vine" is needed, which will be used for further weaving of the product. It should be bent in half and fork should be placed near the ray of formed "crosses". At turns the working tube should be bent. You should skip the top down, and the bottom - upwards, until you reach the other ray of the six tubes. Bends should be performed at an angle of 90 degrees, and constantly change the lower and upper part of the "vine. This action should be performed four times. The result will be a ring, which should immediately be fixed with clothespins.
After passing three circles, you need to take six tubes and move apart in pairs to form an even surface. Next, weave with a working straw to make every two straws. And again make three circles. It is necessary to make actions to divide the pairs. It is necessary to do the weaving until the base of the necessary size. The bottom of a round basket will resemble a sun, which consists of 24 rays.
Corner
Corner shaped laundry basket will help to save space in the bathroom, so it is in great demand in small rooms.
When weaving a corner laundry basket from newspaper tubes, you should follow some rules because of the shape of the product:
- For the racks of the basket, it is better to use tubes from a whole sheet of printer's paper or take sheets from a magazine. Soft newspaper tubes cannot hold the whole construction.
- To create a flat bottom you need to put a weight on it when designing the basket, with special attention to the corners.
- Before painting the product it is necessary to calculate the amount of acrylic varnish, otherwise you will have to finish painting with another color, and the result will not be perfect.
Decorating the edge
When the basket of the required height is ready, it is necessary to hide the ends of the tubes, which form the frame, and do not forget to fix and hide the working tube. This requires a long needle. It is necessary to stick it into the hole near the post in the middle for 3 rows. It is here it will be necessary to hide the tip.
Action with a needle should be repeated in the other direction also for 3 rows, put it on the rack and slip down. Thus, each stanchion will be bent and tugged. When finished, the edge of the piece will be finished.
In each hole, where the rack hit, you need to put glue and give time to dry. After that, use scissors to cut all the edges of the protruding tubes. All cuts should be neatly hidden between the newspaper tubes.
For a simpler way to decorate the edge, see the following video.
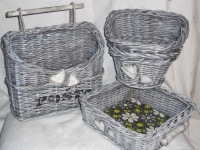
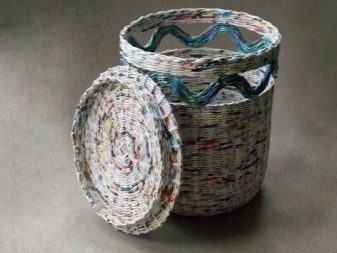
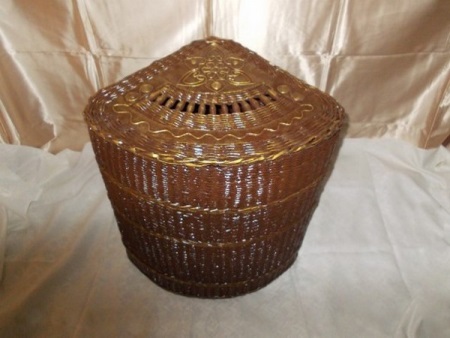
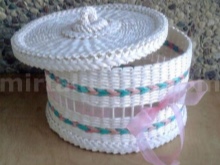
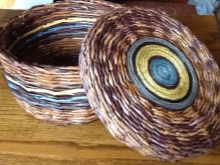
Decorating
The basket can be supplemented with a lid, which can be fixed at one wall or woven separately. Using a method of weaving the bottom, you can make and lid. Already finished product is desirable to cover with varnish. Acrylic varnish is an excellent solution because it is odorless and dries quickly.
The use of lacquer will give the basket durability, it will be impossible to distinguish it from the real vine products. When the varnish is not completely dried, you can correct the shape of the basket, to give the bottom stability, eliminate kinks.
Sometimes for basket weaving paper tubes without coloring are used, then after the end of the work the product should be thoroughly primed and painted. A primer can be used as a primer or ordinary PVA glue. To paint the basket, you can use aerosol paints, which should be applied several times.
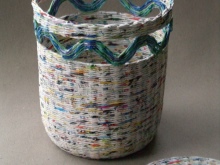
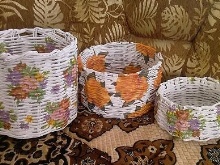
Baskets decorated with a picture using decoupage technique can be called a real work of art. For fixing the picture varnish is also used.
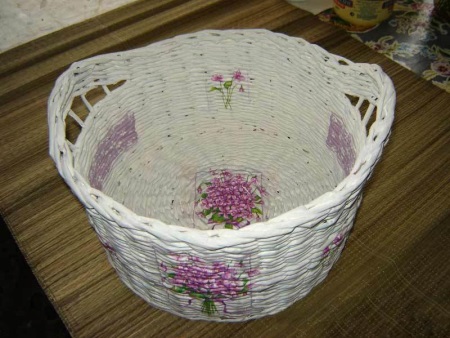
You yourself choose the style and color of the basket. For decoration you can use ribbons, beads and other decorative elements. For practicality, you can sew a liner of chintz separately.

Basket of newspaper tubes, made by your own hands, will be a great decoration of the interior of the bathroom. The main thing is to do with love.