Shower cabin with their own hands
Many of us dream of a shower cabin, but not all can make their dream come true, because the shower or hydrobox - not a cheap pleasure. Prices for more or less acceptable quality models start from several tens of thousands of rubles. In addition, not every bathroom has the space to put in addition to the bathtub and shower cabin.
This problem has a great solution - you can build a shower cabin by yourself. Even using expensive building materials, you'll spend less money than for a ready-made shower enclosure from leading manufacturers, and there is no point in buying another, because the cheapest models quickly fail. As a result, you'll get a shower cabin that meets all your requirements: in shape, size and equipment. You will be confident in its quality characteristics, and it will serve you for many years.
Shower Cabin: all the pros and cons
If the size of the bathroom allows, you do not have to choose between a bathtub and a shower cabin, so you can enjoy the benefits of both sanitary devices. If square meters dictate their conditions, then, in order not to make a wrong choice, we suggest you consider all the advantages and disadvantages of shower cabins. It will help you to decide whether you're ready to exchange the usual bath for a modern shower enclosure.
Supporters of shower cabins usually cite the following arguments:
- For people who lead an active lifestyle, the shower cabin seems to be the best option. It allows you to make hygienic procedures literally on the run, not distracting on, constraining movements, high boards and curtains, which are constantly striving to stick to a wet body.
- If there are elderly people in the house, then they will be much more comfortable to wash in the shower cabin, especially if you set there a bench. Go into the shower and get out of it will not be any trouble for them. But grandparents often need help to overcome the high edge of the bathtub.
- Shower cubicle is usually a more or less enclosed space and therefore heats up faster than the entire bathroom. Warm up the cabin can be simply by running warm water for a few minutes, and then, at a comfortable temperature you can begin to take care of hygiene and cosmetic procedures.
- Shower cubicle takes less space than a bath. On the saved square meter you can install a bidet, a washing machine or a cabinet. In addition, a beautiful shower cabin, whether it is purchased or made by hand, can be a real highlight of your bathroom.
Opponents of shower cabins indicate the following disadvantages:
- For many people, taking a bath is a real ritual, which is accompanied by fragrant foam, oil, candles, pleasant music and even champagne. Not everyone is willing to give up this pleasure, which helps fight stress and fatigue.
- Young children are very fond of splashing in the water. Rubber toys and special paints for the bath are able to occupy them for a long time. In a shower cubicle, unfortunately, such entertainment is not available.
- In the bathtub, it is convenient to wash large things that do not fit in the washing machine or clothes that require delicate hand washing. Of course, there are shower cabins with a deep tray, which partially solve this problem.
- Installing the finished enclosed cabin does not require preparatory work, but if you decide to make a shower enclosure with their own hands, you will have to take care of waterproofing.

Choose a place of installation and shape
In principle, the shower cabin can be installed anywhere in the bathroom, but only if you began to plan the finishing of the room at the final stage of construction, when the sewage pipes are not yet conducted. In this case, you can make sewer layout at your discretion, based on the location of the plumbing fixtures. If you just decided to replace the old bathtub with a shower, then install it as close as possible to the sewer riser, that is, in place of the bathtub. Of course, you can extend the sewer pipes yourself, but it is not always possible and, in addition, it is not safe.
As for the form of the shower, it will depend entirely on your skills in construction and repair. Beginning masters is better to stay at the rectangular or square cabin. Such a cabin is easy to fit into the corner, so you will need less construction work and materials. More advanced repairmen may recommend a rounded shape shower enclosure or even in the shape of a shell.
Decide on the tray
There are two options for the base of a homemade shower cabin.
Prefabricated shower tray
This is the simplest and most obvious solution. You will not spend a lot of time and effort to install it, and besides, you do not have to deal with the waterproofing of the floor.
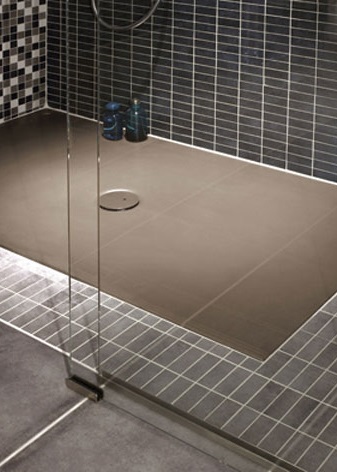
One "but": a quality shower tray will cost you much more than a homemade floor, and buying a cheap, low-quality version makes no sense. The most popular are acrylic and faience shower trays. They look great and retain heat well, but they are quite fragile products.
Stronger and more durable are cast iron shower trays, but because of their weight they are gradually falling out of use.
The best option is the shower trays made of kvaril or artificial marble. They combine the beautiful appearance and thermal conductivity of acrylic and faience with the strength and durability of cast iron. But for such a purchase will have to lay out a rather large amount of money.
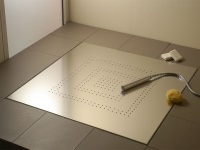
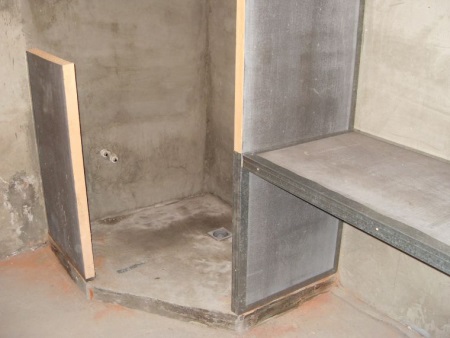
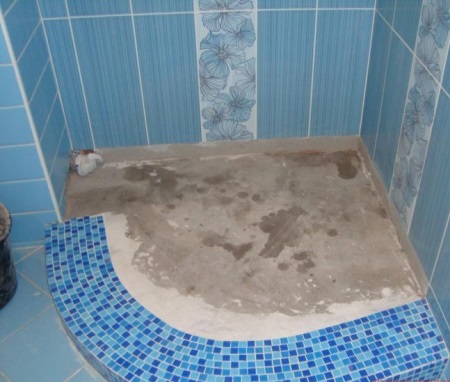
Inclined floor.
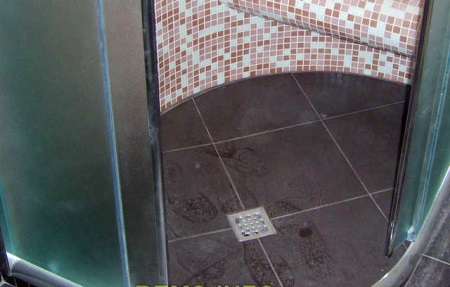
This is more reliable, but also a more labor-intensive solution. It involves creating an uneven floor in the shower cubicle with an angle of inclination, at which the water will flow into the drain. You can make such a floor yourself by knocking down a few centimeters of the floor from the walls of the shower enclosure toward its center. Then the floor is laid with non-slip tiles with the observance of the slope. It is important to add to the tile adhesive special compound against mold and mildew. Joints with the walls are treated Bathroom sealant.
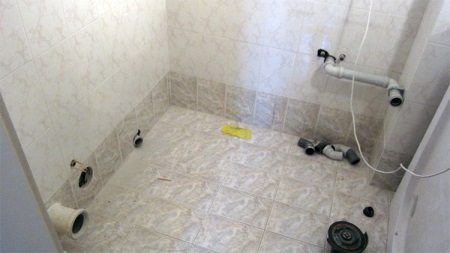
Connection to the water supply and sewerage
An important part of the independent creation and installation of the shower cabin is to connect it to the sewage and water systems. In order to do this correctly, be sure to consider the following points:
- To connect the shower enclosure to the water pipes you need to use special flexible hoses. Choose hoses slightly longer than necessary.
- The pipe that connects the drain to the sewer should pass at a slight angle. In the future, this will prevent the drain from forming clogs.
- Drain pump is necessary if the shower enclosure is far from the sewer riser.
- To prevent the shower enclosure from flooding, install pumps with magnetic valves.
- To avoid water accumulating in the tray, choose the position of the siphon so that it is above the drain.
- Sewer pipes should run below the level where the drain trap is located.
- When connecting the shower enclosure to the water supply, be sure to use gaskets and, if necessary, silicone sealant.
See the following video on how to typically install a drain into the floor.
Electricity
If you do not intend to equip your shower cabin with additional functions, such as whirlpool, steam bath or sauna effect, then you need electricity only for lighting and forced ventilation (using a fan that runs on the mains). Close contact with water implies increased safety of electrical appliances. Wiring of electricity is better to do on the outside of the shower enclosure. Do not forget to install a safety switch, which will protect the electrical network from overloads. If there is a socket next to the shower, make sure it was the appropriate class of protection from moisture and dust.
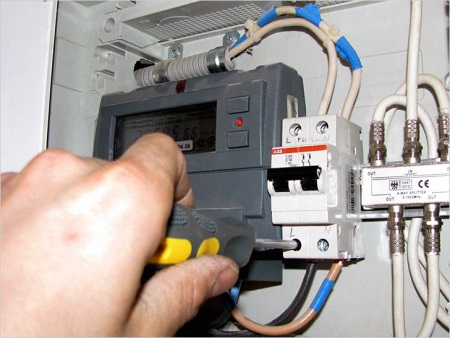
If possible, it is better to entrust wiring professional electrician to be sure of his own safety and the safety of all family members.
Finishing materials for walls and floors
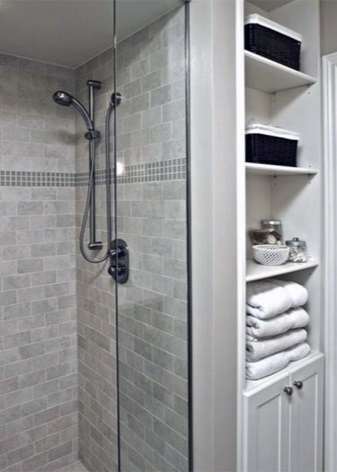
Optimal option for finishing the walls and floor of the shower cabin is tile. You can also install plastic panels on the walls, but this is only a temporary and not very reliable solution. For the walls, you can choose any ceramic tile - with or without a pattern, glossy or matte, flat or embossed. Here it all depends on your preferences and the rest of the bathroom interior. Excellent looks in the finishing of shower cabins - mosaic coating.
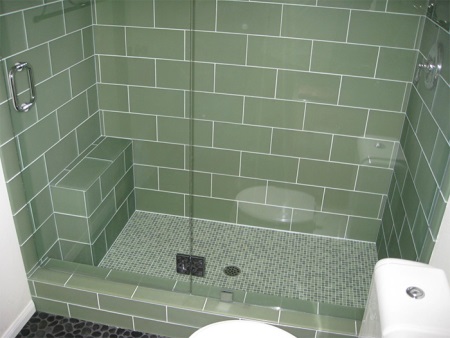
With the choice of tiles for the floor should be careful: on smooth tiles is easy to slip and fall, and tiles with too much relief pattern can cause blisters and micro traumas on the feet. To protect yourself, lay a special rubber mat on the floor of the shower cabin.
Equipping
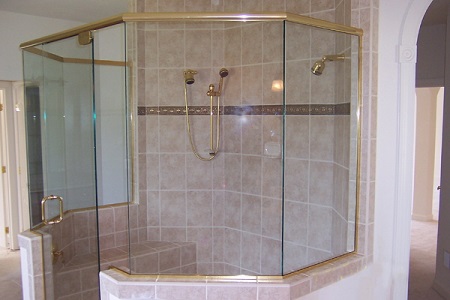
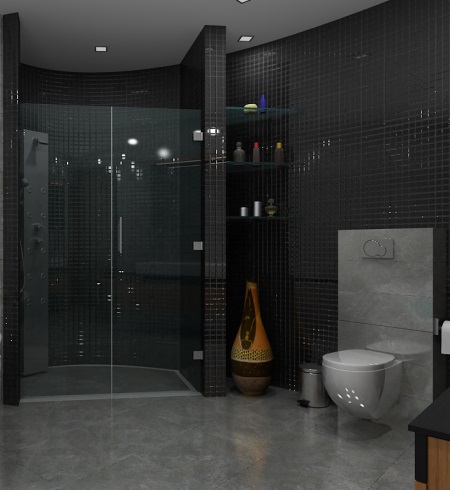
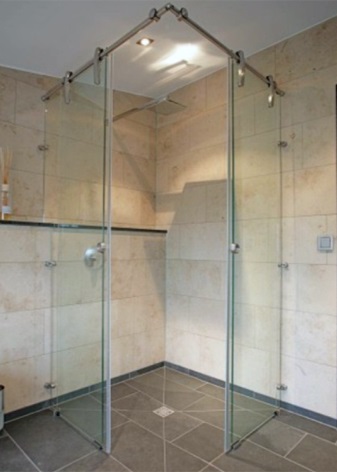
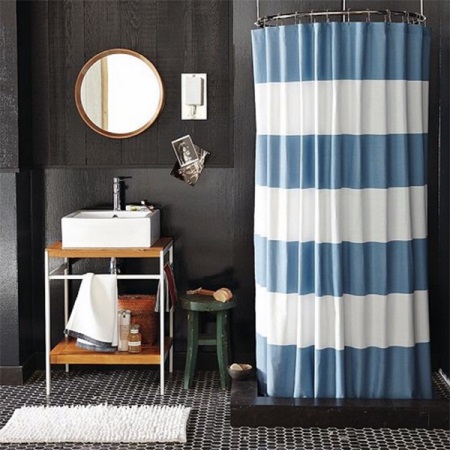
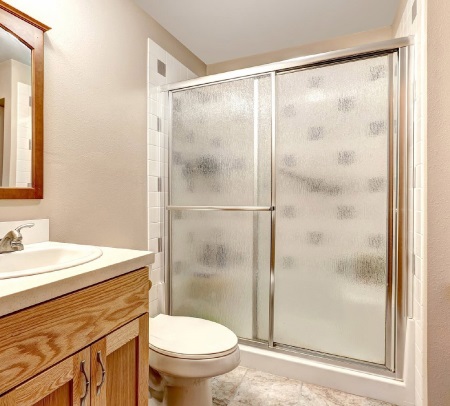
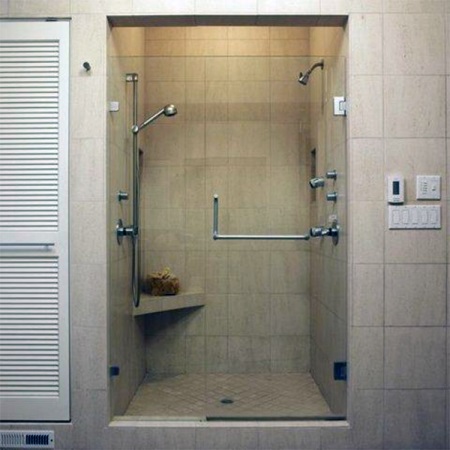
Finished with the main components of the makeshift shower enclosure, you can begin to solve the secondary issues. The first thing to decide with additional walls of the shower cabin. Someone can do without them, but in our opinion it is not very convenient, especially if the bathroom in the apartment combined. The most budget option - is to close the shower enclosure conventional bath curtains of waterproof material. However, in order to give the shower enclosure a really beautiful and finished look, we recommend installing transparent sashes.
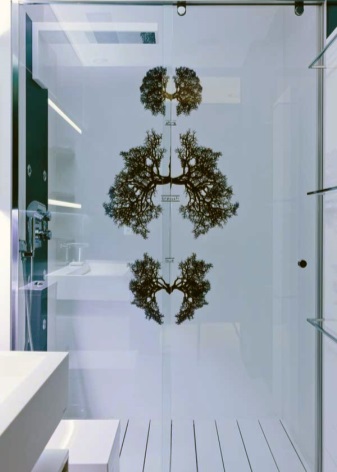
Shower enclosure sashes are usually made of glass, fiberglass or acrylic. Glass sashes are certainly beautiful, but extremely impractical, because they may crack or break even after a light blow. You can, of course, buy tempered glass, but it is expensive. The same story with fiberglass - for our purposes it is not strong enough.
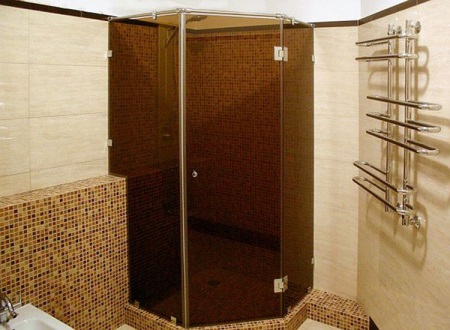
The best solution - is the sash of polycarbonate. They can be any color, transparent or frosted, with or without a pattern. You can cut the sheets yourself or order them from a company that specializes in this. Sheets of polycarbonate can take any shape, you can even use them to create a rounded or spiral shower enclosure. With the help of special construction equipment you can bend polycarbonate sheets at home.
Plumbing equipment: faucets, shower heads and others - is installed at the stage of connecting the shower cabin to the water supply. There are several variants of shower heads - with a hose, static, which is attached to the wall and ceiling-mounted. For greater convenience, we recommend combining the two types of shower heads, for example, conventional with a hose and a ceiling-mounted shower head for taking a procedure of tropical showers.
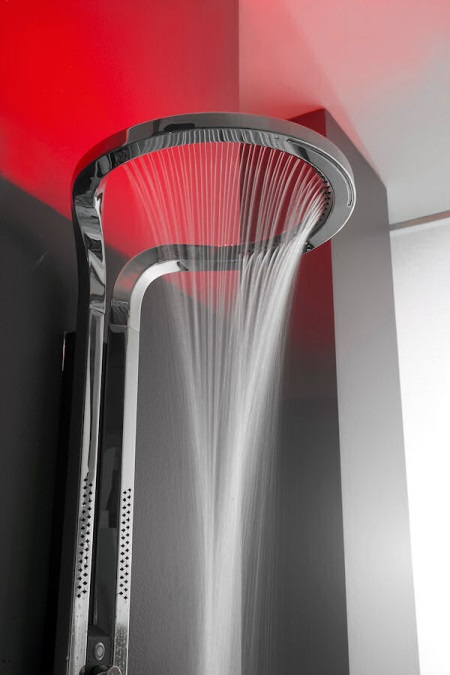
The shower cabin is needed not only to keep the body clean, with its help you can also carry out procedures to maintain health and beauty. In a large plumbing store, look in the department where they sell equipment for shower cabins. There you will find hydro-massage panels, devices that create the effect of a tropical shower or Charcot shower, steam generators, equipment for sauna and infrared heating.
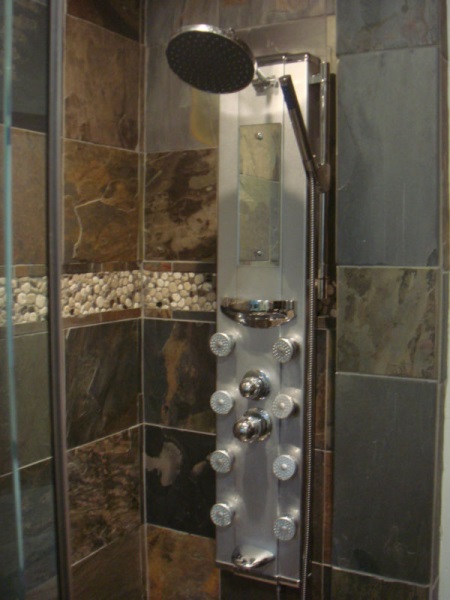
Also do not forget about accessories: rubber mats, handrails, benches and other important little things.
Creating a shower cabin with your own hands: the nuances and possible mistakes
To sum up our conversation about the self-assembly of the shower cabin, we give the following recommendations, which, if possible, should be observed:
- First you need to decide on the size and shape of the future shower cabin. Based on these data, decide whether you will buy a tray or make a sloping floor. At the same stage to determine the size and number of flaps, for example, if the cabin is angular, then two is enough;
- Before you proceed directly to the work, using a construction level to determine whether the walls in the place where the shower enclosure will be located, right angle. This only matters if the cabin is located in the corner of the bathroom, and most often it is.
- Do not forget about tightness. First of all, this applies to a sloped floor: Observe the correct proportions of the concrete screed levelling compound. Treat all joints with silicone sealant.
If you do everything correctly, the shower cabin, created with your own hands, will become an object of your pride, as well as the object of admiration and envy of your guests.


I myself will do a shower cabin in my cottage. So far, everything seems uncomplicated.