Stencils for the bathroom
In Soviet times, bathroom walls were painted with oil paint, using a maximum of two colors. Then it became fashionable to paste the walls with tiles. Now designers offer a lot of options on how to make an ordinary room bright and unique. One affordable and creative way - stenciling - is great for decorating the most humid room in the house.
Features of application in the bathroom
The main feature of the bathroom and its problem is water, or rather a lot of water in a small space.
Hence the nuances of the work:
- Use moisture-resistant paints for painting. Since the room is enclosed, it is better that the paints dry quickly. The same requirement for the main coating of the walls.
- A small space requires a careful approach to the selection of the picture and its position. Using the right size pattern can increase the size of the room.
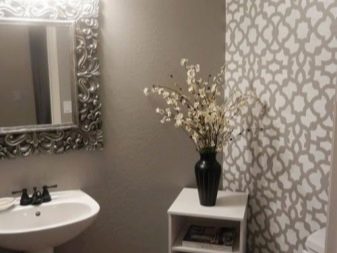
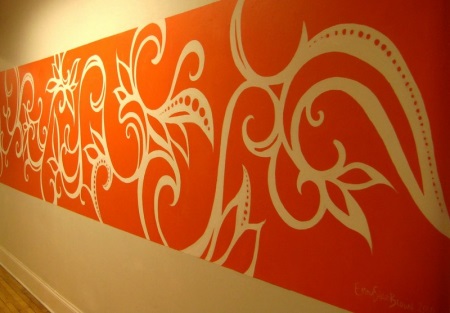
Large drawings are good where there is a feeling of emptiness, which cannot be filled with volumetric objects.
Preparatory work
Stencils can be applied to even prepared walls, on existing tiles, mirror surface or cabinet doors. The main condition is to clean the surface. If applied to bare walls, then aligned and prepared for painting, if on other surfaces, it is worth to pass a soapy solution to clean and degrease. Otherwise, the paint will not lay or will begin to lay in spots, and after drying will quickly come off. A clean surface will ensure the adhesion and durability of the design.
As for the stencil, the preparation is divided into the selection of a pattern or the creation of a drawing, as well as transferring it to the template - a kind of billet. About this - a little later.

Types of application technique
Painting with paints is a fascinating occupation, especially for creative people. However, even pragmatic individuals can find their joys in this activity and make this a hobby.
How you can draw patterns:
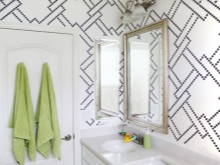
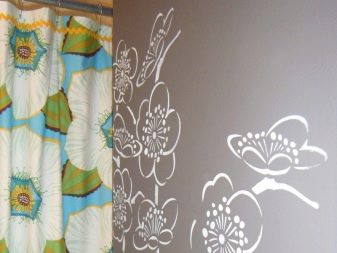
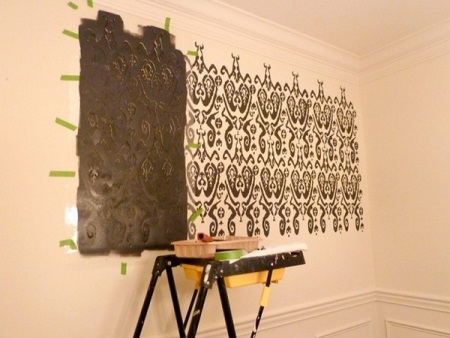
The easiest way is single-color flat drawing on a template. You only need to go over the pre-prepared drawing with one color. Excellent for the first experience. This way you can create simple ornaments and complex paintings. The only difference is in the patterns used.
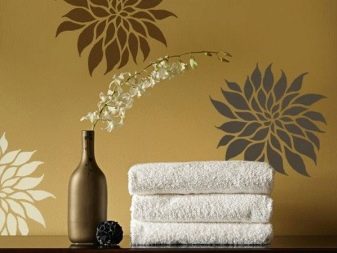
An option for the patient is a multicolor pattern that uses two or more colors. This option allows for a more expressive or cheerful pattern. It is expected that the process of preparing and selecting a pattern will take more time, as well as its application. The preliminary stage involves choosing a color palette and planning how to use it on the picture itself. You may need several blanks for each color.
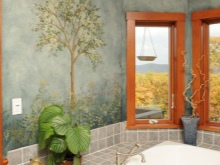
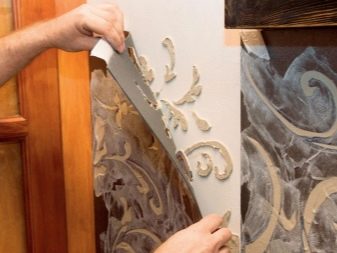
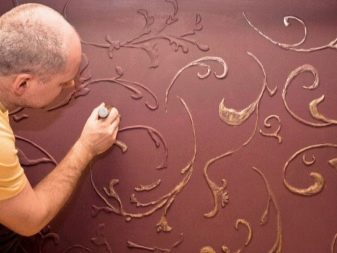
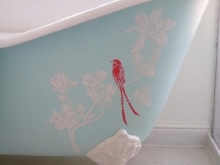
Volumetric stencils are an art for professionals. The template acts as a reference for arranging the parts of the drawing, giving a uniform shape. Plastic masses or special fillers will help to create a relief image. Also work with color is not excluded. In this way you can make beautiful three-dimensional images (ships, clouds, mermaids), creating a certain style and atmosphere. Of course, it will take a lot of time to do such work, but you can make a bas-relief yourself if you practice beforehand. The work may not succeed the first time.
Reverse stencil (negative) is a tricky technique when you need to paint over the area around the template, leaving the selected pattern in its original color. It helps to work with contrasting colors and textures to create an interesting deep and layered pattern. Also an option for the sophisticated, it is often used in a multicolor format.
The choice of paint
For painting in a damp room, silicate-based paints or quick-drying acrylic will work well.
If the chosen composition is not resistant, the longevity of the drawing can be achieved by securing the result of the work with water-resistant varnish. The same trick will also help when working with bas-reliefs, prolonging their life
How to apply paint compositions? Choose according to personal preference: brushes, rollers, sponges, spray cans. There are no rigid canons in this matter.
The choice of place
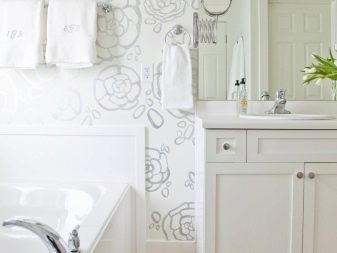
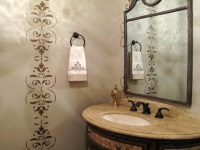
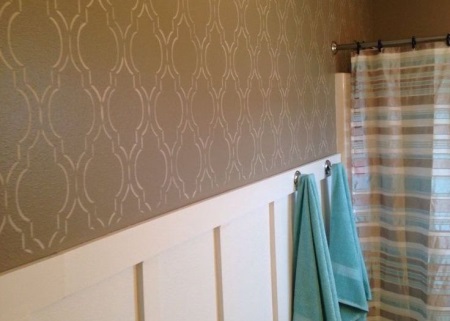
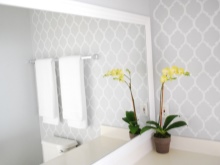
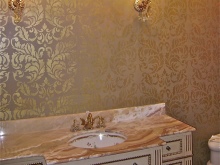
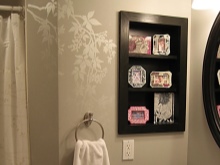
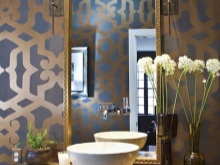
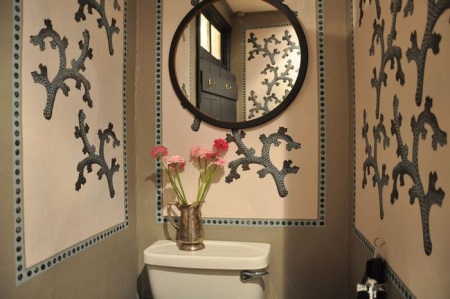
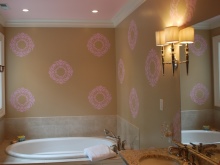
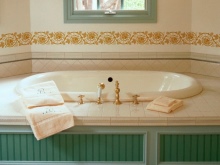
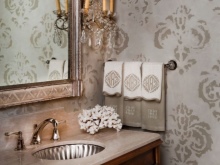
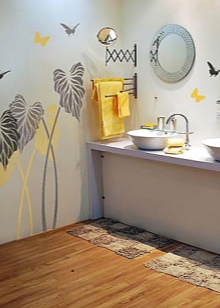
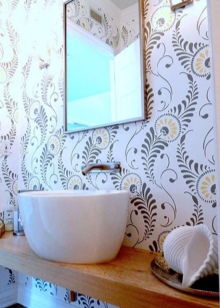
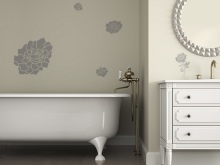
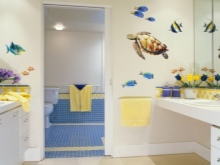
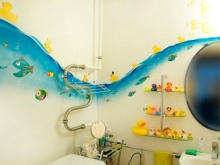
Large stencils look best in large spaces, free of furniture and details (on the wall above the bathroom, for example). Small patterns help to give a smart look to the room, where there are no bright color accents. So you can not only decorate unavoidable or bulky, boring objects (ventilation, socket, shelves, mirrors and cabinets), but also beat them up, combine with the rest of the interior, using the same theme (fish, butterflies, plant patterns). Drawings will help to hide and some defects in the walls.
How to make a stencil with your own hands?
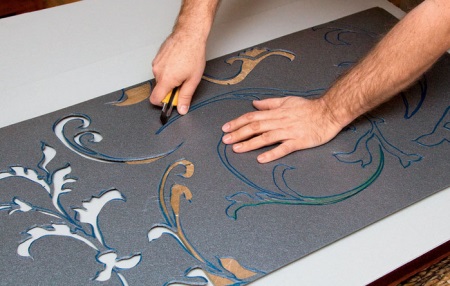
In addition to purchased options from the construction store, you can use homemade templates for drawing. The picture itself can be found on the Internet, asking the subject of interest pictures in a search engine, or you can create it yourself. The last option is better to use if you have a clear idea or some experience in decorating. Draw a sketch on paper, if it is complicated, then simplify the idea to make it more convenient to implement in life. If the silhouette is vague or unrecognizable, make it stylized. Transfer the design to vinyl or other durable material (plastic, cardboard). Use a construction knife or scalpel to cut out the design, taking care not to injure yourself.
Stenciling
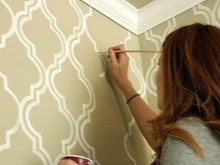
Before applying paint to the wall, it's a good idea to make sure the result is close to what you envisioned. Try it out on old wallpaper or a large piece of paper. This will help and relieve a little excitement before the first experience, to get used to the tool. Check that the place for the drawing is dry and clean.
Check the level of the design, make light marks with a pencil if necessary, fix the stencil with masking tape or a special non-stick adhesive (so as not to leave traces on the surface and easily come away from it). "Hide" with tape and paper those parts of the interior that should not get paint on them. If necessary, cover the floor with newspaper or polyethylene.
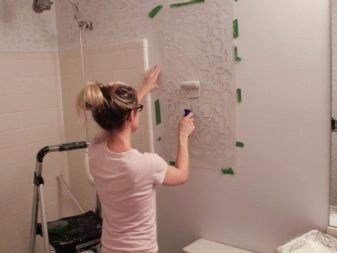
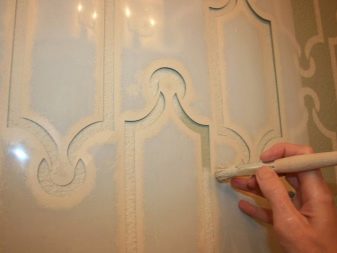
Apply the first coat of paint. After it is completely dry, you can refresh the color with a second coat (as needed and based on the idea). The sponge and brush should be blotted beforehand, removing any excess so that it does not run over the edge. Paint from a spray can should be sprayed at a distance of about 25-30 cm (this will give a more even layer and make the best consumption).

Further work depends on your imagination: change the color, transfer the stencil to the next place.
When the work is ready, you can apply a fixing layer of transparent varnish. When it's dry, remove the rest of the tape and paper, and admire the creation!
Tips
Despite the name (stencil, pattern) this technique makes the room one-of-a-kind. In order not to spoil the work, and then the mood, to get pleasure from his work, it is worth paying attention to the recommendations:
- The less experience, the fewer tricks should be used. Use store-bought blanks, they simplify the task. Large clear lines are better transferred to the surface, small features, a large number of corners are difficult to transfer and often "cut off".
- The size of the drawing should correspond to the possibilities of the space: on a large area large compositions are appropriate, in the design of details and small areas - small stencils.
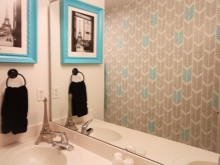
- Paintings made in one technique or supporting the same theme look elegant, the number of colors can be arbitrary. The theme helps to unite the elements of the room, to create your own style.
- Reverse stencils help to create a depth, volume effect. They are best done with spray paint. Anti-patterns are good for creating landscapes - leaf fall, tree branches, fireworks, waves, horizon lines. Natural materials can be used as a stencil: expressive branches, large leaves (for example, fern, maple, birch branches). This method is better to work out beforehand, to catch a good "angle": from different points, spraying will give new "shadows".
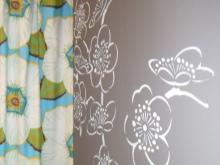
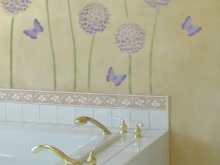
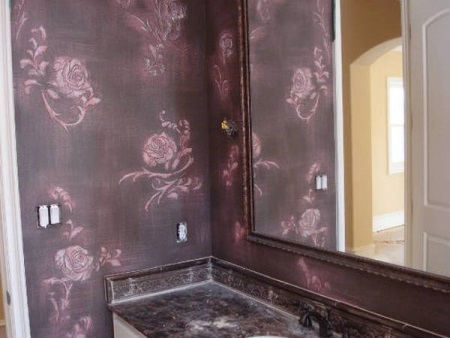
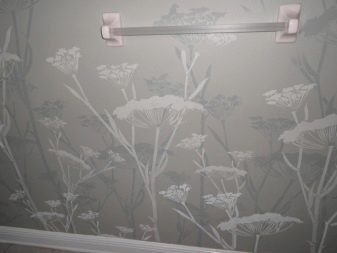
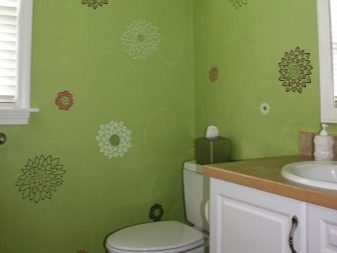
- Favorite themes for bathroom templates: stylized flowers, plant ornaments, Greek, Roman and Egyptian patterns, marine themes (fish, shells, anchors, etc.), landscapes, African motifs, cartoon characters. When choosing colors, choose bright, juicy, pleasing to the eye shades and combinations. Dark, black and dirty shades are the prerogative of experienced craftsmen, beginners can go overboard.
- Drawings can decorate a room, zoning, decorate flaws, unite disparate parts.
It is not always possible to accurately implement the idea. This is not a reason to be upset, because the bathroom has found its face and will be recognizable to your guests. Small mistakes are the twists and turns, which is how it was conceived. Let the rest of us think that way.

Alternatives
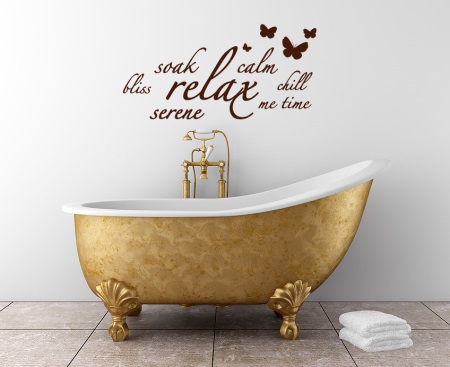
It is possible to decorate the walls and furniture of the bathroom without a stencil. For example, a simple painting, without a template. Still, it is better to sketch on paper sketches and pick up colors, so that the final result is not disappointing. Professionals create true masterpieces, which it is a pity to lose because of the new repair. However, and the time for such a variant can take a lot.
There is a simple and exciting method, where you do not have to be good at drawing, it's called decoupage. This is a useful design skill that goes well with country and Provence styles, makes interiors nice and close to the heart, deprives them of cold gloss and adds coziness. It is often used for decorating separate subjects of interiors and combines with other methods in order to achieve special expressiveness and effect of "nice old thing".
Decoupage is based on the use of ready-made picture, applied on thin paper or napkin. In handicraft stores you can find ready-made decoupage kits. Decide where and what kind of pictures you want to put, prepare the surface. If the tissues are too thick, you can slightly soak them, so that the upper layer of paint comes off faster. Carefully press it to the desired area of the wall, over the picture brush with PVA glue. Do not be afraid of torn edges and irregularities - it creates a charm, a look of "longevity", a thing with history. The glue will help stick to the surface, and when the picture is dry, you can protect it from moisture with acrylic varnish. Very thin paper with a picture can be glued dry.
Decorating the bathroom is certainly not every owner's favorite kind of decoration. However, it reflects your true attitude towards yourself and your home, it shows how much you love your family, making them beautiful even in small things. And also it's a great way to revive the tired interior without spending a lot of money. If you get the rest of the family involved, you can create a great family tradition or hobby!