Design and installation of a chimney for the baths
In the past, people heated baths without using a chimney, that is "black". After such a heating the walls remained black, which is not very aesthetically pleasing. In addition, this method is not very effective. Nowadays baths are heated with a stove with a chimney. About the device and installation of this element and will be discussed in this article.
The device of the chimney in the bath
The main task of the chimney is the output of combustion products of wood in the stove. So that Any kind of chimney in the first place is made so that it performs its primary task.
There are many ways to intelligently install a chimney. All of them will be appropriate in certain cases.
However, there are a few types of chimney installation that are considered basic and worth looking up to.
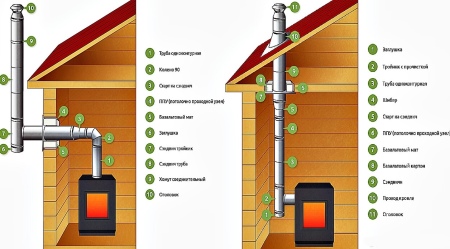
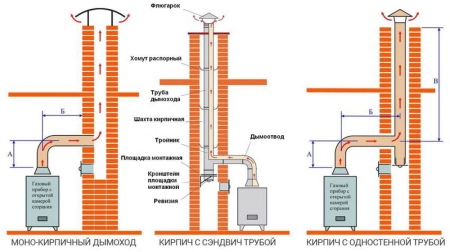
Through the ceiling
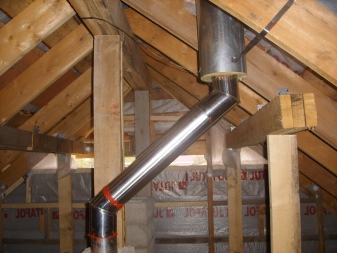
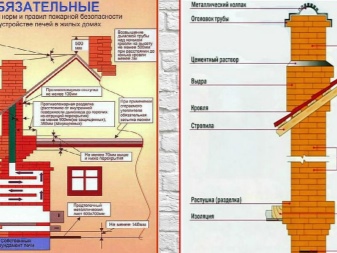
This option involves a straight chimney that will extend through the ceiling to the outside. It is important to note that the use of such a straight chimney will provide a high draft for the escape of unwanted gases. In addition, a noticeable detail is the occupation of free space in the bath by the chimney. This will take up space in the steam room, but on the other hand, it will heat up faster. This method is quite dangerous in terms of fire, because it will be difficult to see unplanned smoke in the attic.
The general scheme of such a pipe is as follows:
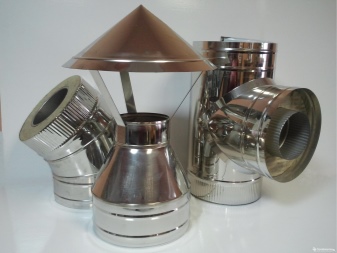
- starter pipe - the inner part of the pipe, in which there should be a gate valve;
- the sinker, that is, the part of the pipe that is inserted into an opening or passage in the ceiling;
- sandwich pipe - located in the attic with one end and ends with the other on the roof;
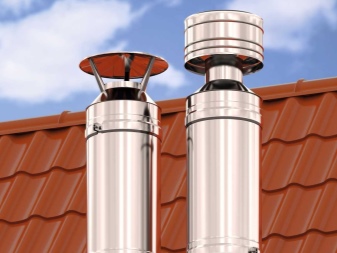
- cone and spark arrestor at the end;
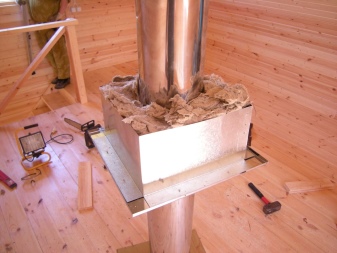
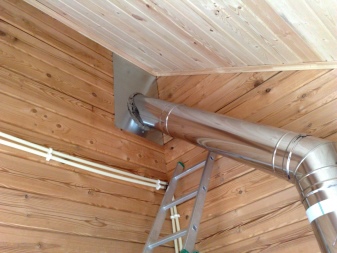
- The part of the chimney located in the attic, it is necessary to cover with non-combustible wool for safety.

The main advantages of this method of installation are the following:
- good draft;
- undisturbed thermal insulation, and therefore high thermal efficiency;
- stable position, which allows you to save on fasteners;
- the total cost of all parts is lower than when using other methods.
The disadvantages are the following characteristics:
- Relative fire hazard;
- occupation of potentially useful internal space in the bath.

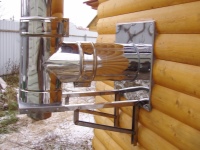
Into the wall.
A more aesthetic option. So, the pipe comes out to the outside not through the ceiling, but through the wall. It then rises, resting on the wall of the bathhouse. This leads to a more difficult and expensive installation. The fact is that this type is picky about competent construction. Therefore, you will have to measure more. The parts themselves will cost more, because the stability of such a pipe is less, which means that its attachment must be stronger. The risk of fire is very low, as you can always see the smoke coming out of the middle of the pipe. Also with such a chimney saves space in the bath.
The device of this version of the chimney will have a starter pipe inserted in the passage in the wall, the outer part of the pipe, the bottom of which should be attached with an angle, and the top - with fasteners.
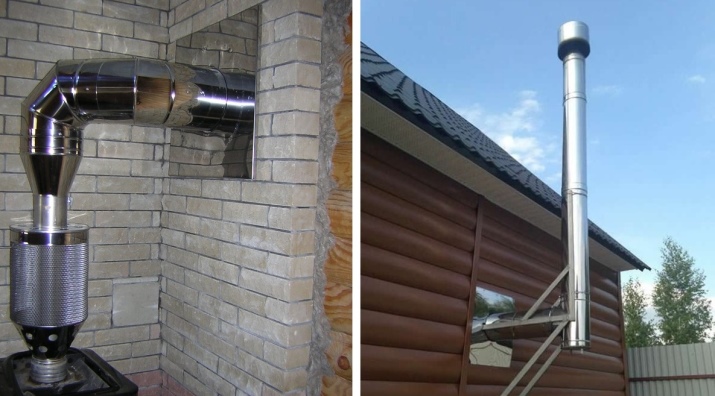
On top, as in the first case, should be a cone and spark arrestor.
The strengths of such a device:
- Does not take up space inside the bath;
- low risk of uncontrolled combustion;
- it is easier to check the integrity of the system;
- more aesthetic appearance;
- no need to make a hole in the attic and the roof.
However, there are also weaknesses, namely:
- low thermal efficiency;
- complicated and expensive installation;
- slightly lower chimney draught.
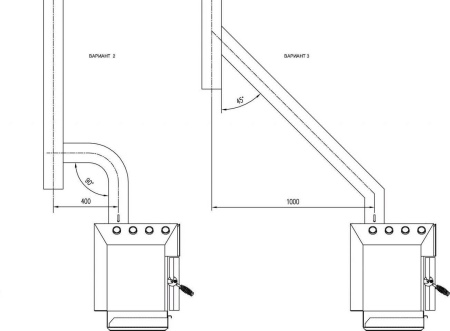
Into the wall and through the roof overhang
The third method is a variation of the previous one. Its essence is to bring the outside pipe through the roof overhang. In some cases, this is necessary. For example, when you can not take the pipe further away.
In general, this option is very similar to the previous and the structure and characteristics. The pipe is rather necessary through the roof. However, if you still have to use this method, then conduct the pipe through the overhang should follow the same rules as in the first case.
Materials
Of course, it could not be that for so many years of the existence of chimneys there were not different kinds of materials from which they would be made. Nowadays, you can find different ways to build a chimney, differing in the choice of raw materials. However, the most reliable and proven pipes are those made from the building materials listed below.
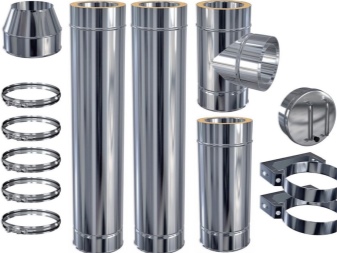
Made of stainless steel
Quite a popular option is to make an iron chimney. Basically, this material is used by those who make the installation of the pipe through the wall.
The advantages of stainless steel are quite a lot. So, the main ones are a relatively low price and easy installation. Indeed, it is much easier to assemble the chimney with separate metal parts than to build the foundation first and then assemble a brick chimney for a long time. Added to all this is the possibility of replacing a damaged part. For example, if smoke was detected in a metal chimney, you only need to replace the part where the damage is located. In the case of brick, you will have to completely rewire the chimney.
However, there are weaknesses. Metal is a very good conductor of heat, so in a strong frost during furnace heating, condensation can form on the inside of the chimney.
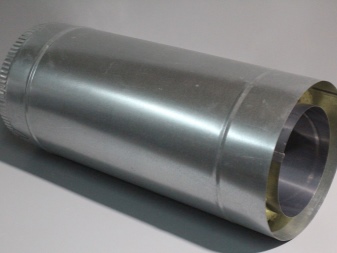
The solution to this problem is special sandwich pipes. Their essence is that the inside of the chimney is insulated with a special material, and the outer part is superimposed on top. Thus a kind of "sandwich" is formed, which insulates the chimney and prevents the formation of condensation. You can do with a cheaper option: just wrap a metal chimney with some cloth or wool.
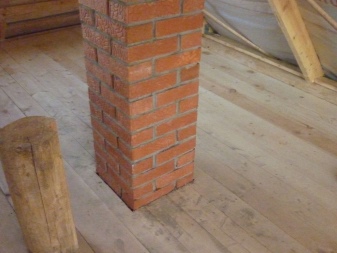
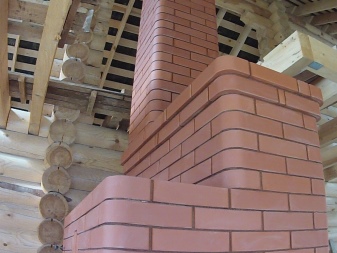
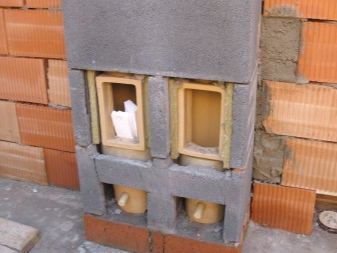
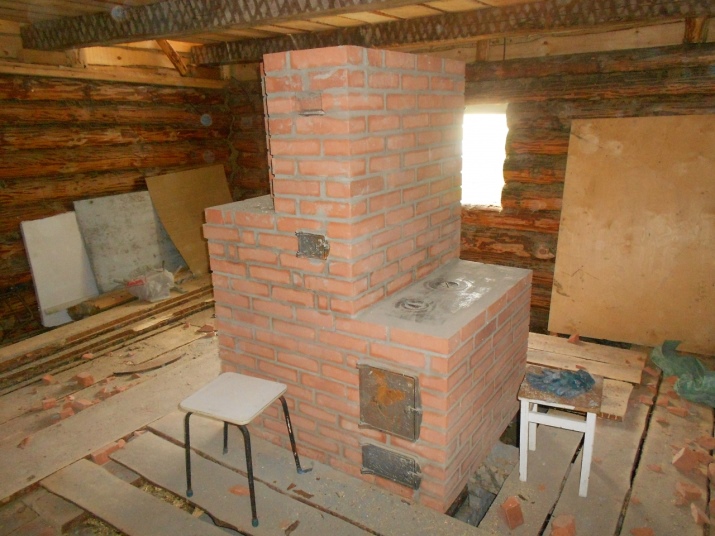
Made of brick
Brick chimney is used by people for a long time. Brick was one of the first to be used in construction, including stove pipes. Despite the emergence of competing materials, brick still remains relevant.
One of the greatest strengths of brick is its durability. Unlike metal types of pipes, brick options can only be deformed with a sledgehammer or something similar. This gives a sense of reliability and durability. In addition, pipes made of this material look beautiful and authentic. They are excellent for stoves also made of brick. Such material, unlike iron and other metals, is a poor conductor of heat, in addition, it has the property of accumulating heat in itself. Therefore, baths with a brick chimney keep heat longer. Fire resistance is also a characteristic of brick pipe.
Especially special heat-resistant samples, of which the furnaces themselves are usually made. Such building material will not be anything from high temperatures, unlike metal, especially low-quality.
The disadvantage is the roughness of the surface, due to which the inner part of the pipe quickly acquires a soot buildup. This causes some inconvenience associated with the timely cleaning of the chimney. Some people also notice a weaker draft. This is due to the shape of the chimney. Cylindrical metal pipes allow smoke to pass through better. Difficult installation is another problem with such chimneys. First, it is a large mass of the final structure, which forces the construction of a separate foundation, if the pipe is led through the wall. Secondly, it is the brickwork itself, which requires some construction skills. From the difficult installation results and another problem - the need to completely rebuild the chimney in the case of his crackling at least in one place.
From all this it follows that brick chimney is better to choose if the furnace itself is also made of brick, and the chimney is led out through the ceiling, not through the wall.
Ceramic
Such pipes appeared in Russian baths not very long ago. Of all the materials mentioned in this article, this one is the most expensive. That is why (mostly) ceramic chimneys are quite rare.
Such construction consists of three layers. Inside there is a round ceramic pipe. It is surrounded by a heat insulating layer. On the outside this design is clad in a kind of shell made of porous material: brick or concrete.
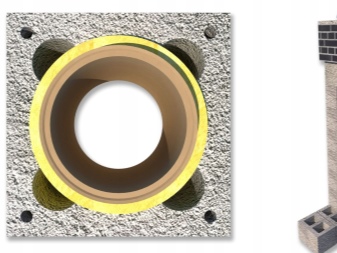
An obvious advantage is the circular contour of the pipe, which allows the gases to escape easily, without leaving much soot on the walls.
To build a chimney is not difficult, at least easier than the brick version. The pluses also include durability of construction. This is provided by the strength of the original materials and firmness from external influences.
The disadvantages of this option are the high cost and weight. Because of the large mass in the case of installation through the wall will have to pour the foundation. The high price is outweighed by the durability of the product.
Calculation
Very important points in the construction of the chimney are not only the material and type of installation, but also some of the dimensions.
First of all, this is the diameter of the pipe. On how big or small this figure will be, depend on the important characteristics of the bath. So, if you make the chimney too narrow, then it will not be able to provide the necessary flow of gases. Smoke that will not have time to escape through the chimney will fall into the interior of the bath. If the diameter is too large, then with the products of combustion will go away and the heat from the burning wood. Because of this, more resources will be used for heating the sauna than it should be.
The minimum diameter of the chimney should be 150 mm. The maximum can reach 270 mm, but these are only approximate figures. In fact, it is better to use the instructions.
If the furnace is purchased, then in the enclosed instructions it should be stated about the recommended width of the inside of the chimney. With this diameter and it is worth making this design.
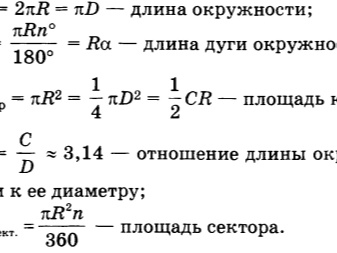
The data sheet for electric stoves (and sometimes for wood-burning stoves as well) says the capacity. If along with it it is not written about the diameter of the construction for the gas outlet, then you should make the following calculations: you need to multiply the power (in kW) by 8, the resulting value will be the area of the inside of the chimney in sq. cm. Knowing the formula for the area of the circle for cylindrical variants and the area of the rectangle, you can calculate the diameter or dimensions.

In the case where it is not possible to use these methods, the last option comes to the rescue. It consists in using the recommended ratio of the chimney area to the area of the furnace. For cylindrical pipes, it is 1 to 10, and for rectangular - 1 to 1.5.
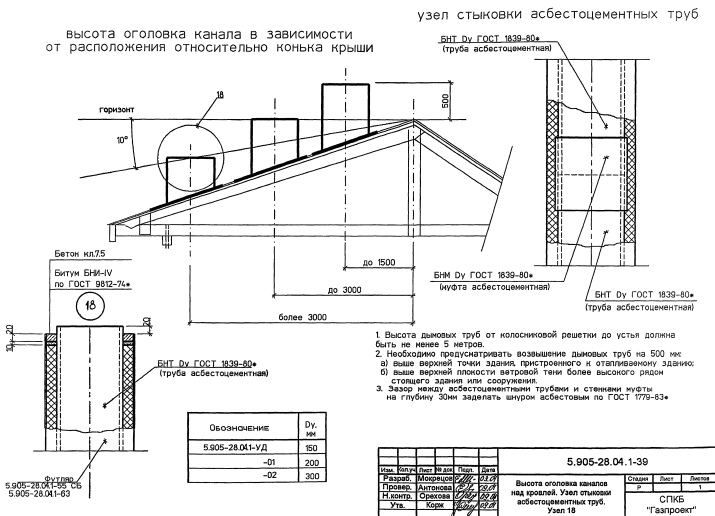
The height of the chimney is no less important. The higher it will be, the stronger will be the draft. But it is also better not to make this figure too high, since there will be large heat losses. The total height should be about 5 m - in this case the optimal draft will be provided.
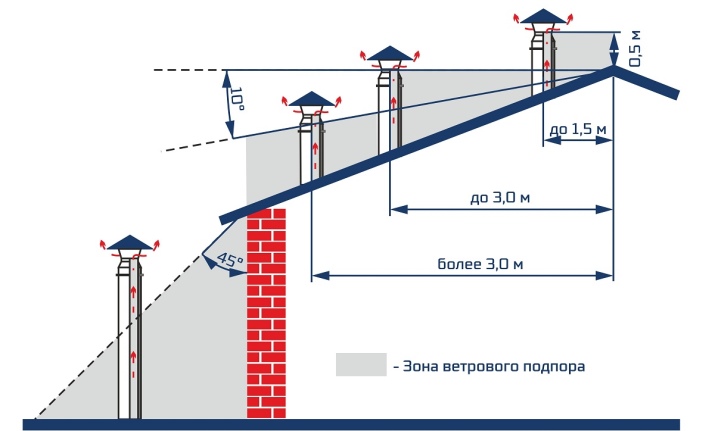
But here is also important and the distance from the roof and ridge. Should be guided by the proximity to the ridge:
- If the chimney is located closer than 1.5 m to the ridge, then it should be made higher than its level by 50 cm;
- if this figure is in the range of 1.5 to 3 m, then the chimney should be located at the level of the ridge;
- When the pipe is further from the ridge than 3 m, then the height is allowed below its level.
Installation
Selecting the right material and calculating all the dimensions is only part of the job. A very important final step is the installation of the entire chimney for the wood stove. In order to do this construction properly, you need to have basic construction skills, even in the case of the metal type. The following instructions will help in the installation of the stove metal chimney.
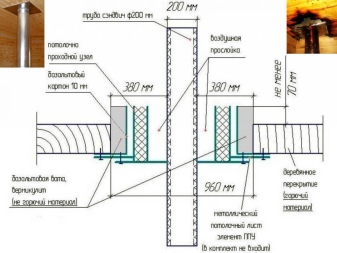
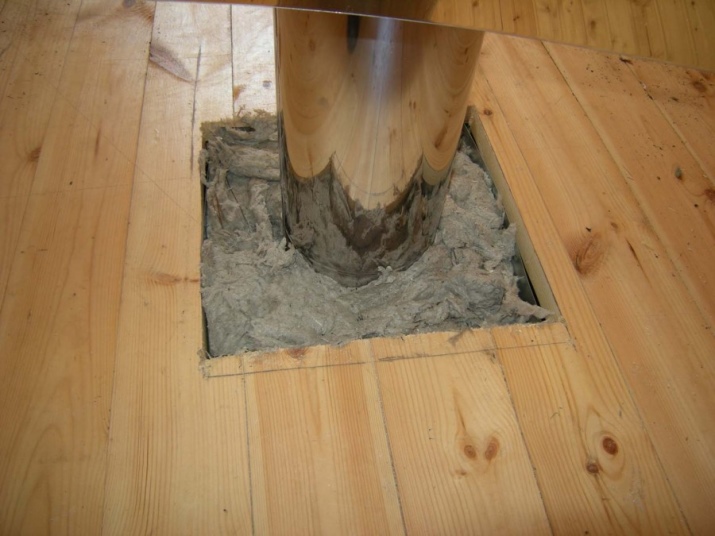
First you need to deal with the preparation of the place. Basically, this will be the arrangement in order to protect against fire. So, the entire surface of the outer pipe should be lined with non-flammable wool.
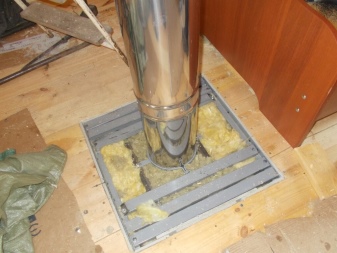
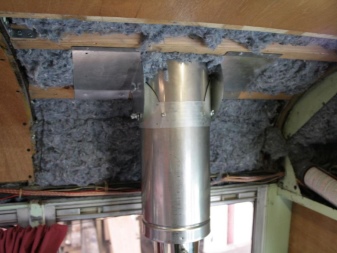
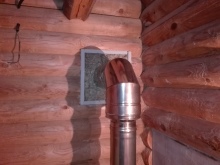
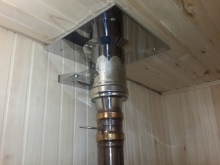
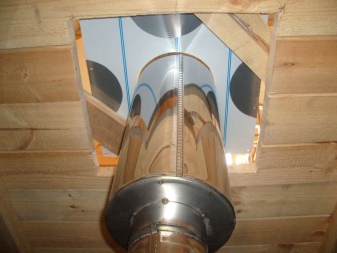
In places where it is planned to vent the chimney outside, it is necessary to cut holes. They, in turn, should be insulated and in some cases also cover with non-combustible material.
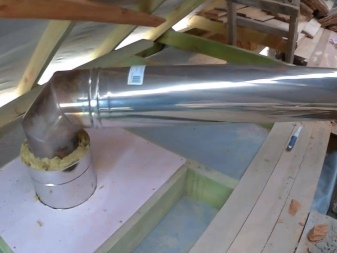
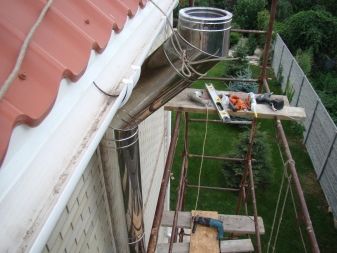
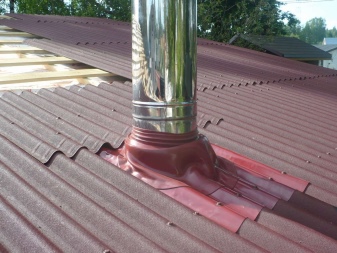
After preparation, you can do the work on the roof. There it is necessary to cut a hole for the chimney. Its diameter must be calculated taking into account the arrangement. For reliability, a special element - master flash is used. It is put on the pipe and fastened to the roof from the outside, thereby preventing this passage from leaking. Additionally it is necessary to pass the edges with adhesive sealant.

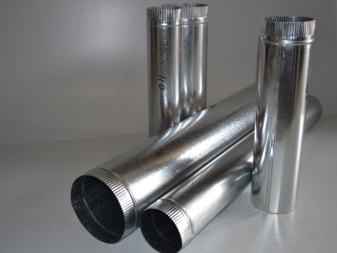
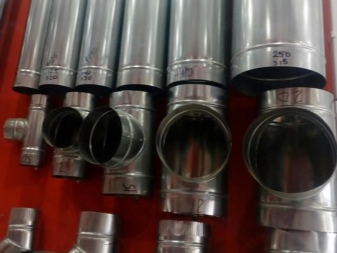
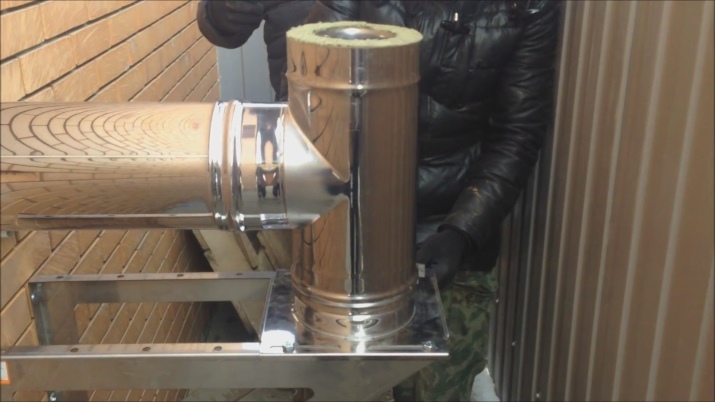
For the next steps will need two types of elements: sandwich pipes and single-wall pipes.
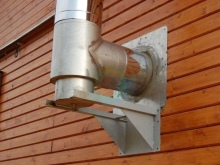
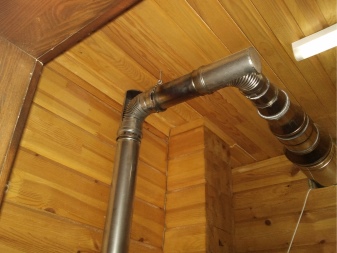
So, Let's consider the variant of installation through the wall - as a heavier. First of all, a single-wall pipe, small in length, but not less than 50 cm, is attached to the hole in the furnace. There must be a place for the gate in it. If it is not present, it must be cut out. To this pipe is attached so-called elbow, which will redirect gases at an angle of 90 degrees, then you can attach a sandwich pipe, which is already through the wall will go out. If there is not a very thick wall is enough length of 0.5 m. The use of sandwich pipe in the passage is mandatory. In addition, this place should be covered with kaolin or mineral wool.
Already outside from the bottom it is necessary to attach a condensate drain, which will collect the condensed moisture. It is attached to the tee. The remaining space in this element is occupied by a sandwich pipe, which will go up and will remove the products of combustion themselves. At the bottom, there must be a fastener that will hold this entire structure. If the pipe turns out to be high, then approximately in the middle is additionally necessary to attach a special iron clamp, which chimney must be attached to the wall.
If the installation is made through the ceiling, then everything is much easier. All that needs to be taken care of is protected and arranged passages.

Fasten between the parts of the metal pipe should be "on the condensate". Another option is to assemble "on the smoke", but it is considered wrong. In the first option, the upper pipe is inserted inside the lower, and in the second - vice versa. Thus, in the first case, the installation does not interfere with the flow of condensate, which allows it not to stay on top and not to react with the metal, and in the second - does not prevent the passage of smoke. Soot can be cleaned, but getting rid of corrosion will be more difficult.
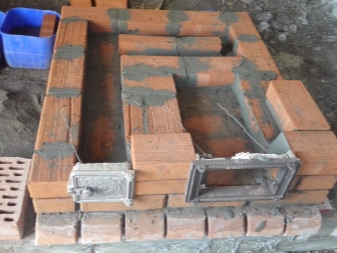
If the chimney is made of brick, then it is necessary to install it according to certain instructions.
- Lay out the initial pipe, which will connect the stove and the ceiling. About the second layer to make a hole under the slide. The masonry should be of the mosaic type.
- Near the passage through the ceiling is laid out a cusp, which is slightly wider than the bottom.
- The passage itself must be insulated from the heating of the brick.
- The remaining part is laid out at a height calculated in advance, depending on the location of the pipe and ridge.
- For external installation, you will have to pour a small foundation and lean the entire chimney on it.
Recommendations
When installing the chimney in the bath, you can use the advice of experts.
- For various reasons, sparks can fly from the chimney (from above). This creates a risk of fire, especially in the warm summertime. This problem can be solved with a spark arrester. It is installed on top of the pipe and prevents potential sparks from flying outside the chimney.
- When installing a chimney through the wall you need to use a condensate drain. It is installed at the bottom of the entire structure and serves as a sort of collector of all moisture generated. Without it, there is a risk of problems with metal corrosion.
- If the chimney is made of brick, then to the stage of masonry is worth approaching responsibly. Brick itself is not flammable, but mistakes in masonry can lead to the fact that smoke will leak out of it, and with it sparks.
- Since we are talking about the bath, very often the inside of the chimney is heated to a high temperature. Therefore, you should not use low quality materials when building the pipe.
- Assemble a metal chimney should be "by condensation," not "by smoke.
- Each passage through the wall, ceiling or roof must necessarily not only be insulated, but also covered with special materials to protect against fire.

The chimney is a very important part of the entire sauna stove. Once you understand the structure and operation of this element, it will not be difficult to erect it with your own hands. To do this, you need to buy the necessary material, make calculations and perform the assembly according to the instructions. At the same time, you should follow the basic recommendations for installation.
How to make a chimney in the bath, see below.


