Making a bath with our own hands
Many people are interested in how to build a cheap and quick bath with their own hands. In this can perfectly help a step by step construction instructions. But in addition to it, it is necessary to study the projects of baths from improvised materials and carefully acquainted with other subtleties.
What can be used to build it?
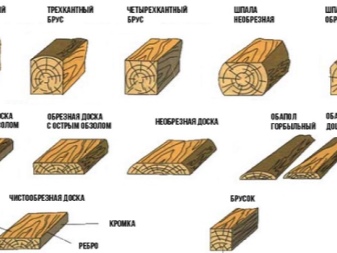
The most traditional and quite obvious solution is to build an inexpensive bathhouse out of boards. Most often it is constructed using frame technology. Important: a wooden structure needs a very good waterproofing. The interstices of the building structures must also be reliably insulated. In addition, baths made of board, especially unedged board, do not look too graceful, they must be finished and insulated.
Another nuance - you will need to use reliable flame retardants. They need to renew the treatment systematically, to avoid problems. Another way to build cheaply and quickly - to use solutions from improvised materials. And with the right approach, you can guarantee a very decent result.
Alas, improvised means are only suitable for small buildings. If the size of the sauna is at least 6x8 m, you will already have to buy new materials additionally - at least in part. Dry timber is an excellent alternative to logs. The method of building from them is quite similar, and in both cases requires a strong foundation. Even among the improvised materials advantageously stands out adobe.
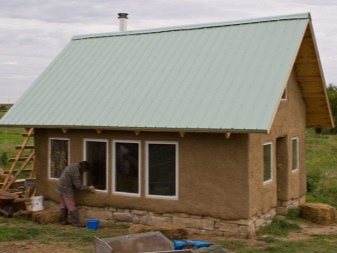

The walls are made either by the half-timbered method or by the "heavy adobe" technology. The second option requires more time and effort. But the walls can have almost any shape you want, rather than being limited to a rectangular configuration. Saman is economical and environmentally and sanitary safe.
Another not-so-bad exotic is the "mud-bath" method.

It is also possible to build a sauna:
- from pallets;
- from sleepers;
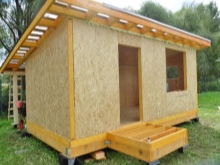
- OSB;
- Arbolite.

But still the vast majority of builders give preference to:
- brick;
- frame and panel construction;
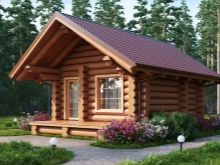
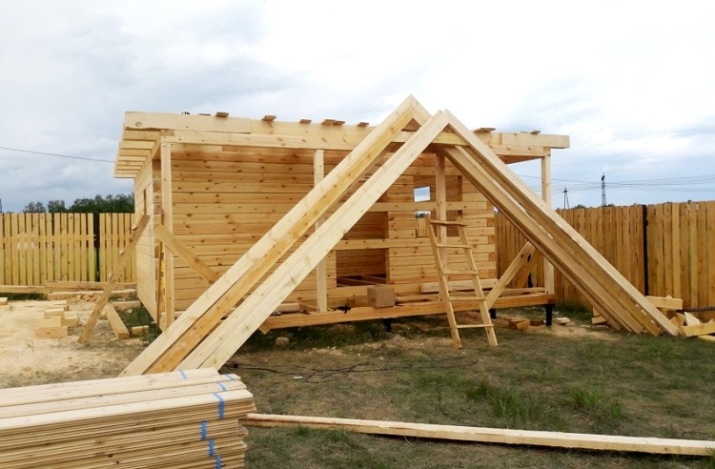
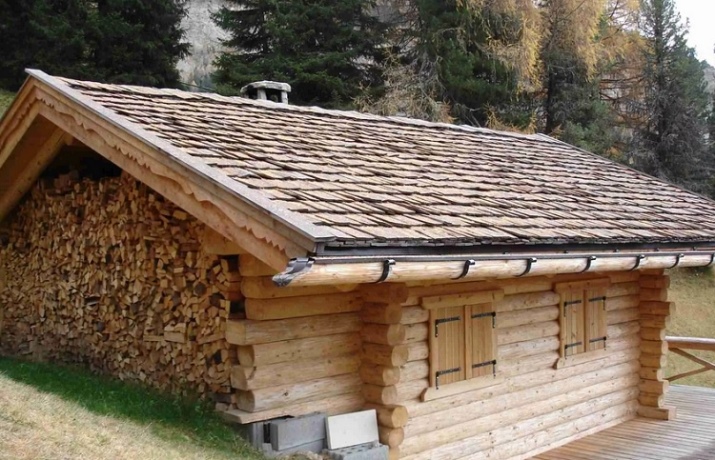
- the traditional log cabin;
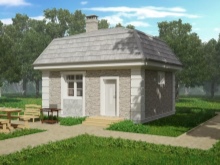
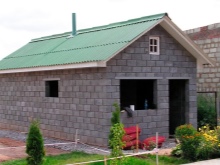
- to the newer gas block (although this solution just causes a lot of criticism).
Drafting
The scheme used directly depends on what type of bath is created. Even the most budgetary building should be optimized for a particular heat and moisture regime. Most often it makes sense to start from proven target schemes.
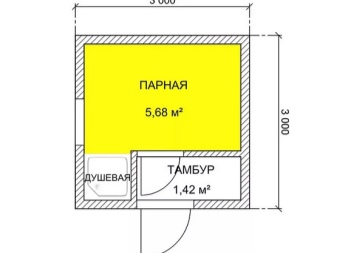
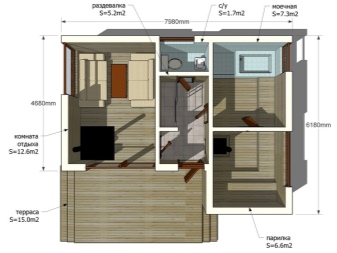
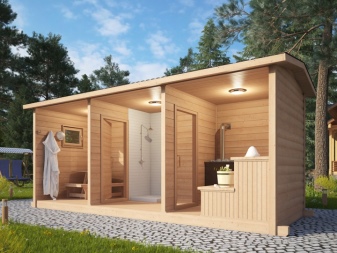
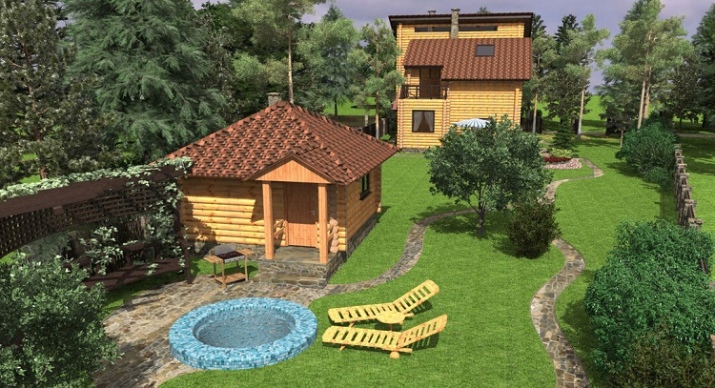
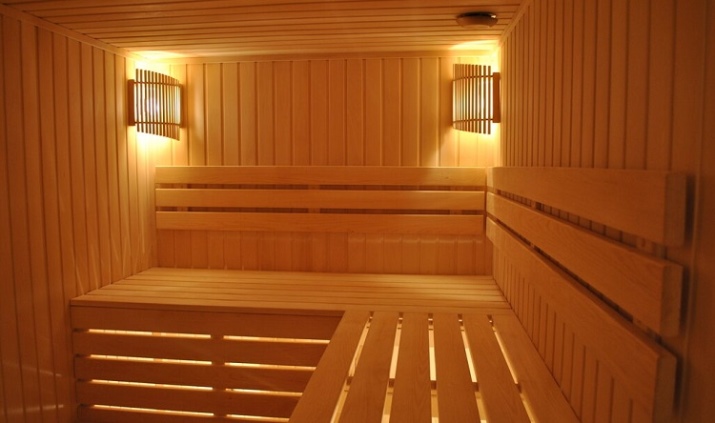
The photo shows an excellent arrangement of the Russian bath, containing:
- a place for bathing;
- shower area;
- seating shelves.

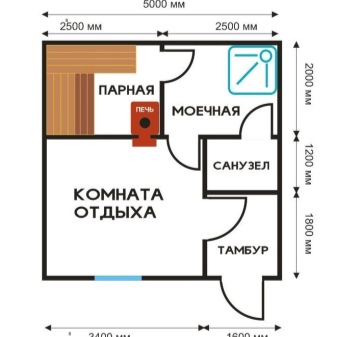
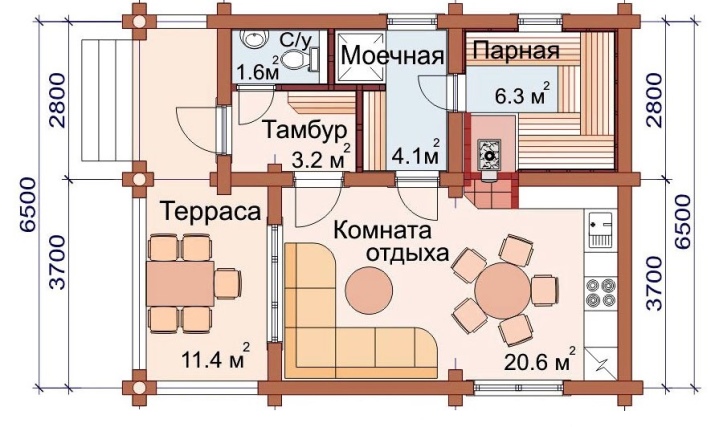
If a small structure is not satisfied, you can focus on the bath of medium area. Here the steam room and shower room are clearly separated. In the 8-meter rest room, you can easily stay two or even three people without feeling cramped. The designers have even provided a separate bathroom. The use of the vestibule significantly improves the comfort of the building, protecting the washing from draughts.
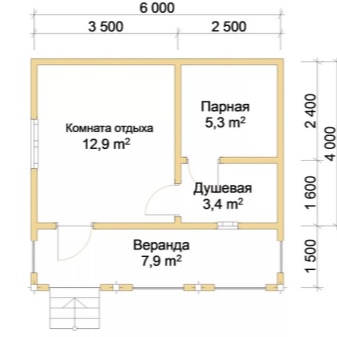
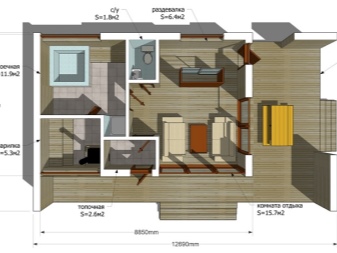
For the largest area, you can also focus on such projects. The anteroom, checkroom, and sitting area are placed in one of the corners. In addition, there is also room for a hallway, which will please fans of space and harmony. The steam room and washing room are quite large. But the price of such a structure will be tangible for the personal budget.
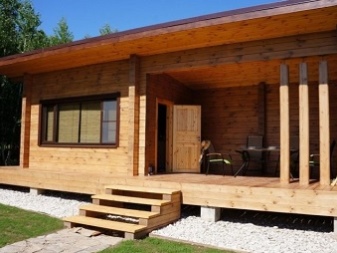
Blueprints of constructions of a small area usually involve the merger of the dressing room and leisure areas. But it will be possible to build everything with your own hands in a short time. It is very good if all the rooms are lined up consistently, and the number of passing rooms is minimized. The addition of a veranda or terrace is welcome in any case.
If you need to build a house-bath, then you will have to think about creating an insulated attic floor.
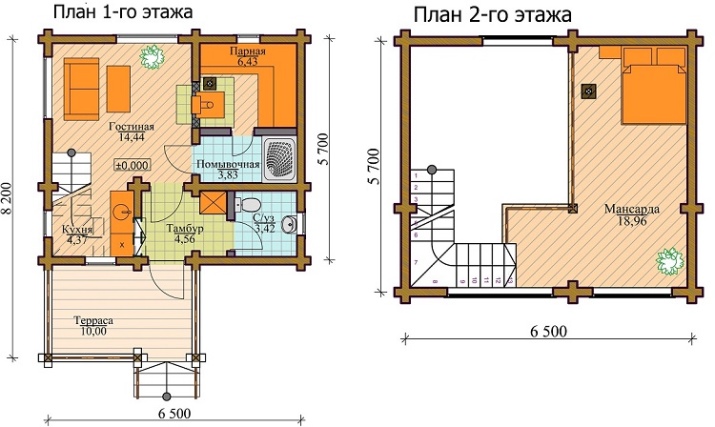
In the largest baths can allocate:
- swimming pools;
- several rest areas;
- 2 or more isolated steam rooms.

Another option includes:
- a bathroom;
- hallway;
- rest room;
- a separate sink and steam room;
- a rather large terrace.
Calculation of the amount of materials
It is from this point it is advisable to start preparing for construction. After all, just do not consider the required amount of materials leads to many unpleasant consequences. The vast majority of builders justifiably gives preference to natural wood. It is ideally suited to the concept of Russian baths - but in other cases, excellent help. Calculation is guided primarily by the choice of timber or log construction.
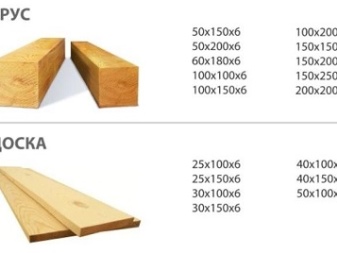
The typical timber layout is usually based on a 6-metre log. Usual sections are 10x10, 10x15, 15x15, 20x20 cm. If these values differ, the calculations must be adjusted accordingly. The usual approach involves multiplying:
- The length of the structure along the perimeter;
- the height of the structure;
- the thickness of the structure.
Some builders recommend introducing a correction factor of 10-20% for the purchase of wood. This is supposed to compensate for shrinkage. However, in reality it is enough to do otherwise: do not take into account the openings for doors and windows, and then the material is exactly enough. A common mistake is to substitute the length of the perimeter for the area, which underestimates the result. You can even assume that this error is the reason for the myth about the need to necessarily enter the correction of 10-20%.
If in any doubt, you can always use online calculators. They are already quite advanced and cope with their tasks effectively. The costs for each floor are calculated separately. Be sure to pay attention to the intermediate floors.
If the bath is built of foam blocks, then it is necessary not only to carefully calculate the need for the material, but also to introduce an additive of 5 to 10% to compensate for manufacturing defects; with two-layer masonry simply increase the calculated figure by half.
Step by step construction instructions
Selecting and preparing the site
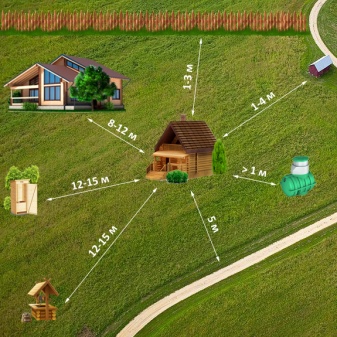
At this stage it is obligatory to take into account:
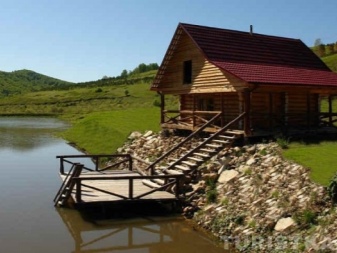
- location in relation to water bodies;
- distance to the ravine;
- distance to other structures, including those on adjacent plots.

The standard rules also require:
- take into account the provisions of the master plan and other urban planning documents;
- avoid placing the bathhouse downwind of other properties;
- Ensure that it is clearly visible from house windows (then you can control the process of firing up without being present at all times).
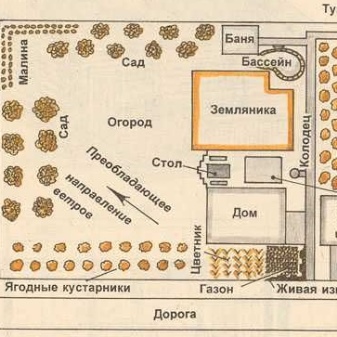
Bathhouse in Russia is traditionally equipped with southern entrances. Window openings oriented to the west or south-west. This significantly improves natural lighting. In addition to energy savings, it provides increased visual comfort. If the site is uneven terrain, the bathhouse should be placed on an elevated site so that sewage water can flow freely.
An area with sandy soil is not very suitable for construction. It is also desirable to avoid areas that are regularly flooded in the spring and fall. These problems can be corrected by special engineering measures. But it is much more correct to bypass the problem areas from the beginning if possible.
Even the simplest bathhouse should not be placed closer than 5 m from roads and railroads, closer than 4 m from trees. The permissible distance to residential buildings is 8 m.
After selecting a suitable place, all the plants and turf should be removed. The area is leveled, creating a slope in any direction except to the north. Hillocks should be cut down, and pits and hollows should be filled. Sometimes even special soil is brought to fill in the hollows.
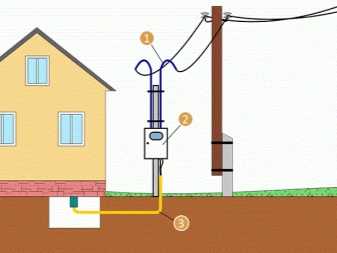
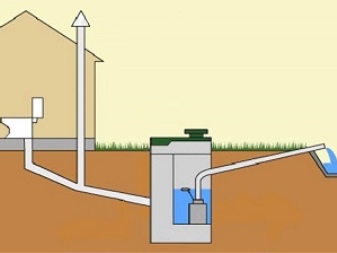
When new development of the site should be brought immediately:
- electricity;
- water supply;
- Sewerage (or equip a septic tank).
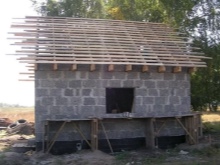
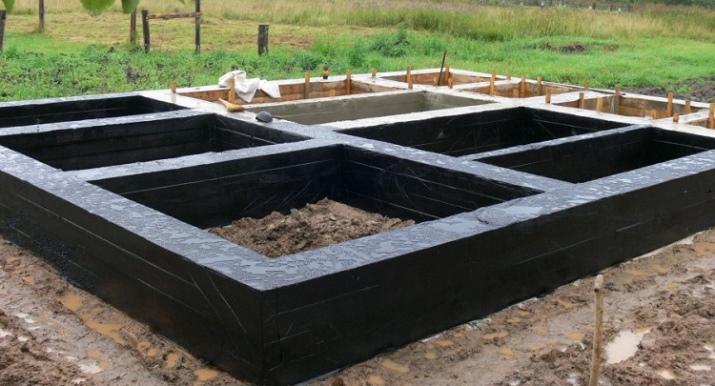
Foundation
The foundation of the bath must be given special attention during its construction from scratch. Most often it is built on a strip foundation. The contour should be marked as carefully as possible, without ignoring the thickness of the foundation itself. Even on the smallest site, the area of the bath can not be less than 3x3 or 3x4 m. Selection of the foundation should be based on the results of soil analysis in the laboratory.
Saving on such analysis makes no sense if the site is put into circulation for the first time. When building a makeshift bathhouse on the previously developed territory, it is enough to read the documents and projects. Usually proceed as follows:
- The monolithic strip is poured on swampy ground, on forest soil;
- clay and loam, sand and gravel imply usually a columnar base;
- Rocky site is used at its discretion - there erect their own hands any kind of foundation.
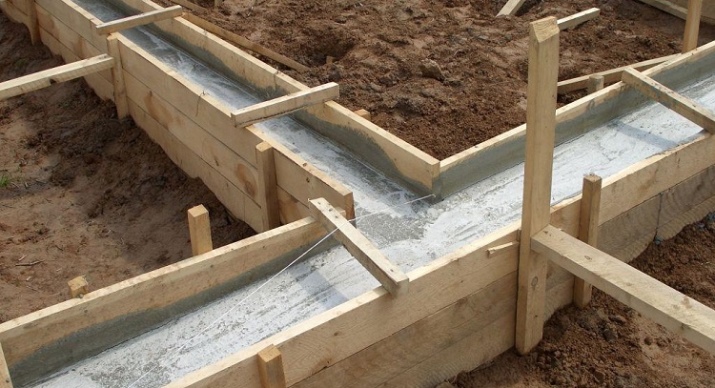
Whatever the base, it is required to perform very carefully waterproofing. It is carried out on the basis of parchment, Ruberoid or bituminous mastic. Wooden posts are not too practical, and if they are used, they must be impregnated with special compositions. Pouring tape is divided into buried and shallowly buried types. Although the costs of forming tapes are quite large, they will be fully compensated by the achieved result.
If there is not much time for construction, it is better to use a pile or block technique. Sometimes foam blocks are also used. They are advised to be placed on a cushion of sand. On top, parchment or roofing felt, and only then comes the turn of the blocks themselves.
Piled foundations are preferred where the geological conditions are difficult; the furnace is placed on a separate foundation block.
Walls
The frame technology is very widespread. But it requires a careful approach and comprehensive attention. Begin the work with the creation of the bottom strapping. It is made of a bar with a section of 150x150 mm. To connect the bars, corners and special steel plates are used. Sometimes on the edges sawed studs and grooves, and then connect the workpieces with nails or screws; when performing strapping cannot be abandoned waterproofing.
Vertical struts form again from a bar of size 50x150 mm. Between them you must make a gap of 500-600 mm. To exclude errors, it is required to determine in advance the location of window and door openings. It is recommended to support the uprights with temporary planks, thereby preventing warping. The upper strapping is attached to the edges of the vertical struts.

Next:
- rigidly fasten this strapping;
- Fasten the joints of the corners with diagonal props;
- Prepare a purlin for the ceiling;
- Hang the walls with boards, taking care not to leave any gaps;
- assemble the thermal insulation;
- add a steam barrier on top of it;
- To wrap the sauna from the inside.
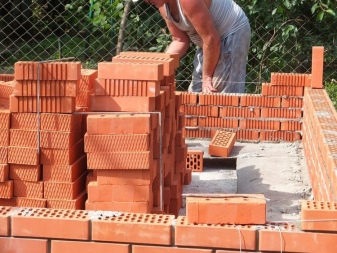
Sometimes the walls of the bath are built of bricks. It is not easy to do it right, but the result - a strong, beautiful and warm building - justifies all the efforts. There are two nuances to consider. Brick construction increases the load on the foundation, and not everywhere it will be acceptable. In addition, the inevitable wet work is forced to be limited to the warm season of the year - only on large construction sites it is rational to lay bricks in the cold season.
Before you start, it is useful to read 5-10 videos and instructions thoroughly. This is the only way to bypass the characteristic blunders. Brick is laid primarily on the corners. The choice between one-row and multi-row lacing is determined by the size of the structure and whether there will be a second floor.
The walls should be insulated as soon as the grouting is finished, once the cement has hardened.
Roof
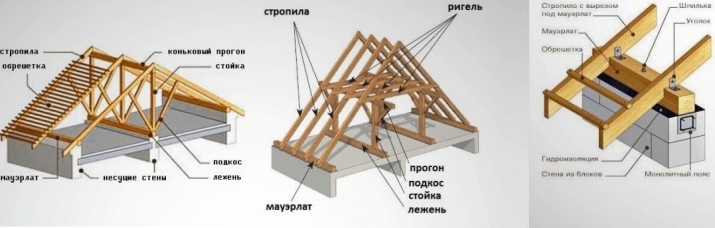
It is best to equip bathhouses with a gable roof. It will minimize the accumulation of snow and ice. And to dry after the rains will be much faster. The choice of a solution with or without an attic depends only on personal needs. Designs with many slopes and with complex curves to create is not recommended - they are too difficult for an amateur builder. One-slope structure is good when it is attached to the house or try to save as much as possible.
The roof must rest on the mauerlat. Trusses either buy ready-made, or make them from logs (from profiled beams). Strung rafter assembly is more reliable pendent, but the accuracy of calculation in any case should be the same. Too steep slopes are best avoided.
A strong slope:
- Makes construction more difficult;
- creates a negative sail effect;
- restricts the use of the roof for leisure and other purposes.
Walls under the laying of the mauerlatta are covered with waterproofing of ruberoid. It should be folded in 2 or 3 layers. Fastening to the mauerlat of other structures is made with studs or anchor bolts. All corners are aligned by a hydraulic level. Waterproofing roll materials are attached with nails or stapler; ventilation gap is achieved with counter-battens.
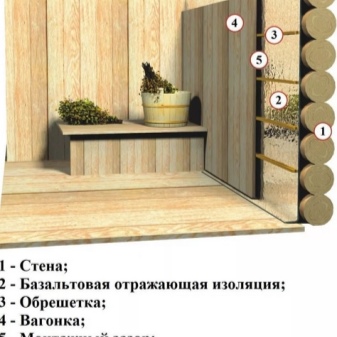
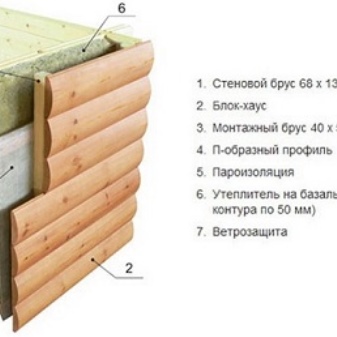
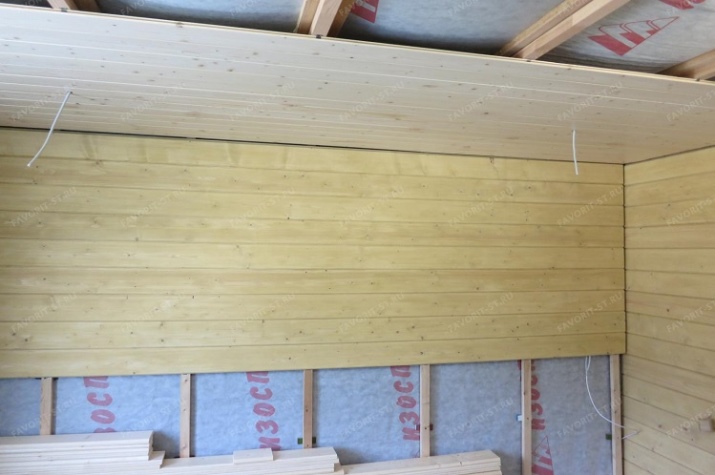
Insulation options
Using old-fashioned natural heat insulation is not too reasonable. Mineral wool is mainly used inside to conserve heat. It must be covered with waterproofing films. Block buildings are insulated with foamed plastic on the outside. In any case, it is desirable to create a frame. On the inside of the insulation and waterproofing is sewn veneer or boards. When using mineral wool:
- put brackets (corners);
- place the mats themselves;
- put construction adhesive tape on the board joints;
- Attach roll waterproofing thin slats.
Steam barrier in the steam room is created strictly from foil or foil-glass fabric. Joints of this material are fixed with reinforced tape. It is better to use foil insulation - they allow you to do without an additional vapor barrier. The floor and the ceiling must also be insulated. The roof of the steam room is stuffed with mineral or rock wool.
Finishing of the bath
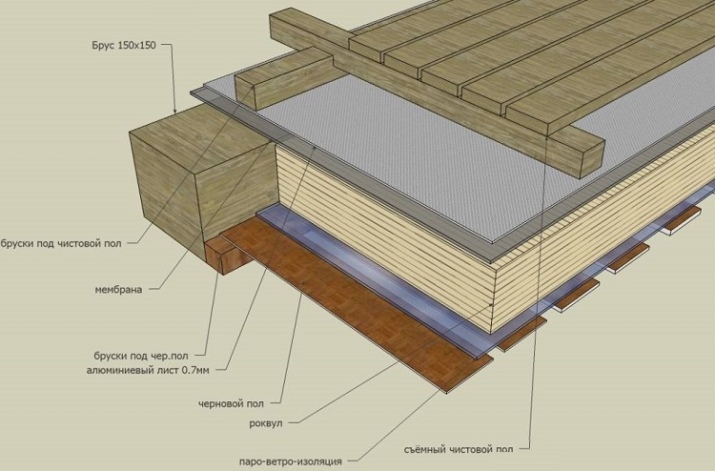
Premises with high humidity are advised to finish with clapboard. This material is preferable to others on uneven surfaces. Cracks and joint lines thoroughly caulked. When decorating the floor, especially leaking, it is necessary to prevent drafts. The traditional solution - laying planked wood, a more modern - laying tiles.
In the first place it is necessary to work with the floor. The subfloor is made of clay or concrete. On top of it for originality it is better to lay a cork coating. But much more often the standard tongue-and-groove board is used.
In the steam room, it is advised to use tiles with minimal slip; the ceiling is better to make wood everywhere.
Arrangement of furniture and accessories
The leisure room, if it has enough space, is furnished with:
- A sofa;
- chair;
- chairs;
- a kitchen table;
- a television cabinet or counter;
- A basic kitchen appliance.
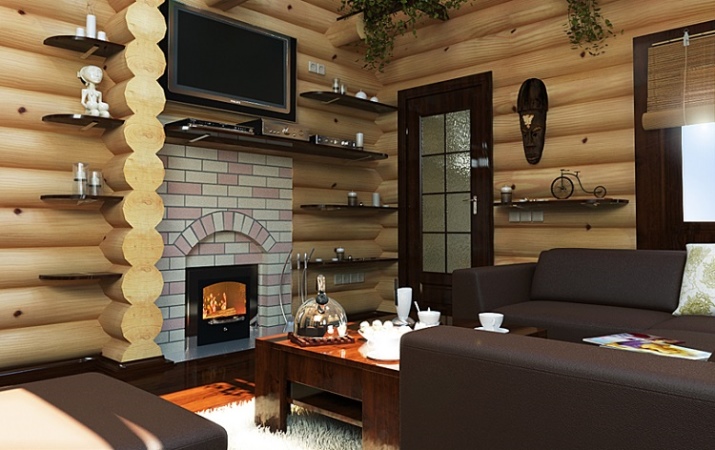
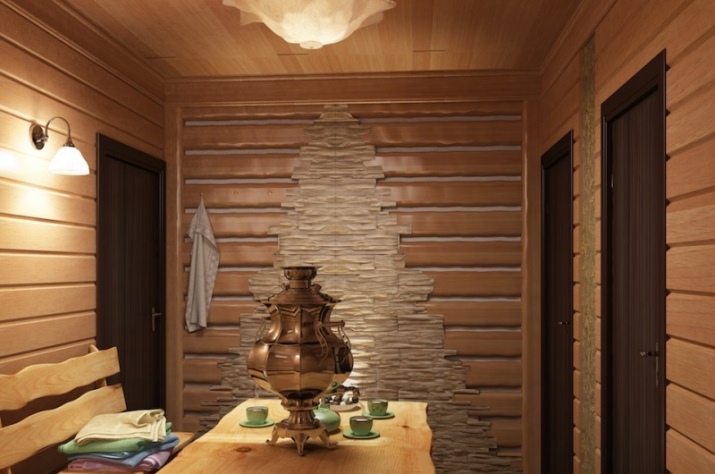
But even with the most limited space you can use portable benches. A Russian style bathhouse can be decorated with brooms and herbal gatherings. Good accessories in this case also become:
- samovars;
- hinged shelves;
- benches with carved backs;
- Ceramic and wooden painted utensils.
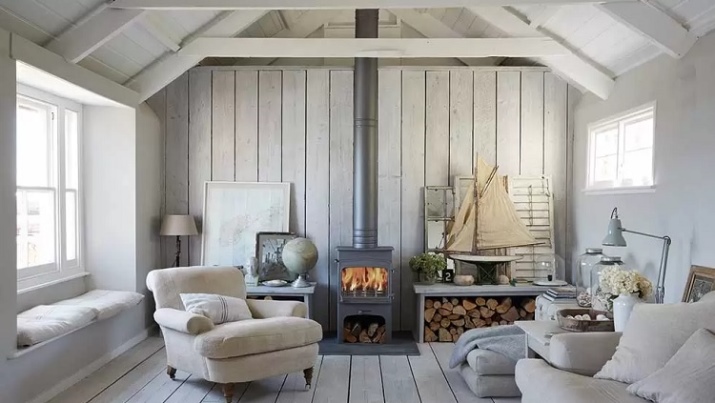
In the Scandinavian approach the emphasis is on accessories of atypical configuration. They can be made of both wood and metal. Additionally decorate the space:
- soft knitted bedspreads;
- fluffy carpets;
- saturated color inclusions.
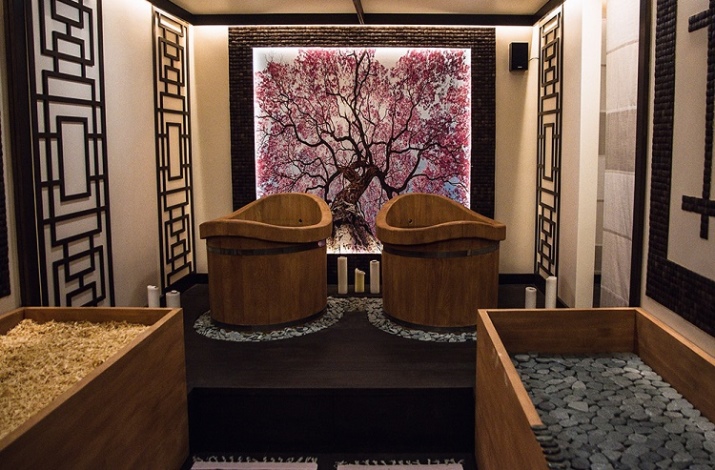
Japanese style is expressed by:
- colorful fans;
- bamboo screens;
- sakura branches;
- decorative hieroglyphs.
Classic style in the bath can be created only on a large area. It also requires carved solid furniture in noble colors. Not everyone can "pull off" making complex stucco by hand. It is easier to choose the modernist approach, which is expressed in symmetry and simplicity. It also involves neutral and not bright colors.
Useful tips
It is necessary to carefully avoid mistakes such as:
- Excessive downsizing;
- Too narrow shelves;
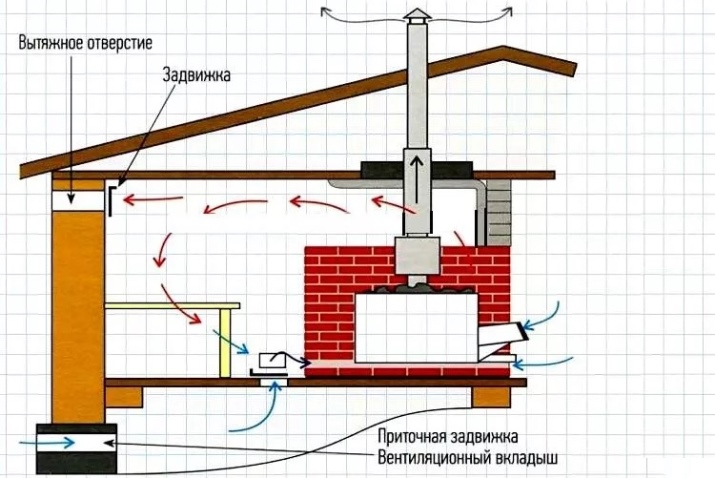
- Inattention to ventilation and lighting;
- Choosing a stove that is too powerful;
- Incorrect chimney installation;
- problems with plumbing and drainage (including due to the slope of the drain);
- refusal of accessories.
Small-sized functional bath is best created on the basis of a simple typical project. It is necessary to make ventilating ducts in the foundation. Initially chosen layout should be adhered to until the end of construction. The cable must be in asbestos insulation. All lighting fixtures should be protected with watertight plafonds.
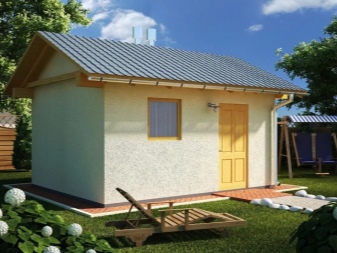
The materials are necessarily evaluated for environmental safety. When choosing a construction, it is necessary to give preference not to brick, but to aerated concrete. Its use facilitates the foundation. It is necessary to estimate in advance the future construction time.
It is better to order the stove in advance, so that it stands ready and there are no problems with delivery by the deadline, with the removal from the catalogs.
About what is important to consider during the construction of the bath, see the following video.


