Sauna on the balcony: projects and ideas of arrangement
Using a sauna on the balcony is not considered a serious option often enough. However, in fact, a sauna with a steam room on the loggia in the apartment is very attractive. To reduce the fire hazard, you can switch to electric mini-baths.
Pros and cons
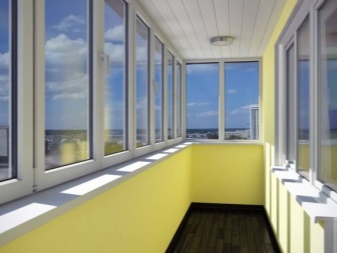
It is quite obvious that placing a sauna or bathhouse on the balcony saves free space in the house and other buildings. If made well, it can completely replace the usual outdoor bath or the use of commercial services. Staying there will be comfortable and pleasant, and the opportunity to view quite improves the mood.
However, you should understand that the bathhouse on the balcony will invariably have a certain size, and only a limited number of people can wash there. In addition, not all buildings are allowed to arrange the balcony baths and saunas.
Requirements
Of course, preparing such a construction, you will have to carefully think through all the nuances and subtleties. Separate the sauna from the balcony is categorically impossible, they should form one merged room. Before you start the work will have to:
- take care of glazing;
- Provide a full thermal insulation;
- Make a quality waterproofing.
The last point is often ignored - and for good reason. If it is not secured, any leak can flood the balcony below or the wall of the house. And it is not known in advance what will be worse. Regardless of the method of obtaining heat, you will need to make sure to provide quality fire protection. When using wood finishing, all such structures are dried in advance and treated with flame retardants.
There are two main options for the realization of his dream. In one case, you buy a completely finished building. Some companies sell miniature saunas, and they can even be found in a wide range. Assembly takes place according to the instructions, it does not require much time and effort. True, this option costs quite a lot of money.
Another way is to independently equip the bath or sauna on the balcony. The lack of ready-made recipes and schemes can be considered both an advantage and a disadvantage. With proper diligence, it's easy to complete the task and enjoy your sauna experience. It is true that the selection of materials and designs for an independent project is not easy. But it can be imagined as a kind of exciting adventure, and at the same time take into account a maximum of subtleties. Here are a few more basic requirements:
- Maximum lightweighting of the entire structure;
- the use of fire- and water-resistant materials as much as possible;
- coordination of all works and features of the project not only with the state authorities, but also with the neighbors;
- inadmissibility of overlapping staircases and grooves, various fire passages;
- imperative insulation of the building (even in areas with a mild climate).

Projects
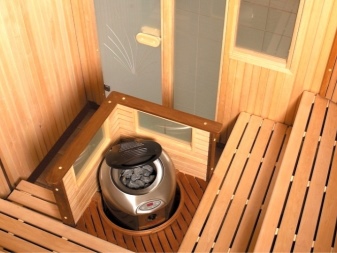
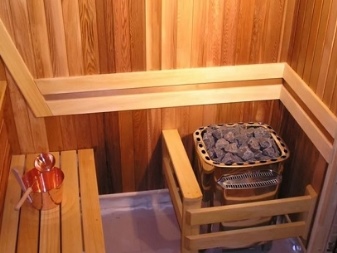
Designing a sauna on the loggia in the apartment, it is necessary to choose solutions with open and closed execution of the furnace. When it is made according to the closed scheme, more safety is provided. But the open solution is much better and fuller spreads the heat in the external volume. In the upper part of the device is placed a grid, which serves as a support for heated stones.
Note: in the vast majority of cases, balcony baths and steam rooms are equipped with electric stoves. Important advantages of such a solution:
- No ash to clean up (and littering of the surrounding space);
- no risk due to open flames;
- easier to control;
- greater reliability as compared to a conventional sauna heater;
- absence of carbon monoxide and other toxic combustion products (as well as smoke);
- Can be used immediately after installation in a designated area.
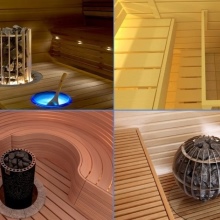
But Even in a mini-sauna significant step is the choice of finishing material. Abasi wood, despite its high cost, is gradually becoming more popular. This is not surprising, because this material has a number of attractive features.
Particularly appealing is the low heat capacity. If you make small areas (the same shelves) from such wood, there will not be a serious blow to the pocket.
Somewhat more budget solution - traditional for our country oak boards. You can also think about using:
- Canadian cedar;
- ash;
- linden (which is generally considered a universal solution for baths and saunas);
- spruce and pine (these species are suitable only for exterior work).
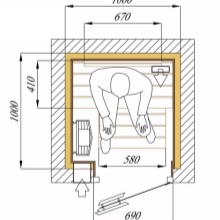
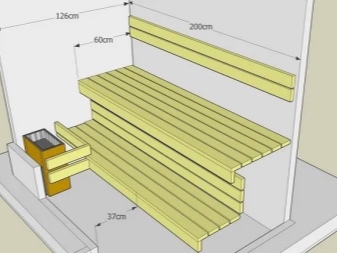
Most often, when selecting or drawing up a project are guided by the size of 0.8 m in width and 2 m in height. Experts recommend giving preference to solutions with a dry steam room. It is safer, and the heating of the air will happen in minutes. But you can also equip a "wet" steam room on the balcony with some effort. The choice between such solutions is only up to the users themselves.
How to prepare a balcony?
No matter what specific project option is chosen - you will have to prepare for its implementation. Often the balcony has to be extended. The main part of the structure should ideally be in contact with the walls of the apartment or house. Such a requirement is designed to reduce unproductive heat loss. Attention should also be paid to high quality glazing; it is equally important to think about the place for the withdrawal of ventilation communications.
How to make?
The beginning of making a balcony sauna with their own hands is the purchase of suitable materials. For the work will be needed:
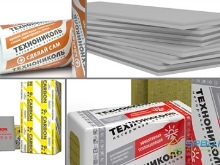
- mineral wool;
- membranes with waterproofing properties;
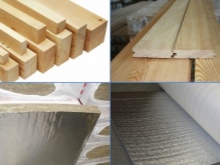
- timber with a thickness of 0.05 m;
- corrugated metal or plastic pipes;
- vapor barrier insulation made of foil;
- foam
- metal sleeve;
- linings;
- asbestos board;
- board in assortment.

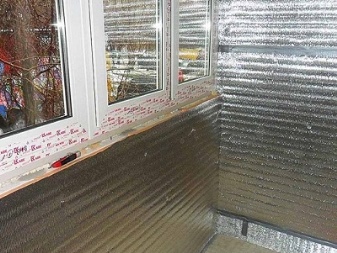
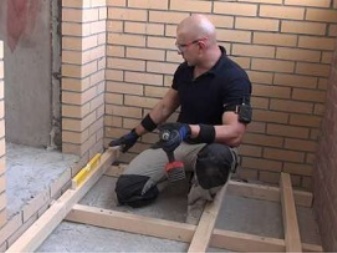
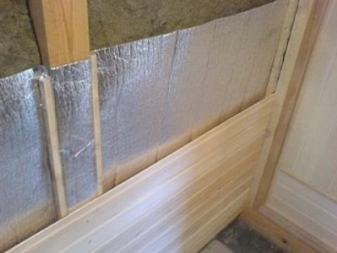
Prior to the arrangement of the frame, the balcony or loggia is thoroughly insulated. When this is done, form the floor covering. His level in the steam room should be at 0,1-0,2 m higher than in the rest of the room. This improves the outflow of fluid from the critical area. The work is carried out as follows:
- lay the waterproofing;
- install beams height 0,05-0,08 m, step - 0,4-0,5 m;
- fill the gaps between the beams insulated material;
- form an additional layer of waterproofing;
- nail the boards to the very caps to prevent burning;
- Finish the finish is made with hardwoods with a maximum moisture content of 10%.
Creation of the frame
Formation of walls begin with foam insulation on the outside. The thicker the layer, the faster the booth will warm up. Nailing of beams shall be carried out with a 0.5 m gap. The recommended cross-section of the timber is 5 cm2. To increase the adherence of the insulation it helps to upholster it with plywood sheets.
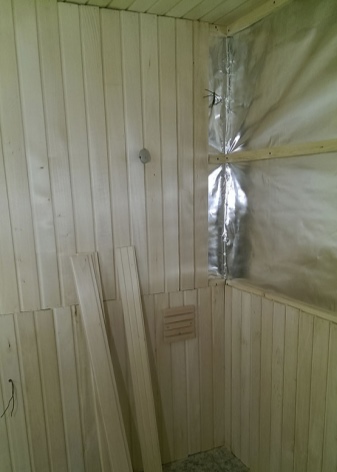
Foil vapor insulator is laid in the gaps between the joists. This material should be placed with the reflective face outward. Mineral wool is cut so that the boards are as close to the walls as possible. Over the thermal protection is fixed aluminum foil, the reflective edge of which looks inward. Points of joints joined metal scotch tape, and cladding is carried out with the help of battens.
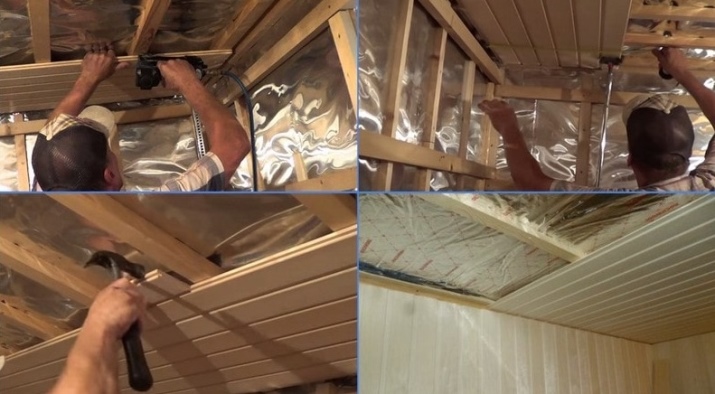
Finishing the ceiling, too, deserves close attention. There should be a good layer of vapor barrier. Otherwise, the upper room will damp all the time. First, a standard timber with a cross section of 0.05 m is nailed (with a gap of exactly 0.4 m).
The resulting voids are saturated with waterproofing, and then:
- put the insulation itself;
- Fix it with a wooden plank and nails;
- Put a couple of layers of vapor barrier membrane;
- Cover the outer surface with clapboard.
Phase of the formation of the frame is closely related to the arrangement of electrical wiring, ventilation. Electricity is provided by cable with heat-resistant insulation. The switchboard is connected via a separate circuit breaker.
It is necessary to take care of the presence of a RCD and the introduction of the wire in a corrugated tube. The wire that powers the light fixture must be inside the metal sleeve.
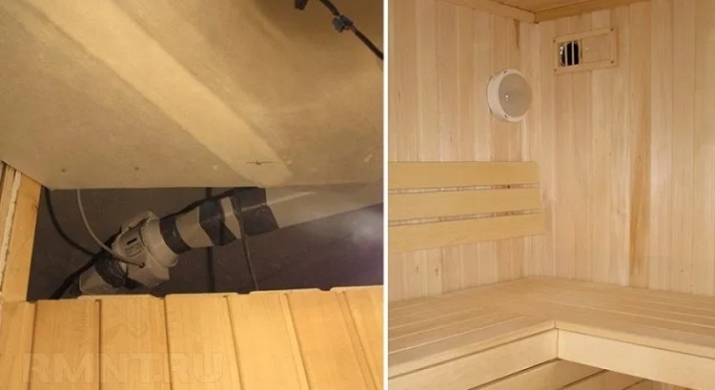
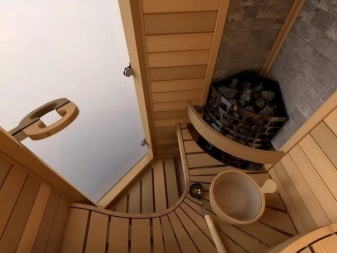
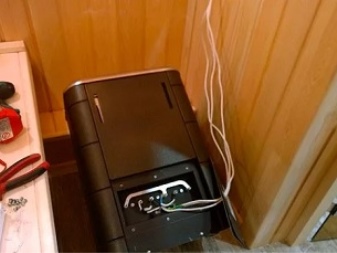
Installing the furnace
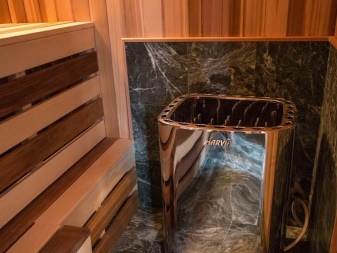
When determining the required capacity of the electric sauna heater, the capabilities of the home power grid are taken into account. This includes both the wiring itself and the circuit breakers. Important: The outlets must be suitable for the conditions in the sauna room.
The entire space around the stove - both electric and fire - must be decorated with asbestos cardboard. The weight of the stones should be a maximum of 15 kg - this will ensure proper safety and quick heating.
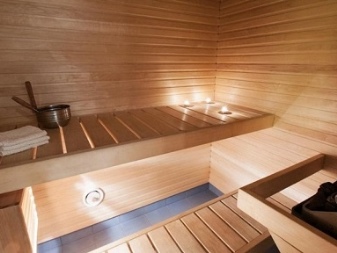
Mounting the shelves
When creating shelves, you should avoid fixing to the wall. This option will not be able to withstand the load of two steaming people. It is much more correct to use racks of special design:
- a 0,08 m thick beam is attached to the floor;
- well-polished 0.05 m boards with a rounded edge are placed over it;
- The floorboards are separated by a maximum of 0,015 m so that the air can circulate freely;
- the whole shelf must be coated with a special oil.
If desired, form an upper shelf and attach a ladder to it. The ideal material for such a construction is poplar and linden wood. Fixing elements should be formed of wood or galvanized metal.
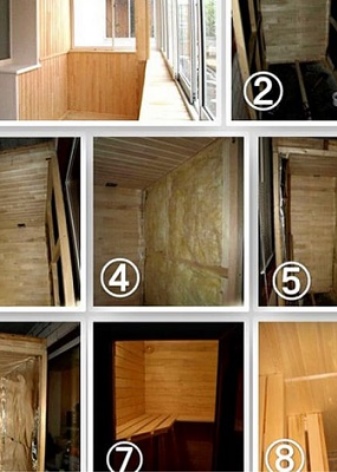
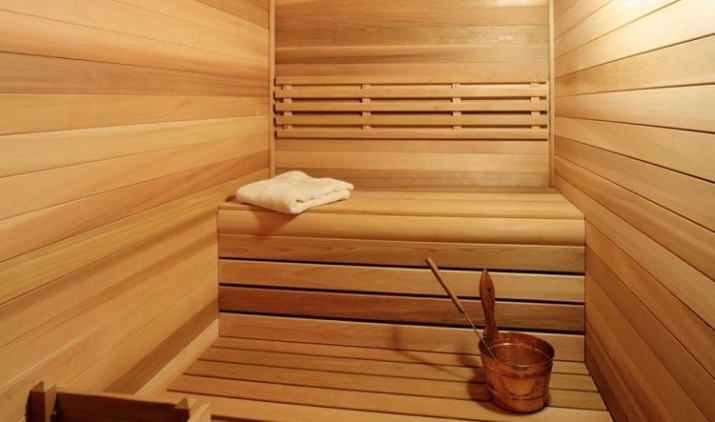
Beautiful examples
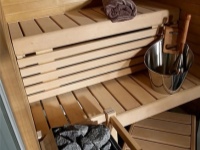
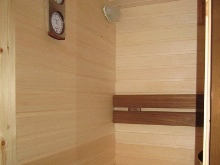
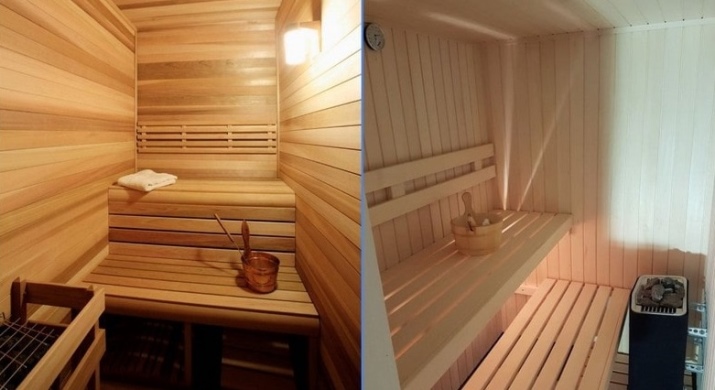
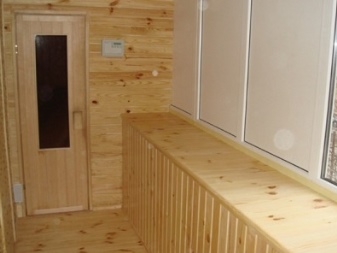
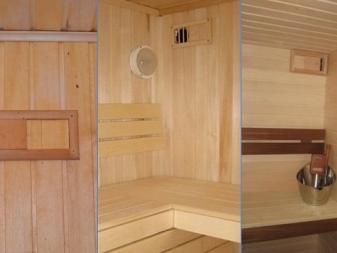
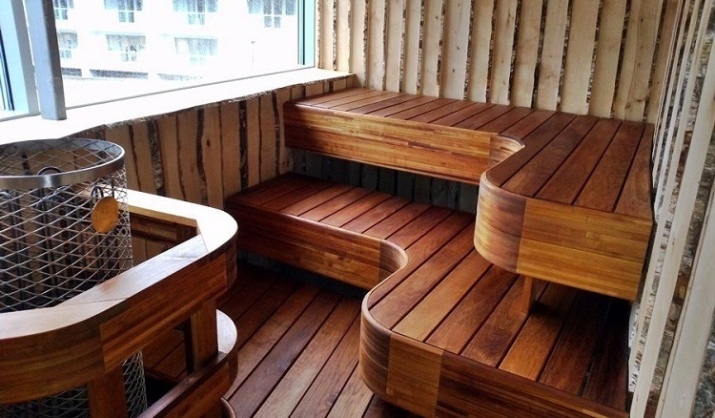
- The photo shows a very attractive version of the execution of the sauna on the balcony. Curved shelves look more beautiful thanks to the dark brown color. The lighter wood on the walls is lighter, but its coloring is also chosen tastefully.
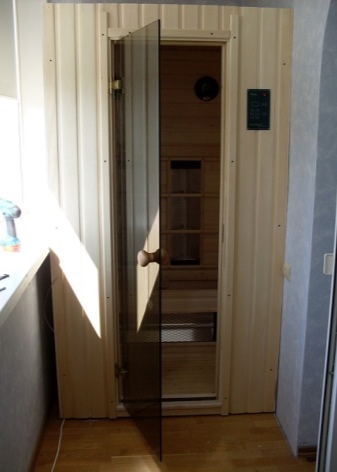
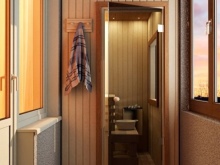
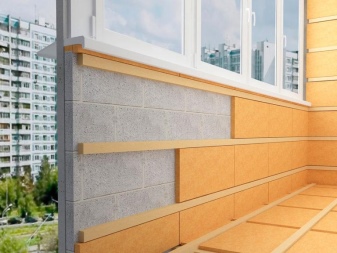
- And here's how another option looks - a bathhouse corner with an apron.
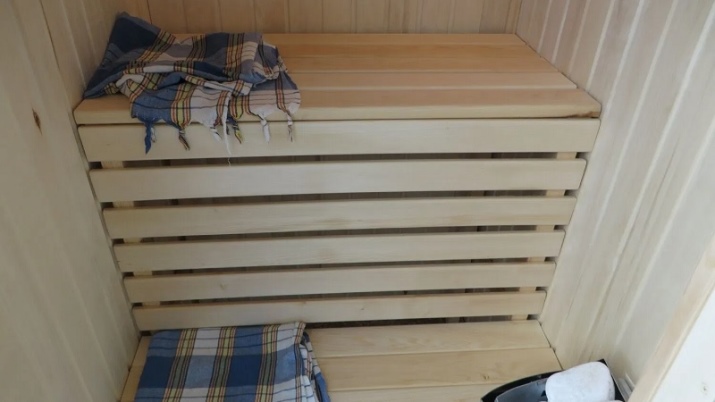
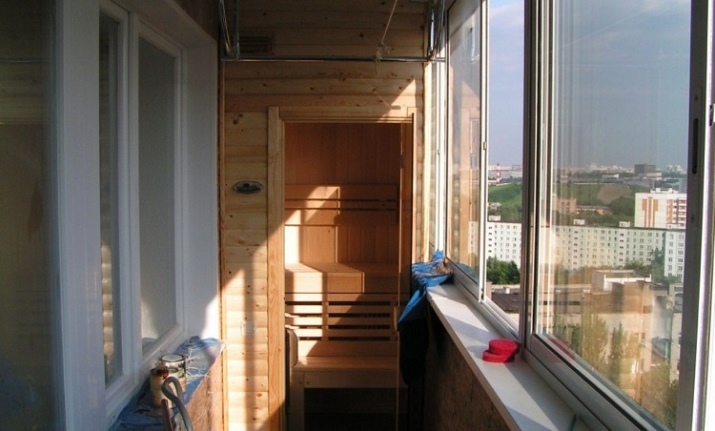
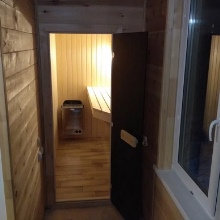
- The photo below shows an elongated balcony sauna clad in light wood. It's also worth noting the good selection of lighting.
In the following video, you can take a look at the sauna on the balcony.


