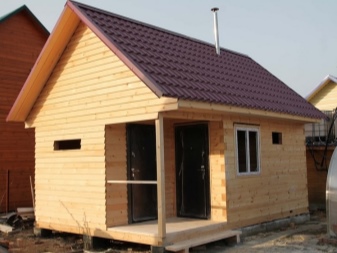
How to build a bath out of a log?

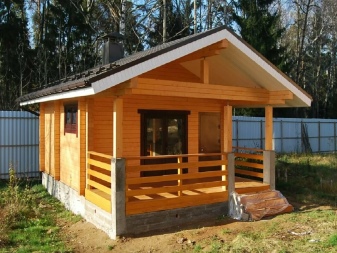
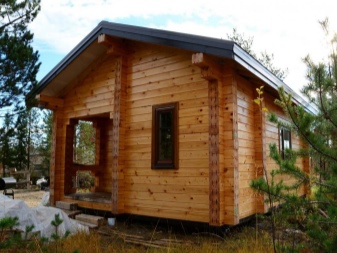
Despite the fact that the 21st century is the age of technology, many people do not forget about the old traditions and familiar types of recreation. Including the bath, which is loved by many. Therefore, on the sites you can often find baths made of logs, made in the traditional style.
Choice of material
When starting construction on your property, first of all you need to select the material for the log bath. It can be made of logs, logs from edged, profiled or glued beam, as well as a log cabin or on piles.
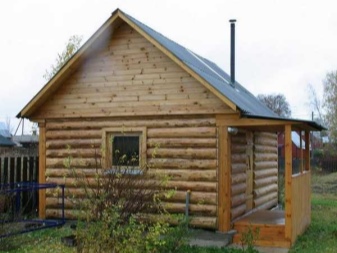
From logs
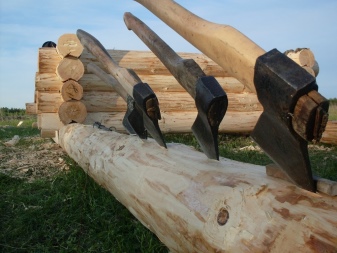
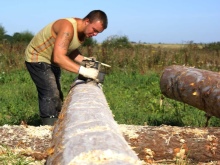
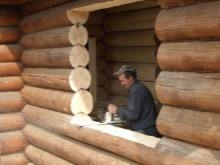
This material is considered the most common for the construction of wooden structures, including log cabins. With the use of hand-cut logs, not too complicated technology is used. Only a simple axe is needed for logging. With its help, only branches, knots and bark are removed.
Thus, the integrity of all the inner layers is preserved, and therefore the logs are not destroyed as quickly.
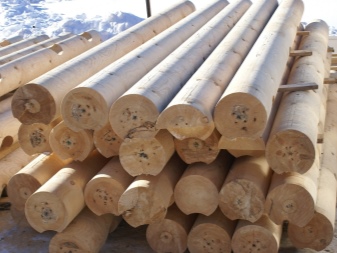
Cylindrical logs
Such logs are obtained through processing on special machines. This is how a perfectly flat cylinder is created. After this, the material is trimmed. Slots and bowls are cut along the length of the logs, so that during construction it was easier to lay them. Ultimately, the prepared wood is treated with special antiseptics.
It is worth noting that This variant of building material not only has a beautiful appearance; it is also very convenient in installation work. However, if we talk about the duration of operation, the logs are significantly inferior to logs.

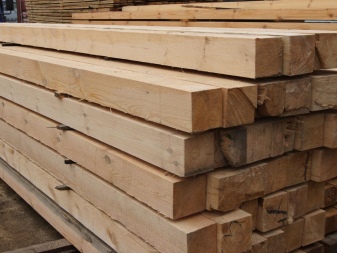
Square-sawn timber
The length of a log is usually 6 meters. To produce edged beam can be made from a variety of wood species, it could be larch, and alder, and pine. Most often the latter is used, as the cost of its much lower. When choosing this material should always take into account the degree of drying of logs, which were made joists. After all, if they were poorly dried, over time, they will crack and become deformed.
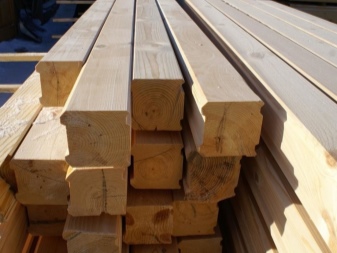
From profiled beams
Such material is very easy to work with, because it has the required number of ledges and grooves. In addition, a bath built of profiled bar is very warm and durable. However, the price of this material is high compared to others.
Glued beam
This material does not give shrinkage, which allows you to finish literally after the erection of walls. In order to To prepare a log cabin for the bath from any of the materials presented above, you can use several options.
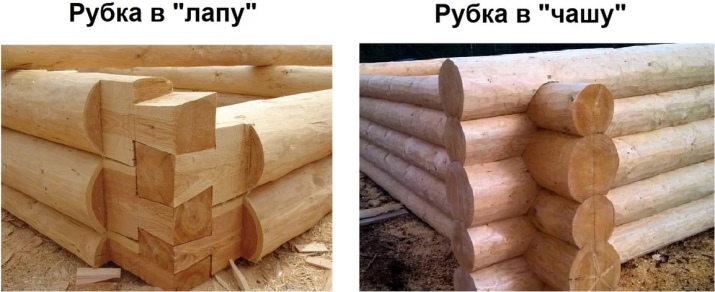
- "In the paw." It is possible to make such a felling in two ways. In the first case, insert spikes for connection are used, in the second - the root spikes. Many people like this technology because the logs do not go beyond the log cabin itself. However, the process is very complicated and requires the intervention of professionals.
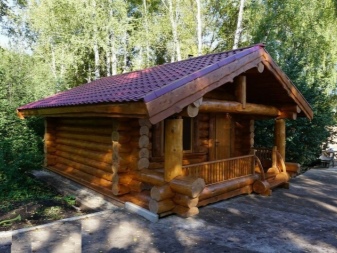
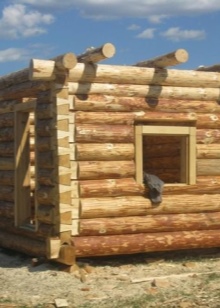
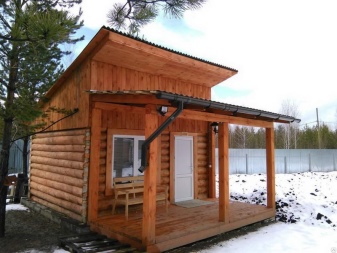
- "In the bowl". This option is used in construction a little more often, because it has a large number of advantages. First of all, it is the beauty of the finished building, because it turns out similar to a fairy-tale hut. In addition, the log house is more stable and protected. However, due to the fact that the logs at the corners protrude 25-30 centimeters, it will be very difficult to make additional cladding.
As for the choice of wood for the future building, it is worth saying that you can use for this and summer, and winter material. However, it is best to opt for the first one, because wood cut in winter will be heavier and the humidity in it will be higher.
Preparing the project
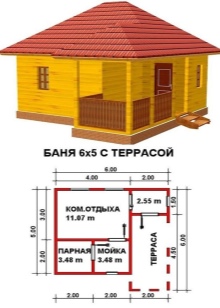
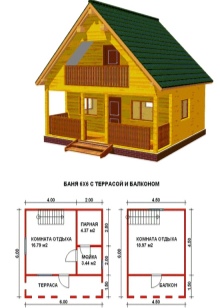
When building wooden baths, it is necessary to take into account not only the size of the building, but also its configuration. In addition, you need to think about the placement of furniture that will be in such a house. To do this, it is necessary to make drawings in advance.
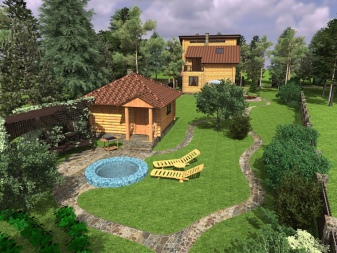
The main rooms in the bath are the steam room, the shower room and the anteroom. In some cases, the shower room and the steam room make up one room. The height of such a room should not be less than 2 meters. If the area allows, you can add a guest room, a terrace and even a swimming pool.

Where to place it?
When choosing a place for the bath, you must take into account several important points. First of all, Such a structure should be as far away from the road as possible. In addition, it is worth taking care of an artificial or natural fence to hide the bath from prying eyes.
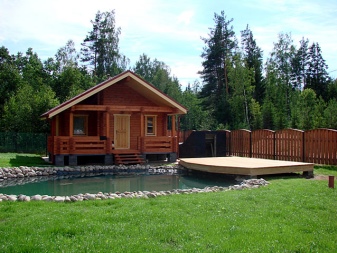
As for the living quarters, the distance between the bathhouse and them should not be less than 15 meters. That way a fire can be avoided. Ideally, it is best to place the bathhouse near a natural body of water, such as a small lake or river, so that you can take a dip there after a hot steam bath.
Construction steps
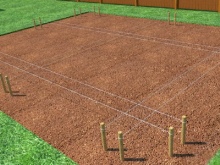
Before you start building the sauna with your own hands, you need to make a marking on the ground, as well as remove all debris. After that, you can proceed to all stages of construction.
Foundation
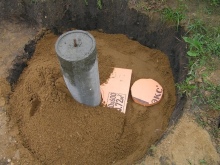
Construction of the sauna must begin with the foundation. You can use both post and strip foundations for this - it all depends on the material used for the walls of the bath. If the walls of the bath are made of light material, you can use a post foundation. To do this, you will need to dig trenches, the cross section of which should not exceed 35 centimeters. After that, it is necessary to put piles in their corners. All the space between them should be filled with coarse-sized sand or fine crushed stone, and everything should be poured with concrete from above.
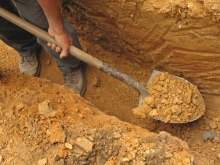

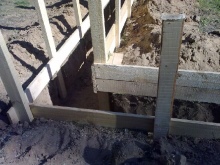
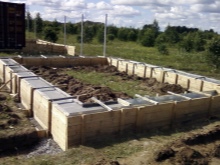
If the selected logs are too heavy, then your preference should be given to a strip foundation. It can be made in two ways. Applying the first option, it is necessary to first dig trenches, and then fill them with fine gravel, and then pour all the voids with concrete. In the second option, to begin with it is necessary to dig an excavation pit. Then it is necessary to make a formwork on its edges, which should be filled with concrete mortar.
Despite the fact that the strip foundation is more durable, its cost is much higher than the columnar foundation. In addition, in this case you will need additional insulation, as well as waterproofing.
Walls
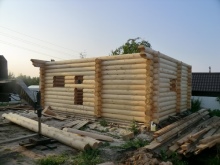
When the foundation is completely ready, you can proceed to the construction of the walls. It is best to give preference to the wood, because it is not only well air permeable, but also perfectly keeps the temperature in the room. If the owners decide to use a log cabin as the basis, it is better to order it from specialists. Those who prefer to do everything with their own hands, it is worth to get acquainted with the process of installation in stages.
First it is necessary to plan all the logs to the desired thickness. After that, mark the location of windows and doors, and then correctly cut the edges of the beams so they fit in size. After the log house is made, you should give it some time for shrinkage. This is to prevent cracks or warping over time. There are certain timescales for shrinkage. For example, in the summer time, you will need to wait for at least one year. If the log house is installed in winter, it is enough to wait only 6 months before shrinkage.
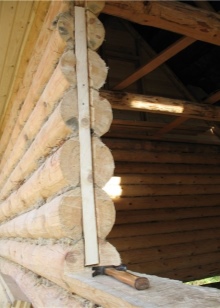
As a result, there may be small holes. It is imperative to seal the gaps with hemp both inside and outside. If the time given for shrinkage is very short, it is worth resorting to certain building tricks. They will help to avoid the appearance of cracks after the complete drying of wood.
First of all it is necessary to make a cut above the top of the windows and doors 3-4 centimeters wide. This will only reduce the width of the kerf, but the cracks over time will not appear. In order not to spoil the appearance of the bath, all kerfs must be cashed. However, everything must be done in such a way as not to interfere with shrinkage. When the time required for shrinkage has passed, all the platbands should be removed and the seams should be sealed with macroflex. When the wood is completely dry, you can begin exterior decoration.

Roof
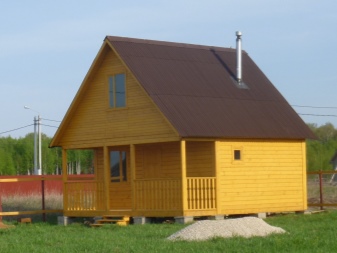
For baths, most often make a single-pitch or double-pitch roof. They differ from each other only in the slope. As for the first option, it is usually used for non-residential premises. Double pitch roofs consist of two planes that join together at the top and create a ridge. The roof itself consists of sheathing, rafters and additional waterproofing.
It will be difficult for an inexperienced person to make a roof on their own, so it is best to enlist the help of professionals.
Floor
As for the floor of the bath, it can be made not only of wood or concrete, but also of clay. If we talk about insulation, it is not particularly required. It is enough to put a wooden grid or cork mats on the floor surface. This will prevent you from feeling cold when you touch it.
If we talk about the wooden floor, it can deteriorate very quickly. After all, it is quite humid in the bathhouse, so water, penetrating into the gaps between the boards, can cause not only an unpleasant smell, but also rot or fungus. With frequent use of such a structure will need to replace the floor after 5-7 years.
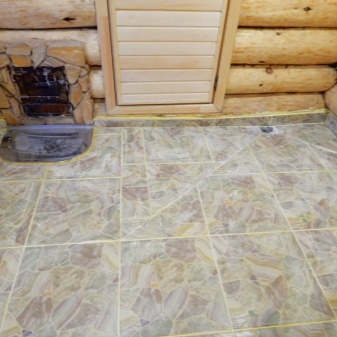
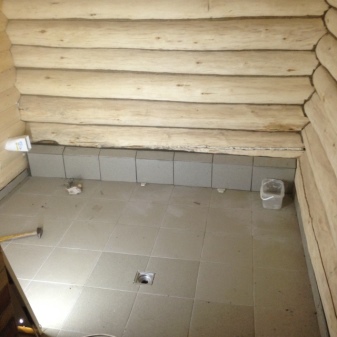
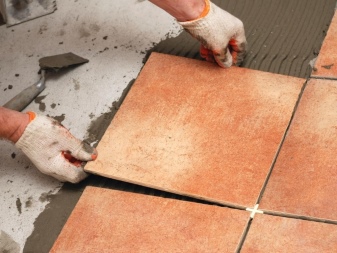
That's why will be better to use as a floor covering tile, which is not at all susceptible to moisture. However, to begin with it is necessary to get acquainted with the technology of pouring concrete. Beginners will need a step by step instruction.
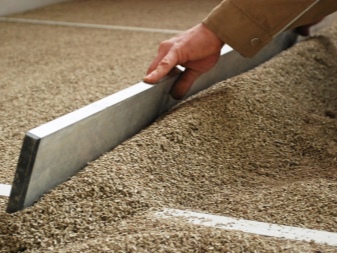
First of all, it is necessary to insulate the floor base. To do this, you will need to fill the bottom with 10 centimeters of sand and 10 centimeters of gravel. Each layer must necessarily be thoroughly tamped, as well as leveled.
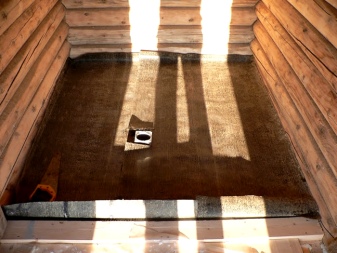
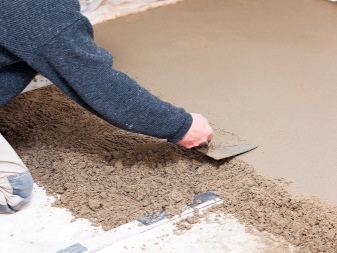
The next step is the laying of roofing felt. It should be laid so that it covers the walls to the height of the future floor. The next layer is a cement perlite concrete screed, the height of which is 5 centimeters. When it is well cured, it must be thoroughly sanded. Concrete can be laid only after one week. Its layer should not be more than 3 centimeters. You can also start laying tiles only after grinding.
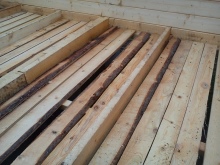
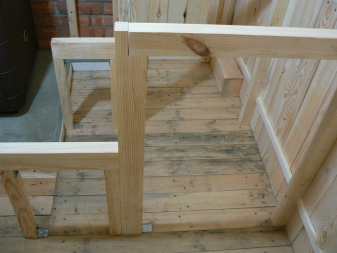
If you still prefer a wooden floor, then after the concrete is poured, you will need to lay a layer of roofing felt as waterproofing. NextNext, you must install wooden beams, and on them lay a board not cut, the thickness of which should be within 2 centimeters. Thus, you get a rough floor.
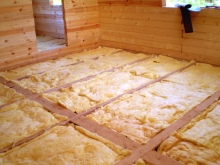
The joists shall be installed on this base. Between them it is necessary to lay insulation. This can be not only foam plastic, but also basalt wool or expanded clay. Assembling the final flooring is the last step.
The height of the floor should not be too high.

Installation of windows and doors
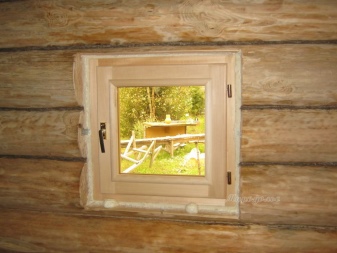
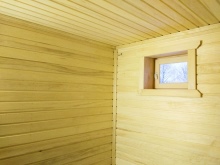
As for the windows, they should be small, 50 by 70 centimeters. They should not be placed too high. This is required so that a sitting person could easily look out, while not rising from his seat. They must have a vent so that you can ventilate the room at any time.
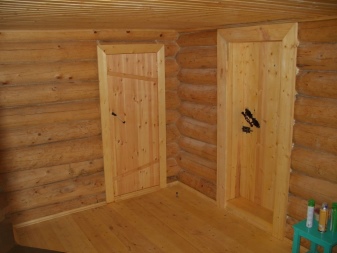
Doors in the bath must always open outward. This is required as a fire safety measure. The size of the door to the washing room should be 1.6 by 0.6 meters, but it is better to buy a door of 1.5 by 0.8 meters to the steam room.
Finishing work
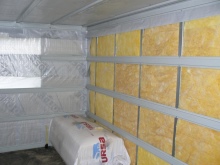
When all the construction work is finished, you can grind the sauna inside. To begin with, it is worth getting acquainted with the finishing of the ceiling. It is necessary to attach a vapor barrier film on a rough base, as well as insulation. After that, you can cover the ceiling with tongue and groove boards, the thickness of which is 2 centimeters.
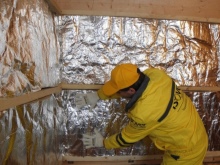
When the floor and ceiling are finished, you can begin paneling the walls. To do this, it is necessary to nail parallel strips on them, and between them lay a layer of insulation. After that, it should be covered with foil and trimmed with tongue and groove boards.
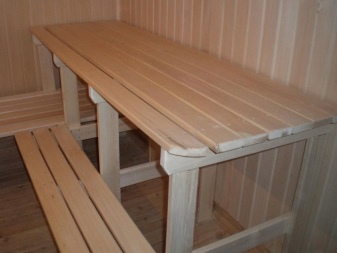
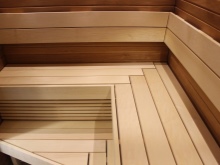
When all the finishing work is done, you can begin to make the shelves. As the material for them, you can use hardwoods. But it is better to refuse from the pine boards, because they emit resin when heated strongly. The minimum length of the shelves is 1 meter 80 centimeters and width is 80 centimeters. If the shelves are two-row, the distance between them should be at least 35 centimeters. It is necessary to place the shelves so that a person could freely lie on them without feeling discomfort.
After that, all existing corners should be thoroughly cleaned with sandpaper. If there are any blackouts on the shelves, they must be bleached. To make the procedures more comfortable, you need to install special headrests.
Their length should not be less than 45 centimeters, and the height - equal to 20 centimeters.
Recommendations
Building a bathhouse on their own, it is worth listening to some expert advice.
- It is necessary to be especially careful in the process of selecting boards for shelves. If there are even small areas with knots on them, it is best not to use them.
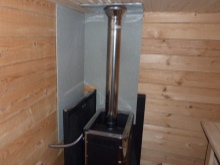
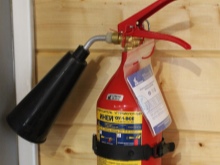
- Be sure to protect the sauna from the threat of fire. To do this, it is necessary to lay a metal sheet in front of the stove. In addition, you should make sure that the mounting of the furnace door is safe enough. You must also install near the stove all necessary extinguishing equipment, such as sand or water tanks and a fire extinguisher.
- It is not necessary to block the aisles so that a person can reach both the door and the window without obstacles in case of need.
To summarize, we can say that to build a log bath can be even a beginner, if you follow the advice of experts in the choice of materials, as well as in all phases of construction.
See a review of the 3x5 bathhouse from chopped logs in the following video.


