How to make a floor in a bath with your own hands?
Bath is a rather specific room - there is hot steam, temperature differences, as well as a significant amount of water flowing down. Especially severely affected by these conditions, the floors, so their arrangement should be treated with the utmost care. And this raises a lot of questions, such as how to arrange the floor in the steam room, what materials are better to build the final floor and how to repair damaged boards. About this we will tell in our review.

Materials
Many experts advise to arrange in the steam rooms and wash rooms floors of concrete, especially popular such a decision for owners of brick baths. It is believed that such a design will be the most durable and practical. Concrete floor has many advantages:
- a long operating period - from 40 to 60 years;
- increased resistance to the adverse effects of temperature jumps and constant humidity;
- resistance to deformation, as well as destruction, fungus, mold and other pathogens;
- the affordable price of the consumables needed to manufacture the construction;
- the variety of decorative cladding;
- ease of maintenance, which does not require the use of expensive household chemicals.
At the same time, it is not without its disadvantages. For example, the concrete floor is considered the most expensive construction. The process of laying the floor requires the obligatory laying of concrete mortar in 3-4 layers, and each of them must dry well.
That is why the construction process stretches for a long time. You should also remember that concrete is a cold material. Even if you place a thermal insulation coating inside, the floors will still remain icy. The only acceptable way out can be only the arrangement of the system "warm floor". Finally, this floor is not very aesthetic appearance, it usually has to be additionally finished.
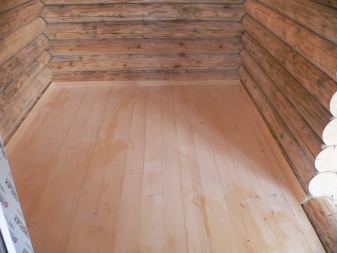
In Russian country baths traditionally arrange the floor made of wood. The main advantage of this material - environmental friendliness and useful properties. Of course, this material does not last as long as concrete, after 10 years of systematic use, some wooden elements of the structure requires updating. Nevertheless, it is not difficult to replace damaged boards, and the final costs will still be much lower than when decorating the floor of concrete.
Floor in the steam room is traditionally made of hardwood or softwood, which is characterized by resistance to temperature fluctuations and high levels of humidity. It should be durable material with a dense structure that almost does not absorb liquids. Of the variety of solutions offered by modern construction market the most successful are considered alder, as well as larch and oak. Immediately mention that oak wood is expensive, and to find it in stores is not always possible. For this reason, the use of this material in country baths is not economically feasible.
Alder, like larch, is characterized by high resistance to wear and tear. The structure of the wood is so dense that moisture absorption is close to zero.
However, these materials also can not be called cheap, so most of the owners of country baths prefer pine boards. Of course, it is a short-lived material, but this disadvantage is fully compensated by the low cost. When such boards fail, their replacement with new ones will not be a blow to the family budget.
Regardless of which material you choose, it is important to consider its moisture content. When it comes to the bath, the drier the boards - the better. In floor structures can not use wood, the humidity of which exceeds 12%, because in contact with water it will begin to warp, and then swell and deform.
As for the thickness of the material, then no separate requirements are set, as this parameter can only influence the pitch between the individual joists. For example, for a board with a thickness of 25 mm, the step should correspond to 40 cm, and for a board of 40 mm - 60-75 cm.
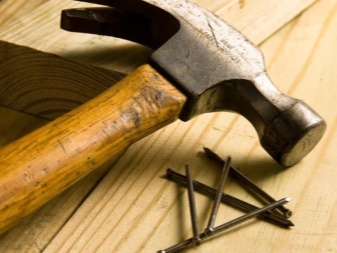
Tools
The arrangement of flooring in the steam room and shower room is made with the help of construction tools used for any work on concrete, soil and wooden substrate.
You will need:
- hammer;
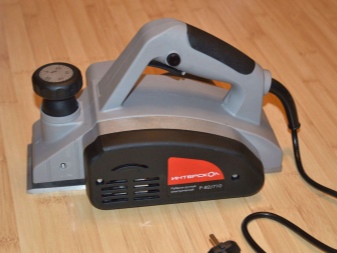
- planer electric or manual;
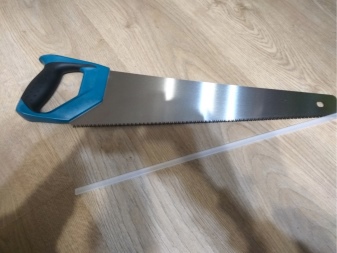
- hacksaw;
- power drill;
- spirit level;
- angle piece;
- screwdriver;
- clamps;
- circular saw;
- grinder.

How to calculate the consumption?
When constructing a concrete floor in a sauna, it is supposed to use construction as well as thermal insulation materials.
In addition, you will need metal-plastic waste pipes, as well as fasteners made of any galvanized metal.

The total number of materials and their characteristics depend directly on the design parameters of the floor and the installation technique.
As an example, let's calculate the basic materials required for a 3x3 m bath or sauna.
To carry out the installation should prepare certain materials.
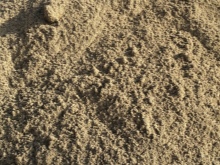
- Fine fractional river sand - it is needed to fill a layer of thickness about 12 cm. Amount of material = (3x3) × 0.12 m = 1.08 m3.
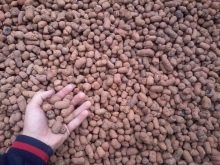
- Medium-sized expanded clay for backfilling with a layer of 40 cm. The required amount = (3x3) × 0.40 = 3.6 m3.
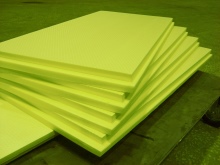
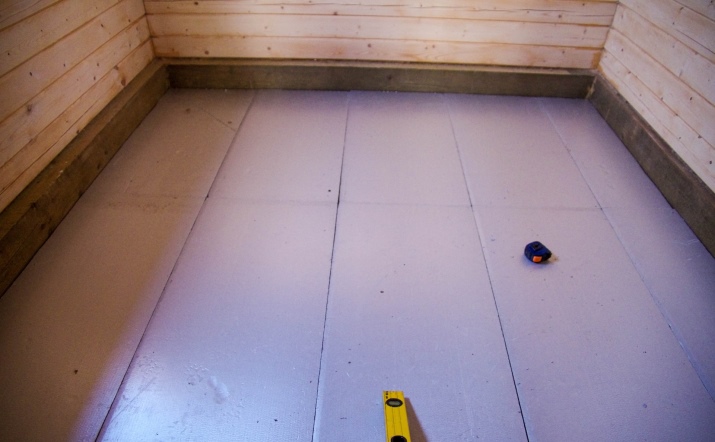
- Extruded sheets of polystyrene foam. The amount of material is determined by calculation: the required thickness of insulation - 10 cm, respectively, the number of sheets for the bath metered 9m2 - 2.5 packages.
- Cement-sand mortar. Screed width - 6-10 cm, the consumption of dry mixture about - 20 kg/m2. For a 1 cm layer of concrete = (3x3) x20 kg/m2 = 180 kg.
- Reinforced mesh for fixing the screed with parameters 5x5 cm.
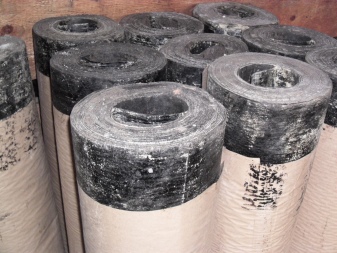
- Ruberoid in rolls to install air cushion waterproofing.
- Metal profile for beams under the concrete screed. For a steam room of 9 m2 you will need 18 m of profile.
- Plastic pipe for the design of the drain up to 5 m in size, with a diameter of up to 3 cm, as well as a sanitary siphon and a swivel knee.
Let's calculate the necessary volume of materials for the design of the boardwalk floor in the structure of the same area, for ease of calculation we will consider the covering of the leaky type.
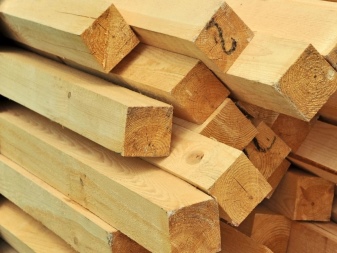
- Wooden bar for the arrangement of the rough floor 3x3 or 4x4 cm in the length of the beams. Step between the beams corresponds to 50 cm, respectively, the total number of beams - 30 m.
- Second-grade board for the base with a width of less than 30 cm and a thickness of 3 cm. For each section is required: (300/30) x 0.5 = 5 m. For the design of 5 sections: 5x5 = 25 m.
- A guide bar under the drain with a section diameter of 2x3 or 3x3 cm.
- A timber for fixing the joists under the finishing floor with a diameter of 6x6 cm.
- Ruberoid or film for installation of waterproofing. For the steam room you need about 16 m.
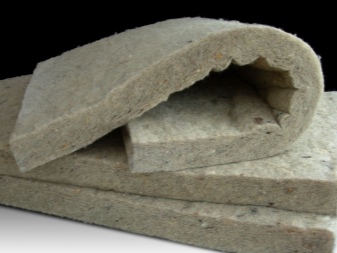
- Basalt wool in a layer of 8-10 cm for effective thermal insulation.
- Steel, zinc-coated sheets with thickness less than 0.6 mm - 11 m2.
- Polymer pipe, as well as a lap and a trap for installation in the drain. For arrangement of a correct drainage system the elbow with a pipe should be installed at right angles.

Fabrication technology
When installing a concrete floor, you need to start the work with the preparation of the base inside the foundation.
First you need to get rid of debris and dirt, only after cleaning the ground can proceed directly to the laying of the post base.
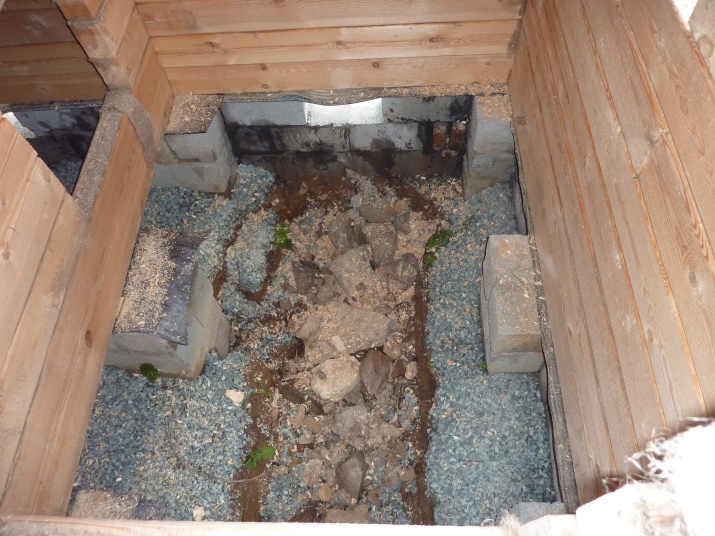
These works consist of several stages.
- The soil is well tamped, and then leveled. The inner parts of the foundation are treated with bitumen several times - it is necessary to apply at least three layers.
- At the preparatory stage, install a drainage pipe through the entire foundation. To this end, it is necessary to formalize the incoming hole and fix an adapter in the base to bring the metal-plastic pipe.
- Next, the pipe is led into the area where the drain is provided, put a plug to prevent the formation of gaps.
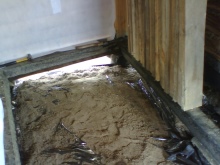
- On the ground lay a sand cushion 13-15 cm thick, dampen the sand and compact it thoroughly.
- On the inner walls of the foundation a roofing felt is laid, so that an allowance of 15 cm is left, the joints are additionally covered with heated mastic.
- After that, 25-40 cm of expanded clay is laid, leveled and tamped again, while 8-10 cm must remain up to the edge.
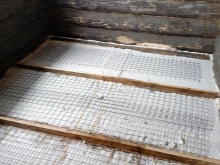
- The expanded clay is covered with waterproofing material, such as thick polyethylene. The joints are fixed with construction tape, and the insulating material is laid on top.
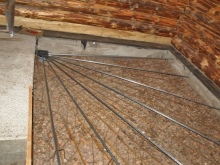
- After completing the work on the insulation of the foundation, mount the rails. For pouring the mortar, they are placed at intervals of 60 to 90 cm, beacons are laid on a mixture of sand and cement.
- When fixing the guides, it is necessary to observe a small slope so that the water can drain properly during the operation of the sauna. For this purpose, the beacons are set exactly on the level.
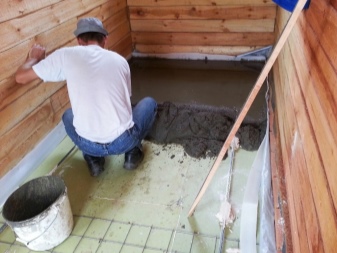
- From below, along the entire perimeter of the walls, place a damper tape 10-15 cm wide, after the filling and subsequent drying of the concrete screed, it can be removed.
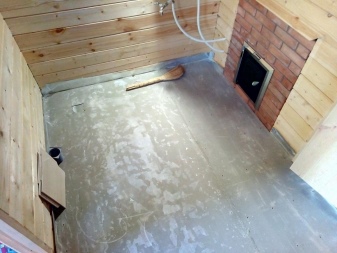
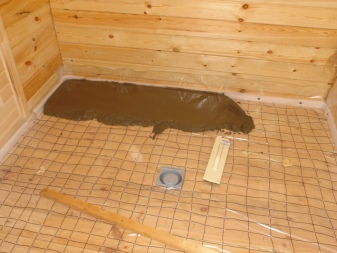
- Then it remains only to pour the concrete with the prepared mortar and leave until the final drying.
When arranging the wooden floor it should be borne in mind that in the steam room, as well as in the washing room a lot of water is poured on the floor. It must be removed through a pit system, drainage or simply into the ground beneath the bath. That is why, structurally, to eliminate such a problem, wooden floor structures are made by leaking, as well as nonleaking scheme.
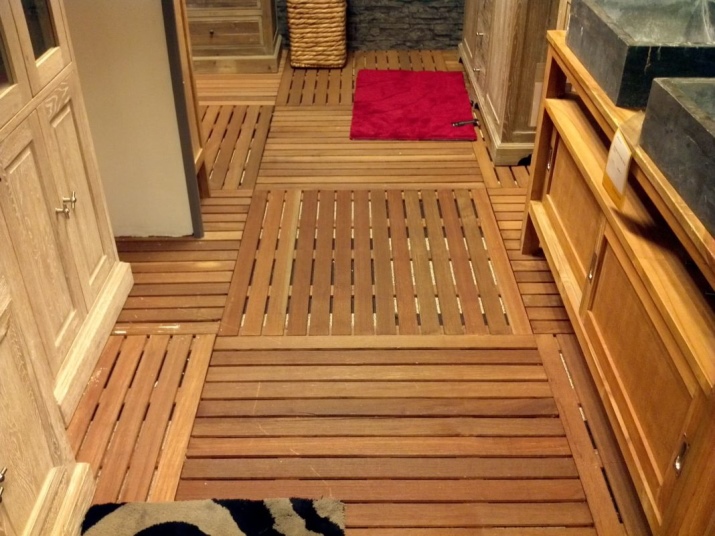
Leaking
This is one of the most affordable options in terms of price. It is presented in the form of wooden battens, the individual modules of which are fastened with the observance of small gaps - this will allow the drainage of water.
Instructions for the arrangement of such a floor are different in that this technique does not require the installation of drainage, as well as any additional insulation.
That is why saunas and baths with a similar floor usually operate exclusively in warm seasons or in regions where high air temperatures remain throughout the year.
A step by step guide for the construction of a flooded floor involves several types of work.
- Preparing the subfloor. In order for the moisture entering the basement to be removed from the ground, it is necessary to arrange the basement. To do this, part of the soil from above is cut off and poured over with small chips with a layer of 25-30 cm, it will act as a waterproofing air cushion.

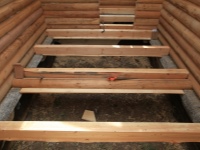
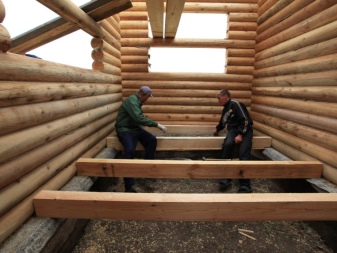
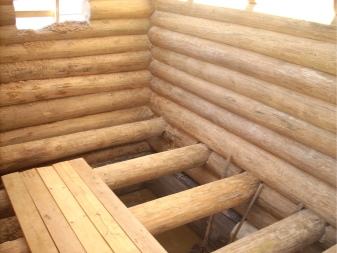
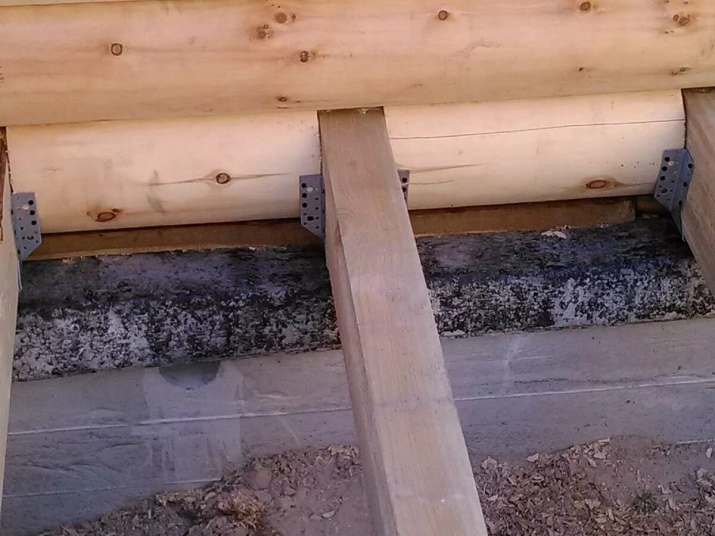
- Installation of supporting beams. Beams are fixed on concrete posts, they are fixed against the shorter wall of the structure. To prevent swelling and deformation, all the supports should be covered with several layers of waterproofing - traditionally for this purpose take a roofing felt, smeared with heated bitumen. Natural ventilation when installing the beams provide small gaps of 4-5 cm.
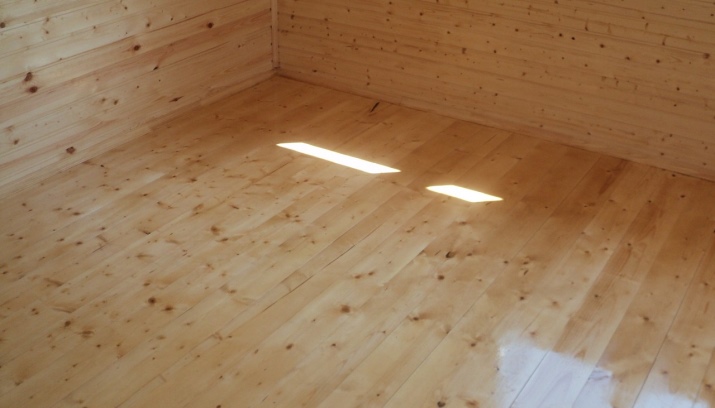
- Laying of wooden flooring. To floor the finishing floor, boards are used. They are fixed perpendicular to the fixed joists. It is very important to observe the indents in front of the individual structural elements of the flooring - 5 mm between the boards and 2-3 cm between the boards and the walls. Attaching the wood board to the joists is done with ordinary nails.

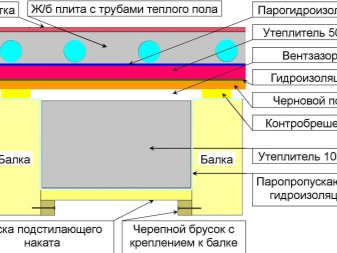
Non-flowing
Non-flowing design assumes a solid floor, which is installed on wooden joists fixed in the ground or concrete base. For efficient drainage of sewage, the floor is made with a slight slope towards the drain.
The upper part of the flooring is usually laid on the subfloor, it is additionally insulated with any moisture-resistant material.
All the work is carried out in a certain order.
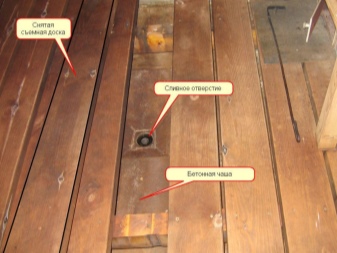
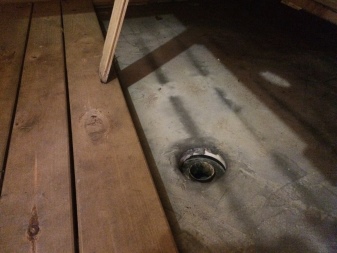
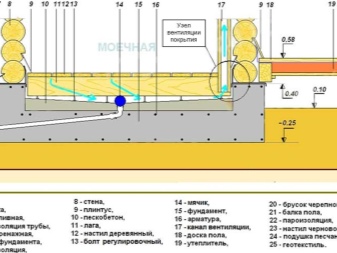
- First, a water inlet with a size of 45x45 is arranged, it is located between the supports. The device is laid at a depth of 30-40 cm, and at a height of 3-4 cm from the bottom of his bed under a gentle slope set a plastic pipe for the withdrawal of effluents into the cesspool or drainage well.
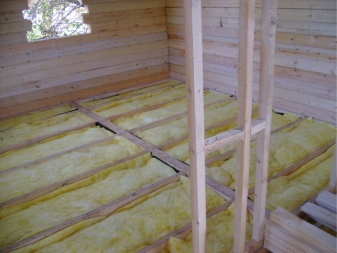
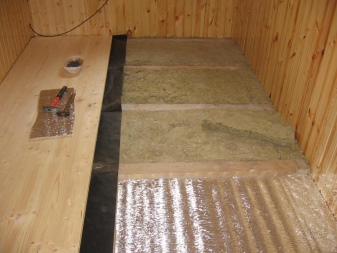
- Next perform work on the arrangement of the underfloor. It is made in the manner of a pie of any cheap material, such as second-class boards, on which the waterproofing, thermal insulation, as well as vapor barrier should be laid.
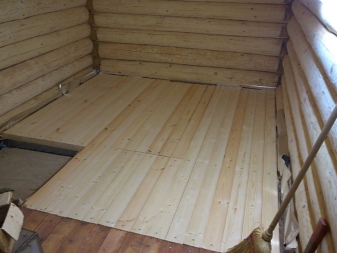
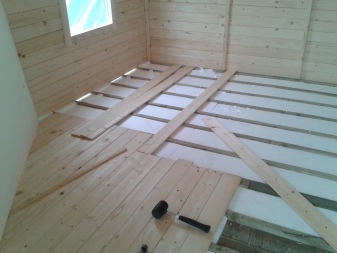
- After that, you can move on to fixing the finishing coat. On the fixed lag should be put tongue and groove boards with reduced water absorption, while along the perimeter in places of adjoining walls should be provided with a gap of 2 cm. Boards are fastened with nails at an angle of 40-50 degrees, and at the final stage of installation of any decorative plinth.

Finishing
Even before the start of work, it is necessary to perform preparation of the finish coating, that is, to thoroughly dry all the boards. If you neglect this stage, then during the operation of the bath repeatedly increases the risk of floor deformation. It is necessary to dry the boards as long as possible. If there is no such a possibility, it is better to give preference to a thin beam. Of course, it can withstand a much smaller load, but this disadvantage can be compensated by fixing an additional layer of cross beams. As practice shows, the susceptibility to swelling and warping in boards less than 2.5 cm thick is almost imperceptible.
In the vast majority of cases, lime cladding is used to cover the floor in the steam rooms. This material can withstand temperature fluctuations, it retains its technical and operational properties for a long time, it does not rot and does not change color. Over time, the surface appears dark tarnish, but it can be removed by sanding.
Linden timber has a fairly dense, but very elastic structure, so the deformation of the volume spreads very slowly.
The advantages of linden timber also includes a reduced heat capacity of the material, this floor does not overheat, so the probability of burns in contact with the skin is minimized.
Aspen is similar to linden in its characteristics, so it is also used for the arrangement of the finishing floor in the steam room. In addition, this material is much cheaper. The only disadvantage - reduced resistance to water and darkening of the surface with the operation. For this reason, aspen linings are usually covered with floors in dry steam saunas.
Aspen is pleasant to the touch, it does not overheat, so there is no risk of burning your feet in such a room.
The best cladding material for the floor in the steam room is considered cedar board. This is due to the fact that its structure consists of thin shortened fibers - thanks to this board does not change its original shape even in frequent contact with water. In cedar wood the concentration of oleoresin is increased, when heated such boards begin to secrete phytoncides having healing properties. In addition, cedarwood does not require any additional antimicrobial treatment, so that such a board can be used in its natural form.
When arranging the floor it is necessary to take into account the overall style of the room. Each type of wood has its own shade, conventionally allocate dark and light varieties, species of pink and mahogany.
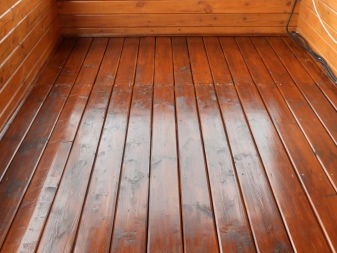
For example, pine and larch are light species, and if you want to give the surface a darker shade, you have to use a varnish coating.
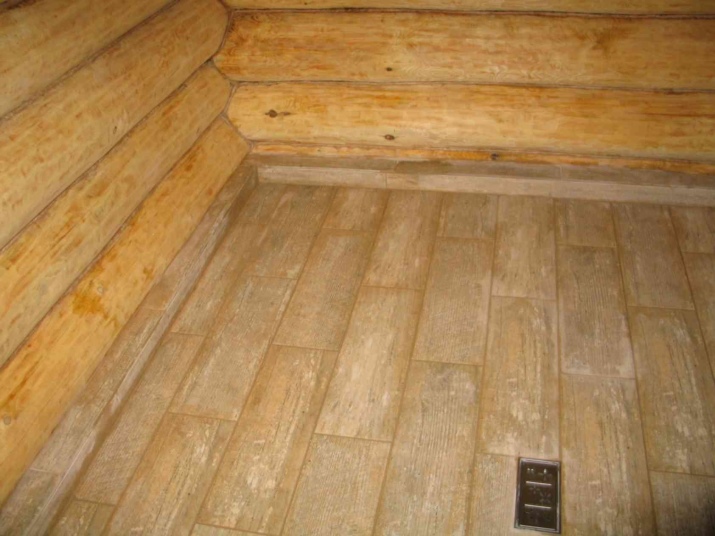
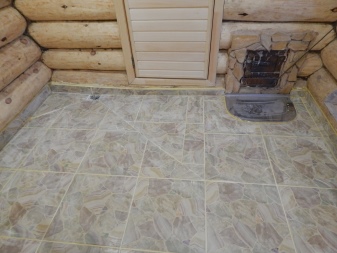
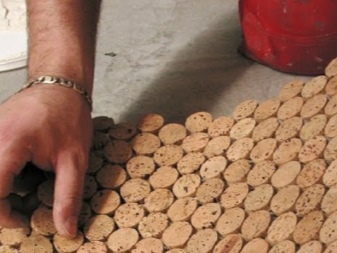
Less often for finishing the floor in the steam rooms use cork from bottles and tile, the latter can lay out a recreation area or the anteroom, because in the steam room and the washroom under the influence of water tile becomes slippery.
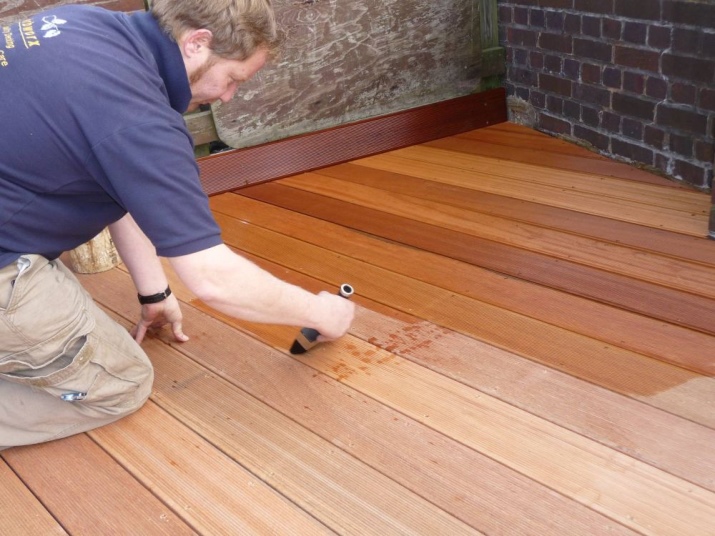
Protection against rotting
To ensure that the boards in a humid bath do not rot, experts advise treating them with a special aqueous varnish with high heat resistance. Such a coating can withstand heat of more than 100 degrees, thereby it provides the structure with effective protection from heated steam, moisture and dirt of various types. Protective varnish should be applied to the boardwalk with a brush in no less than 3-4 layers. All works should be done in a ventilated room with the air temperature within the range of 4 -25 degrees.
In addition, All kinds of natural-based impregnations can be found on the market. As a rule, they have a shorter exposure period and require regular renewal.
Repair tips
With intensive use over time, some elements of the floor in the bath require replacement. In this case, it is necessary to remove all the boards and floor joists that have rotted, and then remove all accumulated debris under the floor structure. These measures will prevent the risk of fungal microflora from the old floors to the new boards. It is desirable to additionally cut the ground to a depth of 10-15 cm. The ground should be treated with antiseptic agents, copper sulfate is highly effective.
As water after washing always gets on the floor, it is best to organize their runoff outside the room during the repair work, to do this, the top layer of soil is decorated with a slope.
The optimal will be the design of the concrete screed with reinforcement. However, often there is not enough physical, technical or budgetary possibilities, so you can get by with laying a couple of layers of roofing felt, membrane or polyethylene film.
Installation of floors in the bath - is quite technically complex procedure, which directly depends on the properties of the foundation, the size of the room and the structural features of the structure. However, in spite of all the difficulties, to master the correct technology of installation and make the floor structure with their own hands can every owner of the bath.
How to make the floor in the bath with your own hands, see below.


