Making a font with our own hands

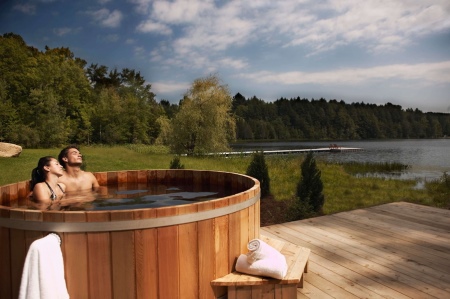
Rest in the bath is both pleasant and useful. Many people are very fond of how to properly steam, and then plunge into the font. It is quite possible to build their own hands and set not only in the bathing room, but also on the street. About this we will talk below.
Choosing the material
To create a homemade baptismal font at the site near the house or in the country house, the first thing you need to do is to choose good materials. Let's consider what in most cases such structures are made of, and what properties they have.

Wood
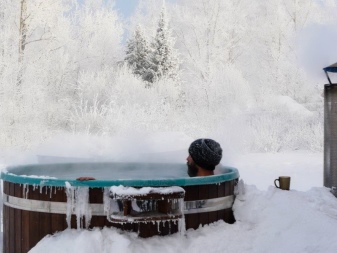
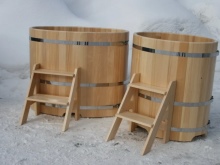
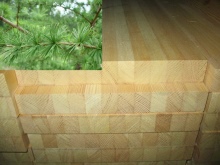
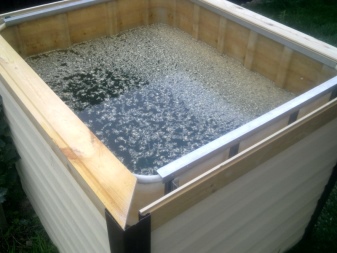
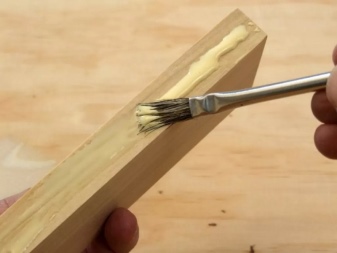
Widespread are wooden self-made fonts made of timber and boards. The most reliable and high-quality structures are obtained from cedar, oak or larch. Cheaper will cost a font made of pine. The upper part of the natural material necessarily undergoes treatment with special protective solutions or wax.
Thanks to the use of such agents, the considered base does not suffer from contact with water.
Let's learn more about the different species that are most often used in the assembly of the font.
- Cedar. This wood is distinguished by the release of essential oils, which have special healing qualities. Water in a quality cedar tank will be filled with phytoncides and will be able to gently clean the human skin.
- Larch. An excellent natural material. Even in not the easiest conditions in the sauna, this wood does not suffer from the effects of high temperatures or high humidity. The wood is reliable, durable, not exposed to rotting.
- Oak. A strong and durable wood. In contact with water, oak releases so-called tannins that can have an anti-inflammatory effect.

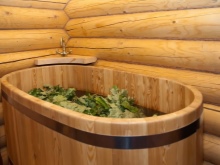
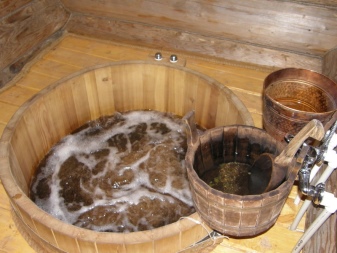
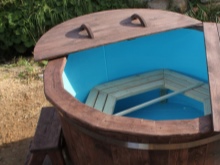
Wooden water closets are good not only for the environment, but also for its luxurious appearance. Natural materials can have a beneficial effect on human health. Often in the bowls of solid wood provides an inlay of polyvinyl chloride (PVC-membrane).
To not face the problem of desiccation of such a basin, it will need at least once a week regularly filled with water. After that, the bowl should be covered with a lid, a deck of wood or film. Also, the owners will need to take care of quality ventilation of the bottom of the structure.
On sale you can find pre-made wooden fonts, the price of which ranges from 22 to 80 thousand rubles (and sometimes more). Make such a tank yourself will be many times cheaper.
Stainless steel or cast iron
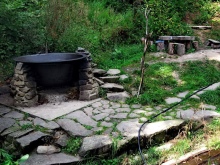
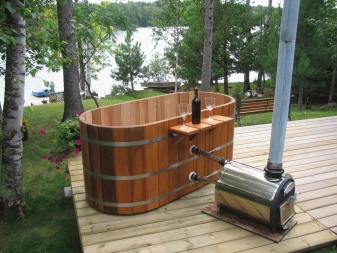
Cast iron or steel tanks are implemented as a vat. The bowl is fixed as on the pit, as well as on a tripod, supporting legs. Often such fonts are fixed on heavy-duty chains and even above the wood-burning stoves in the bath.
The bottom of such font is usually covered with stones or specially prepared wooden shields.
It should be taken into account that independent installation of a cast-iron font can be very difficult and time-consuming. This is due to the large weight of such containers. Welded structures are lighter, but many users find them less spectacular and attractive.

Ready-made cast-iron and steel fonts are quite expensive. Make with your own hands master can only welded construction and only with the ability to work with a welding machine.
Concrete
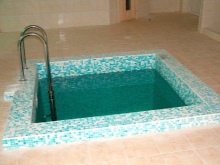
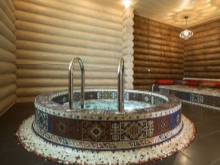
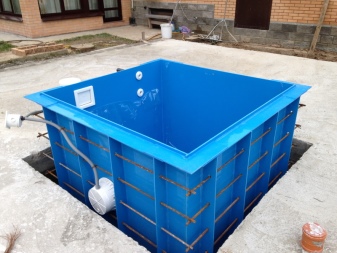
One of the most resistant to wear and tear and durable structures. Models made of concrete look like compact swimming pools. To equip them it is possible only in the preliminary prepared pit. Outside the sides of the capacity is painted with a special rubber paint or lined with ceramic tiles, mosaics, designed for installation in the pool.
To mount a concrete font in the bath, it is necessary to make a detailed project and choose the ideal place to install such a vessel.

It is also very important to provide the location of the water supply and drainage systems.
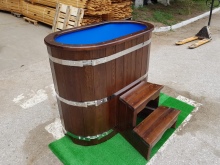
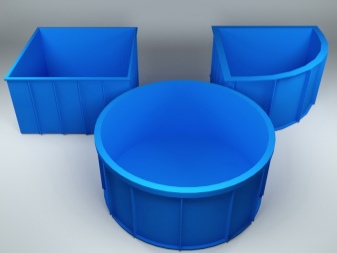
Polypropylene
In many baths you will find polypropylene tanks. Such tanks are available in two versions: with 5 and 8 mm thick walls. The cost of such fonts is relatively low. Bowl can be further strengthened by stiffening ribs, or by using a frame of metal.
Eurocube .
Not bad copies will be able to create from the eurocube. This option is a plastic container of certain sizes. Euro cube is often used in industry and for transportation of bulk or liquid cargo. Often these tanks have an external steel crate, making them as strong and reliable as possible. It is in this crate and placed itself a plastic container in the form of a cube.

Options for making a font
High-quality and aesthetic font can be built with their own hands. First you need to buy the appropriate material, then proceed directly to the matter.
Wooden
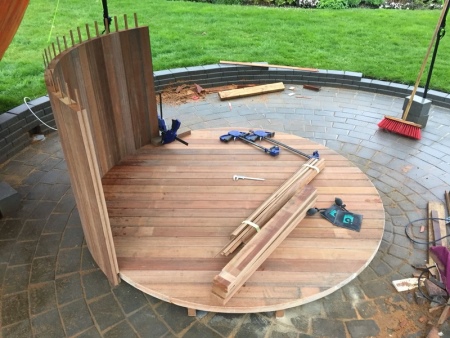
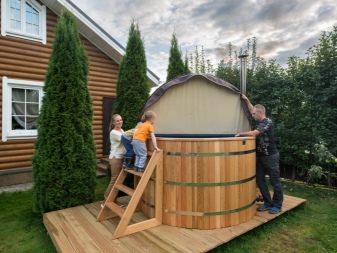
Before you start the work, it is important to calculate the available space in the bath or on the estate (depending on where you want to install the tank). It will be necessary to equip the font with a special drain trap with an overflow drain. Then it will be necessary to connect it to the water supply, so it was not necessary to carry water by hand.
Choose for the installation of a wooden structure in an area where it will be as close to a reliable communication systems. If you want, the reservoir will be equipped with a hydromassage or solid fuel stove on firewood (turn an excellent heated baptismal font). For a heated tank must think in advance about the possibility of pulling electrical cables and a chimney.

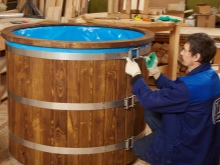
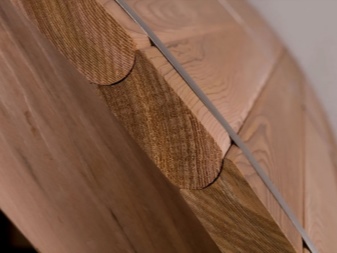
All wooden font is collected from the panel components with a thickness of 35 to 50 mm. They can be fastened to each other in two ways.
- Adhesive. The ends of the parts to be connected are fixed by means of a heat or moisture-resistant adhesive mortar. The resulting structure is tightened through 3-4 iron clamps. If there are asthmatics or allergics among the users, it is better not to construct such a container.
- Ship-groove. Elements are fastened to each other on the principle of battens. As a result, it is possible to achieve a perfectly flat surface, which will not have gaps or visible joints, even if the material is a little desiccated.
Let's consider how to make a model from wood. To do this, it is necessary to prepare:
- Tongue-type boards with a thickness of 40 mm;
- boards of 150x40 mm;
- large clamps made of metal;
- drain trap and polypropylene pipe;
- 40x40 mm bars (to make the legs);
- PVA glue;
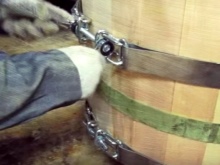
- nails and bolts to fix the hoops.
Let's analyze the stages of fabrication.
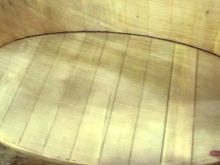
- First, the bottom part is made of tongue and groove boards. They are laid out in a row, dab the tongue and groove adhesive and fasten the panel part of a rectangular structure. Fixation is carried out by means of clamps, the construction is left so until it dries.
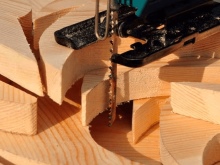
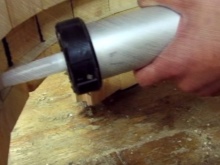
- Prepare the boards for the wall bases of the bowl. Using a router on the side surfaces of the parts on one side prepare a longitudinal groove in the form of a semicircle and a similar one, but on the opposite side. Cut transversal grooves along the bottom half of the boards with a width of 42 mm and a depth of 20 mm.
- Form the bottom base from the board part. Draw an oval on it with a pencil and cut off the excess with an electric jigsaw. Screw in 2 pieces of wood from below, leaving a small gap between them - these will be the supports.
- In the bottom piece should make a hole for the drain. At the bottom spend a tube, connect it to the siphon, screwed to the boards with screws. The area where the siphon is close to the wood, treated with sealant.
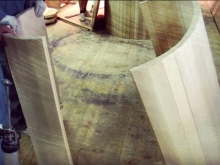
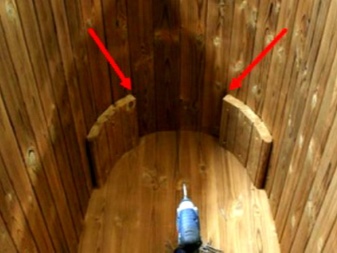
- Next, construct the wall bases of the font. Boards must be stacked around the bottom, installing the protruding elements in the grooves.
- At the end of all work, the walls will need to be tightened by means of clamps. The edges are nailed on small nails to the boards, tighten the bolt. Thus install the hoop at the bottom, in the middle and at the top.
- All elements of the font should be sanded with sandpaper. Finished tank set in its permanent place, and then connect the hose siphon with a sewage pipe or lead to the opening of the drain. Inside the font is allowed to further establish a makeshift benches.

Let's see how you can make a bench for a wooden font, which looks like a barrel.
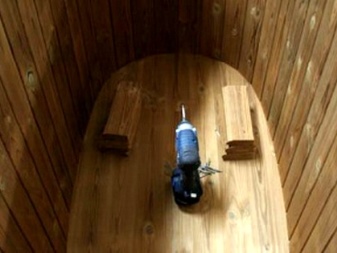
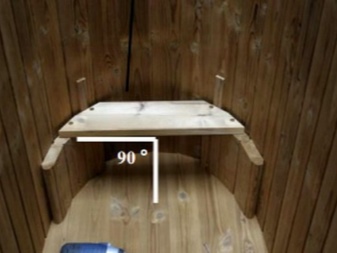
- First, you will need a marking of the support. At the bottom of the vessel with the help of a pencil expose the marks. If the dimensions of the tank allow, the benches can be placed along the walls. In small tanks, put 2-4 support benches. To make them, you need to take a bar 40x40 mm and a length of 20 cm.
- Supports are attached using self-tapping screws directly to the walls of the font. Caps will need to deepen just a few millimeters into the boards.
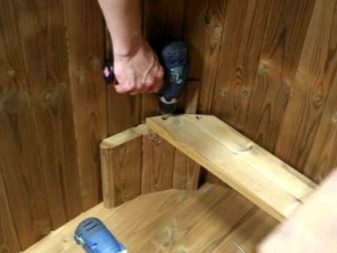
- Based on the configuration of the bench, the edges of the boards will need to be trimmed to 45 degrees or do them rounded with an electric jigsaw. Having completed the work on the processing of the edges of the designs, boards are connected by laths in pairs, and then a good grind.
- The seats should be placed on the support base, to join the adjacent end sections and screw them together with screws. It is necessary to recess the heads into the wood. Then the recesses are sealed with a special waterproof wood putty.
In many prefabricated fonts, sold in stores, benches are present initially and the owner does not have to mount them.
Concrete
To make your own hands a concrete font, it is desirable to have a concrete mixer. The process of creating such a container consists of several stages.
- First, a pit is dug out. The depth of the pit should be 1.5 to 2 m.
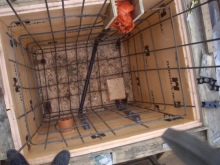
- Next, a grid of rebar is installed on the walls and the bottom of the pit. First, the grid is laid down, maintaining an indentation of 5-7 cm from the bottom. After that, the reinforcement structures are placed on the walls of the tank made.
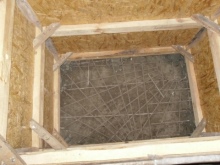
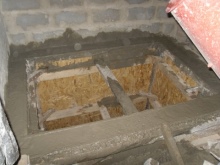
- The next stage is the installation of the formwork for the inner and outer walls of the font, as well as the pouring of concrete mortar. The formwork itself can be constructed from sheets of OSB or plywood. These materials should be additionally strengthened with timbering.
- The formwork should be set higher than the reinforcement mesh. The walls of the formwork are filled with ready-mixed concrete 1 time, and then the bottom is poured.
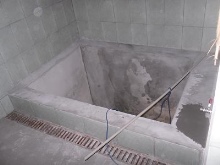
- After the disassembly of the formwork, you can proceed to finishing the tank. It is necessary to plaster its walls and bottom, resorting to fixing the waterproofing layer.

Recommendations
Self-construction of the font can not be called prohibitively difficult. All that is required of the master is diligence, patience and consistency. If you are faced with such work for the first time, it is advisable to keep at hand a detailed step by step instructions, as well as heed to some useful recommendations.
- Choosing a suitable form for the future self-made font, do not stop only at round or oval designs. The tank can have a square, rectangular or even angular shape. Choose the version that will seem most convenient to you and will not look cumbersome.
- To build a font, you must take into account the fact that its size depends on the number of people who will simultaneously use it. If desired, the tank can be supplemented with various useful components: benches, stairs, a special filter for water purification, a heating mechanism and even a hydro-massage.
- Constructing a quality and durable concrete font, it is recommended to finish its walls with the material that has water-resistant properties. This can be ceramic tiles of suitable design or film coating. To go down into the tank was as convenient as possible for the descent and immersion is advisable to establish a solid iron staircase or summarize the edge of the monolithic steps.
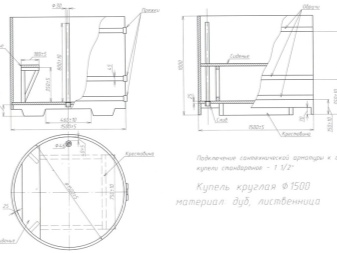
- Before starting preparatory work it is recommended in all cases to make detailed drawings of the future construction. They should indicate all the dimensional parameters and features of the planned tank. Having a draft of the font at hand, it will be much easier to make it correctly.
- Preparing a trench for the subsequent installation of a concrete font, you can dig it, making a slight slope towards the sinkhole and run a pipe into it. Such a system of drainage is more to the liking of many users.
- Making a concrete font, the mortar begins to fill it with the bottom. Here it is recommended to resort to additional processing of the solution through a special immersion vibrator. Neglect this step should not be neglected, because at the expense of it increases the water repellency of concrete.
- To many masters, making a font out of concrete mortar seems too complicated and drawn out. In this case, the way out can be reinforced concrete rings. The font can be quite made of them. Such materials are no less reliable and durable.
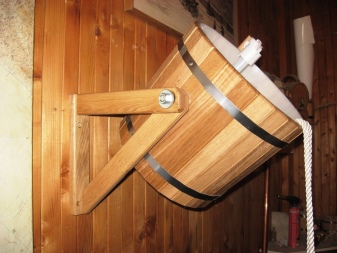
- If you think that it is too much trouble to make a full-fledged fonts, you can do with a simpler option - to install a large bucket for pouring. Such a simple device is placed on the wall in the bathhouse and a rope is attached to the bucket. As soon as the user pulls it, the ladle or fixed bucket turns over and the water pours out on the person.
- More sunken fonts look much more spectacular. To make them even more original, you can install lighting. Such constructions are never neglected. However, it should be borne in mind that moving them from one place to another will be almost impossible.
- If you decide to build a good font from wood, it is very important to pay due attention to the quality of the chosen materials. Pay attention that the wood has no traces of rot, attacks of insects that devour natural material, mold or fungus. There should also be no dents or cracks in the wood - such parts are not allowed to be used for tank construction.
- The most striking and attractive finish for a concrete font is mosaic tiles. If you want to decorate the bath or area (in the case of an outdoor tank) stylish and expensive-looking tank, it is advisable to use a mosaic for this purpose. True, such a high quality finishing material may not have the most democratic price tag.

Self-made high-quality fonts made of natural wood, concrete or suitable improvised materials rarely takes a lot of free time. Master must have in stock all the necessary tools and instructions for the manufacture of the reservoir.
If you can not build yourself a font or this work fears and doubts about good results, it is better to buy a ready-made version or hire professionals who for a fee will make you a reliable and durable vessel.
On how to assemble a font with your own hands, see the following video.


