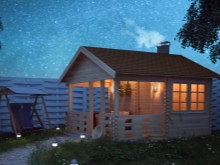
Building a frame sauna with their own hands
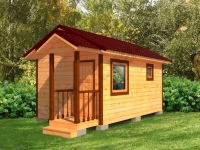
A frame sauna is considered an easy construction, which can be completed in a short time. This does not affect the quality and reliability of the finished building. In this article, we will learn how you can build a frame sauna with your own hands.


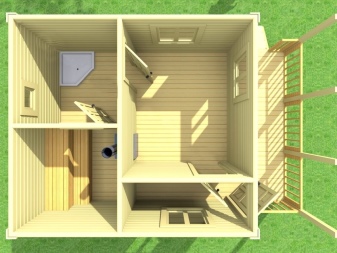
Creating a plan and scheme
The first stage of construction work will be the design. A person who decided with his own hands to build such a building on the plot, should prepare in advance all the necessary drawings. They should indicate all the dimensional parameters and features of the future erection. It is not worthwhile to work without a plan, as this will lead to serious errors.
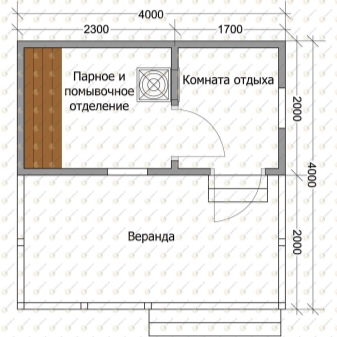
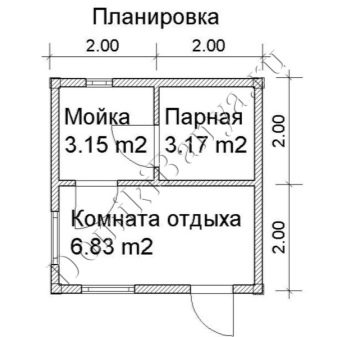
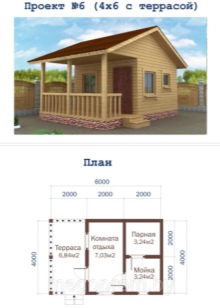
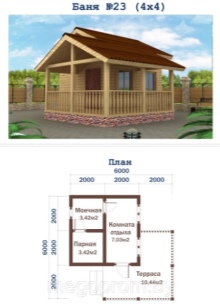
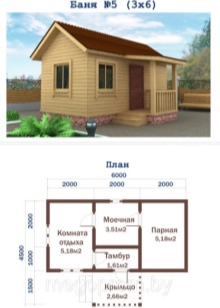
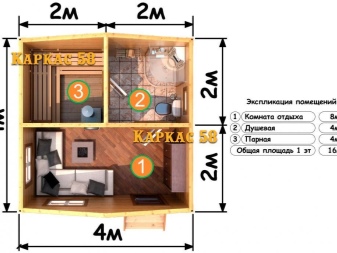
The first thing a builder should determine - is the size of the future frame-type construction. The larger will be the structure, the more time will be required for its construction, and the financial investment will be more serious. In addition, it is necessary to take into account the fact that too big steam rooms are heated up for a long time. The most popular and optimal variant is a 4x4 m frame sauna. There will be enough space to equip a steam room, a washing room and a pre-bath.
If you have a small plot at your disposal and you planned to build a budget frame-board bath, it is advisable to give preference to a frame building measuring 3x3 m. It can accommodate 2-3 people. If you want to equip a recreation room, in a small building is better to arrange it on the second floor or attic, or can be combined with a pre-bath.
Decide on the size of the future bath in advance. It is necessary to sketch a plan of the building, to decide where the partitions between the rooms, as well as window and door structures will be located.
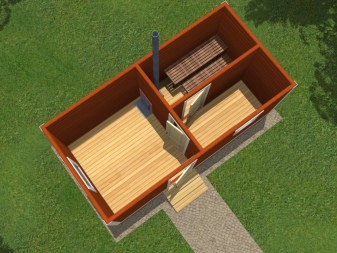
Before the start of construction work it is necessary to determine the place for the furnace. If you want to install a solid cast-iron stove in the bath, under it will need to prepare a reinforced foundation. You must also determine the ventilation and drainage system.
When the project and all the drawings are ready, you will be able to calculate the amount of materials needed for construction work.
Choosing the materials
An important point - the choice of suitable materials for the construction of a strong bath. The quality of the finished construction will depend on this feature. Let's consider some useful tips regarding the choice of good materials.
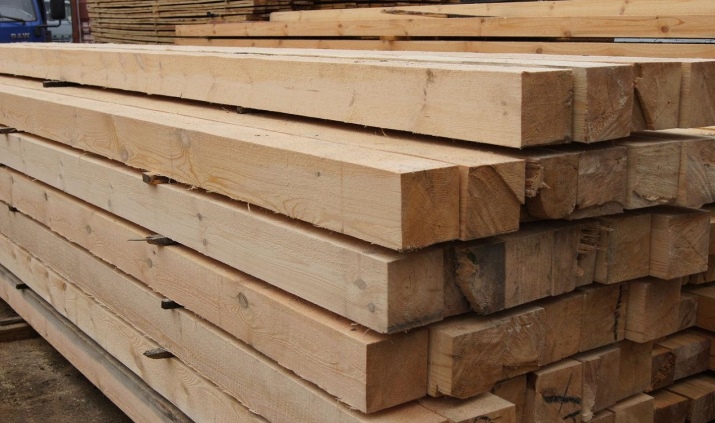
- To build a quality wooden frame-type bath, it is best to choose deciduous varieties. They are practically not subject to warping and can boast of high thermal insulation characteristics, which is very important for a bathhouse.
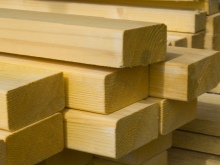
- You can also choose a cheaper building material - pine beam and boards. However, such options will be suitable only for the construction of the frame basis of the bath.
- For internal finishing works, it is not recommended to use pine, as this wood species under the influence of high temperatures begins to release resin. The latter not only attract attention by their specific aroma, but can also provoke thermal burns in case of contact with the human body.
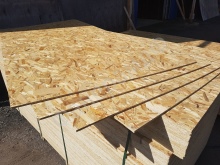
- Interior and exterior wall bases of the bath most often sheathed sheets of OSB or CBP (used for sheathing paneled and paneled baths, and for metal frame). Finishing of such inexpensive, but high quality panels is characterized by ease of installation.
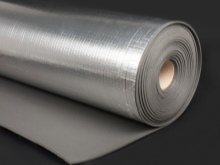
- It is strongly not recommended to use roll bitumen materials in order to organize a vapor barrier sauna building. Under the influence of high temperature values, such units begin to emit pungent, unpleasant odors. It is advisable to buy inexpensive foil or special parchment.
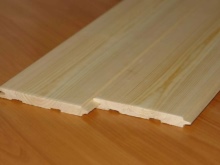
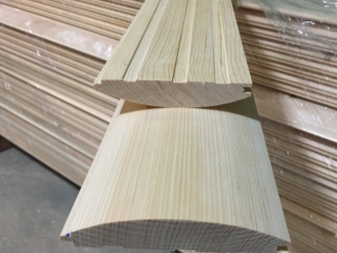
- For interior cladding, you will most often use clapboard. Outside the bath can be finished with blockhouse or the same siding.
On materials for the manufacture of quality frame bath is better not to save. It is important to monitor the condition of the selected wood. The wood must be in perfect condition. Boards and bars should not show signs of rot, protruding knots or damage from wood pests.
Defective materials will cost less, but you will not be able to build a good and durable bath from them.
Calculation and necessary tools
The number and size of materials needed will directly depend on the size of the planned construction. Consider the calculation of the necessary positions on the example of the bath with common dimensions 4x4 m:
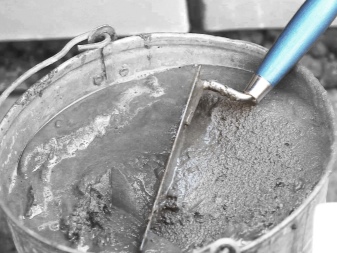
- Cement - it is recommended to buy the composition of grade 400;
- Sand - suitable coarse-dispersed, sifted;
- timber - 150x150 mm, 50x150 mm, 40-50 mm;
- edged board;
- boards for the manufacture of formwork;
- armature;
- blockhouse - with its help will be carried out the external finishing of the structure;
- insulation material - better to buy in the form of mats or rolls;
- foil vapor barrier film;
- polyethylene waterproofing film;
- pipes for the arrangement of the drain and sewage systems;
- faucet for draining the liquid;
- roofing felt sheets;
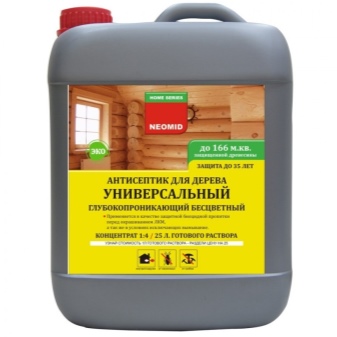
- quality antiseptic solutions;
- metal entrance doors;
- metal-plastic blocks for the arrangement of windows;
- linings for interior finishing;
- self-tapping screws and anchors;
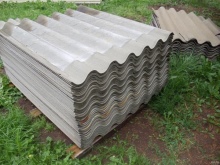
- slate;
- galvanized pipe for the chimney;
- sauna stove and a water tank of 70 and 120 liters;
- pump, through which the water supply will be carried out.

To build a frame sauna, the master must have in his arsenal of a number of necessary tools. For a successful construction work, you will need:
- a pair of shovels;
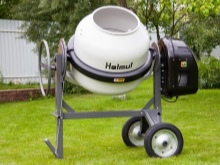
- concrete mixer;
- A special vibrating machine to work on concrete;
- hammer and screwdriver;
- angle and a building level (laser or bubble level will do);
- electric jigsaw;
- roller and paint brushes.


All prepared tools must be of good quality. If the tools of the builder leaves much to be desired and is not designed for serious construction work, then with it the procedure of erecting a bath can greatly delayed.
Construction stages
The erection of a modern frame bath takes place in several basic stages, none of which can not be neglected.
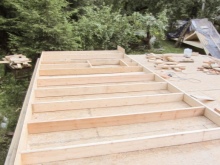
Foundation
An important component of any structure is the foundation, and the mini-bath or sauna-house is no exception to the rules. It is necessary to take into account the fact that Frame structures have a small weight, so there is no need to prepare a super strong and reinforced base.
Allowed the construction of the foundation by a special simplified technology.
The most popular by right recognized columnar type of foundation. Let's consider a detailed step-by-step instruction for beginners in its manufacture.
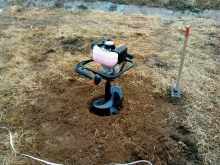
- Previously, it is required to properly clear the site, on which the construction of the foundation will be carried out. It will be necessary to make a marking of places for the installation of poles.
- The next step will be the drilling of holes, the diameter of which will be 20 cm, and a depth of 1.5 m.
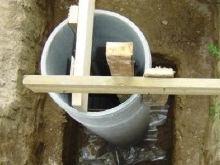
- Asbestos pipes should be inserted into the holes, the diameter of which should be at least 10 cm.
- The empty space on the outer side must be filled with concrete mortar.
- Pipes will need to measure, using a construction level. It will be necessary to place marks, so that all the parts turn out perfectly even.
- Next, it will be necessary to trim pipes.
- The internal components of the pipes must be filled with concrete mortar.
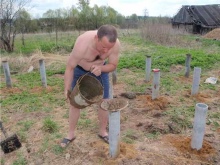
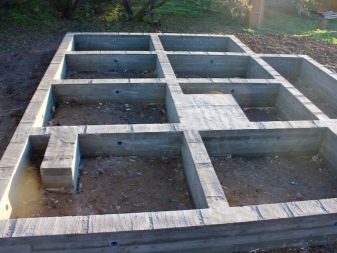
Also, for a frame sauna, a strong and reliable foundation made of blocks, strip foundation, pile and screw foundation will be suitable. For larger and heavier structures and for the soil, where the structure is dominated by clay, a strip foundation will be more suitable.
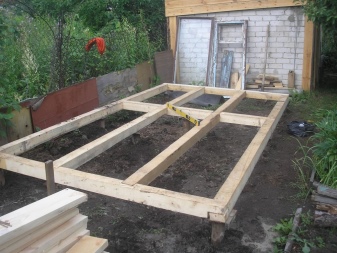
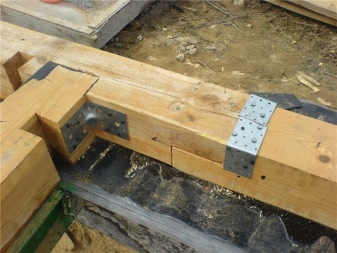
Strapping
To put a quality and reliable foundation is quite simple. After that, the next step is strapping, which must be done correctly. Let's understand this case.
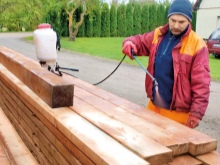
- Installation is required to begin with the basement strapping. To this end, the builder must prepare boards, different section 5x10 cm. Preliminarily they must be smeared with a special antiseptic solution, so that the wood does not rot, does not dry out and did not become a target for wood pests.
- Before proceeding directly to the strapping, you will need to make a marking of the future wall structures of the frame bath. It is necessary to lay out the boards with their outer edge on the outer contour of the walls, and then fasten them together at the corners. You can use ordinary nails for fastening.
- Bonds should be connected on the supporting bases. Only in this case, the construction will be as strong and reliable as possible. It will be necessary to assemble the entire basement strapping by means of supports.
- The builder must make sure that the strapping is as even as possible. It is necessary to constantly check the correctness of its installation, using a construction level. These figures will depend on the flatness of the wall structures themselves and the construction as a whole.
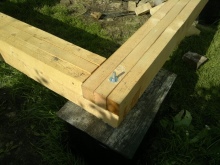
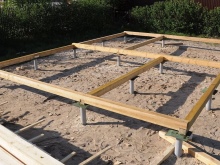
If certain deviations were still found, it will be necessary to resort to laying special pads, made up of several layers of roofing paper, or small pieces of plank.
To add strength to the structure, it is best to fasten the joists with metal plates, and to attach them to the foundation base using high-quality anchor bolts.
For the subsequent sheathing and thermal insulation you will need to build intermediate posts. Binding will necessarily have to be treated with protective compounds (preservatives), so it will last as long as possible and will not be deformed under the influence of external influences.
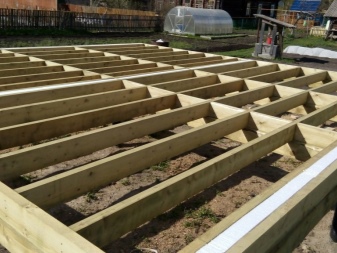
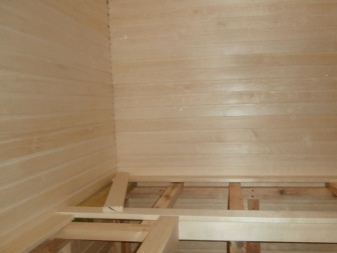
Walls
The next important step in the construction of the sauna is the construction of the walls. The master must do everything correctly so that the construction will turn out reliable and safe. It is most convenient to attach frame walls on the ground. Such a method of installation has several advantages:
- one will get to build both the foundation and do the assembly of the frame base at the same time;
- the craftsman will not get tired quickly, because he will not need to constantly lift his hands above his head;
- there is no need to use ladders or other similar devices to reach the top of the building.
Due to these advantages, wall installation is very simple and absolutely safe. Many craftsmen turn to this method.
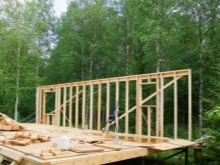
During the process of assembling the wall structures, it is important to make sure that a gap of 0.6 m is left between the axes. In areas where the frames will "meet" the walls or lintels in the openings with windows and door frames will need to set auxiliary racks. Fixation of the necessary components should be done using conventional nails. At all stages of the work, the master should make sure that all the constructions are level and accurate. As a result, the frame should be rectangular.
The assembly of the walls usually begins with one of the corners. First, the wall structure itself is assembled, which will be in contact with the strapping prepared in advance. It must always be checked for evenness. It is advisable to resort to temporary fixation of the wall by means of special shoring. Then you can proceed to the installation of other frames. Using planks, it is necessary to fix the strapping and nail it down.
Having finished the work at this stage, it is important not to forget to carry out the necessary treatment of the wood from the outside. In this case, as in all the previous ones, you can not do without special antiseptics. Without them, the building will not be protected from the negative factors of the environment, and soon may lose its former reliability and aesthetic appearance, so neglect this stage should not be neglected. On the inside of the boards will need to undergo a thorough sanding, and then cover them with a couple of coats of furniture varnish.
When the assembly of the frame will be completed, you should proceed to its direct cladding.
Plywood sheets are perfect for this purpose. Do not forget about the thermal insulation of the walls.
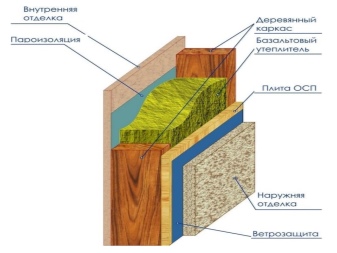
As a result of all the work, the walls of the homemade frame bath will consist of several layers:
- linings;
- inner sheathing;
- vapor barrier material;
- insulation layer;
- waterproofing layer;
- outer sheathing;
- cladding.
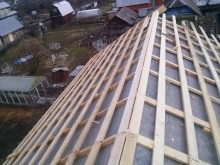
Roof
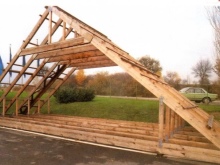
Frame baths can be supplemented with absolutely any type of roof. The traditional variant is a roof with a rafter system. It is constructed as follows.
- For the beams, which will relate to the ceiling structure, you need to prepare high-quality bars 15x15. They are placed on the upper strapping. A small gap of 0.5-0.6 m must be maintained between these components.
- On the ceiling beams you should lay a temporary flooring. Boards with a thickness of 0.5 cm are perfect for this.
- The next step is the installation of rafters. It is possible to prepare them both on top and on the ground - each master chooses what will be convenient for him. Of course, the preparation on the ground is chosen most often.
- It is important to take care of quality ventilation of the constructed structure. To this end, purlins are attached over the rafters. It can be constructed both solid and sparse. Solid - the best option in case the roof is soft.
- For modern frame-type baths often in the role of roofing material choose ondulin. Do not forget about the thermal insulation and waterproofing of the structure. For this purpose, mineral wool is suitable. As backfill you can use expanded clay or sawdust.
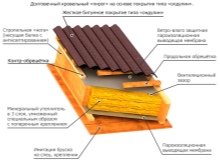
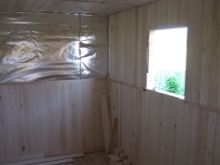
Finishing and insulation
When the main work on the construction of the frame bath is finished, you can think about its quality finishing and insulation. This is no less important moment of construction. Consider in detail how to act correctly at this stage.
- All walls inside the bath should be covered with an additional layer of high-quality insulating material.
- On top of it it is necessary to nail a special foil film.
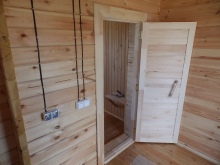
- After this, you can move on to finishing the walls with clapboard.
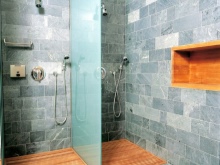
- It is necessary to fix all the necessary units in the shower room of the frame bath. In a place where the shower cabin itself will be located, you can put tile or install plastic panels.
- The floors in the steam room can be mounted at your discretion. The choice of arranging these parts depends on how many people will be visiting the steam room. You can mount a two-tiered shelf to make it more comfortable.
- Next, the master can take care of all the electrical wiring in the sauna. Wiring must necessarily close the special pads or initially hide under the lining. Absolutely all the outlets and switches should be installed only behind the walls of the steam room, but not inside it. The same applies to the shower room. Switchboard should be placed near the front door.
Special moisture-proof lamps may be installed inside the frame sauna.

Recommendations
Making a frame sauna with your own hands is not as difficult as it may seem at first glance. The main thing - to act step by step, do not rush and use only quality materials/tools. If you decide to take on such construction work, it is advisable to arm yourself with some useful tips and recommendations presented below.
- Developing a plan for the future construction, you should immediately decide where the stove of the bath will be located. It is recommended to place it in the steam room, in the corner that is closest to the exit - this is the best solution.
- If you want to place in the sauna and a good rest room, a small building can hardly do. Think carefully during the drafting of the project, so as not to encounter serious problems at the stage of construction. You can go to experts who, for a fee, will draw up a plan for the future of the frame structure.
- The walls and any coatings near the stove should be made of fire-resistant materials that are not easily flammable. For example, quality sheet metal with zinc coating in this area will be appropriate. Separators can be constructed of asbestos cord. In such areas, the best insulation will be a special asbestos board.
- Working with foilized materials, the master should be as careful as possible, because they can be easily damaged. Any gaps and holes will noticeably reduce the level of effectiveness of the thermal insulation. It is best to fix the vapour barrier with a special construction stapler. At the same time, the master should make sure that the material does not sag anywhere. The smallest distance between the battens and the layer of insulation material can be only 1 cm.
- Inside the frame bath is strongly not recommended to use such insulation, such as polystyrene foam. This is due to the fact that such boards are very fond of attacking rodents, and after 2-3 years of insulation in the bath can turn into dust.
- Most often, builders and novice craftsmen cover the wall at the sauna stove with brick. This material is ideal for this area and ensures the safe operation of the heater. Around you can build a special platform, finished with metal sheets.
- To minimize the consequences of shrinkage of a frame wooden bath, in the construction it is recommended to use lumber that has undergone special chamber drying.
- Do not neglect making a preliminary plan of the frame structure. The fact is that only with the drafted project the builder can not worry about the possible overspending of materials.
- If you decide to build a bath, prepare a strip foundation, the construction of the walls can begin only after it dries completely. Until then, no action should be taken.
- If you want to save money on building materials, the anteroom can be built separately in the form of an attached veranda. Then there will be much more free space for the steam room and the sink.
- Some masters believe that the foundation is not so important for a frame sauna, and you can do without it in view of its lightness. However, in such conditions the walls of the bath can begin to get damp, so it is better to build a quality base.
- When the assembly of the frame of the bath and the hanging of the door panels, the master must act as quickly as possible in order not to catch bad and rainy weather.
- When constructing a bathhouse roof, it is important to take care that it has a sufficiently sized overhang. Simply put, the distance between the edge of the roof and the wall should be approximately 600-800 mm.
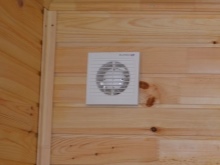
- To arrange a forced ventilation in a frame bath, you can use electric fans of sufficient power. Operation of such devices for 30-40 minutes reduces the level of humidity in the interior space of the steam room by 95%.
- When finishing the interior of the frame bath, the rough floor should be laid out of the cheapest board. It will play the role of insulator, as well as protect the finishing floor from negative external influences.
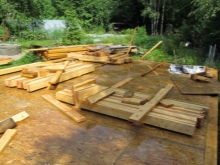
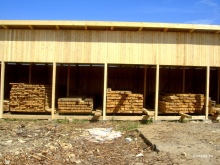
- If you have purchased wood to build a frame bath, before you start the work, it must be stored properly. It is not recommended to scatter it around the yard and leave it in the open air without a shelter. You can put everything in one place and neatly cover or hide it in a separate spacious shed, if any.
- If you are not going to equip a frame sauna attic, be sure to take care of its insulation from the outside.
- Preparing the site for the construction of the foundation, you should not only remove all debris, but also get rid of all weeds and vegetation.

If you are afraid to make attempts to build a frame bath by yourself or have already made serious mistakes, it is not worth experimenting and transferring the material in vain.
It is better to turn to professionals who will do everything for you for a fee. Of course, quality services will not cost very cheap, but you will save your time, you will not transfer construction materials and you will end up with a good, reliable bath on the frame.
See the following video for an overview of a 3x5 frame bathhouse.


