How to build a log sauna with your own hands?
Many people prefer to build a bathhouse on their own plot on their own. It does not cause any special difficulties, because the construction is as simple as possible. A sauna made of natural beams creates a special atmosphere of coziness and unity with nature. The structure turns out to be reliable and durable. It is important to plan responsibly, then the construction process will be as easy as possible.
Choosing a site
You need to look at your plot and decide what's possible. You can not put the bathhouse anywhere, for it must find a suitable place. And the size of the bath will largely depend on the size of the plot. There are several recommendations on the choice of locations.
- You can not locate the bathhouse close to bodies of water. There is a great risk that the structure will be flooded.
- The building can be stand-alone or attached to the house. In the latter case, it is necessary to comply with fire safety regulations.
- Experts recommend building on the back of the yard.
- It is important that the bath has a drain for water and good ventilation.
- It is better to build on the southern side. This way there will be enough natural light inside.
- The bathhouse should be located at least 20 meters away from the well or borehole.
Projects and planning
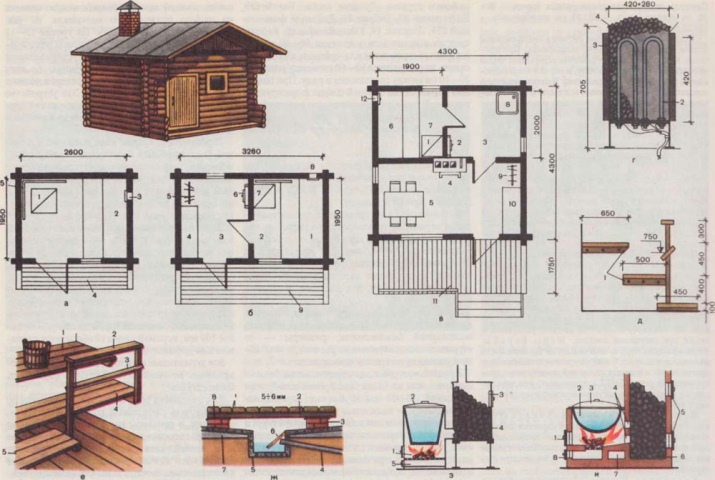
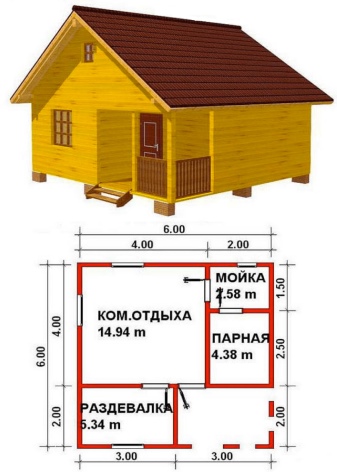
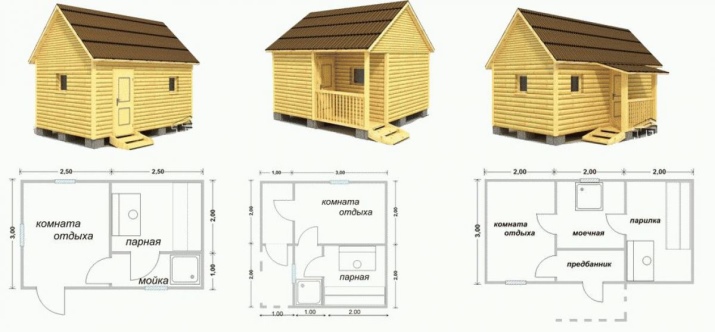
At the first stage of construction you need to make important decisions on design features. You can make a simple one-story structure or a full-fledged house with a veranda - it all depends on the budget and skills. And also it is necessary to think about the size of the bath, to draw a detailed scheme. According to the norms for one person in the steam room should be allocated about 4 m2. It is necessary to indicate the location of the furnace, usually its foundation is laid during the construction of the bath.

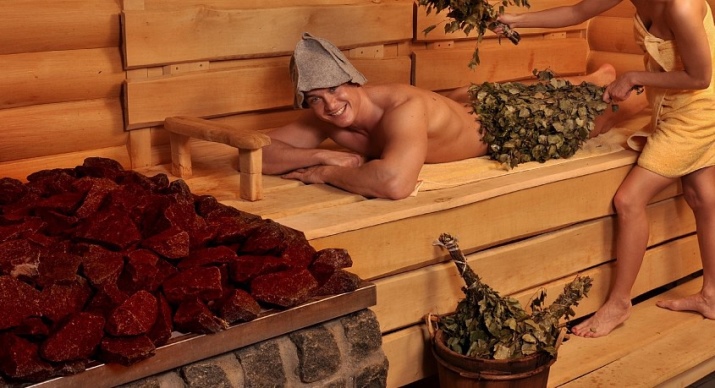
Standard construction consists of a steam room, a vestibule and a pre-bath. The bathhouse must have such dimensions that it was comfortable for everyone. Modern constructions for this purpose can be dry or wet. The first variant provides a temperature in the range 60-120 ° C and humidity of 5-25%. The damp bath is heated up to 50-70 ° C, and the moisture level is higher and amounts to 80-100%.
In the latter variant, the wooden structure consists of a washing room, a steam room with a stove and shelves, and a warm pre-bath. A Finnish sauna, on the other hand, is simply a steam room with stones on which herbal infusions or essential oils are dripped. The function of the rooms is the same, but the appearance and size are different. Usually at the cottage build just a Russian bath with a steam room and a washing room, a room for rest, changing clothes.
It is easier to calculate the size of the bath according to the number of people that will use the building. For example, a small bath is suitable for one person. The washing room has one purpose and may have an area of only 1 m2. But the changing room should be made so that it is comfortable to use without hitting the walls. The size of the steam room depends on how it will be used - 1 m2 will be enough for a sitting bench.
Sauna from a bar for 2-4 people is always freestanding, the pre-bath must be made necessarily. For each person in the changing room should calculate 1 m2 or slightly more. Washing room is more spacious than the previous room. This is especially important if children will go to the bath. The steam room should accommodate benches measuring at least 180x60 cm.
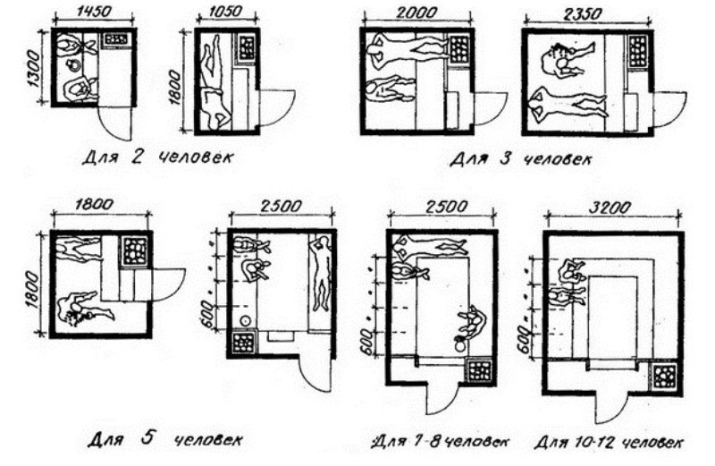
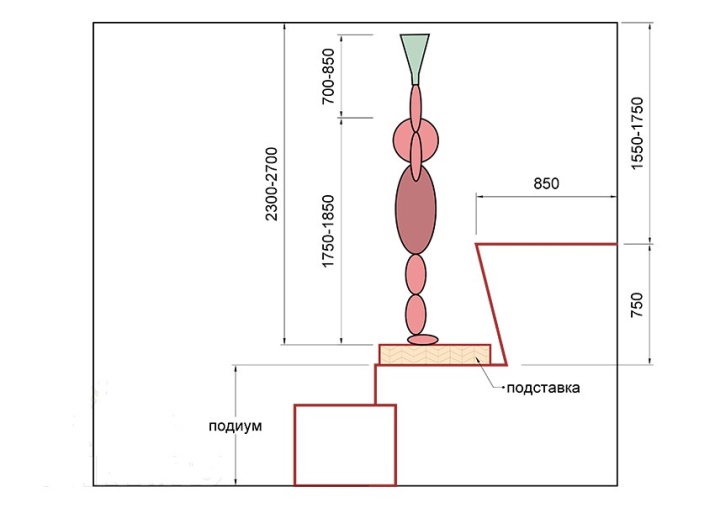
The height of the ceilings should be based on the height of the tallest member of the family. You can do the same for the size of the benches. The floor in the steam room should be about 15-20 cm higher than in the changing room. This will better retain heat in the room.
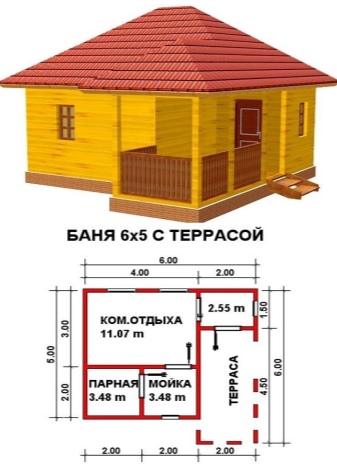
For summer baths, the requirements are a little less. You can not even make a shower room, and use an outdoor structure. Such a bathhouse is usually small and can be made from bars of small width. It is possible to make a structure of literally 6 by 3 meters in size.
A blueprint is a must before you begin construction. It helps to visualize what is being done and calculate the amount of material needed. The main thing is to determine the number of people who will steam at the same time. For example, a family sauna may be small, but for gatherings with friends, you should take care of a large space. If the building will be used both in summer and winter, you should think about the optimal arrangement.
In some large baths you can even make a full bathroom for convenience. So, all the internal arrangement should be shown on the diagram. Inside the bath you need a steam room, shower room, ante-bath, shelves and benches, and a stove. You can equip a dressing room with lockers for clothes. When calculating, you should also take into account some of the nuances.
- The height of the structure and the length of each wall. This is necessary to calculate the material.
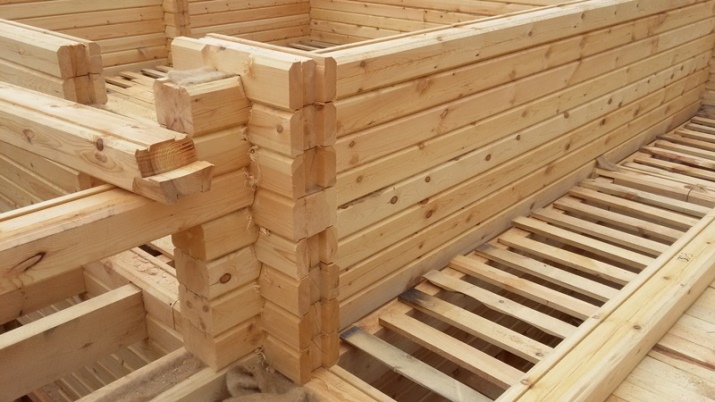
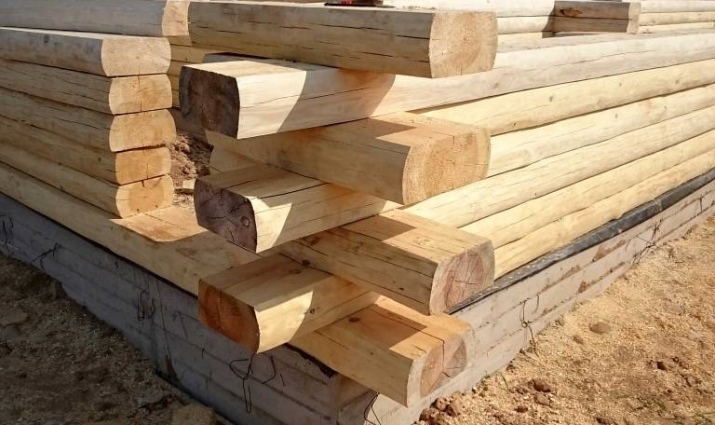
- The choice of the thickness of the walls. At the bottom, a thicker log house is used, for example, 200x200 mm. Further, the timber 100x100 mm or 100x150 mm is suitable. And it is the second option that is the most popular for a bath of medium or large size.

Choice of materials
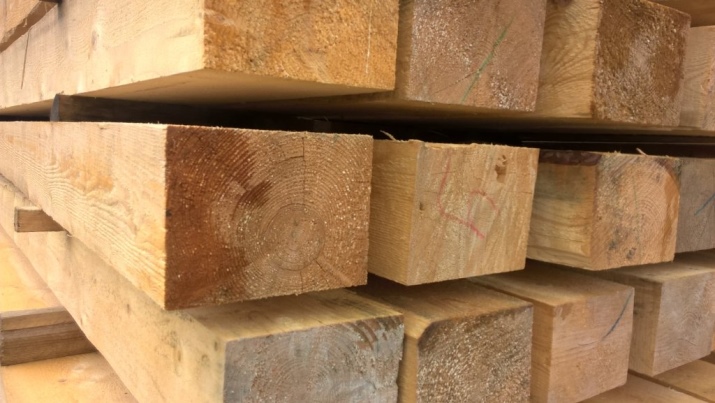
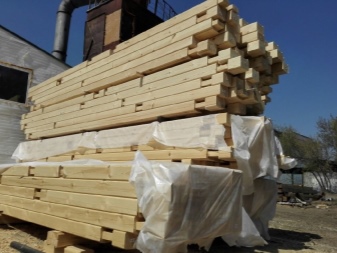
The quality of the bar affects the quality of the construction and the duration of its operation. Many nuances should be taken into account. Bar should be harvested in winter, after which the wood is put aside to rest. This process takes about a month, and only then can the material be processed and used in construction.
Only high quality timber without cracks is suitable for the bath. Otherwise, during shrinkage the wood will disintegrate. And also you can not use lumber with mold, blue stain, worm holes. Any defects will become a big problem during operation.
The type of wood also matters. The bottom layer is especially exposed to the external environment. It is necessary to use larch timber - it does not rot and only gets stronger from contact with water. In some cases you can choose softwood.
Bar is divided into types depending on the treatment. For independent construction of the bath you can use any variant. It is enough just to compare the properties and features of lumber to make your choice.
- Glued. Used extremely rarely. Chemical substances are used in the manufacture of such a beam, the material is no longer completely natural. Under the influence of high temperatures, toxins can be released, and it is detrimental to health.
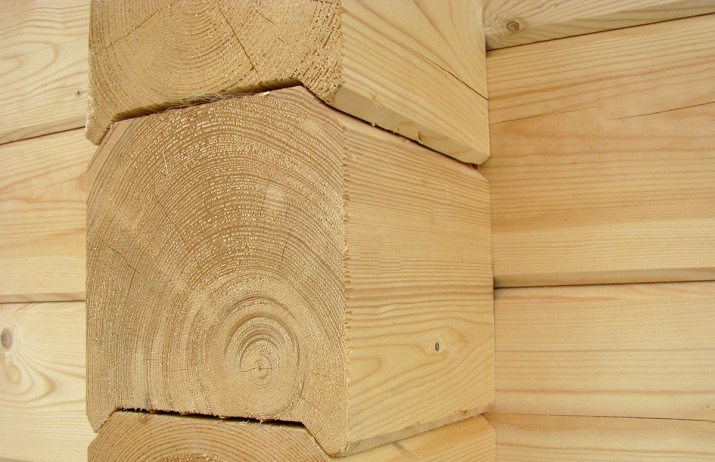
- Unshaped (sawn). It is possible to build a sauna from it, only with some reservations. The material is subject to deformation. It can lead or twist during use. This is characterized by a log cabin strong and often uneven shrinkage. When building with a log with such a treatment will need to do not only the interior decoration, but also the exterior.
- Planed. From the previous version differs in that it is additionally sanded. So the timber becomes smooth and attractive. On the surface there are no cracks and defects. Usually it is this lumber that is used for the construction of the bath. The construction of dried planed beam gives minimal shrinkage.

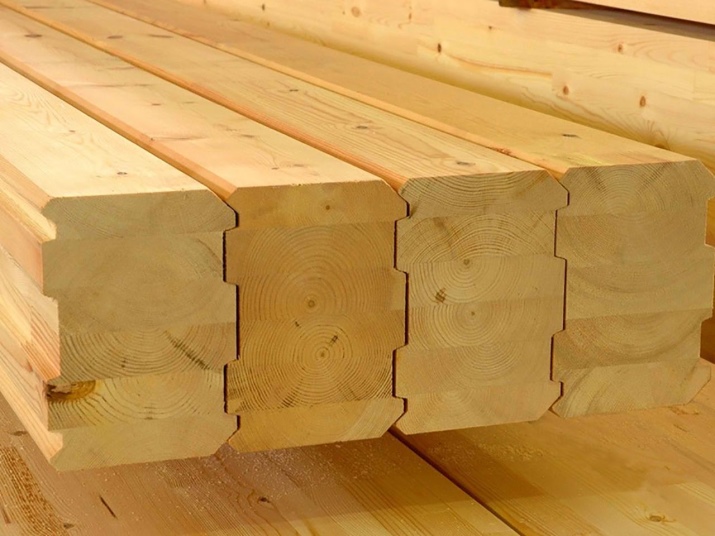
- Profiled. Bar with treated sides, like the previous one. However, additionally the locking system is cut out, which simplifies installation many times over. The material can be dry or with a natural moisture level. The locks ensure a tight and precise adhesion of the timbers to each other. From the dry profile material you can build a bath with minimal shrinkage in a short time, even without skills.
And there is also lafet - a double edged beam. At the same time on the material can also be implemented a system of locks. Half-timber has always been popular due to its accessibility and decorative appearance. Construction of the double-edged material is not difficult, and the result is quite spectacular. From a half-timber can make a bath of any size.
Some people turn their attention to the house kit. This is the easiest decision to make. The kit contains the necessary amount of natural material, taking into account the calculations that were made during the planning process. Or you can skip the planning stage altogether, just choosing a set of the right size. This is even better if you are not confident in your abilities.
Construction technology
Build a bathhouse with your own hands from scratch is not difficult, if you think through and plan everything well, make drawings. For example, you should determine in advance the thickness of the timber walls, the features of the roof and foundation. You can build a sauna even without any experience in such work. There are different ways to solve the same problems, so you will always be able to choose the best option.
It is important to build the sauna correctly and give it time for shrinkage. Of course, this is a long process, but this is the only way to achieve good quality. The construction of the bath should be carried out step by step, with due attention to each step.
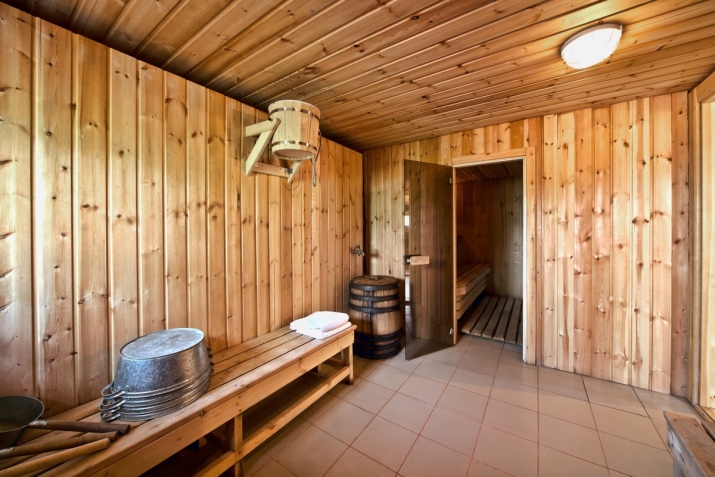
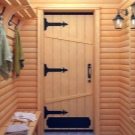
- Entrance to the steam room should be arranged from the washing room or the anteroom.
- Doors should be made of wood or tempered glass. Only the hinges may be made of metal.
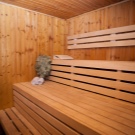
- You should place comfortable-sized shelves inside. At the same time there should be space on the floor for the person who will wield the broom.
- Conifers give off a lot of resin. Do not use them in the steam room.
- It is necessary to install a thermometer and a hygrometer in the main room. These devices allow you to control the microclimate.
- Lighting should be soft and warm. Bright light is irrelevant in the steam room.
- The furnace is usually located near the door. In this place, you need to think about the insulation of the walls and floor.
Foundation
A strong and reliable foundation will guarantee a long life of the construction. You can make a columnar or strip foundation for the bath. In this case, the foundation must be wider than the perimeter of the bath on each side by 10 cm or more. It is recommended to strengthen any foundation with a reinforcing mesh. Let us consider some features of construction.
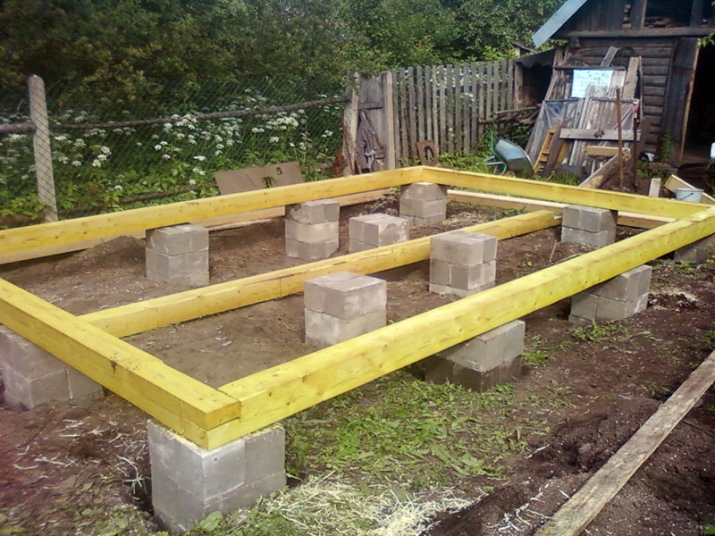
- Pillar foundation. Quite simple to implement and suitable for a light wooden structure. Brick posts are installed along the perimeter and corners. Concrete inserts are built to protect against subsidence. It is important to place the supports with the same distance. In this case, the step should be about 1.5 m, no more.
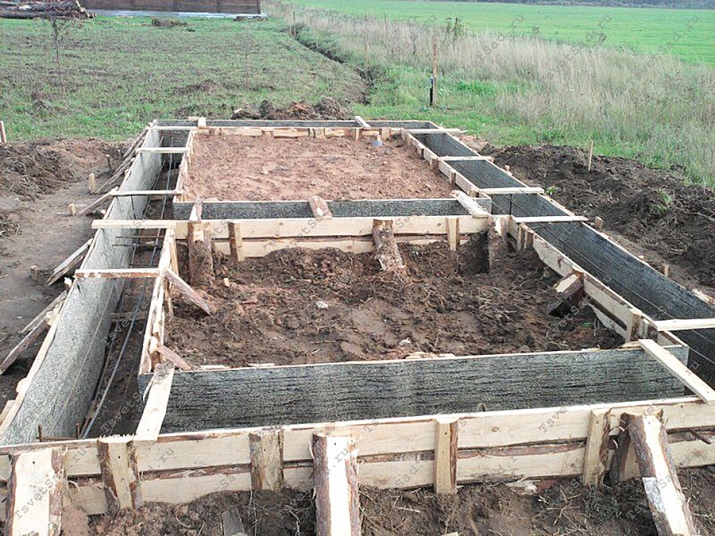
- Ribbon foundation. Universal foundation of high strength. The construction is not complicated, but it takes a lot of time. First, a formwork is made and poured with concrete mortar. The foundation should be higher than the ground level by 50 cm or more. The inside is filled with sand with crushed stone. You should leave the foundation until it dries completely for about 2-3 weeks.
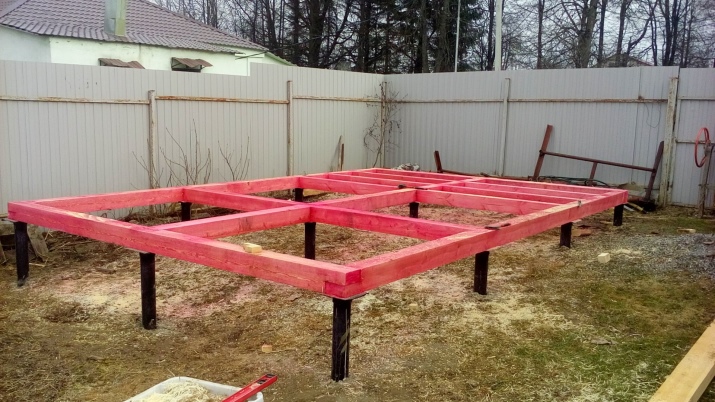
Some people make a foundation on screw piles for the bath. The design is reliable, but quite difficult to perform. Piles are screwed into the tamped soil at a distance of no more than 3 meters from each other. Then the construction is concreted and tied with a bar. Foundation of this type will last a long time, but for the erection of it is better to contact professionals.
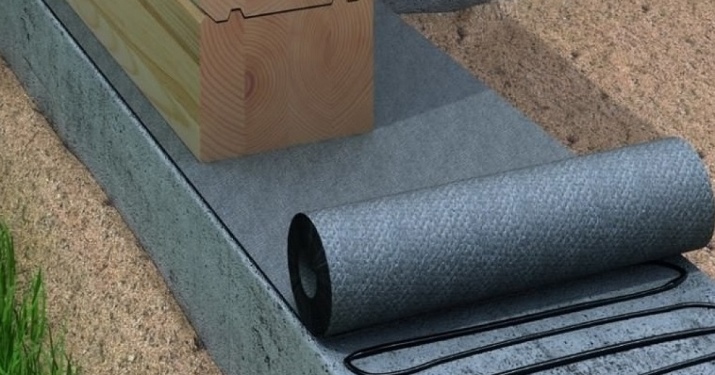
Waterproofing
When you build it yourself, it is necessarily necessary to provide protection from water and moisture. Otherwise, the bath will not last as long as expected. Melted bitumen is applied to the ready-made foundation. On top, you should lay a roofing felt - this material for waterproofing is the easiest and most affordable. Then you should apply bitumen again, and then lay a second layer to be sure.
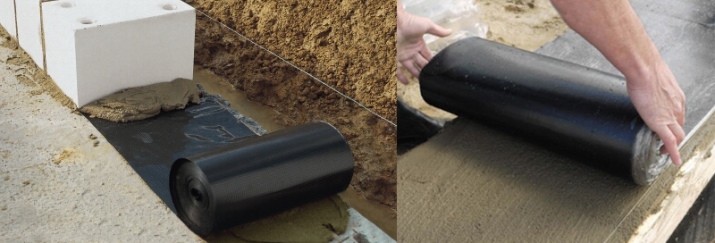
It is important to act in stages to ensure that the coverage is of the highest quality. Waterproofing allows you to protect the foundation and frame from the effects of moisture. Otherwise, the lower wood will soon begin to rot. Making waterproofing allows the use of other materials, more modern. However, it is ruberoid that is the most budget-friendly.
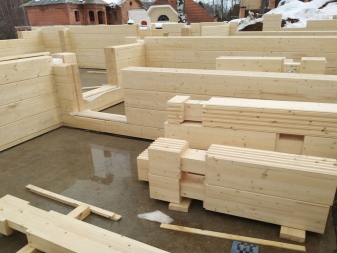
Walls
A log banya is made under shrinkage, so there is no point in installing the material tightly. And also the first crown is usually not fixed. It is this part that will break first, and so it will be easier to replace it. At the same time, the weight of the entire structure will still hold the wreath in place. When erecting, it is necessary to take into account some peculiarities.
- First, a frame of slats no larger than 150 mm is installed. The distance between the wooden parts should be 20-30 cm. It is important only to pre-treat the partitions with antiseptic.
- The first vein is laid of a large bar measuring 20x20 cm. Further you can use smaller, for example, 15x15 cm.
- It is important to constantly double-check yourself with a building level. All elements must be laid evenly.
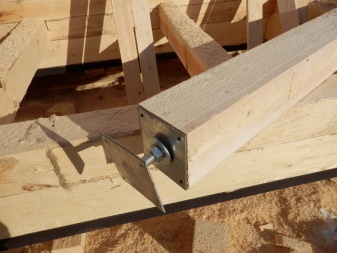
- Metal pins are used to fasten the subsequent wreaths. It is necessary to make holes at a distance of 1-1.5 meters. It is necessary to drill the laid material and the one under it.
- The upper bar is removed, the pin is installed. Then the material is put on top. This is how you should connect all the subsequent wreaths, except for the top two. There is no need to fasten them, because you will have to remove them temporarily to install the ceiling beams when installing the roof.
- The corners can be formed with nails and studded metal plates. Inside, however, T-joints are used.

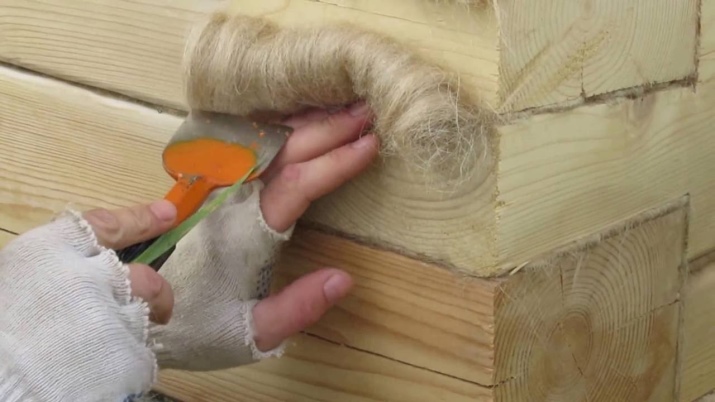
Caulking the gaps
Shrinkage of the frame after assembly takes about six months. During this time, construction stops. At the same time, the wood should not get wet, so it is covered with ceiling boards. On top as a waterproofing thick film, slate or roofing felt should be laid.
Caulking is the process of caulking the cracks in the structure. You can use moss, sealant, jute, hemp or felt. Caulking starts at the bottom layers and gradually moves upwards. After the process is complete, you can cut openings for doors and windows with a chainsaw. It is worth noting that some people leave free space when laying the walls.
The roof
The rafters should be assembled according to the classic scheme. So, first the outermost rafters are installed, pinching the ridge. Then two rafters are mounted in the central part. The rest should be nailed through the ridge, alternating sides of the roof.
It is not difficult to lay the floor joists. Then it is necessary to determine the type of roof. It can be a single slope and a double slope. The first is good for a small bath, the second do on a larger structure.
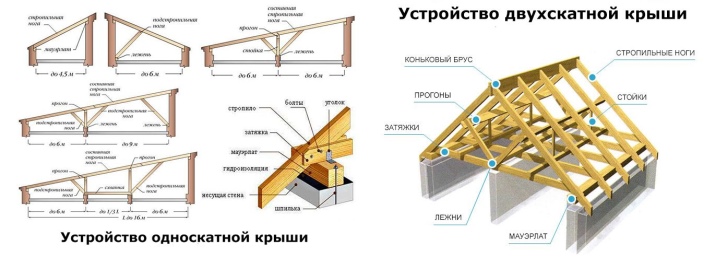
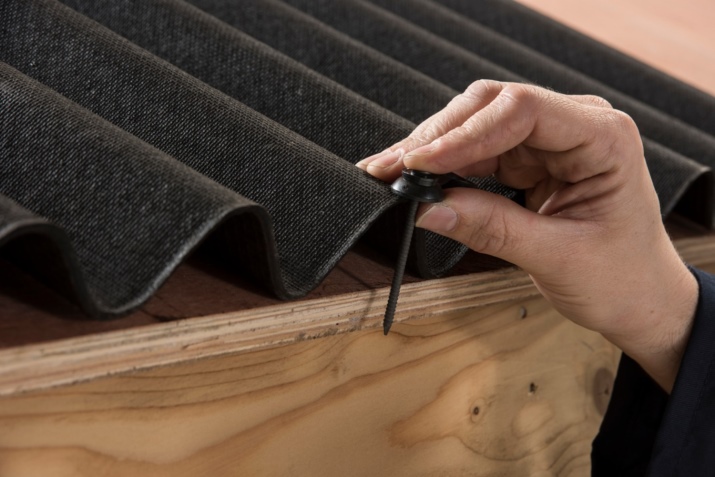
The sheathing can be covered with waterproofing material. On top of a suitable roofing material is laid. Roofing can be covered with ondulin roofing material that is nailed to the purlins. Sheets should be placed with an overlap of one wave.
Finishing .
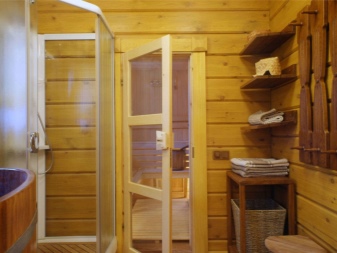
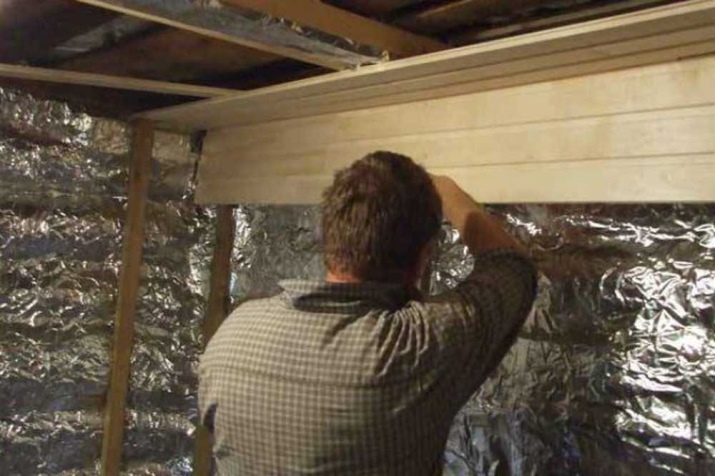
This stage is the final one. External cladding is not usually done, but the inner is simply necessary. In the steam room and the washing room, only natural cladding is used. The rest room can be clad with any material from plywood to plastic panels.
Installing the battens requires patience and attention. Usually the frame is made with 20x50 cm beams. The walls must necessarily be perfectly flat. When finishing, it is worth adhering to the instructions.
- In the corners, laths should be nailed to the level, stretch a rope between them as a reference point. The rest are installed on it with a distance of about 40-50 cm.
- The first and the last row of battens will allow you to correct the unevenness of the structure if necessary. In this case, between the finishing material and the floor, ceiling should leave a gap of 1-2 cm. The gaps will then be closed with a skirting board. At the same time baguettes should be nailed to the battens, not to the ceiling.
- The cladding material is fixed with 1.5-2 cm nails. They should be hammered into the grooves.
At the same time there are different ways of laying, depending on the location of the material. Vertical fastening has a small disadvantage. If the beams are not heated evenly, they deteriorate faster. However, this is a good solution for a steam room with high temperatures and low humidity. Holes can be made in the cavity between the insulation and the battens to improve ventilation.
When the material is placed horizontally, deformation due to temperature changes is unnoticeable. At the same time, such decoration visually increases the space of a small bath. Rodents practically do not breed in the cavity between the cladding, because it is difficult for them to get there. However, it is important to make sure that the groove is directed downwards during installation.
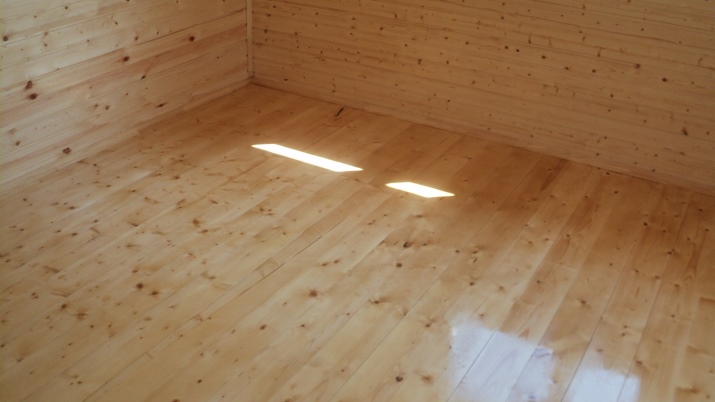
You do not need to put the joists on the floor. This is not necessary for the sauna. In this case, it is important to choose a floorboard that will withstand all the stresses and peculiarities of the microclimate. Do not install them too tightly, otherwise as a result of high humidity can appear deformations.
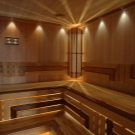
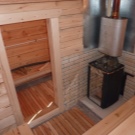
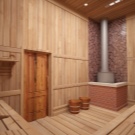
Beautiful examples
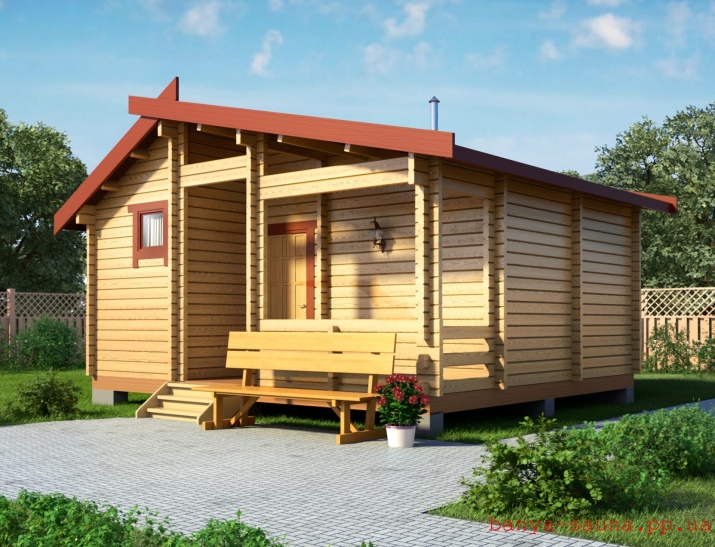
The appearance of the bath depends on personal preferences. The building from a bar in itself is very aesthetic, even if you use simple forms. Here are some interesting examples.
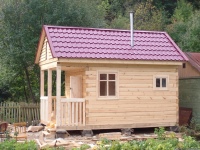
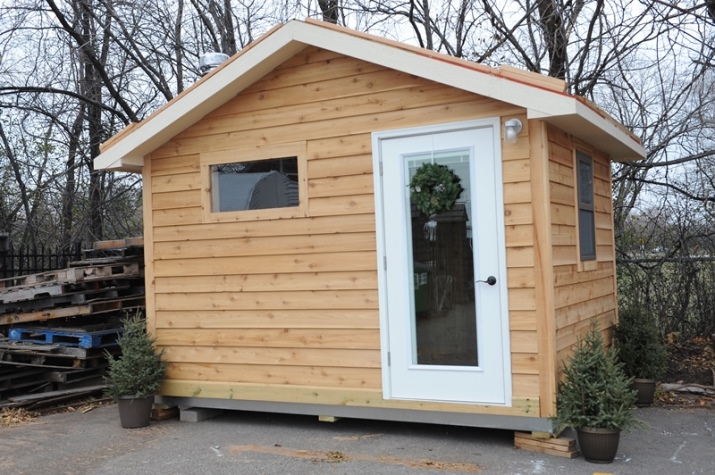
- The beautiful structure looks like a full-fledged little house. The post foundation allows the structure to rise slightly off the ground.
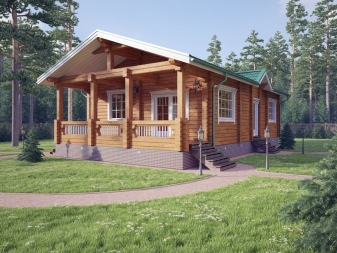
- A successful realization of a small bathhouse. One person can take a steam bath there in complete comfort.
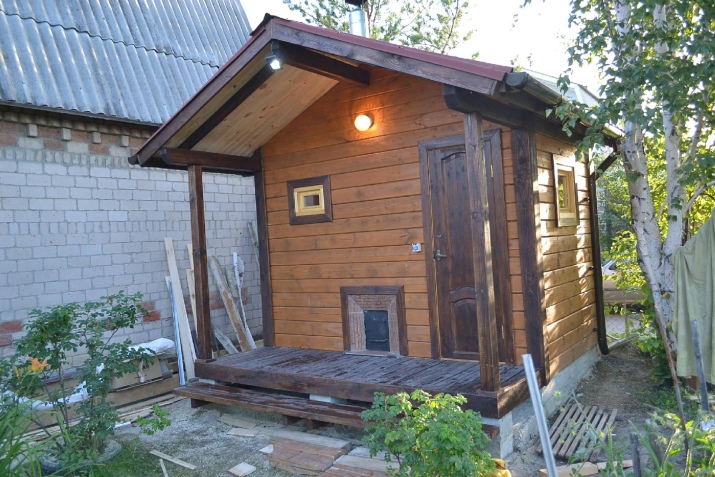
- The small bath is made of dark beams and looks very presentable. The door allows you to clean the stove from the outside, which is very convenient.
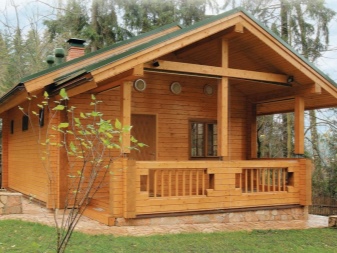
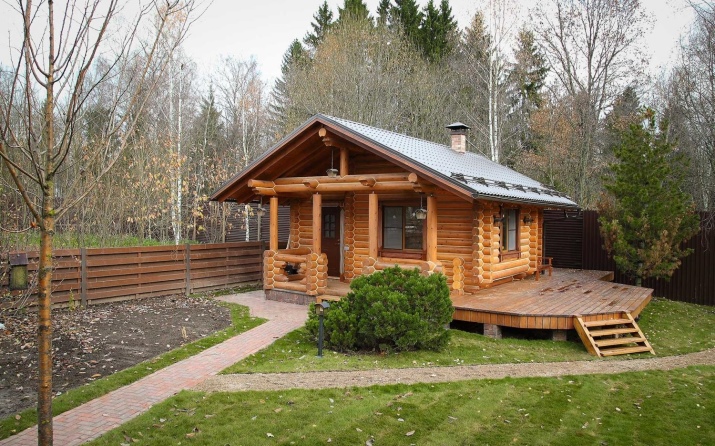
- Unusual solution. The bath looks attractive, it can comfortably accommodate a group of friends. The platform allows you to put a table with benches to continue socializing in the air.
About how the bathhouse built with their own hands looks, see the following video.


