All about the concrete floors in the bath
Not all baths are equipped with floors made of wood. Often this base is made of concrete. Concrete floors have certain features and nuances of operation. About them we will talk below.
Advantages and disadvantages
Concrete floors in the bath are quite common. Many owners give preference to this kind of material, because it has many positive characteristics. Let's get acquainted with them.
- Concrete screed can boast a high strength. Damage to floors made of concrete is very difficult, if they are made according to the correct technology. Based on this indicator, we can conclude that more durable and reliable floors for the bath does not exist.
- Concrete flooring is durable. Qualitatively made screed will last very many years, without causing the owners unnecessary trouble.
- Such floors do not deteriorate if they are affected by high humidity levels in the environment. At first, under the influence of water, concrete becomes even more durable, and over time, its impact becomes quite insignificant. If you compare with the concrete screed popular in the sauna floors made of wood, it is worth noting that the latter under the influence of moisture and dampness can deform, swell and rot.
- Concrete is a hygienic building material. It does not become a breeding ground for mold or mildew. Insect pests do not spoil concrete floors. The same cannot be said about wooden flooring - all the above problems are well known to them, and the owners have to deal with them throughout the life of such a floor.
- Concrete screed does not require regular and thorough drying. Wooden floors in the bath conditions is required to dry, and this is an extra hassle. Concrete floor does not need the mentioned procedures.
- Properly made screed looks aesthetically and neatly, gives the bathing rooms a neater appearance.
The listed advantages make concrete floors very popular. They are unpretentious, look neat and do not need constant monitoring of their condition. But, unfortunately, they also have certain disadvantages, which should also be taken into account.
- Concrete floors are characterized by an impressive weight. Concrete itself is a massive material, so for its laying it is necessary to prepare a reinforced, strong foundation. On a weak foundation, the arrangement of a concrete screed can cause a lot of problems.
- When laying a concrete floor, you must be prepared for the fact that the base material will take a very long time to dry. It takes about 1-1.5 months for the moisture in the concrete structure to dry out quickly, which is quite a long time.
- It is necessary to take into account the shrinkage of such a floor. Its duration is depending on the amount of water present in the concrete mortar.
- Many users of such floors are discouraged by their cost. The fact is that the concrete screed can cost a pretty penny compared to laying a standard wooden floor. However, if we take into account the service life of different finishing options, we can conclude that the overpayment is justified.
Before making a concrete floor, it is worth considering both the positive and the bad aspects of such a solution.
So the owners will not encounter unexpected "surprises" and will not be disappointed in their choice.
Installation methods
Installation of concrete floors can be carried out in different ways. Each of them has its own "plan of action", which must be adhered to the master. Let's learn more about the most common installation methods.
On the ground
Many owners prefer this method of installation. It involves laying a concrete layer on the ground with the removal of the turf layer. When removing the latter, a depth of 45-50 cm is usually maintained. In the resulting recess a gravel layer is poured, the height of which reaches 15 cm. Then the surface is well tamped.
On top of the gravel layer is poured a sand "cushion" with a thickness of 30-50 cm. It is also thoroughly rammed. After that you can move directly to the pouring of screed made of concrete mortar. A slope must be provided.
The layer of screed can be single or double. Do not forget about layers of waterproofing and thermal insulation.
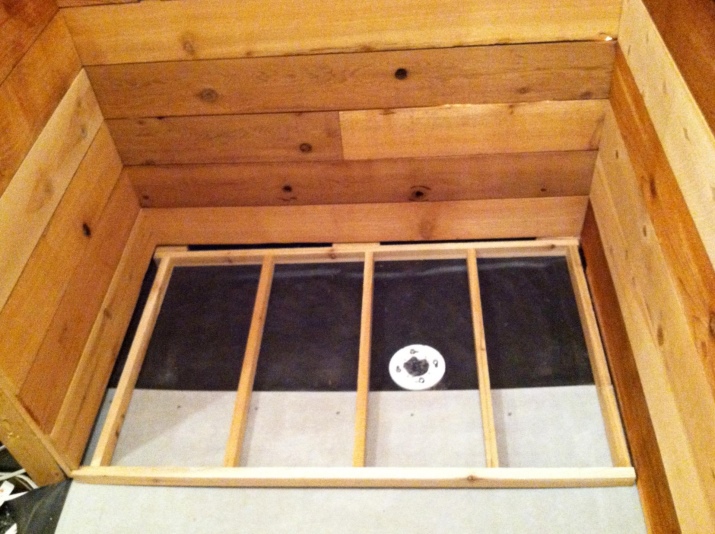
On the joists
This is the second most popular method of installing a concrete screed. It is represented by a slightly different pouring process. The method is attractive because under the floor in the sauna building is formed enough ventilated space, thanks to which it is not necessary to mount auxiliary components of ventilation in the screed.
To carry out installation under the scheme is very important to properly prepare the wooden parts. They must be thoroughly impregnated with special antiseptic solutions. Next, the already dried beams are placed in their places, forming a kind of grid of bars with a cross section of 10x20 cm.
The next step is to attach the rough floor, made up of planks, to the joists. The thickness of the latter is usually 2 to 4 cm.
With this method of installation, you should also not forget about quality thermal and waterproofing. Only after completing the above steps, the screed itself is poured, which should be reinforced with a strong metal mesh.
How to prepare the mortar?
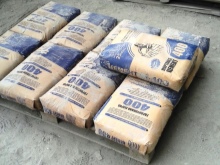
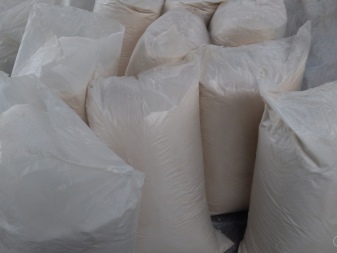
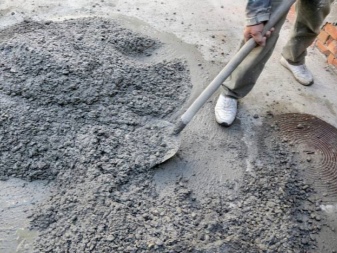
To pour the floors in the bath, it will be necessary to competently prepare the cement mortar. An easy way out of the situation will be to buy a ready-made dry composition. If you decide to prepare the mortar yourself, you will need to stock up on water, sand and cement. It is recommended to use cement of M-400 grade or higher. For 4 portions of sand you will need 1 portion of cement and liquid. It is necessary to ensure that the mortar does not turn out too liquid, because later it will not be the most durable and reliable concrete floor.
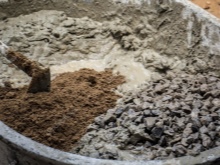
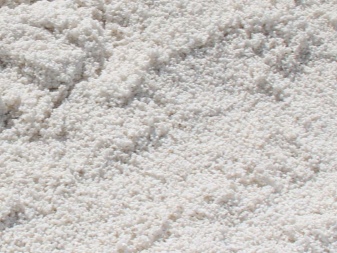
Often, instead of simple sand for the preparation of the mortar, its perlite variety is used. Such sand is characterized by high thermal insulation characteristics. Among its disadvantages are its low weight. Because of this, perlite sand is very dusty, and in windy conditions it is impossible to work with it.
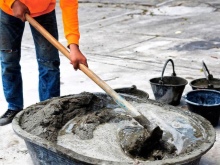
To independently prepare a solution for the subsequent pouring, you will need to act according to the following scheme:
- Pour a couple of buckets of perlite or ordinary sand into a container, pour 10 liters of water;
- add 5 liters of cement;
- all well stirred and add another 5 liters of water;
- the mixture should be stirred until it becomes homogeneous;
- further, you will need to add another bucket of perlite and 2 liters of water, stir everything again;
- the resulting mortar should be left for 10 minutes, so that it acquires a more plastic consistency.
When the preparation of the mortar is left behind, you can safely begin the main work.

Stages of a concrete screed
Pour the floor with concrete in the bath building is possible with your own hands. The main thing is to act correctly and step by step. Let's break down the process into several basic steps and analyze each of them in detail.
Preparing
Preparatory activities are important. First it is necessary to find out about the condition of the base under the sauna. If it is sandy or "covered" with loose soil, then the drainage system can be dug under the planned structure. The depth of the pit should be 0.5 to 1 m. The length and width will be similar. It is necessary to think well about the ventilation system, so that later no unpleasant odors will be noticed. To this end, the basement must provide air holes with the possibility of through air flow.

If the soil structure is dense or clay, it is necessary to prepare a compact pit and from it to run a water pipe that will go under the foundation and exit into the drain.
At the final point of the water pipe, you can build a penstock to prevent unpleasant odors in the bathhouse.
The above solutions will be relevant only if the screed is planned to be slightly elevated above the ground level on the site. If the mortar will be poured directly on the ground, first you need to think about the drainage system.
When the drainage pit will be prepared, you can proceed to the preparation of the basis for the future concrete floor.
Installation
Peculiarities of laying a concrete floor will be depending on the type of foundation available. Let's consider how to act correctly on the example of the foundation on piles.
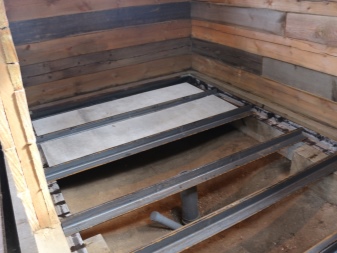
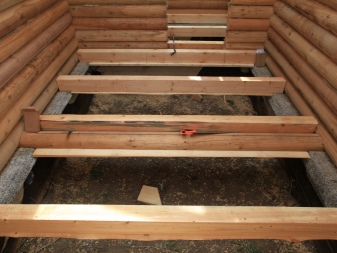
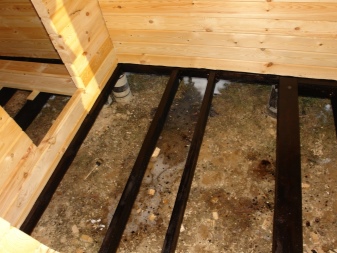
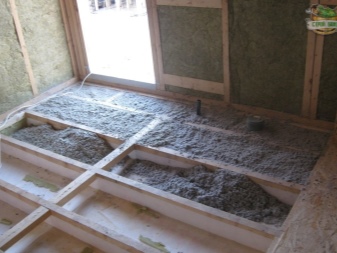
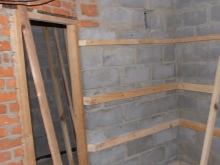
- First, it is necessary to expose the beams, maintaining a step of 0.5-0.55 m. For the beams it is best to use a bar with a cross section of 100x200 mm.
- It is allowed to fix bars 150x50 mm under the joists so that you get a kind of frame structure, resembling shelves.
- On the resulting protrusions bars should be put rough flooring. For this purpose, it is worth to use boards with a width of about 3 cm. Preliminarily they must be treated with antiseptics.
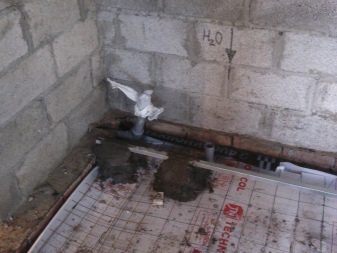
- Next, you must prepare the pipes that will drain the water.
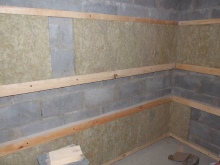
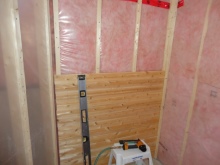
- Next lay a waterproofing layer.
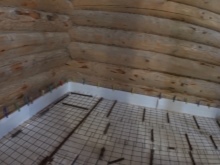
- Between the joists laid insulation. Do not forget about this stage. The floor in the bath must necessarily be warm.
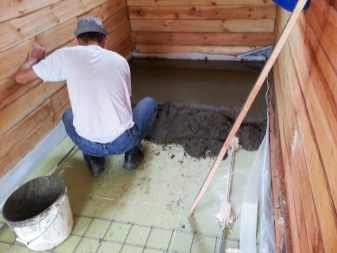
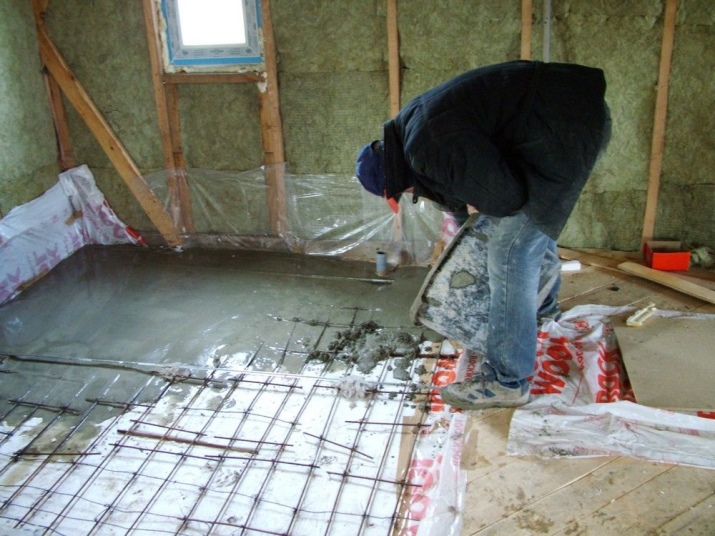
- Next, a reinforcing mesh is laid.
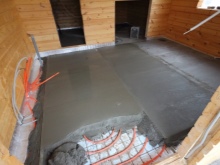
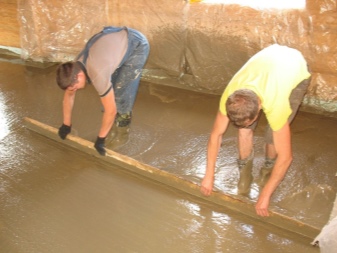
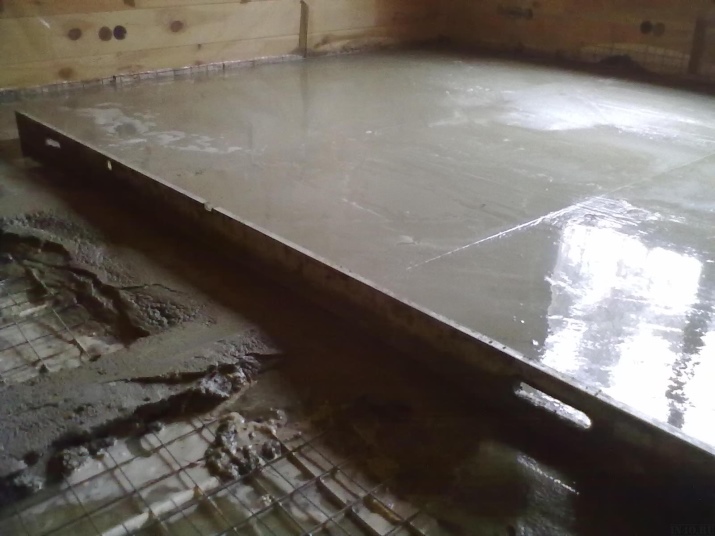
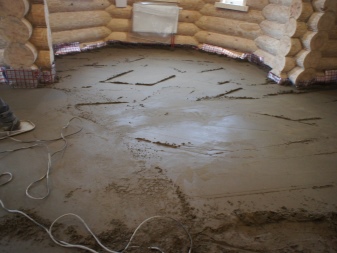
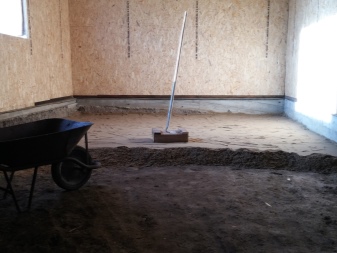
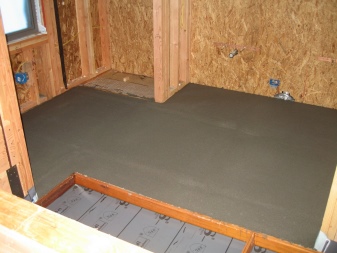
- Prepare beacons, and then all that is left is to pour the prepared base with concrete. Correctly pour the mortar, making a slope towards the pipes.
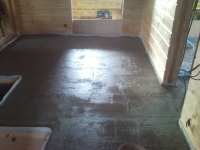
Concreting a properly prepared floor is not difficult at all. It is important to do everything carefully, without hurrying.
Finishing
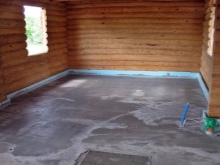
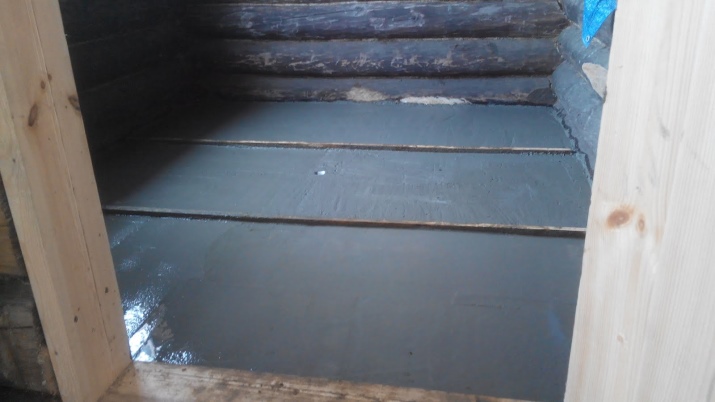
Poured floor in the bath can be finished with a variety of materials. As a rule, masters think about this issue from the very beginning. Concrete base almost does not limit the owners in the choice of suitable finishes for the steam room and pre-bathroom. Some people prefer to leave the screed in its natural form or put up wooden pallets. Most owners still decide to put an attractive finishing material on the concrete base.
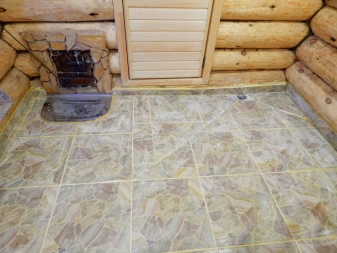
A quality ceramic tile will be a win-win solution for the bath. It is wear-resistant, durable, environmentally friendly and looks attractive. It will look nice and a wooden raised floor or ordinary wooden flooring of simple device (the most short-lived option).
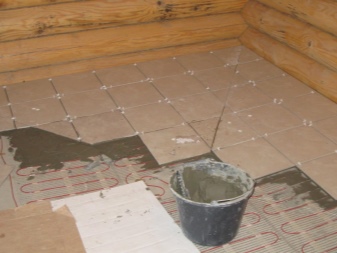
Consider the way of finishing the concrete base with tiles.
- It is necessary to take 4 tiles, put them in the corners on the drain, mark the diameter of the hole. Carefully cut them out with a "grinder".
- The tiles at the drain should have slopes in 2 directions. Small slopes will be formed, using adhesive mass. For larger slopes, you will need to deal with the screed first, or to glue to use cement-sand mortar.
- Place the material on the surface of the starter tile. Put it in place and gradually push it in so that the drainage point is as low as possible. Watch the level of the slope. Do the same with the rest of the tiles at the drain.
- Finish the first row.
- The position of the tiles in the second row should be checked by looking at the edges. They should be in the same plane as the previous row and parallel to each other.
- Further work is better to continue in parallel rows.
- It is advisable to sealing the seams only after the tile adhesive dries to the end and hardens.
After finishing the decorative design of the concrete floor in the bath, it is possible to proceed to tiling the remaining interior surfaces.
Useful tips and recommendations
Engaging in the construction of the concrete floor in the bath, it is advisable to arm yourself with some useful tips from more experienced craftsmen.
- Experts recommend buying high-quality plastic pipes for the sewage system. They are ideal for underground installation because they have an increased wall thickness. The optimal diameter of such pipes will be from 50 to 100 mm.
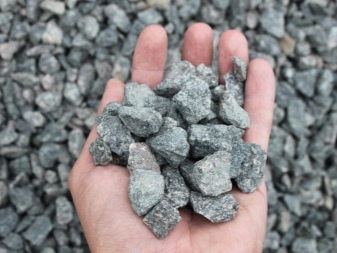
- If during preparatory work you use crushed stone, it is strongly not recommended to use materials of large fractions. Work with them is much more difficult, and sufficiently positive effect you will not notice.
- Pouring the floor, it is not recommended to throw the mortar on too large areas, as it will be very difficult to tweak them. The width of the area should allow the craftsman to easily pull up to the edge areas with his hands, sitting on his knees.
- The slope should not be forgotten when pouring the floor with concrete. However, the slope should not be too great. Literally a few millimeters per 1 linear meter will suffice. One way or another, the water will flow away, and it will be much easier to work.
- Another important nuance - excessive slope when pouring the floor leads to certain difficulties during water procedures.
If you yourself equip the concrete floor in the bath you are afraid or do not have the proper qualifications, it is advisable to turn to professionals who will do all the work for you. In this case, you will definitely get good results.
How the concrete floor in the bathhouse looks like, see below.


